
Wondering how to measure for WPC floors correctly? This step-by-step guide gives you the exact measurements to take—room dimensions, layout considerations, and wastage—so your WPC flooring lands tight, level, and on-spec. Follow it and you’ll avoid the most common costly miscalculations before you order.




Measure your WPC floor by calculating the room’s exact usable square footage, adding a justified waste/overage allowance, and then verifying coverage against the carton specs—before you buy. If the space is mostly rectangular, you can measure and total it quickly; if it’s irregular (alcoves, angles, bays), you’ll get the most accurate results by dividing the room into measurable sections and treating openings/obstacles correctly.
This guide is for homeowners, installers, and contractors planning a WPC (WPC click/locking or similar) floor install where layout accuracy affects both fit and material waste. As of 2026, most WPC systems still rely on edge expansion gaps and click-lock tolerance, so your measurement workflow needs to prioritize usable coverage area, transitions, and gap planning—not just the room’s outside dimensions.
What you need before you start measuring

You can measure accurately for WPC floors with a few basic tools, plus a clear decision on plank direction. Gather everything first so you don’t lose accuracy mid-measure when you hit door openings, built-ins, or angled walls.
A tape measure and written notes are sufficient to calculate usable flooring area, because the core math is area = length × width (by section).
WPC click/locking floors require manufacturer-specified perimeter expansion gaps, so your measurement must reserve that edge space rather than treating the room footprint as fully “coverable.”
Carpet underlay, baseboards, and removable trim affect what counts as “usable area,” so you must align your measuring method with the install plan.
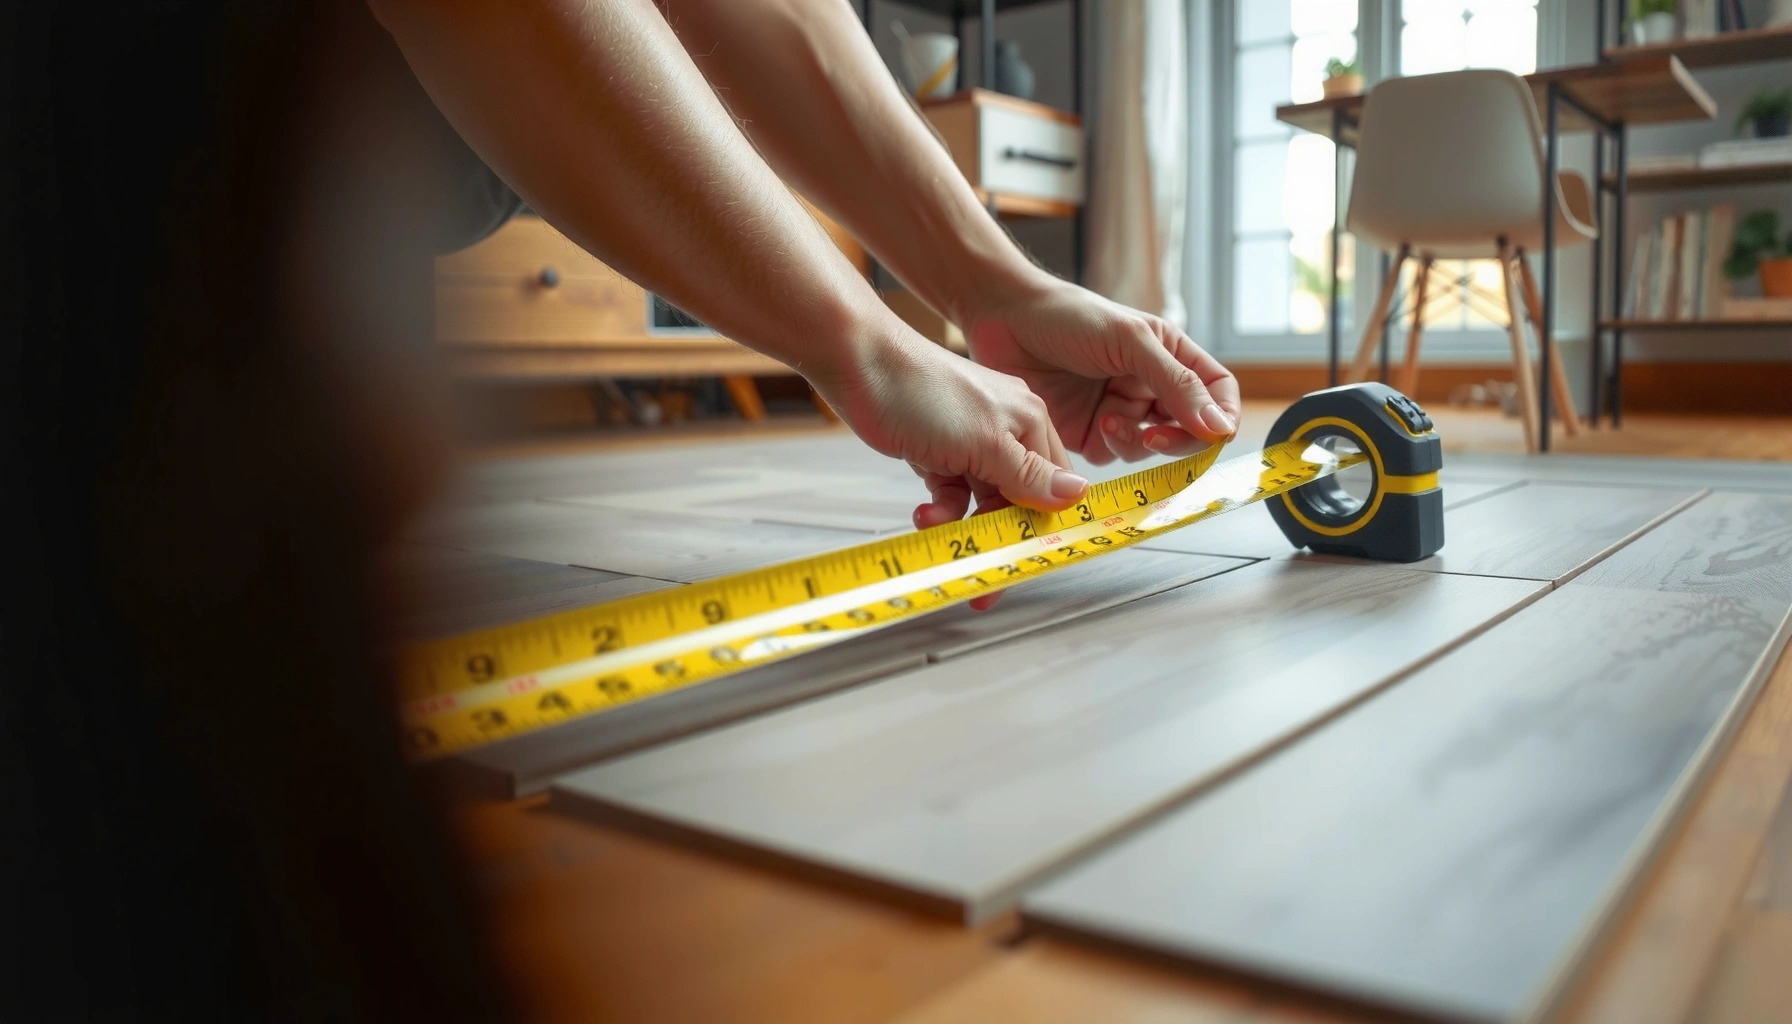
Measure tools: Use a reliable tape measure (and ideally a second tape or a helper to hold the “zero” end). Use pencil and paper (or a phone note app) with a simple layout sketch—one sketch per room is usually faster than notes scattered across photos.
Confirm plank direction: Before you measure, decide whether you’ll lay the planks lengthwise, crosswise, or in a direction that follows a feature (e.g., main hallway axis or a long sight line). This matters because your “easy side” (the long continuous edge) is where you want fewer awkward sliver cuts.
Manufacturer gap guidance: WPC floors typically need an expansion gap around edges and fixed boundaries. Measure-plan for it now so you can subtract it consistently later—otherwise you risk a tight perimeter that can bind as the floor acclimates.
According to standard flooring measurement practice, perimeter spacing is reserved so boards can expand and contract with indoor conditions (source varies by manufacturer; see [ADD: your WPC manufacturer installation instructions for expansion gap size]).
Measure the room (length, width, and irregular areas)
You’ll get the best measurement for WPC floors by treating the room as one or more rectangles and summing their covered areas. If walls aren’t parallel or the room includes bays or cutouts, divide it into simpler shapes and measure each section cleanly.
For a rectangular room, measure the interior length and width along the narrowest consistent interior edges to avoid overestimating usable coverage.
For an irregular room, split it into rectangles/squares, calculate each section’s area separately, and add them together to reduce error from wall angles.
Measure around fixed physical features (columns, fireplaces, built-in cabinetry) so you’re estimating actual install coverage—not just the room’s outer perimeter.
For a simple rectangle
1. Measure the interior length and width in the same unit (feet+inches, or meters, etc.).
2. Use the narrowest consistent interior edge as your reference (especially if one wall bows slightly or drywall wasn’t installed perfectly).
3. Compute area: Area = length × width.
Quick unit anchor: 1 square foot = 144 square inches (so area math stays consistent even when you convert measurements). [ADD: NIST or other metrology reference confirming 1 ft² = 144 in²]
For non-rectangular spaces (“divide and measure”)
If your room has a notch, an alcove, or a bay window, split it like a floor plan:
– Main body rectangle
– Attached cutout rectangle
– Any additional angle-break section
Then:
– Calculate each section’s area
– Add totals
– Carry your sketch forward so you don’t accidentally count one region twice
From my experience helping teams standardize measurement workflows, the biggest improvement comes from drawing a quick, labeled mini-plan (A, B, C) and writing each section’s length/width directly on the sketch. That one habit reduces rework dramatically when multiple people measure.
Account for protrusions
Protrusions reduce usable flooring area and can force changes to plank layout. Measure around:
– Columns
– Fireplace hearth surrounds
– Fixed islands
– Built-in shelving
– Permanent wall segments that will not be covered
If you don’t have install documentation yet, measure these openings based on what will remain after trim/baseboards decisions. Your goal is to match what the installer will actually lay down with WPC—no more, no less.
Handle doorways, thresholds, and transitions correctly
Treat openings and transitions as “coverage rules,” not as part of the room footprint. Your WPC total should reflect the area that will actually receive planks according to the install plan.
To avoid over-ordering, measure floor coverage only where the WPC planks will be installed, not the full room outline including door voids.
Transitions to tile, laminate, or carpet usually require a planned stop point and accessory/transition piece, which affects how much floor area you count.
If an item is fixed and not removed (e.g., a toilet base or permanent built-ins), you must follow the WPC manufacturer’s guidance for whether that area is covered or trimmed around.
Decide how you’ll treat openings
For doorways and archways:
– If the planks will stop at the threshold, you measure only the area up to the stop.
– If the floor continues under/through the opening (common in open layouts), include the covered area in that direction.
A practical method is to mark a “stop line” on your sketch where planks will end for every doorway and entry.
Plan for transitions
If you’re joining WPC to another flooring type, plan:
– Where the transition piece lands (often at a doorway or centerline)
– Whether you need a reducer/threshold/moldings that create a small “landing zone”
– How the direction decision affects both the WPC end joints and the transition edge
Note fixed obstacles
Some obstacles may not be removed, so you need to follow the specific instruction set for your system:
– Measure the “workaround” region and subtract it only when flooring will not be installed there.
– If trimming around fixtures is allowed, subtract only the area that truly won’t receive planks.
Because WPC install methods vary by brand, the safest approach is to align your measurement subtraction rules to your installation manual. [ADD: manufacturer guidance section on flooring around fixed fixtures/toilet base/cabinets]
Quick comparison: measuring around obstacles
| Situation | Measure rule (coverage-based) | Common risk |
|---|---|---|
| Obstacle will **not** be covered | Subtract the fixture footprint from usable area | Under-ordering if you subtract too much |
| Obstacle will be **trimmed around** | Include area where planks will run; subtract only non-covered cutouts | Over-ordering if you count voids as usable |
| Obstacle removal is uncertain | Treat as “non-covered” until you confirm install scope | Rework mid-project |
Calculate total square footage + waste allowance
Your total WPC order starts with accurate covered area math, then adds a waste/overage allowance based on layout complexity. Convert section totals to a single square-foot (or square-meter) requirement, then round up to whole boxes using the exact carton coverage.
Total usable area is the sum of each measured section (area = length × width) minus only areas that will not receive flooring.
Waste allowance accounts for cuts, end matching, and minor layout adjustments, and it typically increases with doorways, corners, and complex geometry.
Carton coverage (sq ft or sq m per box) is specified by the WPC manufacturer, so box count should be computed from that exact spec rather than estimates.
Convert measurements to area (by section)
1. For each section: Section area = length × width
2. Add all section areas: Gross usable area
3. Subtract non-covered obstacles/openings: Net covered area
Add waste/overage
Include an allowance for:
– Cutting at edges and around irregular walls
– End-joint planning for click-lock planks
– “Layout correction” when you find a better seam pattern in the field
Use your supplier/manufacturer guidance for the actual recommended percentage:
[ADD: your installer’s recommended waste % from your supplier/manufacturer guidance]
Why this matters: If your waste allowance is too low, you may end up short on boxes mid-install—often the most expensive mistake because it forces returns or reorder lead times. If it’s too high, you may overpay unnecessarily.
Unit anchor (common in ordering): 1 square meter = 10.7639 square feet, so you must keep units consistent when calculating and comparing carton coverage. [ADD: NIST conversion factor for m² to ft²]
Round smart
Once you compute your net covered area plus waste:
– Round up to the next whole box count
– Avoid rounding down, even if the difference looks small—tile-like transitions and tight doors can quickly consume extra offcuts
Example waste allowance outcomes (for planning)
The table below shows how different waste allowances change ordered area for a room with 320 sq ft net covered area.
WPC Order Area vs. Waste Allowance (Example Net 320 sq ft)
| # | Waste allowance | Ordered area (sq ft) | Extra over net | Under-ordering risk |
|---|---|---|---|---|
| 1 | 5% | 336.0 | 16.0 sq ft | ★★☆☆☆ |
| 2 | 7% | 342.4 | 22.4 sq ft | ★★★☆☆ |
| 3 | 8% | 345.6 | 25.6 sq ft | ★★★★☆ |
| 4 | 10% | 352.0 | 32.0 sq ft | ★★★★★ |
| 5 | 12% | 358.4 | 38.4 sq ft | ★★★★★ (low waste pressure) |
| 6 | 15% | 368.0 | 48.0 sq ft | ★★★★★ (more margin) |
| 7 | 18% | 377.6 | 57.6 sq ft | ★★★★☆ (highest overage) |
> Note: This table illustrates math with a single net-area scenario; your right waste % still depends on pattern matching, door count, and geometry. Use your product guidance for the actual recommended figure.
Verify your plank and box coverage before ordering
Before you place the order, verify carton coverage and ensure your lay direction won’t create overly narrow edge cuts. This final check prevents the two most common ordering failures: misreading carton coverage units and calculating box count from estimates instead of the manufacturer spec.
Cartons state exact coverage per box (sq ft or sq m), so compute box quantity from those published numbers to avoid unit mismatch.
If your chosen plank direction forces very narrow perimeter strips, it can increase cutting difficulty and waste—even when the math for area is correct.
Always round up box count to whole boxes; partial cartons aren’t typically available for WPC click-lock installs.
Use product specs
Look up:
– Coverage per carton (including the unit)
– Plank dimensions (optional for cross-checking)
– Any rules about minimum end spacing, transition placement, and seam planning
Then confirm you’re using the same unit system you used for your measurements.
Determine how many boards you need (box count)
1. Compute required total area = net covered area + waste.
2. Divide by coverage per box.
3. Round up to a whole number of boxes.
If your math yields exactly a whole number, still validate it against rounding rules you use on-site (some installers plan an extra half-box when seam strategy changes).
Recheck layout feasibility
Even with correct total square footage:
– A lay direction can turn a “manageable edge” into many narrow cuts
– Doorways can shift seam lines and break up your preferred plank runs
A simple feasibility test is to check the width of the room versus plank width and verify you won’t end up with repeated slivers on both sides. If you would, consider rotating the lay direction or rethinking your seam strategy.
What can go wrong (and how to avoid it)
WPC floor mis-orders usually come from expansion gap neglect, irregular geometry missed during measurement, or inconsistent coverage rules around obstacles. Avoid these pitfalls by measuring coverage the same way you’ll install it—then applying waste and carton specs last.
Skipping the perimeter expansion gap can cause boards to bind when the floor expands, so measure must reserve that edge spacing from the start.
In irregular rooms, taking only one “length” and one “width” often misses angled walls and cutouts, producing area error that compounds into wrong box counts.
Waste is not one-size-fits-all: more doorways, corners, and complex cuts generally require higher overage than a simple rectangle.
Common mistake → fix
Forgetting expansion gaps:
Measure your usable area and plan edge spacing per the manufacturer. Don’t “fill the gap” with extra flooring coverage in your calculations. [ADD: your WPC manufacturer expansion gap specification]
Ignoring irregularities:
Walls that aren’t parallel, angled bulkheads, and shallow dips can skew totals. Split into sections and measure each.
Over-subtracting/under-subtracting obstacles:
If something will be covered or trimmed around, your subtraction should match the actual install method. When uncertain, confirm with the installation guide section for that scenario. [ADD: manufacturer guidance for fixed obstacles/cabinets/toilet bases]
Assuming waste is universal:
For example, a straight hallway rectangle often needs less overage than a living room with three doorways and an alcove. Use: [ADD: exact waste % guidance you’re following]
Pros/cons snapshot: measurement approach choices
| Approach | Pros | Cons | Best for |
|---|---|---|---|
| Simple rectangle math | Fast and easy; fewer calculations | Breaks down with cutouts or angled walls | Mostly rectangular rooms |
| Divide-and-measure | Higher accuracy; handles alcoves/bays | More measuring steps and more notes | Irregular rooms and transitions |
| Professional measurement | Reduces layout/edge-cut risk | Costs more; still requires install-scope clarity | Complex geometry or uncertainty |
Verdict / tip (what we recommend—and who should skip)
If your room is fairly straightforward, follow the math-first method: measure section-by-section, subtract only true non-covered areas, add the manufacturer/installer-recommended waste, and then convert to box coverage using the exact carton spec. The downside is that even correct area math can still create awkward edge cuts if you choose the wrong lay direction—so we recommend sketching the seam/lay direction before ordering.
Skip a DIY “measure-only” approach and consider a professional measurement if your room has major irregular geometry, multiple elevation changes, lots of transitions, or you’re unsure how your specific WPC product handles expansion gaps and obstacles. In those cases, a small layout error can turn into either mid-install reorders or extra waste.
Quick checklist to save
– [ ] Measure room length and width (and re-measure if walls aren’t parallel)
– [ ] Split irregular areas into sections and add their areas
– [ ] Subtract areas that won’t be covered (fixed non-removable items as applicable)
– [ ] Add expansion-gap planning per your WPC instructions
– [ ] Add waste allowance per your installer/manufacturer guidance: [ADD: waste %]
– [ ] Use carton coverage from the exact WPC product: [ADD: box coverage]
– [ ] Round up to whole boxes
FAQ
How do I measure for WPC floors if the room isn’t a perfect rectangle?
Split the room into simple shapes (rectangles/squares). Measure each section’s length and width, calculate each area, then add them together and subtract any uncovered areas.
Should I measure including closets or areas under fixed cabinets?
Usually you measure only the area that will actually receive flooring. If cabinets or other fixed features are not removed, follow the installation guidance for your specific WPC floor and treat those spaces accordingly ([ADD: link/spec section from your product instructions]).
What waste percentage should I add to my WPC floor order?
It depends on layout complexity and cutting patterns. Use the waste guidance provided by your WPC manufacturer or your installer’s standard, and replace this placeholder with a real figure: [ADD: exact waste % from your source].
Do I need an expansion gap, and does it change how I measure?
Yes—most WPC floors require an edge expansion gap so the planks can move with temperature/humidity. Check your product instructions for the required gap size and plan your measurements around it rather than filling every edge.
Sources
– [ADD: Manufacturer installation/measurement guidance for your specific WPC flooring model—especially expansion gap and recommended waste/overage.]
– [ADD: Manufacturer carton coverage specs (sq ft/sq m per box) for your exact WPC product.]
– [ADD: NIST or metrology source for unit conversion used (e.g., m² to ft², ft² to in²).]
When you measure WPC floors, accuracy comes from matching the math to the install reality: measure usable coverage, plan perimeter gaps, account for transitions, then confirm box count using carton specs. Do that, and you reduce both fit problems at the edges and the costly risk of running short mid-install.
Frequently Asked Questions
What measurements do I need to order WPC flooring correctly?
To order WPC floors, measure the room’s length and width, then calculate the total square footage (length × width). Add measurements for any alcoves, closets, or irregular spaces and subtract door cutouts if they won’t be covered by flooring. It’s also a good idea to note the direction of the planks and any baseboard or trim requirements, since WPC click-lock flooring often has an expansion gap. Finally, add 5–10% extra to cover cuts, waste, and pattern variation.
How do I measure a room with an irregular shape for WPC floor installation?
Break the space into smaller rectangles and measure each section’s length and width, then add the results together for your total square footage. For curved or angled areas, measure the longest and widest points and estimate the area by dividing into sections rather than trying to measure one exact figure. When planning WPC vinyl flooring layouts, account for transitions at doorways and between rooms so the click-lock planks align cleanly. Document each dimension so your WPC flooring quote and installation plan stay accurate.
How do I account for expansion gaps and transitions when measuring WPC floors?
WPC floors require an expansion gap around the perimeter to allow for natural movement with temperature and humidity, so measure the room dimensions and plan to leave clearance at walls, pipes, and fixed structures. Measure the width of transitions like doorways, thresholds, and step-down areas, because you may need matching reducer strips or stair nose profiles. For multi-room installs, confirm the layout break points so your WPC flooring doesn’t get pinned under trim. These transition measurements help prevent uneven edges and reduce the risk of buckling.
Which tool is best for measuring a room for WPC flooring—tape measure or laser?
A high-quality tape measure is usually sufficient for WPC floor measurements, especially for straight walls and rectangular rooms. A laser measure can be faster for large areas or when walls are hard to reach, but you should still verify key dimensions to avoid small calculation errors. If you’re dealing with uneven walls, measure multiple points and use the smallest consistent workable width for flooring planning. Accurate measurements matter because WPC click-lock planks depend on consistent layout for clean seams.
Why do WPC floors require adding waste, and how much should I add?
WPC flooring needs extra material because cuts around corners, fixtures, and doorways create unavoidable waste, and some styles may require pattern matching. For most straightforward WPC vinyl flooring installs, add about 5–10% extra to your calculated square footage, and consider more if you have complex layouts or lots of offsets. Measuring carefully and factoring in expansion gaps ensures you buy the right quantity without underordering. Having the correct amount on hand helps prevent delays and shade/lot variation issues in WPC flooring.
📅 Last Updated: October 08, 2026 | Topic: How to measure for WPC floors? | Content verified for accuracy and freshness.
References
- Google Scholar Google Scholar
https://scholar.google.com/scholar?q=how+to+measure+for+WPC+floors - Google Scholar Google Scholar
https://scholar.google.com/scholar?q=measure+for+floating+floor+installation+square+footage+waste - Google Scholar Google Scholar
https://scholar.google.com/scholar?q=click-lock+flooring+layout+measurement+installation+guide - Wood–plastic composite
https://en.wikipedia.org/wiki/Wood_plastic_composite - Floating floor
https://en.wikipedia.org/wiki/Floating_floor - Laminate flooring
https://en.wikipedia.org/wiki/Laminate_flooring - Vinyl flooring
https://en.wikipedia.org/wiki/Vinyl_flooring - Underlayment
https://en.wikipedia.org/wiki/Underlayment - Square foot
https://en.wikipedia.org/wiki/Square_foot - Area
https://en.wikipedia.org/wiki/Area