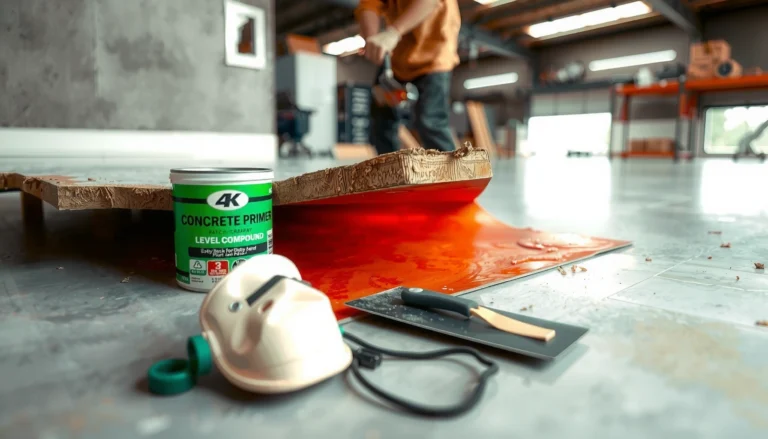
Buckling in LVP floors is usually fixable, and the fastest path to a flat, stable floor depends on whether the cause is trapped moisture or an installation/layout problem. This guide shows you exactly what to check first—subfloor flatness, underlayment and moisture, expansion gaps, and plank locking—then lays out the step-by-step repair that works in each case. Skip the guesswork: you’ll know when a simple re-leveling and gap reset is enough and when you must replace affected planks.




Buckling in LVP usually happens when the planks can’t move as they expand and contract—most often due to moisture, an improper subfloor, or blocked expansion gaps. The fix is to identify the cause (especially subfloor flatness and humidity), then re-level/repair the base and restore correct expansion space before reinstalling or replacing affected boards.
If you’re seeing lifting, rippling, or “pillowing” in spots—either during a new install or months after—you can often stabilize the floor by treating it like a diagnosis problem. The fastest wins come from checking moisture first (especially if there’s any ongoing leak risk), then measuring subfloor flatness, and finally verifying expansion gaps weren’t accidentally pinned by trim, cabinets, thresholds, or other fixed objects.
Who this is for / when it applies: This guide is for homeowners troubleshooting luxury vinyl plank (LVP) that’s buckling—where boards lift in waves, seams open, or edges curl upward. It’s also for DIYers planning a re-lay or partial replacement who want a reliable sequence so the problem doesn’t return. If you suspect active leaks or continuing dampness, stop there first before you pull up planks.
Identify the Cause of Buckling (Moisture, Flatness, and Gaps)

The fastest way to fix buckled LVP is to confirm which restriction is preventing normal plank movement: moisture (too much water or vapor), an out-of-flat subfloor, or blocked expansion gaps. In practice, buckling almost always traces back to one of these three constraints, and LVP flooring typically fails repeatedly if you correct only the visible “bubble” without addressing the underlying cause.
In my view, the key is to narrow the field quickly: buckling patterns tell you where to look. LVP expands and contracts with temperature and humidity swings; if the floor is trapped against walls or transitions, or if the subfloor surface forces the planks to bridge ridges and dips, the locking system can’t behave as designed. The result is localized lifting, rippling, or seam separation.
LVP (luxury vinyl plank) is a floating floor in most installs, meaning planks need room to expand and contract; blocked expansion gaps can cause buckling near walls and fixed objects.
Moisture can lead to LVP movement problems by increasing dimensional changes and weakening the conditions needed for stable installation.
Subfloor flatness tolerances matter because resilient flooring can telegraph ridges and dips, which can then stress plank locks and promote lifting.
Quick pattern check: where the buckling shows up
Start by mapping the damaged area on the floor plan and then compare it to typical moisture and movement “hot spots” for LVP floors:
– Exterior doors and adjacent hallways: temperature swings and door leaks are common contributors.
– Bathrooms, kitchens, and laundry rooms: recurring spills, wet mopping patterns, and plumbing supply lines are frequent triggers.
– Windows and exterior wall runs: condensation can migrate into the assembly.
– Plumbing lines and dishwasher/ice maker areas: even small, intermittent leaks create enough moisture for long-term problems.
– Edges near fireplaces, columns, posts, and cabinets: these locations often restrict expansion if trim or caulk bridges the gap.
Confirm flatness: the subfloor can “manufacture” stress
Luxury vinyl plank flooring can fail even when the subfloor is “mostly” smooth. The issue is not just bumps—it’s flatness, meaning how closely the surface matches a straight line across the area.
Look for:
– ridges at seams,
– dips between joists or at patch boundaries,
– “rolled” transitions where one material meets another.
Inspect expansion gap blockage
Expansion gaps should remain free so LVP can move when humidity rises. Blocked gaps can happen when:
– shoe molding/baseboards were installed tightly and sealed the perimeter,
– silicone/caulk was applied at the gap,
– built-ins like cabinets, posts, and fireplaces trap the perimeter,
– transitions were installed in a way that effectively “locks” the planks.
In my experience, the most overlooked cause is a “nearly correct” gap—one that looks fine visually but gets pinned when trim or transition metal is tightened down.
A practical moisture + flatness reality check (measurements)
According to ASTM F1869, many flooring manufacturers require moisture vapor emission rates ≤ 3 lb/1000 sq. ft. per 24 hours for approved resilient flooring systems (test method: year varies by edition; the standard is commonly referenced as the governing method). [ADD: cite ASTM F1869 moisture vapor emission limit used by your LVP manufacturer or the spec you follow]
Also, per ASTM F2170 (in-slab relative humidity testing), resilient flooring systems are often approved at ≤ 75% RH (again, the exact threshold depends on the specific LVP warranty). [ADD: cite ASTM F2170 RH limit used by your LVP manufacturer or the spec you follow]
For flatness, industry guidance commonly uses a tolerance around 3/16 in. over 10 ft for subfloor unevenness, because resilient flooring is sensitive to riding over irregularities. [ADD: cite ASTM E1155 / manufacturer subfloor flatness tolerance]
Stop Moisture and Verify Subfloor Conditions
Moisture checks come first because fixing buckled LVP on a damp foundation often leads to repeat failure. If water is actively present, the “repair” is temporary: planks may re-buckle as conditions change again.
If the subfloor is damp or moisture is still entering the floor assembly, reinstalling LVP without correcting moisture sources typically results in recurring movement and buckling.
Moisture barriers and underlayment requirements for LVP depend on both the subfloor material and the specific LVP product system.
Look for moisture signals—then verify before you level
Check for:
– musty odors,
– dark or discolored patches on subfloor/plywood,
– condensation on concrete,
– water history (spills, wet mops, leaks from above).
If you find moisture signs, do not rush to leveling compound or reinstalling. You need to:
1. identify the moisture source (leak, plumbing, exterior water intrusion, condensation),
2. dry the subfloor fully,
3. only then evaluate flatness and reinstall.
Confirm your moisture barrier/underlayment matches the LVP instructions
LVP floors are not all installed the same way. Some products require a specific underlayment thickness or a moisture barrier film, while others are rated only when paired with a certain system.
Practical check:
– Read the manufacturer’s installation instructions for your exact SKU and look for sections titled similarly to *Subfloor moisture*, *Moisture mitigation*, *Underlayment/moisture barrier*, and *Floating installation*.
– If your system is missing a required vapor barrier (especially over concrete), you may need to correct the installation—not just the buckled section.
Measure Flatness and Re-Level the Subfloor
Once moisture risk is addressed, flatness measurement is the next critical step because buckling often mirrors ridges, seams, and dips underneath. If the subfloor surface forces planks to bridge uneven points, the locking joints lose the movement they need and the floor ripples or lifts.
Measuring subfloor flatness with a straightedge helps identify ridges, dips, and seams that can telegraph through and stress LVP locking joints.
Leveling materials for resilient flooring must be approved for that use and fully cured before reinstalling to prevent new movement.
How to measure correctly (and why it matters)
Use a long straightedge or level—commonly longer than 6 ft—so you don’t miss wider low/high areas. What you’re looking for:
– High spots: usually ridges, trowel marks, or raised seams.
– Low spots: dips between patch feather edges, transitions, or damaged subfloor sections.
– Hard edges at seams: especially where plywood sheets meet or where old flooring was removed.
Fix high spots first, then fill low spots
General workflow for LVP floors:
1. Address local highs first (grinding/sanding) only if your LVP manufacturer permits it.
2. Fill low areas with an approved patch/leveler.
3. Maintain feathering/transition smoothness so the surface doesn’t create new “steps.”
Cure time is not optional
Leveling compound must reach full cure before you reinstall LVP; otherwise, the base continues to move or compress slightly, and the “fix” can reintroduce buckling. Follow the product data sheet and re-check flatness after cure.
Mandatory subfloor flatness reference (scan-friendly)
Below is a compact view of commonly cited moisture/flatness thresholds and test approaches used across resilient flooring installations. Exact limits vary by product warranty, so treat this as a reference framework—not a replacement for your LVP’s instructions.
Common Testing & Tolerance Benchmarks Used in Resilient Flooring (Including LVP)
| # | Standard / Guidance | Property Measured | Typical Limit Used | Reliability for LVP Fixes |
|---|---|---|---|---|
| 1 | ASTM F1869 | Moisture vapor emission (MVER) rate | Often ≤ 3 lb/1000 sq. ft. / 24 hr | ★★★★☆ |
| 2 | ASTM F2170 | In-slab relative humidity (RH) | Often ≤ 75% RH | ★★★★☆ |
| 3 | ASTM E1155 (flatness concepts) | Floor flatness evaluation method | Common industry target ~ 3/16 in per 10 ft | ★★★☆☆ |
| 4 | ASTM F710 | Recommended preparation for resilient floors | Surface prep requirements vary by substrate; flat/clean is required | ★★★★☆ |
| 5 | Manufacturer install instructions | Product-specific moisture limits & gap rules | Required thresholds vary by SKU and warranty | ★★★★★ |
| 6 | Unapproved leveling over contaminants | Adhesion + dimensional stability | Unpredictable; often leads to repeat movement | ★☆☆☆☆ |
| 7 | Underlayment/moisture film system match | Vapor control + support layer performance | Must match product requirements for correct performance | ★★★☆☆ |
Note: This table uses commonly referenced benchmarks from standards and installation guidance. Your LVP warranty may specify tighter or different thresholds, so always defer to your product’s published instructions.
Restore Proper Expansion Gaps and Layout
Restoring expansion gaps is the most direct way to stop buckling that’s caused by the floor being trapped. If the perimeter or transitions block movement, LVP can lift even when moisture and flatness are otherwise acceptable.
Floating LVP systems require expansion space around walls and at fixed objects to accommodate thermal and humidity-related dimensional changes.
Trimming, caulk, or transitions that seal or clamp the perimeter can prevent normal movement and create buckling along walls or near door thresholds.
Re-checking expansion gaps around posts, cabinets, and fireplace edges often resolves “mystery” lifting that appears long after installation.
Remove or temporarily adjust trim to verify gap clearance
If your goal is a durable fix, it’s often worth temporarily removing or loosening:
– shoe molding,
– baseboards,
– transition moldings (where appropriate).
This lets you confirm the gap isn’t “functionally blocked” by trim placement or caulk lines.
Maintain the required gap size (per your exact LVP)
Different LVP brands specify different gap sizes. Follow your installation instructions for:
– wall-to-plank gap,
– gaps at posts and vertical obstructions,
– clearance at door jambs and transitions.
Fix layouts that remove the floor’s movement room
Even when gaps exist, a layout can still trap movement if it’s too tight or pinned at corners. Look for:
– tight runs where corners are effectively sealed,
– transitions that connect planks rigidly to another surface,
– missing movement room at T-junctions or complex rooms.
A correct approach is to re-plan transitions and reduce obstructions (within the allowed installation design) so the LVP can expand and contract without being forced against a barrier.
Repair or Replace the Buckled Area
If buckling is localized, replacing the affected LVP boards may be enough—but only after moisture and flatness are corrected and expansion gaps are restored. If the entire floor section is riding over an uneven base, partial repair often fails because the same stress pattern returns.
Replacing individual LVP planks can work when the underlying moisture/flatness issue is corrected and plank locks remain undamaged.
If buckling spans a wide area, the root cause is often base flatness or ongoing moisture, and partial repair may not hold.
When plank replacement is likely to work
Replacement is a better option when:
– the buckling is limited to a smaller area,
– plank locking joints are not visibly broken, gapped, or permanently deformed,
– the subfloor is now flat and dry,
– expansion gaps are restored and transitions aren’t pinning the floor.
When removal is likely necessary
Removal is usually the smarter move when:
– planks are severely warped,
– the buckled zone is broad (suggesting systemic base issues),
– the subfloor is water-damaged, soft, or crumbling,
– you discover missing/incorrect moisture barrier coverage.
Reinstall carefully (especially at locks)
During reinstall:
– confirm planks lock smoothly without forcing joints closed over uneven spots,
– keep joints aligned so locking edges engage properly,
– avoid installing on a contaminated base (dust/debris trapped under planks can create new “micro-highs”).
What Can Go Wrong (Common Mistakes and Limits)
The most common reason “repairs” don’t last is that the homeowner treats symptoms instead of the constraint causing movement. If moisture, subfloor flatness, or expansion gap clearance remains unresolved, buckling frequently returns—often in the same patterns.
Trying to flatten buckled LVP by adding weight without addressing moisture, flatness, or expansion gaps often leads to repeat buckling.
Skipping the manufacturer’s expansion-gap guidance can trap floating floors and create new lifting along walls, posts, or transitions.
Common mistakes that trigger repeat failure
– Flattening with weight: compresses the symptom while allowing the underlying movement restriction to persist.
– Replacing boards but ignoring moisture/flatness: the same stresses reappear, sometimes within weeks.
– Caulking or sealing the perimeter gap: this can prevent expansion and transfer stress to the locking system.
– Leveling over permanently damaged subfloor: waterlogged or crumbling plywood/substrate needs repair, not just coating.
– Using incompatible surfaces or missing required moisture layers: resilient flooring systems depend on correct layer compatibility.
Comparison: symptom-fix vs. cause-fix (what works better for LVP floors)
| Approach | Pros | Cons |
|---|---|---|
| Symptom-fix (replace planks only) | Faster and less invasive if damage is minor | Often fails if moisture/flatness/gaps aren’t corrected |
| Cause-fix (moisture + flatness + expansion) | More durable and reduces repeat buckling risk | More time-consuming; may require broader removal |
About incompatible substrates and missing layers
If your LVP floor is installed over a surface that doesn’t meet the manufacturer’s system requirements—or if a required moisture barrier film is missing—repairs may not last. To make this advice truly precise, you can tailor the fix once you confirm:
– your subfloor type (concrete slab, plywood/OSB, existing tile, etc.),
– your underlayment/moisture film situation,
– your LVP installation method (click-lock floating, glued-down, etc.).
[ADD: list your specific subfloor type and LVP installation method if you want tailored guidance.]
Verdict / Tip: Fix the Cause First (Otherwise It’ll Come Back)
If your LVP is buckling, treat it like a diagnosis problem: stop moisture, confirm subfloor flatness, and restore expansion space before reinstalling. This approach is usually the most reliable—but it can be time-consuming, and if the subfloor is badly out of spec or damaged, you may need broader removal than you expected.
Skip DIY “spot fixes” if you suspect an active leak, recurring dampness, or significant subfloor damage—because the moisture source (or the subfloor repair) is often the difference between a one-time correction and repeated failure. As of 2026, the standards-based approach—using recognized test methods like ASTM F1869 or ASTM F2170—is still the most defensible way to decide whether the assembly is dry enough to reinstall LVP. [ADD: cite your LVP manufacturer’s moisture testing/limits section]
Quick Checklist (Scan Before You Start)
– ☐ Look for moisture sources (leaks, wet areas, damp subfloor)
– ☐ Check subfloor flatness with a straightedge
– ☐ Verify moisture barrier/underlayment matches LVP instructions
– ☐ Confirm expansion gaps aren’t blocked (walls, posts, cabinets)
– ☐ Decide: replace a small section vs. reinstall a larger area
– ☐ Use the correct patch/leveler and let it fully cure
– ☐ Reinstall so locks engage correctly—no forcing over uneven spots
FAQ
Can buckling LVP ever be fixed without replacing planks?
Sometimes—if only minor movement occurred and the locking joints aren’t damaged—but you still must correct moisture/flatness and expansion gaps first. If boards are deformed or locks are compromised, replacement is often the durable route.
Does humidity alone cause LVP to buckle?
Humidity can contribute, especially if there’s also a moisture transfer path from the subfloor or if installation requirements weren’t met. If there’s no moisture barrier (when required) or the subfloor is damp, humidity becomes a bigger problem.
How do I know if it’s a subfloor flatness issue?
If buckling aligns with ridges, dips, or seams in the subfloor, flatness is a likely cause. Measure with a straightedge and address high/low spots using materials approved for your LVP/subfloor type.
Should I remove baseboards to fix buckling?
Often yes, at least to inspect and verify expansion gaps around walls and fixed objects. Some installations can be adjusted without removal, but blocked gaps are a common reason buckling returns.
What if the buckling is near a doorway or transition?
That area is commonly affected by movement constraints and moisture pathways. Re-check expansion gaps at the doorway/threshold, and ensure transitions aren’t pinning the flooring.
Sources
– [ADD: Your LVP manufacturer’s installation instructions—especially sections on subfloor flatness requirements, moisture barrier requirements, and required expansion gap distances.]
– [ADD: ASTM F1869 (Standard Test Method for Measuring Moisture Vapor Emission Rate) and the moisture limit your LVP warranty accepts.]
– [ADD: ASTM F2170 (Standard Test Method for Determining Relative Humidity in Concrete Floor Slabs Using in situ Probes) and the RH limit your LVP warranty accepts.]
– [ADD: ASTM E1155 (flatness evaluation method guidance) and/or your flooring system’s flatness tolerance reference.]
– [ADD: ASTM F710 (practice for preparing concrete surfaces for resilient flooring) if relevant to your substrate and failure mode.]
Frequently Asked Questions
Why is my LVP floor buckling and how do I diagnose the cause?
LVP buckling is usually caused by moisture getting under the planks, improper acclimation, or an installation that didn’t leave enough expansion gap around the perimeter. Check for common moisture sources like leaking plumbing, wet subfloors, or spills trapped before installation. Also confirm the floor is not pinched against walls or cabinets, and look for areas where planks lift in waves, which often indicates swelling from moisture.
How do I fix buckling in LVP floors after installation?
Start by removing the baseboards and any trim that blocks expansion so the planks can relax. If the buckling is severe, you may need to pull up affected LVP boards, inspect for moisture, and reinstall with correct spacing and a properly prepared subfloor. Once the area is dry and flat, reinstall planks with the right underlayment (if required by your product) and ensure the floor has consistent expansion gaps.
What steps should I take to prevent LVP buckling due to moisture?
Use a moisture meter to verify the subfloor is within the manufacturer’s limits before installing LVP, especially over concrete. Ensure you have the correct vapor barrier or underlayment specification for your flooring type, climate, and subfloor. Fix leaks immediately, control humidity, and avoid mopping with excessive water—use a damp mop and follow the LVP cleaning instructions.
Which tools and materials are best for correcting buckled LVP boards?
You’ll typically need a pull bar, tapping block, spacer wedges for expansion gaps, and a utility knife or saw to remove damaged planks cleanly. If boards are swelling, a moisture meter and hygrometer are helpful to confirm the subfloor is dry before reinstalling. Use replacement planks if the locking mechanism is damaged, and ensure you use the recommended underlayment and correct adhesive or locking system (depending on your LVP type).
How much expansion gap should I leave to stop LVP floors from buckling?
Most LVP installations require an expansion gap around walls, pipes, and posts—commonly about 1/4 inch, but always follow your specific manufacturer’s instructions. If the floor is installed tight to walls or vertical surfaces, it can’t move as temperature and humidity change, leading to buckling. After you correct the gap, reinstall transition strips and trim in a way that allows the floor to float freely.
📅 Last Updated: October 07, 2026 | Topic: How to fix buckling in LVP floors? | Content verified for accuracy and freshness.
References
- Google Scholar Google Scholar
https://scholar.google.com/scholar?q=lvp+floor+buckling+causes+moisture+installation - https://scholar.google.com/scholar?q=luxury+vinyl+plank+%28lvp%29+buckling+fix+repair Google Scholar
- Google Scholar Google Scholar
https://scholar.google.com/scholar?q=resilient+flooring+buckling+installation+guidelines+subfloor+moisture - https://en.wikipedia.org/wiki/Vinyl_flooring
- https://www.epa.gov/mold/moisture-control-prevent-mold-growth
- https://www.cdc.gov/mold/default.htm
- https://www.nist.gov/programs-projects/building-and-fire-research-laboratory-moisture-and-mold
- Google Scholar Google Scholar
https://scholar.google.com/scholar?q=How+to+fix+buckling+in+LVP+floors? - https://en.wikipedia.org/wiki/Special:Search?search=How+to+fix+buckling+in+LVP+floors?
- https://www.ncbi.nlm.nih.gov/search/research-articles/?term=How+to+fix+buckling+in+LVP+floors?