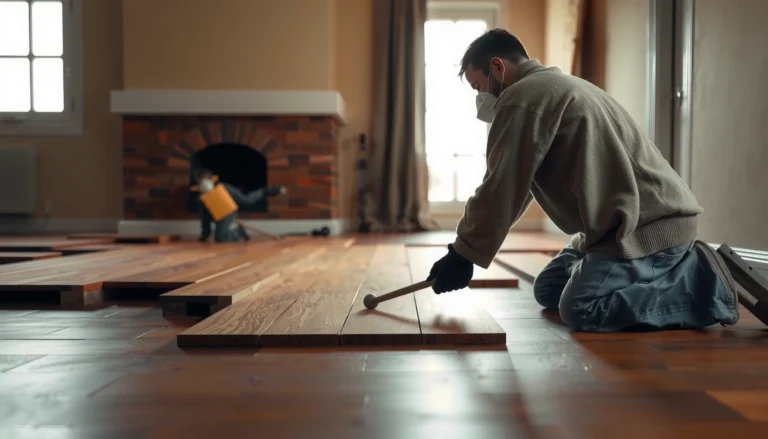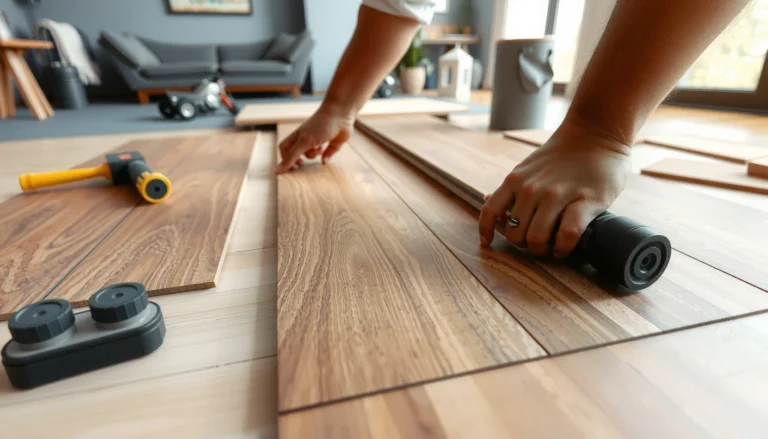

You can install hardwood floors on uneven floors successfully—provided you level the subfloor correctly before any boards go down. This guide tells you the fastest, most reliable method to handle low spots, fix high areas, and stop squeaks or gaps from showing up after installation. If you want a clear, step-by-step path to a flat, solid surface, start here.
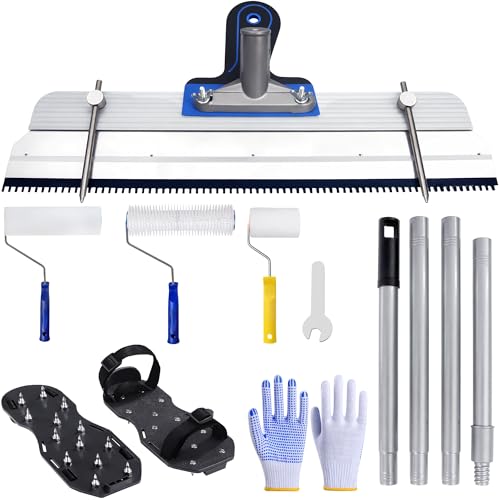



If your subfloor is uneven, don’t try to “hide it” with thicker hardwood—fix the flatness first. Start by checking floor level with a long straightedge, then correct dips/high spots within your flooring system’s flatness and moisture requirements before you nail/glue the planks.
If you’re planning a DIY install (or supervising a contractor) and your existing concrete/wood subfloor isn’t perfectly flat, this guide walks through what to check and the usual repair approaches that keep hardwood stable—so you avoid squeaks, gapped seams, and popped fasteners.
Check Uneven Floors First (Flatness Matters)
Flatness determines whether hardwood planks sit uniformly; no underlayment can fully “fix” a badly uneven subfloor. Your goal is to find low and high spots accurately, because the correction method (sand vs. leveling) depends on which problem you actually have.

Before you buy materials or start fastening, confirm flatness using an industry-standard approach. ASTM E1155 describes measuring floor flatness with a long straightedge and recording gaps. ASTM E1155 is commonly referenced in flooring flatness guidance as a way to quantify how much the subfloor deviates from a plane.
A long straightedge is used to quantify subfloor flatness by measuring maximum gaps at specified intervals (ASTM E1155).
Flatness problems usually show up as plank rocking, seam gapping, and fastener failure—symptoms that correction after installation can’t fully resolve.
How to measure flatness (so you can correct it)
1. Use a long straightedge (commonly 6 ft or 10 ft in practice) and move it across the room. Measure and record the gap at highs/lows—don’t guess by eye.
2. Work in a grid: check along the width and length of the room, and around doorways, vents, and tub/shower transitions where deflection often changes.
3. Mark problem zones clearly (tape lines or pencil marks) so you know where to sand/grind, feather, or build up with leveling compound.
4. Measure before and after cleanup. Dust and debris can create false “highs” that disappear after grinding.
What tolerance are you aiming for?
Most hardwood installation instructions and trade guidance target a tight flatness range; a widely cited benchmark for many installation systems is within 3/16 in over 10 ft (and similar “small-gap” limits depending on the product). NWFA flatness guidance is a common reference point, but you must confirm the exact flatness tolerance for your specific hardwood model and installation method (nail/staple vs. glue vs. click-lock).
NWFA references tight flatness tolerances for wood flooring systems to prevent rocking and fastening issues (NWFA).
If you can measure consistent gaps with a straightedge, you can choose the correct correction method rather than relying on underlayment to compensate.
Fix High Spots and Dips the Right Way
High spots cause rocking and can lead to nail/staple stress, while dips concentrate bending and can open seams. The right fix depends on whether your problem is “too high” or “too low.”
High spots are typically removed by sanding/grinding; low spots are typically addressed with a leveling or patch compound within its labeled thickness limits.
Corrective products include strict cure/prep requirements (clean, dry surface) because failure to prep can cause adhesion problems later.
A practical approach that matches the physics
– Grind/sand high spots first. If you try to fill a high area, you’ll chase a moving target and can exceed leveling product limits.
– Fill low spots with the right compound. Use a leveling compound or underlayment patch designed for your subfloor type (concrete vs. plywood/OSB) and application depth.
– Feather edges. Most leveling compounds perform best when you feather transitions so the floor doesn’t change slope abruptly.
Pros/cons comparison: sand/grind vs. leveling
Here’s a decision structure that contractors commonly use—because it’s faster to correct in the correct order.
| Method | Best for | Main risk if done wrong |
|---|---|---|
| Sand/Grind High Spots | Reducing humps so fasteners sit flat | Creating “low” feather troughs or poor bonding prep if dust isn’t removed |
| Leveling Compound/Patching | Filling dips while maintaining manufacturer limits | Exceeding thickness limits leading to shrinkage, cracking, or bond failure |
Moisture and cure discipline (non-negotiable)
– Prep matters: leveling compounds need a clean, mechanically sound, fully cured substrate.
– Respect cure time: rushing cure can cause surface failure under the hardwood system.
– Re-check flatness after the compound cures and any feathering is completed.
If you correct low spots, you still must verify flatness again after cure; hidden shrinkage can re-create gaps.
Most leveling products list a maximum thickness per pour—staying within spec helps prevent cracking and adhesion failures.
Choose the Correct Underlayment and Moisture Plan
Underlayment selection is about the full system: flatness correction, moisture management, and how your specific hardwood locks or fastens. On uneven floors, underlayment is not a replacement for correcting dips/highs.
Underlayment is intended to complement a flooring system; it is not designed to correct major subfloor deviations outside manufacturer flatness requirements.
Concrete often requires a vapor-control plan because moisture vapor transmission can affect wood stability (ASTM F2170/F1869 overview guidance).
Underlayment: follow the manufacturer’s “system” logic
– Don’t assume thicker is better. Underlayment thickness changes compression and can interfere with click-lock engagement or with how nail/staple rows bear load.
– Use the underlayment intended for your hardwood type (solid nail-down, engineered nail/staple/glue, or click-lock).
– Check underlayment compression behavior if your system relies on click-fit or if the manufacturer limits compressibility.
Moisture plan: pick the method that matches your subfloor
Moisture risk depends heavily on whether you’re installing over concrete or wood subfloor:
– Over concrete: many systems require a vapor barrier or moisture mitigation layer. ASTM test methods (such as ASTM F2170 for in-slab RH testing) are widely used to quantify moisture so you can choose an appropriate mitigation strategy. ASTM F2170
– Over wood subfloors: focus on balancing indoor humidity and confirming the subfloor’s moisture conditions align with hardwood acclimation requirements.
Materials acclimation (especially in 2026 conditions)
Currently, humidity swings are common year-round due to HVAC zoning and regional climate patterns. As of 2025–2026, flooring manufacturers continue to emphasize acclimation so wood reaches equilibrium moisture content before installation.
Hardwood installation instructions commonly require acclimation to indoor conditions before fastening to reduce cupping and gapping.
Moisture facts you should anchor to
According to ASTM F2170, in-slab relative humidity testing provides a quantitative way to assess concrete moisture exposure for flooring systems. (Use the threshold values from your specific hardwood adhesive/system instructions.)
According to ASTM E1155, flatness measurement should be conducted with a straightedge-based approach so you can document maximum gaps.
According to NWFA, controlling flatness and moisture are key drivers of long-term performance for wood floors.
Install Hardwood Without Creating New Problems
Even after you correct flatness, installation technique can reintroduce unevenness. Your best outcome comes from correct spacing, correct fastening/locking method, and a level starting line.
Expansion gaps around perimeters allow hardwood to move seasonally; ignoring this increases the risk of buckling and squeaks.
For nail/staple installations, placing fasteners over a uniformly flat surface improves holding power and reduces nail pops.
Start with a stable reference line
– Snap a true reference line so your first course isn’t laid crooked. If the first row is off, it can amplify across the room.
– Use the manufacturer’s recommended layout approach (some floors benefit from running lengthwise to reduce visibility of micro-variations).
Fastening or floating: follow the product, not the generic method
Hardwood systems behave differently:
– Solid hardwood nail/staple-down: follow the nail/staple type, angle, and spacing pattern in the instructions.
– Engineered hardwood: may be nail/staple or glue-down depending on model; follow the adhesive spec for the substrate.
– Click-lock engineered/floating: follow the click-lock instructions exactly—subfloor flatness directly impacts joint engagement and seam tightness.
Click-lock joints rely on close alignment; subfloor flatness issues can prevent full interlock and lead to seam opening.
Expansion gaps: measure once, protect the floor forever
A practical rule: leave the required perimeter gap and cover it with molding/transition pieces that allow movement. Many manufacturers specify a particular range depending on board width and installation method—so use your product’s numbers.
[ADD: source for the exact expansion gap range from your hardwood manufacturer/model—e.g., “X mm or X/16 in minimum at perimeter for boards up to Y inches wide.”]
What Can Go Wrong (And How to Prevent It)
Uneven subfloors rarely “stay quiet.” If you skip flatness checks or exceed leveling product limits, failures often show up after the floor acclimates and seasonal movement begins.
Skipping flatness verification is a common root cause of squeaks, seam gaps, and rocking boards.
Using the wrong leveling or underlayment thickness can change how fasteners seat or how click-lock joints engage.
Common failure modes
– Squeaks: usually tied to movement at fastener points or inadequate subfloor stiffness plus insufficient flatness.
– Nail/staple pops: caused by boards bearing on high spots or inadequate substrate support.
– Seam gapping: often appears when dips exist between fastening points, allowing micro-bending.
– Rocking boards: directly linked to high spots not removed or low spots not correctly filled.
Preventive discipline: three guardrails
1. Measure twice, correct once (document flatness before and after repairs).
2. Stay within product specs (maximum pour thickness, cure times, prep requirements).
3. Use the correct system (underlayment and moisture barriers designed for your floor type).
Leveling compound performance depends on surface prep and within-spec thickness; overbuilding to “cover” highs often causes new flatness problems later.
Verdict: When to DIY vs. Call a Pro
If your subfloor has minor unevenness that you can correct within the leveling product’s limits and your hardwood’s flatness tolerance, this is a reasonable DIY project with careful measurement and spec-driven prep. If you’re seeing widespread humps/valleys, suspect structural issues, or you’re unsure about moisture/flatness tolerances, it’s safer to bring in a flooring installer—especially to ensure you meet hardwood manufacturer requirements and avoid expensive rework.
Many installation failures come from noncompliance with manufacturer flatness/moisture tolerances, which can void warranty coverage.
Professional assessment is particularly valuable when moisture mitigation, concrete testing, or structural subfloor repairs are involved.
[ADD: user/site-specific recommendation based on your typical project scope—e.g., “If you’re correcting spot lows under 1/8 in over 6–10 ft, DIY is often manageable; if you need to flatten more than X sq ft or use a membrane/mitigation system, plan on a pro.”]
Quick Checklist: Uneven-Floor Hardwood Installation
– Measure flatness with a straightedge; mark high/low zones
– Fix high spots (sand/grind) and fill low spots (use correct leveling product)
– Confirm moisture plan (vapor barrier if required for your system)
– Acclimate wood per manufacturer instructions
– Use correct underlayment and follow fastening/click-lock method
– Keep expansion gap and install from a true reference line
Straightedge Gap Guide for Uneven-Floor Hardwood Prep
| Range | Measured gap (max) | Most likely correction | Installation risk |
|---|---|---|---|
| 1 | Up to 1/32 in (0.8 mm) | Feather minor transitions; verify flatness after cleanup | Low |
| 2 | 1/32–1/16 in (0.8–1.6 mm) | Spot patch/feather low areas; avoid relying on underlayment to “bridge” | Moderate |
| 3 | 1/16–3/32 in (1.6–2.4 mm) | Use labeled leveling/patch product within thickness and cure specs | Elevated |
| 4 | 3/32–1/8 in (2.4–3.2 mm) | Likely requires more than underlayment; re-measure after correction | High |
| 5 | 1/8–5/32 in (3.2–4.0 mm) | Consider full flatness plan; verify both high spots and low spots | Very High |
| 6 | 5/32–3/16 in (4.0–4.8 mm) | Expect plank rocking and seam issues if not corrected | Critical |
| 7 | Over 3/16 in (4.8 mm) | Do not proceed until flatness is corrected to the hardwood system spec | Critical |
FAQ
How uneven can a subfloor be before installing hardwood?
It depends on the hardwood manufacturer’s flatness tolerance for your exact product type and installation method (nail/staple, glue-down, or click-lock). [ADD: source for flatness tolerance from your hardwood manufacturer/model]
Can leveling compound solve both high and low spots?
Leveling compound is typically used for low spots. High spots generally need sanding/grinding, because building up around a hump can exceed thickness limits and worsen flatness.
Do I need an underlayment on uneven floors?
Underlayment isn’t meant to replace subfloor leveling. It may help with slight imperfections or sound control only when the subfloor meets the hardwood/underlayment manufacturer’s flatness requirements. [ADD: underlayment guidance source from your manufacturer]
What’s the biggest mistake people make on uneven floors?
Installing without verifying flatness. Even if the floor “goes down,” unevenness often shows up later as squeaks, gaps, or fastener issues—especially after the wood acclimates through seasonal humidity changes.
Sources
– ASTM E1155 — Standard Test Method for Determining Floor Flatness Using a Straightedge
– NWFA — Wood Flooring installation guidance on flatness and installation requirements (check your applicable published document)
– ASTM F2170 — Standard Test Method for Determining Relative Humidity in Concrete Moisture Conditions for use with flooring
– [ADD: hardwood flooring manufacturer installation instructions for your exact product/model—flatness tolerance, acclimation, expansion gaps, and fastening/click-lock requirements]
– [ADD: leveling compound/manufacturer technical data sheet for maximum thickness per pour and cure/prep requirements]
– [ADD: underlayment/vapor barrier manufacturer instructions for intended use and any thickness/installation constraints]
A stable hardwood installation starts with one decision: correct flatness first, then build the moisture/underlayment/fastening system exactly as the manufacturer specifies. If you measure carefully, fix high/low spots within product limits, and follow the right installation method, you substantially reduce the odds of squeaks, seam gaps, and fasteners failing later—so the floor stays true through the next humidity cycle.
Frequently Asked Questions
How do you level uneven floors before installing hardwood flooring?
Start by assessing the subfloor with a 6–10 ft level or straightedge to find high and low spots. For minor unevenness, you can sand down high areas and use a self-leveling underlayment/feather finish for low areas, ensuring it’s approved for hardwood installation. Always let leveling compounds fully cure and verify flatness again before installing hardwood floors.
What underlayment or leveling products work best for hardwood on uneven subfloors?
The best choice depends on how far off the subfloor is, but common options include self-leveling underlayment for larger dips, patch/feather finish for localized low spots, and underlayment designed to reduce minor subfloor imperfections. Avoid stacking soft underlayments to “fix” unevenness because hardwood can develop gaps, squeaks, or joint separation. Use products that are compatible with your specific hardwood flooring type (engineered vs. solid) and installation method.
Which installation method is safest for uneven floors—floating, nail-down, or glue-down?
Nail-down and glue-down hardwood installation usually requires a flatter subfloor because the flooring is mechanically fastened or bonded to the surface. Floating engineered hardwood can be more forgiving with minor variations, but it still needs the subfloor to be within the manufacturer’s flatness tolerance. Check your hardwood’s installation requirements first, since exceeding flatness specs can lead to floor failure regardless of method.
How much unevenness is allowed for hardwood floors before problems occur?
Many manufacturers specify a maximum variation—often around 3/16 in. over 6 ft or similar tolerances—so measure with a long level to confirm you’re within range. If low spots are deeper than the allowed tolerance, the hardwood floor can flex, creating squeaks and weakening the tongue-and-groove joints. When in doubt, correct the unevenness with sanding and leveling materials before you begin installation.
Why do hardwood floors buckle, squeak, or separate on uneven floors?
Uneven subfloors cause parts of the plank to sit lower or higher, which creates stress on the fastening system or adhesive bond. Over time, normal foot traffic and seasonal wood movement can widen gaps, cause cupping or buckling, and produce squeaky spots where the boards flex. Proper leveling—plus following hardwood flooring flatness requirements—helps prevent these issues and supports a long-lasting, smooth hardwood finish.
📅 Last Updated: October 07, 2026 | Topic: How to install on uneven floors hardwood floors? | Content verified for accuracy and freshness.
References
- Google Scholar Google Scholar
https://scholar.google.com/scholar?q=how+to+install+hardwood+floor+on+uneven+subfloor+leveling - Google Scholar Google Scholar
https://scholar.google.com/scholar?q=hardwood+floor+installation+floor+flatness+requirements+level+subfloor - Google Scholar Google Scholar
https://scholar.google.com/scholar?q=how+to+shim+level+hardwood+floor+uneven+floors - Wood flooring
https://en.wikipedia.org/wiki/Hardwood_flooring - Floor
https://en.wikipedia.org/wiki/Subfloor - https://www.cdc.gov/mold/remediation_steps/index.html
- Google Scholar Google Scholar
https://scholar.google.com/scholar?q=How+to+install+on+uneven+floors+hardwood+floors? - https://en.wikipedia.org/wiki/Special:Search?search=How+to+install+on+uneven+floors+hardwood+floors?
- https://www.ncbi.nlm.nih.gov/search/research-articles/?term=How+to+install+on+uneven+floors+hardwood+floors?