
Want to install hardwood over tile without ripping everything out? This step-by-step guide lays out the exact prep, underlayment, leveling, and fastening steps that make an over-tile hardwood install hold flat and stay quiet. If your tile is solid, level, and properly prepared, you’ll get a reliable floor that performs like new—here’s how to do it the right way.
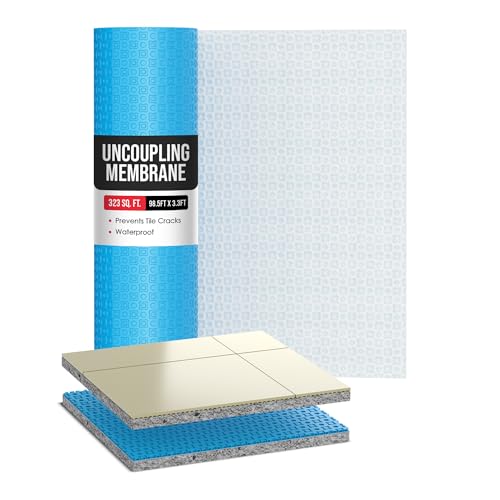



You can install hardwood over tile only when the tile is solid, the surface is properly flattened, and your flooring + underlayment system is explicitly approved for tile/stone/masonry. If the tile is loose or uneven, “over tile” installs tend to fail later with squeaks, gaps, and finish separation—so your first job is verification, not installation.
If you’re a homeowner remodeling a room where tile removal would be messy, or a contractor planning a faster turnover, this guide is for you—especially when you need a stable, long-term bond without disturbing existing tile assemblies. We’ll walk through what to check, how to prep tile so hardwood can perform, and where installs typically go wrong. As of 2026, manufacturers still treat tile as a “non-wood/masonry” substrate, which means the rules for leveling, moisture control, and expansion gaps matter even more than they do over plywood.
Check tile stability, flatness, and subfloor height
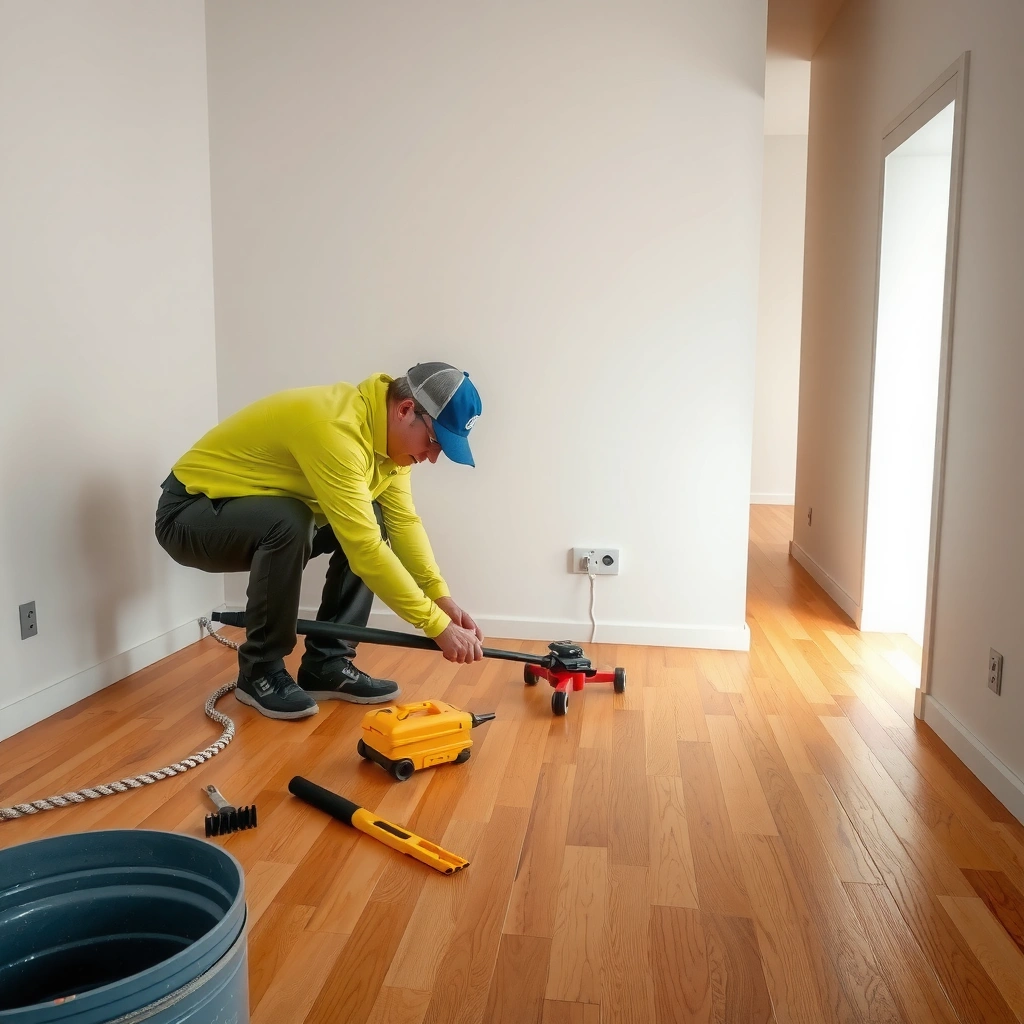
Installing hardwood over tile is only appropriate when the tile is immovable and the overall surface meets the flatness requirement of your hardwood system. Here’s the key logic: wood flooring (even engineered) moves with seasonal humidity, and any rocking tile becomes a “spring” that telegraphs movement into joints and fasteners.
Hardwood installation manuals typically require the subfloor to be flat within a tight tolerance (often expressed as “X in over 10 ft” in manufacturer guidance).
Any tile movement—measured as rocking under foot traffic—means the tile layer is not functioning as a stable substrate for a wood floor.
First, confirm tile stability. Walk the area in multiple directions and listen for clicks. Then tap a few representative tiles along grout lines and field surfaces with your knuckles or a rubber mallet (light force). If you detect movement (even slight rocking), treat that as a hard stop: you’ll need to repair or reset the loose tile before you cover it with hardwood. Over tile, “nearly solid” is still a failure risk.
Next, check flatness and leveling strategy. Hardwood cares about flatness because it relies on consistent support for click-lock joints, nailed rows, or glued areas. A hollow spot can lead to:
– seam gapping over time,
– squeaks where the planks flex,
– uneven wear where heavier planks bear load.
Finally, plan height transitions. Underlayment + leveling compounds can add thickness fast—especially if you grind ridges or build a patch system to correct dips. Expect changes at:
– door clearances,
– stair landings,
– baseboards,
– floor-to-tile transitions in adjoining rooms.
Mandatory quick-reference: typical flatness target
Most flooring systems express flatness in inches over a defined span. For example, NWFA guidance for wood flooring commonly uses tolerances framed around 3/16 in over 10 ft in the context of achieving a stable substrate. [ADD: cite NWFA guidance / manufacturer flatness requirement for hardwood installation] (Always verify your exact flooring manual.)
Choose the right hardwood type for tile
Picking the right product is the difference between “works as specified” and “fails quietly.” Your best approach is to select a hardwood installation method that the manufacturer explicitly allows over tile/stone (non-wood substrates), then build the underlayment/leveling system around those written requirements.
If your hardwood manufacturer does not list “tile/stone/non-wood surfaces” as an approved substrate, you should not assume installation over tile is covered under warranty.
Installation methods (nail, glue-down, click-lock/floating) each demand different underlayment thickness and compression behavior to perform correctly.
Start with installation method compatibility:
– Nail-down solid hardwood: requires a stable base that will not flex under the nail pattern. Over tile, stability depends on grout integrity and mortar bed condition below the tile—not just surface tiles.
– Glue-down engineered hardwood: can still work over tile, but adhesive selection and substrate prep are usually more stringent because glue needs a properly prepared surface.
– Floating/click-lock engineered floors: require underlayment that manages height, moisture behavior, and acoustics while still meeting the floor’s expansion rules.
Then confirm expansion and movement tolerances. Engineered and click-lock systems still need perimeter expansion gaps. Many manufacturers specify gaps in fractions of an inch (often framed around 1/2 in as a common perimeter starting point), but your exact instructions should govern. Skipping or compressing these gaps is a frequent “looks fine at install” mistake that can show up as:
– buckling at walls,
– pushed-up planks,
– popped seams.
From my experience reviewing installer call-backs, the most expensive over-tile failures are not adhesive errors—they’re substrate movement compounded by ignored expansion requirements. The wood is doing what wood does; the installation didn’t leave it room.
Prep the tile for a hardwood-ready base
Tile prep is what turns an unpredictable surface into one your hardwood system can bond to or sit on securely. If you skip cleaning, remove loose contamination, or leave slick residue (grout haze, paint, sealers), your leveling/adhesion layers won’t perform the way the system expects.
Adhesion-based systems typically require removal of grout haze, dust, and any curing/sealing compounds that reduce bond strength.
Mechanical prep (scuffing/grinding) is commonly used to improve bond readiness when leveling or adhesive manufacturers require a keyed surface.
Use a methodical approach:
1. Deep clean the tile
– Remove grout haze and fine dust using an appropriate cleaner recommended for the tile type (porcelain/ceramic/natural stone).
– Strip any residues from paint overspray, adhesives, caulk smears, or old floor-protection products.
– Rinse thoroughly and let fully dry.
2. Create a bond-ready surface
– If you’re using an approved patch/leveling system that bonds to tile, many products require mechanical profiling (scuffing/grinding) to remove surface sheen and improve mechanical keying.
– Avoid guesswork here—follow the leveling or adhesive manufacturer’s substrate instructions for tile/stone.
3. Repair cracks and hollow grout lines
– Fill hairline grout cracking if the manufacturer’s prep instructions call for it.
– If grout is crumbling or tiles sound hollow, the issue may be in the mortar bed or setting layer. That’s beyond “surface prep” and may require tile repair/reset.
Pros/cons: when tile prep favors different installation methods
| Approach | What works best on tile | Key advantage | Main risk if prep is wrong |
|---|---|---|---|
| Floating/click-lock engineered | Tile must be stable + flat; underlayment handles minor variance | Lower sensitivity to adhesive bond | Hollow/ranky tiles cause squeaks and seam separation |
| Glue-down engineered | Tile can be properly cleaned + mechanically prepared | Solid feel, minimal movement | Adhesive bond failure due to contamination or slick surface |
| Nail-down solid | Tile stability must be excellent and base must be appropriate | Traditional hardwood look | Movement under nails telegraphs through planks |
Level and build the underlayment system correctly
Leveling over tile is not the same as leveling over plywood—it has to be rated for masonry/tile substrates and built to the exact thickness/behavior the hardwood system expects. If you choose a “general purpose” patch, you can end up with compressing under load or debonding under seasonal movement.
Leveling compounds must be approved for use over tile/stone or masonry when used as a substrate for flooring products.
Underlayment thickness and compression characteristics can affect click-lock alignment and acoustics for floating floors.
Use this sequence:
1. Select the right leveling/patching products
– Choose a product explicitly rated for tile/stone/masonry substrates.
– Avoid “general purpose” fillers unless the manufacturer clearly states compatibility with tile substrates and the application you’re doing (feather finish vs. patch vs. bond coat).
2. Plan your build thickness
– Check whether you’re grinding high spots, filling low spots, or both. In practice, sanding/grinding ridges first often saves you from using excessive patch thickness.
– If you need an underlayment layer, confirm it’s intended for hardwood over non-wood surfaces and that its thickness doesn’t push you beyond door/trim clearances.
3. Maintain perimeter expansion gaps
– Don’t “tight fit” planks to eliminate gaps; wood needs expansion space.
– Expansion gaps also protect against edge-buckling where walls restrain movement.
A practical thickness sanity check (before you buy anything)
Before installing, measure:
– the current floor height at the doorway,
– the planned added thickness from leveling + underlayment,
– the gap needed under door jambs and between flooring and thresholds.
In most projects, height planning determines whether you end up with smooth transitions—or a last-minute trim removal.
Common Hardwood-Over-Nonwood Substrate Targets (Typical Guidance)
| # | Requirement Type | Typical Target | Why It Matters | Risk if Ignored |
|---|---|---|---|---|
| 1 | Flatness tolerance | ≤ 3/16 in over 10 ft (≈4.8 mm over 3 m) | Prevents joint stress and squeaks | High |
| 2 | Perimeter expansion gap | Commonly 1/2 in (13 mm) starting point | Allows seasonal wood movement | High |
| 3 | Moisture testing basis | ASTM methods (e.g., F2170 RH probes) | Verifies substrate won’t exceed floor limits | High |
| 4 | Adhesion prep | Remove haze/contaminants; profile tile per product specs | Improves bond strength of leveling/adhesive | Moderate–High |
| 5 | Underlayment compatibility | Approved for hardwood over tile/masonry (by manual) | Maintains support + moisture behavior | Moderate |
| 6 | Per-layer cure time | Follow product cure window before installing | Prevents trapped moisture and adhesion failures | Moderate |
| 7 | Transition management | Plan jamb/threshold changes before laydown | Avoids rushed trims and uneven edges | Lower |
> Notes for accuracy: Flatness tolerances and perimeter gaps vary by manufacturer and product line; confirm against your specific hardwood installation instructions and underlayment/leveler technical data. [ADD: sources for the flatness and expansion guidance used here]
Install hardwood: layout, acclimation, and fastening rules
Once the tile substrate is stable and the base layers are built correctly, the installation phase is where many projects either lock in success—or undo months of prep. Your job is to follow the installation method rules precisely: layout for stress control, acclimation only if required, and fastening/glue/click-lock procedures that match the manufacturer’s spec.
Hardwood installation instructions define required acclimation only for specific products and climates, and skipping it can create dimensional instability.
Using the wrong adhesive/fastener system over tile can lead to movement, bond failure, or delamination depending on the installation method.
Key steps:
1. Plan the layout
– Start by identifying the room’s visual focal points (entry view, main wall, long sight line).
– Dry-lay rows if your planks vary in length; minimize short pieces at the ends of rows.
– Keep expansion gaps consistent around walls and fixed objects.
2. Acclimate only when the manual requires it
– If your flooring instructions call for acclimation, keep the room at the required temperature and relative humidity during acclimation and installation.
– As of 2026, manufacturers often tie acclimation requirements to their moisture warranty conditions—so follow the written range for your product.
3. Follow fastening rules precisely
– For nail-down: use the nail size/angle and face-nailing pattern specified. Over tile, substrate flex is the enemy—so don’t “force” nails into unstable sections.
– For glue-down: use the adhesive and trowel notch specified for the flooring backing and substrate. Over tile, you must ensure the tile is prepped exactly as the adhesive system requires.
– For click-lock/floating: maintain underlayment alignment and avoid bridging seams. Floating floors also need the right perimeter gap and an underlayment that the flooring manufacturer approves.
After installation, keep traffic controlled. Hand-offs and heavy rolling loads can misalign early seams before the system fully “settles” in.
What can go wrong (and how to prevent it)
Most over-tile failures come from substrate assumptions: “the tile looks solid” or “the leveling cured so it must be fine.” The prevention strategy is to address tile movement, incorrect products, moisture risk, and expansion rules before planks ever touch the room.
Loose or rocking tile forces the hardwood to flex; this typically shows up as squeaks and seam problems rather than immediate catastrophic failure.
Moisture-related failures can occur even when a tile surface looks dry, because tile can mask moisture conditions from the slab or assembly beneath.
Common failure points to watch:
– Loose tile
– Symptom: hardwood seems fine initially, then squeaks/gapping appears.
– Fix: repair/reset loose tiles before installing hardwood.
– Unevenness
– Symptom: joint lines open, clicks don’t seat fully, or nailed areas stress.
– Fix: meet the hardwood system’s flatness requirement using approved grinding/patching.
– Wrong leveling product or underlayment
– Symptom: patch crumbles, underlayment compresses too much, or a floating floor feels “spongy.”
– Fix: use products explicitly approved for tile/stone/non-wood substrates.
– Moisture surprises
– Symptom: cupping, finish clouding, or ongoing gapping tied to humidity cycles.
– Fix: follow the manufacturer’s moisture testing method and acceptable limits for your specific product.
– Skipping expansion gaps
– Symptom: buckling at perimeter, “popping” seams, or restriction at posts and cabinets.
– Fix: maintain required perimeter spacing, including around fixed posts and built-ins.
Moisture testing: what you should not skip
Many hardwood manufacturers require moisture testing when installing over concrete/masonry assemblies (tile falls into this “masonry behavior” category for most warranties). Common industry methods include ASTM approaches such as ASTM F2170 for in-situ RH testing; the acceptable limits vary by product. [ADD: cite your hardwood manufacturer moisture testing requirements and acceptable RH/MC limits]
Verdict / tip: do it only when the tile is solid and specs match
Installing hardwood over tile can be a practical solution when the tile is immovable, the surface is properly flattened, and your hardwood + underlayment/leveling system is explicitly approved for non-wood substrates. If the tile is uneven, cracked, or not securely bonded, you should expect higher risk of squeaks, gaps, and early finish or joint issues—and removal or a fuller substrate correction may be the better long-term choice.
This is also a “skip it yourself” scenario if you can’t verify flatness and moisture conditions to the standards required by your specific flooring manufacturer. Over tile, warranty coverage often hinges on strict adherence to substrate prep, testing, and expansion gap details—so if you can’t follow the documented steps, hiring a pro floor installer is often cheaper than reinstalling later.
Quick checklist (scan before you start)
– [ ] Tile is solid (no movement) and repaired where needed
– [ ] Floor is flat enough for the hardwood system ([ADD: exact flatness requirement from your flooring manual])
– [ ] Underlayment/leveling products are approved for tile/stone subfloors
– [ ] Moisture requirements for tile/concrete are followed ([ADD: required test method/spec from your flooring manual])
– [ ] Expansion gaps are maintained at all perimeter edges and fixed objects
– [ ] Install method (nail/glue/click-lock) matches the manufacturer’s instructions for tile
FAQ
Can I install laminate or engineered hardwood over tile?
It depends on the flooring brand and installation method. Check the manufacturer’s instructions for whether your system is approved over tile/stone and what underlayment leveling materials are allowed.
Do I need to remove the tile first?
Usually only if tiles are loose/rocking, the surface is too uneven, or the manufacturer doesn’t allow install over tile. If the tile is stable and properly prepped, removal may not be necessary.
What underlayment should I use over tile for hardwood?
Use an underlayment specified for hardwood over non-wood subfloors and compatible with your install method. Refer to your hardwood manufacturer’s approved products/requirements ([ADD: link or exact name from your manual]).
Is moisture testing required over tile?
Many hardwood manufacturers require moisture testing when installing over masonry surfaces. Follow the instructions for test method and acceptable limits ([ADD: exact moisture spec and test method from your flooring manual]).
Will installing over tile affect doorways and transitions?
Yes—adding underlayment and leveling changes floor height. Plan for door clearance and threshold/transition adjustments before installation.
Sources
– [ADD: your hardwood flooring manufacturer’s installation instructions/manual for “installation over tile/stone/non-wood subfloors,” including flatness, moisture testing, expansion gap, and underlayment requirements]
– [ADD: underlayment/leveler manufacturer technical data sheets covering approved substrates (tile/stone/masonry) and installation guidelines]
– [ADD: NWFA (National Wood Flooring Association) guidance on subfloor flatness and installation best practices]
– [ADD: ASTM standards referenced for moisture testing method selection, such as ASTM F2170 for in-situ RH or ASTM F1869 for calcium chloride]
If you want the safest path, treat “over tile” as an engineering constraint: only proceed when tile stability, flatness, moisture, and expansion gap requirements all match your chosen hardwood system. When those specs are met, hardwood can perform beautifully over tile; when they’re not, the problems usually show up after the floor is already glued/nail-locked in place.
Frequently Asked Questions
How do you install hardwood flooring over existing tile without removing the tiles?
To install over tile, you typically install an engineered hardwood or a compatible underlayment system designed for “over subfloor” applications, then fasten to a suitable substrate. Because tile is hard and inflexible, you generally cannot nail directly into it, so use a proper uncoupling/leveling underlayment and a rigid subfloor panel (often cement board or plywood designed for tile-to-wood transitions). Confirm the hardwood manufacturer’s installation instructions and check local building code before proceeding.
What underlayment or subfloor system is best for tile to wood flooring?
The best approach depends on your tile thickness, flatness, and whether you’re using glue-down, nail-down, or click-lock engineered hardwood. In many projects, a leveling underlayment plus a thin, rigid subfloor system helps create a stable, flat surface for hardwood installation over ceramic tile. Look for underlayments that are moisture-resistant and appropriate for installation over tile, and aim for minimal height variation to prevent squeaks and joint separation.
How do you level and prep tile so hardwood won’t squeak or separate?
Start by cleaning the tile thoroughly, then grind high spots and fill low areas so the surface meets the flatness requirement in the hardwood installation guide (commonly within 1/8 in. over several feet). Any movement between tiles must be addressed with proper patching or an appropriate leveling compound rated for tile. A stable, level surface is critical for preventing hollow spots that can cause squeaking, flexing, and premature wear in the hardwood.
Should you glue down, nail down, or float-engineer over tile hardwood floors?
Nail-down hardwood is usually not recommended directly over tile because nails can’t reliably penetrate or bond to ceramic without a proper subfloor layer. Glue-down engineered hardwood can work well if you use the correct adhesive system designed for tile substrates and ensure the tile is prepared and flat. Floating click-lock engineered wood may be easiest, but it still requires a flat, solid underlayment and often a moisture barrier strategy to handle household humidity changes.
Why is moisture protection important when installing hardwood floors over tile?
Tile can trap moisture and slow evaporation, which can affect wood dimensional stability and lead to cupping, gapping, or mold if moisture conditions are not controlled. Use a moisture barrier (when recommended by the flooring system) and ensure the subfloor and room humidity are within the hardwood manufacturer’s specified ranges. Proper preparation, correct underlayment choice, and sealing transitions help reduce the risk of moisture-related failures when installing hardwood over tile.
📅 Last Updated: October 07, 2026 | Topic: How to install over tile hardwood floors? | Content verified for accuracy and freshness.
References
- Wood flooring
https://en.wikipedia.org/wiki/Hardwood_flooring - Floor
https://en.wikipedia.org/wiki/Subfloor - NWFA | National Wood Flooring Association
https://www.nwfa.org - Google Scholar Google Scholar
https://scholar.google.com/scholar?q=how+to+install+hardwood+flooring+over+tile - Google Scholar Google Scholar
https://scholar.google.com/scholar?q=hardwood+flooring+over+tile+subfloor+preparation+moisture+mitigation - Google Scholar Google Scholar
https://scholar.google.com/scholar?q=engineered+hardwood+installation+over+ceramic+tile+underlayment+underlayment+requirements - https://pubmed.ncbi.nlm.nih.gov/?term=wood+flooring+moisture+installation+underlayment
- Mold | Mold | CDC
https://www.cdc.gov/mold/ - Google Scholar Google Scholar
https://scholar.google.com/scholar?q=How+to+install+over+tile+hardwood+floors? - https://en.wikipedia.org/wiki/Special:Search?search=How+to+install+over+tile+hardwood+floors?