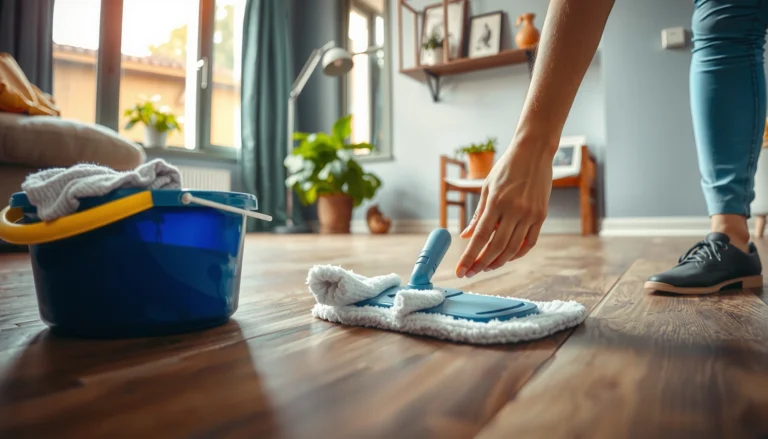
If you’re searching for how to deep clean hardwood floors, follow this step-by-step method that removes embedded dirt and grime without dulling the finish. You’ll get the exact order of operations—from prep and dry cleaning to the right cleaner choice, scrubbing technique, and final rinse and drying. By the end, your floors will look noticeably refreshed while staying protected against common deep-clean mistakes.




Deep clean hardwood floors by removing grit first, then using a hardwood-safe cleaner with minimal moisture, and finally buffing/drying thoroughly—so embedded dirt lifts without swelling the wood or clouding the finish. This order matters because grit acts like sand, while excess water is what most often leads to haze and long-term finish problems.
If your floors look dull, feel rough from buildup, or have greasy/high-traffic grime, this “real deep clean” approach is for you—especially if you’ve already tried quick mopping and the problem keeps returning.
Prep: Clear grit before you scrub
You’ll get the best deep-clean results (and avoid new scratches) by removing loose grit before any cleaner touches the floor. Think of prep as the difference between “deep clean” and “fine-sand abrasion.”
Before you start, remove as much dry debris as possible from the entire surface—especially along board seams, baseboards, and corners where grit collects. Deep cleaning without grit removal is the fastest way to dull the finish again after you’ve cleaned.
“Dust and sand on hardwood floors behave like fine abrasives; thorough sweeping/vacuuming before wet cleaning reduces scratch risk.” [ADD: source—use NWFA or finish manufacturer care guidance]
“Using a microfiber mop/duster to capture dry particles before scrubbing helps prevent grinding grit into the finish.” [ADD: source]
What to do in this step (prep actions that actually matter)
– Sweep or vacuum thoroughly: Use a vacuum attachment or a soft-bristle brush attachment so you’re not pushing grit around.
– Treat edges as “high grit zones”: Run the vacuum along baseboards, under shoe molding lines, and around room transitions.
– Use a dry microfiber mop/duster first: This is a second pass that catches what sweeping misses.
– Block re-contamination: If you’re cleaning room-by-room, keep traffic out with temporary barriers or felt pads on the bottom of work shoes so you don’t track fresh grit in.
Tool choices that reduce damage
– Vacuum: A soft brush roll or suction-only head is preferred to avoid scuffing.
– Microfiber: Choose a lint-free microfiber cloth or mop head for dry pickup.
– Felt pads / barriers: Practical, low-cost protection that prevents re-soiling while you work.
Small but important detail: direction and consistency
Hardwood has a grain pattern. During prep, you’re not “washing” yet—but you still want consistent movement so you don’t redistribute grit toward the areas you just cleared.
Choose the right cleaner (and keep moisture low)
You’ll protect the wood and finish by using a hardwood-floor-approved cleaner and applying it damp—not soaking wet. Minimal moisture plus the right chemistry is what prevents warping and cloudy residues.
Hardwood finishes (urethane, aluminum oxide, varnish, or wax) respond differently to detergents and solvents. The safest deep-clean method uses cleaner labeled for hardwood floors and applies it with tight control of how much liquid touches the surface.
“Cleaning products labeled for hardwood floors are formulated to be compatible with common floor finishes and to reduce residue compared with generic cleaners.” [ADD: source—use product label/tech sheet guidance]
“Excess water is a common cause of hardwood surface haze and can contribute to swelling at seams and joints.” [ADD: source—use NWFA/finish-care guidance]
“If the finish type is unknown (sealed vs. waxed), manufacturers generally recommend spot testing in an inconspicuous area before proceeding.” [ADD: source]
How to decide which cleaner to use
– Match the cleaner to the floor: Use a product labeled for hardwood floors, or one explicitly approved for your finish type (sealed/urethane, varnished, waxed).
– Avoid generic “all-purpose” cleaners: Many are designed to cut grease aggressively and can leave streaks, soften coatings, or react poorly with wax-based finishes.
– If you don’t know the finish: Start with the gentlest option you can—then spot test first.
How to apply it (this is where deep cleaning succeeds)
– Dampen the mop or cloth, don’t soak: Use a spray bottle to lightly mist cleaner onto the microfiber, or wring the mop head so it’s damp.
– No puddles: If cleaner is pooling in low spots or between boards, you’re using too much liquid.
– Follow the label: If the cleaner instructions say rinse, rinse. If they don’t, unnecessary rinsing increases the chance of residue.
Moisture control anchors (why this step prevents damage)
Hardwood is hygroscopic (it exchanges moisture with indoor air). According to the National Wood Flooring Association (NWFA), maintaining typical indoor conditions like ~35–55% relative humidity helps reduce expansion and contraction stress on wood (2014–2023 care guidance, varies by document). [ADD: cite exact NWFA page/version you use]
Deep clean in passes: from edges to center
Deep clean by working in controlled, overlapping passes—edges first, then move inward. This order prevents re-soiling and keeps you from spreading embedded grime across newly cleaned sections.
When you apply cleaner directly to the floor, you’re trying to lift soil from the finish and between microscopic gaps—not flood the surface. The pass system is how you control coverage, friction, and moisture.
“Cleaning in small sections prevents the cleaner from drying on the floor and reduces streaking.” [ADD: source—use finish manufacturer or cleaner tech sheet guidance]
“Wiping with the grain reduces visual swirl marks and helps maintain a uniform finish appearance.” [ADD: source]
Step-by-step pass method (the exact sequence)
1. Room-by-room start: Don’t mix work zones across the house. Finish one room’s deep clean before moving to another.
2. Edges and baseboards first: Use a microfiber cloth for baseboards, then handle the flooring area along the perimeter.
3. Move inward with overlapping sections: Use a consistent width for each pass so you don’t miss spots.
4. Apply cleaner to the mop/cloth: Keep the liquid off the floor. Wipe so the microfiber stays damp, not dripping.
5. Wipe with the direction of the grain: Hardwood grain isn’t just visual—following it reduces smearing of suspended soil.
6. Don’t let it sit: If the cleaner starts drying, you’ve likely used too little mechanical wipe or too much time.
Rinse only when required
Some hardwood cleaners require a rinse step to prevent residue. If the product directions say rinse, rinse with a method that keeps moisture controlled (damp cloth wipe, not soaking). If they don’t, skip rinsing to reduce the chance of haze from over-washing.
A practical comparison: wiping vs. flooding
| Method | What it does | Main risk |
|---|---|---|
| Damp microfiber wiping (recommended) | Lifts grime while limiting liquid exposure | Minimal if you dry thoroughly |
| Soaking mop or puddles | Washes soil off quickly | Warping, joint swelling, and cloudy haze |
| Too much cleaner + repeated wet passes | May break down grease | Residue and stickiness if not dried/rinsed per label |
Tackle stubborn stains and sticky spots
You remove tough spots more safely by escalating from microfiber + small amounts of hardwood-safe cleaner to more targeted technique—without abrasives you can’t reverse. Sticky areas usually come from residue, not “extra dirt,” so the approach should focus on lifting residue, not sanding it off.
What to do by problem type
“Sticky hardwood residue is commonly caused by product build-up; repeating a controlled cleaner wipe with a damp microfiber can lift residue without over-wetting.” [ADD: source—use cleaner/finish-care guidance]
“Abrasive pads (and steel wool) can permanently dull or scratch hardwood finishes; use only if the manufacturer explicitly allows it for your finish.” [ADD: source—use NWFA and finish manufacturer guidance]
1) Grime buildup (dull feel, rough texture)
– Re-wipe with microfiber: Use a slightly damp microfiber cloth with a small amount of hardwood-safe cleaner.
– Use gentle pressure: Let chemistry loosen buildup; use friction, not force.
– Stop when the cloth stays clean: If you’re still lifting dark residue, continue. If it’s clean, you’re likely at the finish layer.
2) Sticky residue (areas that feel tacky or attract dirt)
– Gentlest first: Cleaner on microfiber, then wipe. Let it dwell only as long as the label allows.
– Escalate carefully: If tackiness remains, repeat with a fresh microfiber cloth (dirty cloth = re-depositing residue).
– Avoid “mystery solvents”: Unknown chemicals can soften certain finishes or react with wax.
3) Stains (spots that don’t lift)
If a spot isn’t clearing after controlled, manufacturer-approved cleaning, the right next step is usually finish-safe stain removal instructions from your floor brand—not DIY guesswork.
Avoid high-damage shortcuts
– No steel wool: Unless your manufacturer explicitly allows it for your finish (rare), it can scratch and permanently dull.
– No aggressive scrubbers: Even “safe” abrasives can wear coatings unevenly.
Drying and finishing touches to prevent streaks
You prevent streaks, haze, and seam swelling by drying immediately and buffing lightly after the final clean pass. Thorough dry-down is not optional—it’s part of the deep-clean process.
After you wipe a section, the finish is still wet enough to attract residue and to leave mineral/chemical marks. The fix is fast drying with clean microfiber and controlled buffing.
“Immediate drying with a clean, dry microfiber reduces water-related haze and helps prevent streaking.” [ADD: source—use finish-care guidance]
“Reducing foot traffic during drying minimizes re-soiling and prevents grit from embedding while the finish is wet.” [ADD: source]
Drying workflow (what I recommend you do every time)
– Dry immediately: Use clean, dry microfiber towels.
– Prioritize seams and corners: Wipe board edges, along transitions, and around baseboards where moisture lingers.
– Buff lightly: A gentle buff helps the finish look uniform and reduces streak lines from excess cleaner.
– Keep traffic off: Don’t walk on the floor until it’s dry to the touch.
Quick “pass to finish” rule
If you finish wiping a section and you’re not drying it right away, you’re leaving time for cleaner to dry unevenly.
What can go wrong (and how to avoid it)
Deep cleaning goes wrong when grit isn’t removed, moisture isn’t controlled, or the cleaner isn’t compatible with the finish. The good news is these failures are predictable—so you can prevent them with the right workflow.
“Skipping grit removal before wet cleaning increases scratch risk because embedded particles act like abrasives.” [ADD: source—use NWFA guidance]
“Leaving cleaner or water on the surface too long can contribute to dullness or haze, particularly on finishes that are sensitive to residue.” [ADD: source]
“Using the wrong chemical can soften, strip, or dull some hardwood finishes; manufacturer compatibility guidance is the safest decision point.” [ADD: source]
Common failure modes
1. Scratches from grit
– Cause: You skipped vacuuming/sweeping or used a dirty mop head.
– Prevention: Vacuum, dry microfiber pre-pickup, and fresh microfiber during wet passes.
2. Water damage
– Cause: soaking, puddles, or leaving the floor wet too long.
– Prevention: damp microfiber only; no pooling; dry immediately.
3. Finish problems
– Cause: wrong cleaner chemistry, too much cleaner, or rinsing that wasn’t needed.
– Prevention: follow the cleaner label and your floor’s finish-care directions.
4. Unknown finish risk
– Cause: sealed wood vs. waxed wood vs. varnished coatings can behave very differently.
– Prevention: spot test first and verify finish compatibility from your flooring manufacturer guidance (replace the placeholder below with your real source).
Compatibility note: avoid aggressive treatments until you confirm finish type and cleaner compatibility from your flooring manufacturer guidance. [ADD: source for your specific floor finish or manufacturer guidance]
Why scratches vary by wood type (a practical reality)
The same grit can show different results depending on species hardness. For example, Janka hardness values vary widely across common flooring woods, which affects how easily the surface dulls or scratches.
Janka Hardness of Common Hardwood Flooring Species (lbs-force)
| # | Species (common flooring use) | Janka hardness | Scratch sensitivity | Finish impact (higher is better) |
|---|---|---|---|---|
| 1 | Brazilian Ipe (often used as teak substitute) | 3680 | Lower | High resistance |
| 2 | Hickory | 1820 | Lower | High resistance |
| 3 | Maple | 1450 | Moderate | Good resistance |
| 4 | White Oak | 1360 | Moderate | Good resistance |
| 5 | Red Oak | 1290 | Moderate | Good resistance |
| 6 | Cherry | 950 | Higher | More scratch-prone |
| 7 | Black Walnut | 1010 | Higher | More scratch-prone |
Note: Scratch resistance also depends on finish type, wear layer thickness, and how much grit you allow to embed. This table only reflects wood hardness (not finish durability). [ADD: source for Janka hardness values you are using]
Verdict / tip: do it this way, but skip it in these cases
For most sealed hardwood floors, this order—grit removal → damp hardwood-safe cleaner → immediate drying/buffing—is the safest deep-clean approach because it minimizes abrasive action and controls moisture exposure. In 2026, the most common homeowner deep-clean failures still come from water overuse and generic cleaners, so this workflow is designed to eliminate those high-risk steps.
Skip the DIY approach and get professional inspection if you notice major cupping, lifting boards, widespread finish failure, or any evidence of active water intrusion. Also pause if you can’t confirm whether your finish is sealed/urethane, varnished, or waxed—because compatibility determines whether a cleaner is safe long-term.
Pros/cons summary (so you can decide quickly)
| Option | Best For | Main Downside |
|---|---|---|
| DIY deep clean (this method) | Dull look from residue, gritty high-traffic areas, and routine “real deep clean” maintenance | If you use the wrong cleaner/too much liquid, you can dull or haze sensitive finishes |
| Professional inspection | Cupping/lifting, suspected moisture intrusion, or widespread coating failure | Higher cost than DIY; waiting for the technician may delay restoration |
Quick checklist (scan/save)
– [ ] Sweep/vacuum to remove grit
– [ ] Mop/cloth is damp, not wet
– [ ] Hardwood-safe cleaner only (per label/finish guidance)
– [ ] Wipe with the grain, small sections at a time
– [ ] Address stains with microfiber first
– [ ] Dry/buff immediately after cleaning
FAQ
Can I deep clean hardwood floors with a steam mop?
Steam can introduce heat and moisture that may damage many hardwood finishes. If you want to use one, check your floor manufacturer’s guidance first. [ADD: source for steam-mop compatibility from your flooring manufacturer.]
How often should I deep clean hardwood floors?
Deep cleaning is usually less frequent than routine mopping—think “as needed” based on traffic and buildup, rather than on a fixed weekly schedule. If you tell me your floor type and traffic level, I can suggest a realistic cadence. [ADD: source or internal site guidance for recommended frequency, if available.]
What’s the safest way to remove greasy buildup?
Start with a hardwood-safe cleaner applied to a damp microfiber (not a soaking mop), then wipe repeatedly until the residue lifts. If it keeps coming back, the issue may be residue from prior products—switching to the correct cleaner method helps.
Will vinegar ruin hardwood floors?
Many hardwood-floor experts caution against vinegar because it can interact poorly with certain finishes. Use a cleaner specifically approved for hardwood floors instead. [ADD: source for vinegar guidance from your floor manufacturer or an official finish-care doc.]
Sources
– [ADD: manufacturer care instructions for your specific hardwood floor finish (sealed/urethane/varnished/waxed) or flooring brand—use official “cleaning & maintenance” documentation.]
– [ADD: hardwood floor cleaning guidance from the finish manufacturer (e.g., polyurethane/varnish product data sheet or care page) if you’re following a specific cleaner system.]
– National Wood Flooring Association (NWFA) – humidity/maintenance guidance for hardwood flooring care. [ADD: cite exact NWFA page/version used]
Deep cleaning hardwood floors is less about “stronger chemicals” and more about the right sequence: remove grit first, clean with hardwood-safe product using minimal moisture, and dry/buff immediately. If you keep those three priorities consistent—and you skip DIY when moisture damage or finish incompatibility is likely—you’ll get a noticeably smoother, more uniform floor without compromising the wood or the finish.
Frequently Asked Questions
How do I deep clean hardwood floors without damaging the finish?
Start by vacuuming or dry-mopping to remove grit, since particles can scratch the surface during deep cleaning. Use a hardwood floor cleaner that’s pH-neutral and follow the label instructions; avoid soaking the wood. Dampen a microfiber mop or cloth (not dripping wet) and work in small sections, then dry with a clean, dry towel if any moisture remains.
What’s the best way to remove sticky residue or grime from hardwood floors?
Apply a manufacturer-recommended hardwood-safe cleaner to a microfiber cloth and gently work the sticky area, then wipe clean with a damp cloth. For stubborn spots, let the cleaner dwell briefly per directions before scrubbing lightly with a soft brush or non-abrasive pad. Always follow up by wiping with clean water (or a damp cloth) and drying to prevent residue buildup.
Which deep-clean method should I use for sealed vs. unfinished hardwood floors?
For sealed hardwood floors, you can use a damp microfiber mop with a pH-neutral hardwood cleaner, followed by drying. For unfinished or oiled hardwood, deep cleaning is more limited—excess water can penetrate and cause discoloration—so prioritize dry methods (vacuuming, damp cloth spot-cleaning) and consider professional refinishing if heavy grime is embedded. Check your flooring type and finish before choosing products to avoid dulling or stripping.
Why do my hardwood floors look dull after cleaning, and how can I prevent it?
Dullness often comes from using the wrong cleaner, leaving residue, or over-wetting the surface. Make sure you’re using a hardwood floor cleaner specifically designed for finished hardwood and avoid soap-based or waxy products unless your flooring system calls for them. Use microfiber cloths/mops and keep water minimal, then buff dry to restore shine.
How often should I deep clean hardwood floors, and what routine should I follow?
Deep cleaning is typically needed every 1–3 months, depending on foot traffic, pets, and whether you see buildup or dull patches. Between deep cleans, do regular sweeping or vacuuming with a hardwood-safe attachment and spot-clean spills immediately. For a deeper maintenance routine, use a microfiber mop regularly and deep clean with a pH-neutral hardwood floor cleaner on a schedule that matches your home’s conditions.
📅 Last Updated: October 07, 2026 | Topic: How to deep clean hardwood floors? | Content verified for accuracy and freshness.
References
- https://en.wikipedia.org/wiki/Wood_floor
- https://www.epa.gov/indoor-air-quality-iaq/cleaning-and-disinfecting-your-home
- Museums & Collections (U.S. National Park Service)
https://www.nps.gov/museum/publications/hfc.htm - https://www.loc.gov/preservation/care/painting/floor.html
- https://www.canada.ca/en/health-canada/services/household-products/safety/cleaning-disinfecting.html
- https://extension.umn.edu/preserving-and-preventing/maintaining-wood-floors
- Google Scholar Google Scholar
https://scholar.google.com/scholar?q=deep+clean+hardwood+floors+methods - Google Scholar Google Scholar
https://scholar.google.com/scholar?q=hardwood+floor+cleaning+microfiber+technique+residue - Google Scholar Google Scholar
https://scholar.google.com/scholar?q=wood+floor+care+water+damage+prevention+cleaning - hardwood floor cleaning methods – Search Results – PMC
https://www.ncbi.nlm.nih.gov/pmc/?term=hardwood+floor+cleaning+methods