

If you’re searching for how to install hardwood floors, this step-by-step guide takes you from subfloor prep to the final boards with a clear, do-it-right sequence. Follow these instructions for accurate layout, proper acclimation, tight fastening, and clean finishing—so your floor lands level, solid, and built to last. You’ll know exactly what to do at each stage, including the common mistakes that derail DIY installs.




Hardwood floor installation mostly comes down to three things: start with a truly straight reference line, prepare a flat/stable subfloor, and follow your specific product’s nail-down, glue-down, or click-lock (floating) requirements. If you measure for flatness, acclimate when required, and maintain proper expansion gaps, you prevent the most common problems like buckling, squeaks, and gapping.
If you’re planning a DIY install—especially in a living room, hallway, or bedroom—this guide gives you a clear, step-by-step workflow. It also helps when you’re comparing nail-down, glue-down, and click-lock hardwood, so you can buy the right materials and avoid “it looked fine at first” failures later.
Plan the job and choose the right install method
The fastest way to avoid rework is to pick the correct installation method (nail-down, glue-down, or click-lock) before you buy tools or flooring. Then you build the plan around your subfloor type and the manufacturer’s exact fastening/adhesive instructions.
Here’s what you decide upfront:
– Identify your flooring type (nail-down, glue-down, or click-lock/floating) and follow that manufacturer’s installation instructions.
– Confirm the subfloor type (plywood, OSB, slab/concrete) because each system has different preparation and underlayment requirements.
– Measure the room and account for expansion gaps, direction of plank layout, and transitions at doorways.
Hardwood installation method is not interchangeable; nail-down, glue-down, and click-lock systems are designed around different mechanical and moisture behaviors.
Subfloor material (plywood/OSB vs. concrete slab) determines which moisture tests and underlayment rules apply.
Your plank direction and transition plan control how visible “end-joints” and height changes will be after installation.
Choose your method based on your subfloor and product design
A good planning rule is simple: if the manufacturer says “nail-down,” you nail-down (and use the required fasteners). If it says “glue-down,” you use the specified adhesive system (not just any “wood glue”). If it says “click-lock/floating,” you treat the boards as an assembly that must move with seasonal humidity changes.
Also, inspect your layout realities early:
– Doorways and thresholds often dictate where you place transitions.
– Hallways and long rooms can magnify alignment errors—your first row needs to be accurate.
– Radiant heat, uneven baseboards, and built-in cabinetry change how you handle gaps and trims. (Follow the flooring brand’s guidance for these.)
Quick planning math that prevents ugly surprises
Before you open boxes, estimate:
– Extra material for waste from cutting around vents and odd angles: commonly 5–10% for typical rooms, and more for complex layouts. [ADD: exact waste factor from your flooring brand if provided]
– How many full boards you’ll get per row, and where you’ll distribute end joints.
– Where expansion space must remain: around walls and fixed structures (including door jambs), per the product instructions.
Prep the subfloor for a flat, stable base
A flat, structurally sound subfloor is the foundation of a quiet, long-lived hardwood floor. Before you install planks, fix flatness and moisture issues—hardwood cannot “hide” a problem base.
Prep checklist includes:
– Check flatness and address high spots/low spots before any boards go down; hardwood will telegraph problems.
– Remove old flooring and ensure the surface is clean, dry, and structurally sound.
– For nail-down installs, verify fastening readiness (proper thickness/structure). For slab installs, follow moisture testing and adhesive requirements from the flooring manufacturer.
Hardwood telegraphs subfloor imperfections; correcting flatness before installation is usually cheaper than chasing squeaks and gaps later.
Moisture performance is controlled at the subfloor layer; even visually “dry” concrete can fail moisture tolerances.
Fastening requires a stable substrate thickness and composition; unsuitable plywood/OSB can lead to loose boards.
Check flatness the way your installation spec expects
Most installation problems come from unevenness, but the measurement approach matters. Use a straightedge long enough for your area (many specs reference a 6 ft straightedge), and follow the flooring brand’s flatness tolerance. [ADD: flatness tolerance value from your flooring manual]
If you find:
– High spots: grind or plane them down.
– Low spots: use approved patch/leveling products (not random fillers).
– Loose subfloor: fasten subfloor panels per structural framing requirements before you install any hardwood.
Confirm moisture suitability—especially over concrete slabs
For concrete, the industry-standard approach is test-based moisture verification, typically using ASTM methods. According to ASTM F2170, in-slab relative humidity testing (RH) is a widely used method for hardwood underlayment and adhesive system approvals. Common manufacturer limits often rely on the RH test results (frequently expressed as a maximum in-slab RH percentage), and those thresholds vary by brand and adhesive.
Also, according to ASTM F1869, calcium chloride (MVER) testing measures moisture vapor emission rate in lbs/1000 sq ft/24 hours; many installation instructions use specific MVER thresholds when approving flooring systems.
Key point: follow your hardwood brand’s approved moisture test + pass/fail limit—not a generic rule. Use manufacturer moisture guidance as the authority, and record results before proceeding. [ADD: your flooring brand’s required test method and pass threshold]
Acclimate the wood and layout before installing
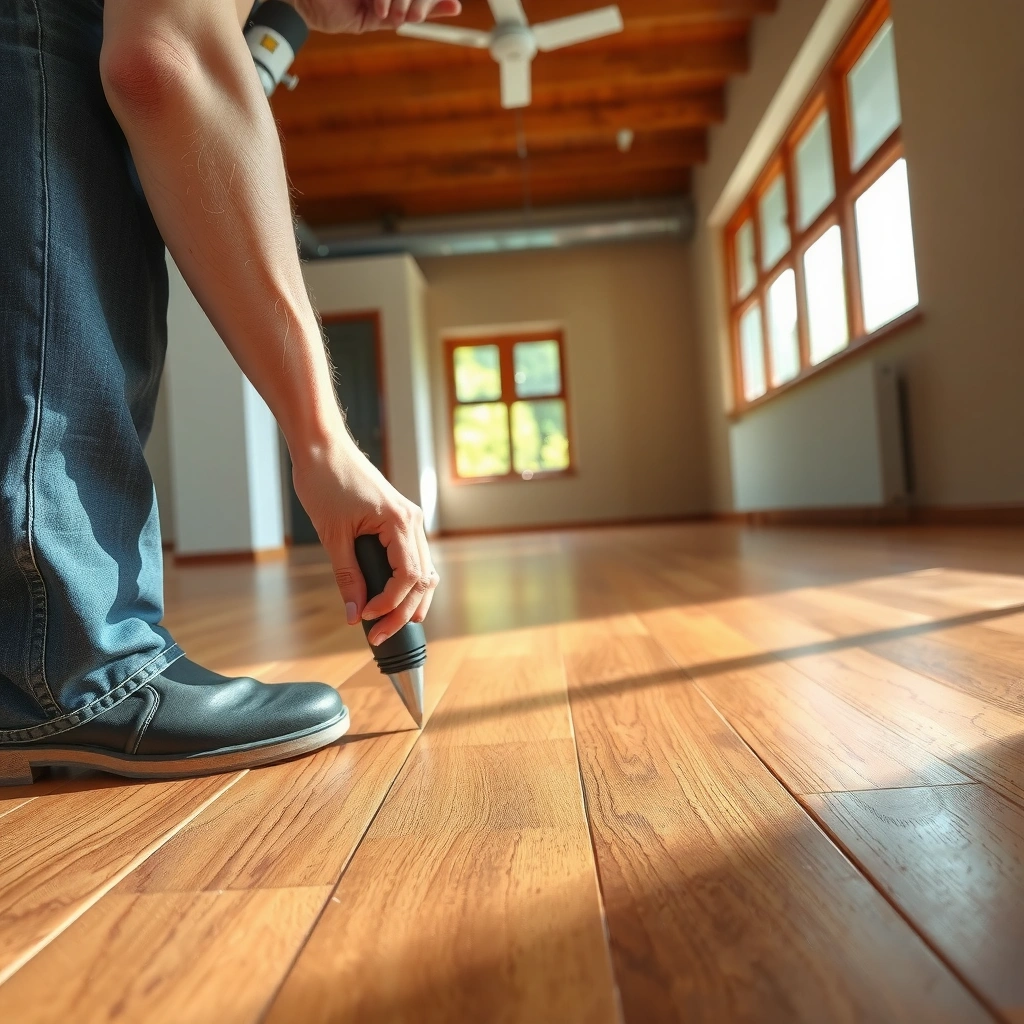
Acclimation and pre-layout reduce surprises because hardwood is a moisture-responsive material. You acclimate only when your flooring instructions require it, and you align the layout so the first rows lock in a straight, professional look.
What to do here:
– Acclimate hardwood only if your flooring instructions require it (and follow the stated conditions/timeframes).
– Plan plank direction (often lengthwise for visual flow) and dry-lay several rows to catch pattern/grade issues.
– Set reference lines so the first row is straight—your entire floor will mirror that first-course alignment.
Acclimation requirements vary by product; using a manufacturer-approved schedule prevents dimensional movement from day-one.
A dry layout (even a partial “test run”) helps detect shade variation, bowing, and pattern inconsistencies before fastening.
Your reference line is the “truth line” for the whole floor—if it’s off, every subsequent row compounds the error.
Acclimation: what to follow (and what not to guess)
Hardwood acclimation typically depends on:
– Indoor temperature and relative humidity
– The product’s moisture content targets
– The manufacturer’s stated timeframe
Because conditions and specs differ by brand, do not improvise. Keep boxes in the room in the manner your instructions specify, and stop if any board shows defects your supplier says to address.
Layout strategy that keeps cuts strong and joints looking intentional
Plan for:
– Plank direction: Many DIYers install lengthwise to emphasize room length, but follow the look you want and the product’s guidance on end-joint staggering.
– End-joint staggering: Avoid a repeating “line” of joints. Use the manufacturer’s minimum stagger requirement between rows. [ADD: your brand’s required stagger]
– Dry-lay: Install several rows without fastening to confirm the direction, color blending, and how your layout interacts with doorways and hall transitions.
In my experience planning DIY hardwood installs, the most common “layout regret” isn’t the color—it’s cutting yourself into a corner where you end up with weak, tiny end joints near doorways. You can often avoid this with a simple shift of the starting row during dry-lay.
[ADD: photo/example source or your flooring type’s guidance on plank direction or end-joint minimums]
Install the first rows and maintain expansion gaps
The first rows determine whether the floor looks straight and stays stable. Maintain expansion gaps exactly as specified—then install each subsequent row with consistent pressure and alignment.
Steps:
– Start with the correct gap along walls and fixed objects; use spacers/shims where recommended by the manufacturer.
– For nail-down: install and fasten according to the specified nailing pattern (near edges vs. face nailing) and spacing.
– For glue-down: follow spread/coverage guidance and adhesive type; for floating: use the correct underlayment and click/lock instructions.
Expansion gaps allow seasonal wood movement; skipping them is one of the most reliable paths to buckling.
For nail-down floors, using the approved fastener type/pattern helps boards seat and reduces squeaks.
For glue-down floors, adhesive coverage and open time control bond strength; “too little” or “too late” can fail.
Expansion gaps: measure at walls and fixed objects, not “eyeball it”
Hardwood needs space at:
– Walls
– Pipe penetrations (with an appropriate cover/trim strategy)
– Door jambs and casings (covered later by trim, not packed tight)
Use the exact gap value from your flooring manual. [ADD: your brand’s required expansion gap width]
Method-specific installation fundamentals
Nail-down (engineered/hardwood with nail pattern requirements):
– Use the correct nailer and fastener length/type required by your product.
– Keep the nail spacing and edge distances within the manufacturer’s pattern to avoid splitting or missed engagement.
Glue-down:
– Use the adhesive type (and trowel/spread technique) specified for your flooring and subfloor.
– Work within the adhesive’s open/working time window so boards bond properly.
Click-lock (floating):
– Use the underlayment system your manufacturer approves.
– Maintain the correct wall gap and avoid locking boards too tightly; follow the click pattern to prevent “peaking” seams.
Cut accurately and handle obstacles cleanly
Cuts define the finish quality—especially around vents, pipes, cabinets, and doorways. The goal is consistent gaps, solid joint placement, and transitions that match your floor height and subfloor condition.
Do this:
– Measure and cut around vents, pipes, and cabinets; plan your cuts so you don’t end up with tiny, weak end joints.
– Install transitions (t-moldings, reducers, stair nosing) based on your flooring heights and the subfloor condition.
– Leave consistent gaps at door jambs and molding boundaries, then cover with trim where appropriate.
Plan cuts so end joints land where the board can be supported and where the transition strategy won’t weaken the layout.
Door jambs and built-ins need consistent gap space; trim is the finish layer that hides the gap, not the board itself.
Transitions must match the floor’s height and thickness stack-up so edges don’t catch or lift.
Common “obstacle” techniques that keep joints tidy
– Pipes: Cut oversized holes and use trim rings/escutcheons where required, leaving the movement allowance your product needs.
– Vent registers: Dry-fit planks first; cut with the correct blade for clean edges.
– Stairs and landings: Treat these as a special case—follow the manufacturer’s stair-nosing/fastener guidance and don’t assume wall trim rules apply.
If your walls are uneven, you typically don’t force the boards to match the crooked perimeter. Instead, you scribe and adjust the first few rows so the floor stays square and the gaps remain consistent.
[ADD: photo/example source or your flooring type’s guidance]
What can go wrong (and how to avoid it)
Most DIY hardwood failures trace back to three root causes: subfloor issues, moisture imbalance, and incorrect method/spec adherence. If you correct those early, you avoid the late-stage symptoms—squeaks, gaps, and movement.
Common problems to prevent:
– Poor subfloor flatness can cause squeaks, gaps, or uneven wear—fix the base before laying planks.
– Skipping the required expansion gap can lead to buckling when humidity changes.
– Using the wrong method/adhesive/fastener pattern for your specific hardwood type can cause loose boards or failed bonding—always match the manufacturer’s instructions.
– Moisture problems (especially on concrete slabs or in humid rooms) can ruin an install even if the planks look fine at first; follow the manufacturer’s moisture guidance. [ADD: specific moisture test method required by your flooring brand]
– If your room has uneven walls, you may need to scribe and adjust the first rows rather than forcing boards to follow a crooked perimeter. [ADD: photo/example source or your flooring type’s guidance]
If you see squeaks or “clicking,” the issue often starts under the floor—fasteners, subfloor movement, or flatness gaps between framing members.
Buckling is usually a movement-math problem: boards expand with humidity and need predictable room to go.
Moisture failures can be delayed; a slab can look acceptable today but still exceed limits under seasonal swings.
A quick pros/cons comparison for install methods
| Method | Strengths | Watch-outs |
|---|---|---|
| Nail-down | Solid mechanical hold; often aligns well in long runs | Requires correct subfloor fastening readiness and nail pattern |
| Glue-down | Great stability for many spaces | Adhesive coverage/open time must be followed exactly |
| Click-lock (floating) | DIY-friendly; less specialized tools | Needs correct underlayment + gap strategy to avoid movement issues |
Moisture test facts you can anchor to standards
– According to ASTM F2170, in-slab RH testing provides a method to evaluate moisture conditions inside concrete slabs rather than relying on surface dryness.
– According to ASTM F1869, calcium chloride testing measures moisture vapor emission rate (MVER), expressed in lbs/1000 sq ft/24 hours.
– The actual “pass/fail” limits depend on your flooring system and adhesive/underlayment approvals, so the manufacturer’s spec remains the controlling document. [ADD: your brand’s exact RH/MVER threshold]
Verdict / tip (who should or shouldn’t DIY)
If your subfloor is stable, clean, flat enough for your flooring’s published tolerance, and you’re installing a method that matches your product specs, you can likely install hardwood floors successfully as a DIY project. The biggest risk is not the cutting—it’s skipping the correct moisture and expansion-gap rules, which can show up months later as buckling, squeaks, or gaps.
Skip DIY (or plan on a professional) if you have an unstable/undercured substrate, significant moisture uncertainty over concrete, a very complex layout (multiple transitions, stairs, built-ins), or you can’t meet the brand’s flatness and moisture testing requirements. For those cases, a pro can verify the base and follow the system spec to reduce warranty-risk.
Quick checklist (scan before you start)
– [ ] Confirm flooring type: nail-down vs. glue-down vs. click-lock/floating
– [ ] Verify subfloor condition and flatness before installation
– [ ] Follow moisture/acclimation instructions from the flooring manufacturer
– [ ] Plan plank direction, layout, and transition points
– [ ] Maintain expansion gaps at walls and fixed objects
– [ ] Use the correct fastener/adhesive/underlayment for your product
– [ ] Cut cleanly around obstacles; leave gaps where required
Moisture Test Methods Commonly Used for Concrete Slabs (Hardwood Install Approvals)
| # | Moisture Test (Concrete In-Slab) | Standard | Measurement Output | Typical Spec Limit Used by Many Install Systems |
|---|---|---|---|---|
| 1 | Relative Humidity (RH) probe test | ASTM F2170 | In-slab RH (%) | ≤ 75% RH (commonly referenced) |
| 2 | Calcium chloride (MVER) testing | ASTM F1869 | MVER (lbs/1000 sq ft/24h) | ≤ 3.0 lbs (commonly referenced) |
| 3 | Concrete surface moisture (qualitative) | ASTM F2659 (capillary-style evaluation) | Surface condition rating | Not a substitute for ASTM F2170/F1869 |
| 4 | In-slab moisture for adhesive approvals | Adhesive system spec | RH or MVER threshold | Manufacturer-defined pass/fail value |
| 5 | Hydration age influence on concrete moisture | ASTM C1064 (testing framework) | Time/curing context | Moisture can remain high in early curing cycles |
| 6 | Testing grid layout (multiple locations) | Installation best practice | Zone-based reading map | Use several slab locations, not one test |
| 7 | Moisture mitigation system (if needed) | Coating spec | Post-mitigation moisture pass | Re-test after mitigation to spec |
FAQ
Here are the most common follow-up questions DIYers ask when installing hardwood, with practical answers grounded in installation requirements.
If you’re stuck at the planning stage, the subfloor and moisture specs determine almost everything else about your install.
Most “mystery failures” trace back to one overlooked spec item—flatness, moisture, or expansion space.
How do I know if my subfloor is ready for hardwood flooring?
Check that it’s clean, structurally solid, and flat enough for your specific hardwood installation instructions. If the manufacturer specifies a flatness tolerance or tests, follow those exactly. [ADD: flatness tolerance from your flooring manual, if available]
Do I need to acclimate hardwood before installing?
Only if your flooring instructions require it. The process and duration depend on the product and environment, so use the manufacturer’s stated requirements.
What’s the biggest cause of buckling or gaps after installation?
Most commonly, inadequate expansion space and/or moisture imbalance. Follow expansion gap requirements and any moisture testing guidance for your subfloor and room conditions. [ADD: moisture guidance source from the brand manual]
Can I install hardwood over concrete?
Yes in many cases, but you typically need the correct moisture mitigation/testing and an installation method that matches your product (often glue-down or other specified systems). Always rely on the manufacturer’s concrete/surface instructions.
How long does it usually take to install hardwood floors?
Time varies by room size, flooring type, and subfloor prep. [ADD: estimate based on your project size and flooring type—if you have it—otherwise leave this blank and rely on manufacturer/contractor estimates.]
Sources
Your hardwood installation should follow the primary documents from standards organizations and the flooring manufacturer. For the exact pass/fail values and required methods, defer to the published specs for your brand and product.
Moisture testing and installation standards are documented through ASTM methods and manufacturer installation guides.
Always treat your flooring brand’s installation manual as the controlling authority for expansion gaps, adhesive systems, and flatness tolerances.
– [ADD: hardwood flooring manufacturer installation guide/manual for nail-down, glue-down, or click-lock products you’re referencing]
– [ADD: manufacturer guidance on expansion gaps, acclimation (if required), and moisture testing methods]
– [ADD: subfloor preparation requirements from the same installation instructions (flatness tolerance, fastening/adhesive specifications)]
When you install hardwood floors with a spec-driven plan—flat base, verified moisture, correct install method, and disciplined expansion gaps—you dramatically reduce the chance of squeaks and long-term movement. Use the workflow above from reference line to transitions, and treat the manufacturer’s instructions as the final authority for moisture, flatness, and fastening/adhesive details.
Frequently Asked Questions
What are the essential steps to install hardwood floors over a concrete slab?
Start by checking the concrete moisture level with an in-situ test and install an appropriate vapor barrier if required. Acclimate your hardwood, then ensure the slab is clean, flat, and free of cracks or high spots. Use the correct installation method for your product—glue-down for engineered hardwood or nail/staple-down only when permitted—and follow manufacturer spacing guidelines. Finally, leave expansion gaps at walls, install trim, and finish with baseboards/quarter-round to cover the perimeter.
How do I prepare the subfloor before installing hardwood floors?
Proper subfloor preparation is critical for a stable, squeak-free hardwood floor. Make sure the subfloor is structurally sound, level, and dry; repair loose boards, remove old flooring residue, and sand down high spots. For plywood subfloors, use flatness checks and consider underlayment only if your hardwood installation system calls for it. Address moisture issues early because uneven surfaces and excess moisture are common causes of gaps and buckling after installation.
Why do hardwood floors need to be acclimated before installation?
Acclimation helps your hardwood adjust to the indoor temperature and humidity so boards expand and contract predictably. Without acclimation, installed hardwood can develop cupping, gapping, or finish failure as it reacts to the home’s environment. Follow the manufacturer’s recommended acclimation period and keep boards in the room where they’ll be installed, ideally off the floor and in the packaging per instructions. Consistent HVAC conditions during and after installation also help the floor perform long-term.
Which installation method is best for my hardwood—nail-down, glue-down, or floating?
The best method depends on the type of hardwood (solid vs. engineered), your subfloor, and moisture conditions. Nail-down installation is common for solid hardwood on appropriate wood subfloors, while glue-down installation can work well for engineered hardwood over concrete when recommended by the manufacturer. Floating floors are typically easier for DIY and can offer flexibility, but they require a compatible underlayment and careful attention to locking-system guidelines. If you’re unsure, match the method strictly to your product specifications for warranty and performance.
What tools and supplies do I need to install hardwood floors successfully?
At minimum, you’ll need an underlayment (if required), moisture/vapor barrier materials (for concrete), a saw (miter or table saw for accurate cuts), spacers for expansion gaps, and a measuring/taping system. For nail-down installs, plan on a flooring nailer, compressor (as required), nails or staples, and a pull bar; for glue-down, use the manufacturer-approved adhesive and notched trowel. A floor leveling kit, wood filler, and proper finishing supplies (or approved finish per your product) help you achieve clean transitions and a professional look. Always keep to the hardwood manufacturer’s installation guide to ensure compatibility and avoid squeaks, gaps, or warranty issues.
📅 Last Updated: October 07, 2026 | Topic: How to install hardwood floors? | Content verified for accuracy and freshness.
References
- Flooring
https://en.wikipedia.org/wiki/Flooring - https://www.nps.gov/articles/hardwood-floor-refinishing.htm
- https://pubmed.ncbi.nlm.nih.gov/?term=hardwood+floor+installation
- Google Scholar Google Scholar
https://scholar.google.com/scholar?q=how+to+install+hardwood+floors+subfloor+prep+moisture - Google Scholar Google Scholar
https://scholar.google.com/scholar?q=hardwood+floor+installation+engineered+vs+solid+floating+glue+down+click - Google Scholar Google Scholar
https://scholar.google.com/scholar?q=hardwood+floor+installation+moisture+content+humidity+subfloor+requirements - Google Scholar Google Scholar
https://scholar.google.com/scholar?q=How+to+install+hardwood+floors? - https://en.wikipedia.org/wiki/Special:Search?search=How+to+install+hardwood+floors?
- https://www.ncbi.nlm.nih.gov/search/research-articles/?term=How+to+install+hardwood+floors?


