If you've got loose rubber floor tiles, start by checking the adhesive quality and moisture levels, as both can compromise bonding. Inspect the tiles for unevenness and listen for hollow sounds. Also, assess the surface preparation; dirt or dampness can hinder adhesion. For repair, clean the area, apply quality adhesive with a notched trowel, and firmly press the tiles back into place. Allow sufficient time for curing. Regular maintenance is key, so guarantee you manage temperature and moisture. By addressing these factors, you can restore stability to your flooring, and there's more to explore on creating lasting solutions.
Common Causes of Loose Tiles
When dealing with loose rubber floor tiles, it is vital to identify the common causes that might be at play. One significant factor is the quality of the tile adhesive used during installation. If the adhesive isn't applied uniformly or is of poor quality, it can lead to inadequate bonding, causing tiles to loosen over time. Always verify you're using a suitable adhesive specifically designed for rubber flooring to maintain peak adhesion.
Another important aspect to take into account is moisture issues. Excessive moisture can weaken the adhesive and cause it to break down, leading to loose tiles. This can arise from high humidity levels or water damage. If you suspect moisture is a problem, check for any leaks or areas where water might be pooling. Implementing proper ventilation and humidity control can help mitigate these issues.
Temperature fluctuations can also play a role in loosening tiles. Rubber expands and contracts with temperature changes. If your floor is subjected to extreme heat or cold, it can cause the adhesive to weaken, making it easier for tiles to detach.
Lastly, insufficient surface preparation before installation can lead to adhesion problems. If the substrate isn't clean, dry, or properly primed, the adhesive may not bond effectively. To summarize, addressing these common causes—tile adhesive quality, moisture issues, temperature variations, and surface preparation—can help you maintain a safe and secure rubber flooring installation.
Identifying Loose Tiles
Identifying loose tiles requires a systematic approach to guarantee you address the issue effectively. Start with a thorough tile inspection throughout the area. Walk across the floor and pay attention to any tiles that feel uneven or sound hollow when you step on them. It's vital to check corners and edges, as these spots often reveal the first signs of loosening.
Next, you'll want to conduct an adhesive evaluation. Carefully lift any tiles you suspect are loose to examine the adhesive underneath. Look for signs of deterioration, such as crumbling or discoloration, which can indicate that the adhesive has lost its effectiveness. If the adhesive appears intact, it may be the tile itself that's the problem.
While inspecting, use a straightedge or level to determine if the floor has any dips or protrusions that could be contributing to the looseness. These irregularities can compromise the stability of the tiles. Additionally, check for any moisture issues, as excess humidity can weaken adhesive bonds, leading to further detachment.
Once you've identified loose tiles and evaluated the adhesive, document your findings. This information will be essential for planning your repairs and guaranteeing a safe, durable installation. Remember, addressing loose tiles promptly not only enhances the aesthetic appeal of your floor but also prevents potential hazards associated with tripping on unstable surfaces. By following these steps, you'll guarantee a safer environment for everyone.
Tools Needed for Repairs
When repairing rubber floor tiles, you'll need specific tools to guarantee a successful fix. Essential repair tools include a utility knife, adhesive, and a roller for proper application. Don't forget to equip yourself with safety gear, like gloves and goggles, to protect against potential hazards during the process.
Essential Repair Tools
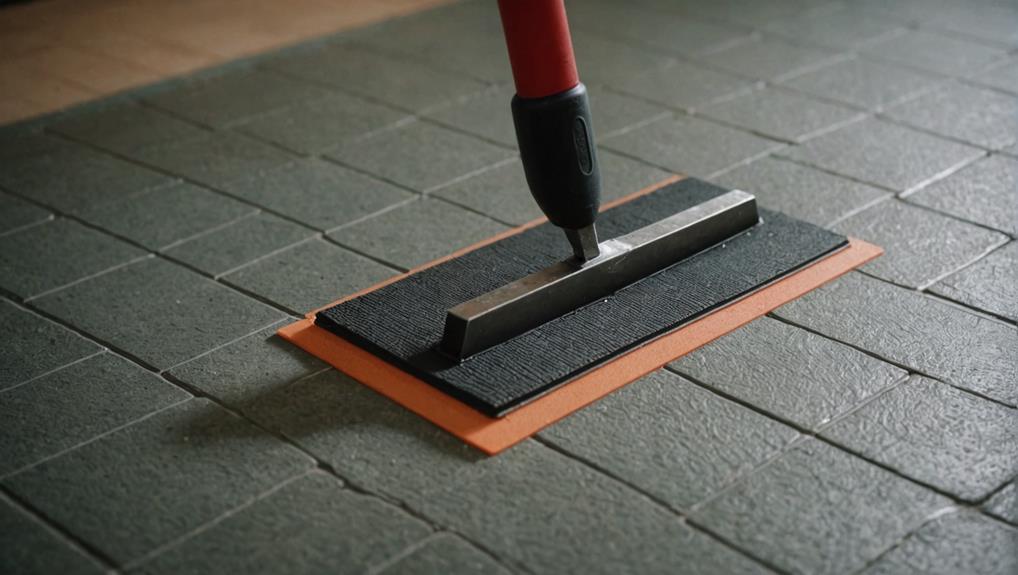
To successfully tackle repairs on rubber floor tiles, you'll need a specific set of essential tools that can make the process efficient and effective. First, gather a high-quality tile adhesive suited for rubber flooring; this will guarantee a strong bond once you've reset any loose tiles. A notched trowel is imperative for applying the adhesive evenly, promoting proper adhesion and minimizing air pockets.
Next, you'll want a floor leveling compound if you're dealing with uneven subflooring. This compound helps create a smooth, stable base for your tiles, preventing future issues. A measuring tape will be necessary for accurately measuring tile dimensions and guaranteeing proper placement.
Additionally, have a utility knife or tile cutter on hand for trimming tiles as needed. A straight edge or level will aid in confirming your tiles are aligned correctly, which is essential for aesthetics and safety. Finally, a squeegee or roller can be used to press the tiles firmly into the adhesive, assuring a secure fit. With these tools ready, you'll be well-equipped to address any loose rubber floor tile issues effectively.
Safety Equipment Requirements
Before starting any repair work on rubber floor tiles, it's important to prioritize safety by wearing the appropriate personal protective equipment (PPE). This guarantees your protection from potential hazards like sharp tools and slippery surfaces. Here's a quick overview of the necessary safety equipment:
| Safety Equipment | Purpose | Significance |
|---|---|---|
| Safety Goggles | Protects eyes from debris | Prevents injury during repairs |
| Gloves | Shields hands from chemicals | Reduces risk of cuts and abrasions |
| Slip-Resistant Footwear | Provides traction on slippery surfaces | Prevents falls during repairs |
Using safety goggles is important, as they shield your eyes from splashes and sharp fragments. Additionally, wearing gloves not only protects your hands from injury but also provides a better grip when handling tools. Finally, confirm your footwear is slip-resistant; this is crucial to maintain balance on potentially slick floors, especially during repairs. Following these safety equipment requirements will help create a safer working environment, allowing you to focus on effectively fixing your rubber floor tiles without unnecessary risks.
Step-by-Step Repair Process
Repairing rubber floor tiles requires a methodical approach to guarantee a durable and aesthetically pleasing result. Start by verifying you have the right safety equipment, such as gloves and knee pads, to protect yourself during the process.
Begin with surface preparation. Clean the area around the loose tiles thoroughly to remove dirt, grease, and any debris that could hinder tile adhesion. Use a mild detergent and warm water, and allow the surface to dry completely. If the tiles are particularly stubborn, consider using a scraper to remove any old adhesive.
Next, assess the condition of the tiles. If they're damaged or warped, you may need to replace them entirely. For tiles that are in good shape, apply a thin layer of adhesive to both the back of the tile and the subfloor. Make sure to use a high-quality adhesive suitable for rubber flooring to ascertain strong tile adhesion.
Carefully press the tile back into place, applying even pressure to eliminate air pockets. Use a roller or a heavy object to further secure the tile and allow the adhesive to set according to the manufacturer's instructions.
After the adhesive has cured, check for any areas that may need additional attention. If the edges of the tile are lifting, apply a small amount of adhesive beneath them and press down firmly.
Preventative Maintenance Tips
To keep your rubber floor tiles in ideal condition, it's essential to establish a regular cleaning schedule. Maintaining appropriate temperature control practices and ensuring proper installation techniques will also greatly extend their lifespan. By focusing on these preventative measures, you can minimize the need for repairs and enhance the overall performance of your flooring.
Regular Cleaning Schedule
A regular cleaning schedule is essential for maintaining the longevity and appearance of rubber floor tiles. By adhering to a consistent cleaning routine, you'll not only enhance the aesthetic appeal but also reduce the risk of loose tiles resulting from dirt and debris buildup. Establishing an appropriate cleaning frequency is key to effective tile maintenance.
To get started, consider the following tips:
- Daily Dusting: Use a soft broom or microfiber mop to remove loose dirt and prevent scratches.
- Weekly Deep Cleaning: Employ a mild, pH-neutral cleaner and a damp mop for a thorough clean that removes scuff marks and stains.
- Monthly Inspections: Regularly check for any signs of wear or loosening, addressing issues promptly to avoid further damage.
Consistency in your cleaning schedule will help guarantee the safety and durability of your rubber flooring. Remember to avoid harsh chemicals that can deteriorate the material. By following these practices, you'll create a safe environment while prolonging the life of your rubber floor tiles.
Temperature Control Practices
Consistently maintaining appropriate temperature levels in spaces with rubber floor tiles is essential for preventing damage and ensuring best performance. Rubber tiles are sensitive to temperature fluctuations, which can adversely affect their adhesive properties. When temperatures rise or fall drastically, the expansion and contraction of the tiles can lead to loosening, warping, or even detachment from the subfloor.
To mitigate these risks, aim to keep indoor temperatures within a stable range, ideally between 65°F and 85°F. Utilize climate control systems, like HVAC, to monitor and adjust your environment consistently. Additionally, consider using thermostats with programmable features to maintain steady conditions during off-hours.
Regularly inspect the areas surrounding the tiles for drafts or sources of heat that may cause uneven temperature distribution. Implementing insulation in windows and doors can also help regulate temperatures.
Proper Installation Techniques
Proper installation techniques are essential for ensuring the longevity and performance of rubber floor tiles. To achieve a seamless installation, it's important to focus on subfloor preparation and select the right adhesive types. An uneven or contaminated subfloor can lead to tiles loosening over time, compromising safety and durability.
Here are a few key tips to follow:
- Ensure subfloor cleanliness: Remove dust, debris, and any existing adhesives before installation.
- Choose the right adhesive type: Use adhesives specifically designed for rubber flooring, as they provide ideal bonding and flexibility.
- Allow for acclimatization: Let the tiles adjust to room temperature before installation to prevent expansion or contraction.
When to Call a Professional
When faced with persistent issues in your rubber floor tiles, such as stubborn stains, notable damage, or improper installation, knowing when to call a professional becomes essential. While minor issues can often be addressed with DIY solutions, certain circumstances require the expertise that only professional assessment can provide.
If you notice discoloration that won't come out despite your best cleaning efforts, it could indicate deeper problems with the tiles or the underlying substrate. In such cases, a professional can assess the situation and determine if specialized repair services are necessary. Similarly, if you have tiles that are lifting or curling considerably, it's critical to address the underlying cause, which may not be apparent without expert evaluation.
Improper installation can also lead to ongoing issues that DIY fixes might not resolve. If you suspect your rubber floor tiles were installed incorrectly—perhaps they're not adhering properly or have gaps—consulting a professional is wise. They can provide a thorough assessment, ensuring that any repairs or reinstallation are executed correctly, which is essential for safety and longevity.
Long-Term Solutions for Stability
To guarantee long-term stability of your rubber floor tiles, it's crucial to implement preventive measures and regular maintenance routines. By taking these steps, you can reduce the likelihood of future issues and enhance the overall durability of your flooring.
First, consider your adhesive options. Selecting a high-quality adhesive specifically designed for rubber tiles can greatly improve stability. It's important to follow the manufacturer's recommendations for application and curing times to secure maximal bonding.
Next, establish a regular maintenance schedule. This should include:
- Routine Inspections: Check for loose tiles or signs of wear every few months.
- Cleaning: Use a pH-neutral cleaner to prevent buildup that could weaken adhesives.
- Repairs: Address any damaged tiles promptly to avoid further deterioration.
If you notice persistent issues, it might be time for tile replacements. Replacing damaged or deteriorated tiles with new ones can restore the integrity of your floor. Confirm you use compatible adhesives and follow proper installation techniques to maintain the stability of the new tiles.
Frequently Asked Questions
Can I Use Adhesive Tape to Secure Loose Rubber Tiles Temporarily?
Yes, you can use adhesive tape as a temporary solution for securing loose rubber tiles. However, it's important to choose a strong, durable tape designed for floor maintenance. Make certain the surface is clean and dry before applying the tape to guarantee proper adhesion. While this method can provide quick fixes, it's essential to address the underlying issue for long-term safety and stability. Regular checks can help prevent further loosening of the tiles.
How Often Should I Check My Rubber Floor Tiles for Looseness?
Just like a car needs regular oil changes to run smoothly, your rubber floor tiles require routine checks for looseness. Aim for a maintenance frequency of every few months, but increase inspections if you notice heavy foot traffic or environmental changes. Use simple inspection techniques: walk the area, feeling for any shifting tiles. This proactive approach guarantees safety, preventing tripping hazards and costly repairs, keeping your space safe and functional.
What Type of Adhesive Is Best for Rubber Floor Tiles?
When choosing the best adhesive for rubber floor tiles, consider adhesive types like pressure-sensitive or waterproof options. Pressure-sensitive adhesives offer easy installation and removal, while waterproof adhesives guarantee durability in wet areas. For ideal results, follow installation tips: clean the surface thoroughly, apply the adhesive evenly, and allow it to set according to the manufacturer's instructions. Using the right adhesive not only enhances safety but also extends the lifespan of your flooring.
Will Moisture Affect the Adhesion of Rubber Floor Tiles?
Moisture effects can greatly impact the adhesion of rubber floor tiles during installation. If the subfloor is damp, it can prevent proper bonding, leading to tiles lifting or curling over time. It's essential to verify the area is dry before laying tiles. Consider using moisture-resistant adhesives specifically designed for rubber flooring to enhance durability. Always test the subfloor's moisture levels to assure a secure, long-lasting installation that prioritizes safety and performance.
Can Furniture Placement Cause Rubber Tiles to Loosen Over Time?
Yes, furniture placement can definitely cause rubber tiles to loosen over time. If you're placing heavy furniture on the tiles, you're putting immense pressure on them, which might disrupt tile alignment. Over time, that weight can compress the tiles unevenly, leading to looseness. To maintain safety and durability, it's essential to distribute furniture weight evenly and avoid dragging items across the surface, as this can exacerbate the issue.


