To lay wood flooring on concrete, start by evaluating and preparing the surface, fixing cracks and guaranteeing it’s level. Test for moisture and address any issues with vapor barriers if needed. Choose the right wood—engineered hardwood works best for concrete. Install a 6-mil polyethylene moisture barrier, then acclimate the wood for 72 hours in your space. Next, lay an appropriate underlayment, and finally, install the flooring with precise alignment. These steps set the foundation for a durable, stunning floor—exploring each guarantees success.
Assess and Prepare the Concrete Surface

Before you lay any wood flooring on concrete, you’ll need to thoroughly assess and prepare the surface to secure proper adhesion and longevity. Start by inspecting the concrete for cracks, uneven areas, or debris. Surface cleaning is essential—you must remove dust, grease, or any contaminants using a stiff broom, vacuum, or a concrete cleaner. This guarantees the flooring adheres without issues. Next, focus on concrete leveling. Unevenness greater than 3/16 inch within 10 feet can cause problems, so use a leveling compound to smooth out high or low spots. Properly leveled concrete prevents gaps and warping, giving you the freedom to enjoy a flawless wood floor finish. Investing time here means your wood flooring will remain stable and beautiful for years to come.
Test for Moisture and Address Issues
Since moisture can severely damage wood flooring, testing the concrete slab for dampness is essential before installation. Begin by conducting moisture testing using a reliable method such as a calcium chloride test or a moisture meter designed for concrete. These tests will accurately reveal the slab’s moisture levels, allowing you to determine if they fall within acceptable limits for wood flooring. If elevated moisture is detected, you’ll need to implement moisture control measures like applying a vapor barrier or specialized sealants to prevent future damage. Addressing moisture issues early not only protects your investment but also guarantees the wood flooring will remain stable and free from warping or mold. Taking these precise steps grants you the freedom to enjoy a flawless, long-lasting wood floor over your concrete base.
Choose the Right Type of Wood Flooring
With moisture levels properly managed, your focus can shift to selecting the best wood flooring that suits both your concrete slab and lifestyle. Engineered hardwood is often the ideal choice for concrete because its layered construction resists moisture and temperature fluctuations, providing stability and durability. It combines a real wood veneer with plywood or high-density fiberboard, allowing you to enjoy genuine wood aesthetics without compromising on performance. Solid wood, while prized for its natural beauty and longevity, is more susceptible to moisture-related issues and requires a well-prepared subfloor and strict climate control. Consider your space’s humidity, usage, and maintenance preferences carefully. By choosing the right wood type, you guarantee a lasting floor that complements your freedom to live beautifully and confidently in your home.
Install a Moisture Barrier
Moisture barriers play a critical role in protecting your wood flooring from the dampness that can seep through concrete slabs. Without this layer, you risk warping, cupping, and mold growth—issues that can undermine your flooring investment. Understanding moisture barrier benefits helps you appreciate why proper installation techniques are vital.
To install the moisture barrier effectively:
- Clean the concrete surface thoroughly to guarantee adhesion and avoid trapping debris.
- Lay the moisture barrier material—usually a 6-mil polyethylene sheet—over the entire slab, overlapping seams by at least 8 inches.
- Tape all seams securely with waterproof tape to create a continuous, impermeable shield.
These steps give your wood floor the freedom to thrive, protecting it from moisture damage and guaranteeing long-lasting durability.
Acclimate the Wood Flooring
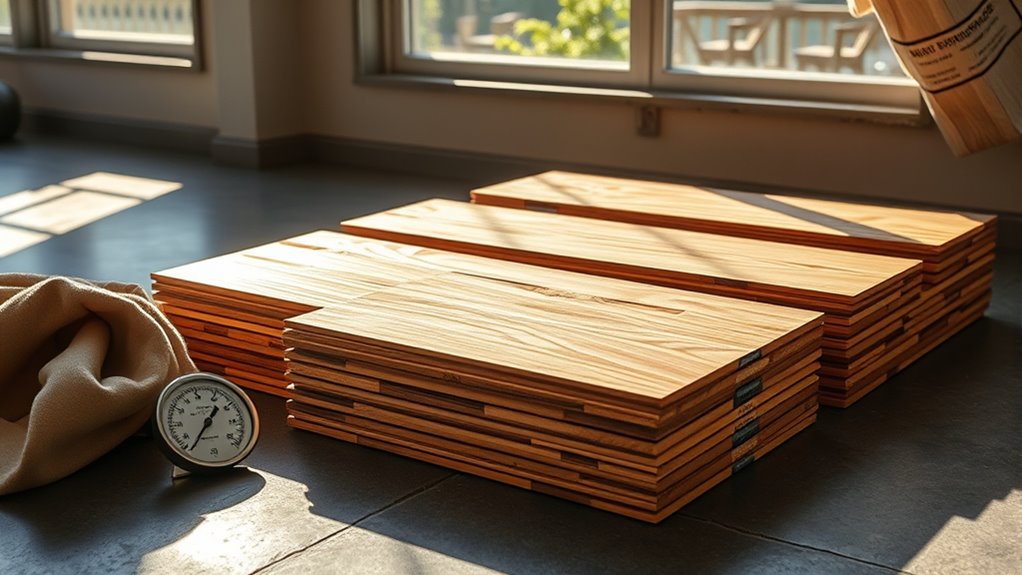
Before you lay your wood flooring, it’s essential to acclimate the boards to the environment where they’ll be installed. This process balances the moisture content between the wood and the room, preventing future wood expansion or contraction that can cause gaps or buckling. Store the wood flat in the installation area for at least 72 hours, ideally longer if conditions vary. Maintain strict temperature control—keep the room between 60-80°F and humidity around 35-55%. Avoid exposing the boards to direct sunlight or drafts during acclimation, as fluctuating conditions can disrupt moisture equilibrium. By controlling temperature and humidity, you guarantee the wood adapts naturally, preserving its integrity. Proper acclimation grants you freedom from post-installation issues and ensures a stable, long-lasting floor.
Lay an Underlayment
Before installing your wood flooring, you need to lay an underlayment to provide moisture protection, sound insulation, and cushioning. Selecting the right type—whether foam, cork, or rubber—depends on your specific subfloor conditions and flooring type. To guarantee peak performance, carefully follow manufacturer guidelines for precise placement and secure installation.
Purpose of Underlayment
An underlayment serves as a critical barrier between your concrete subfloor and the wood flooring, ensuring stability and longevity. Installing it properly not only protects your investment but also enhances comfort and performance. Here’s why it’s essential:
- Moisture Protection: It prevents moisture from seeping up from the concrete, which can warp or damage your wood floors.
- Sound Absorption: Underlayment reduces noise transmission, giving you a quieter, more peaceful living space.
- Thermal Insulation: It helps maintain a consistent temperature by insulating against cold concrete, increasing your comfort and energy efficiency.
Types of Underlayment
Choosing the right type of underlayment is vital when laying wood flooring on concrete, as each option offers distinct benefits tailored to specific needs. You’ll typically choose between foam, cork, or rubber underlayments. Foam is lightweight, cost-effective, and provides decent sound absorption, reducing noise transmission. Cork excels in thermal insulation and sound absorption, making your floor warmer and quieter. Rubber underlayment is durable, highly effective at sound absorption, and offers superior moisture resistance. Additionally, some underlayments incorporate vapor barriers, critical for concrete subfloors prone to moisture. Selecting the appropriate underlayment enhances comfort, protects your flooring investment, and guarantees long-term performance. Consider your environment and priorities—like thermal insulation or sound absorption—to confidently choose the underlayment that best supports your wood floor’s longevity and your freedom to enjoy a comfortable living space.
Installation Tips
Two critical steps guarantee your underlayment lays perfectly: thorough surface preparation and precise alignment. Before you begin, verify the concrete is clean, dry, and level to prevent future issues. Use the right installation tools like a utility knife, tape measure, and roller for accuracy and efficiency. Lay the underlayment carefully, avoiding overlaps or gaps that can compromise wood flooring maintenance.
Here’s how to proceed:
- Roll out the underlayment parallel to the longest wall, trimming excess with a sharp utility knife.
- Butt edges tightly without overlapping to maintain a smooth surface.
- Secure seams with manufacturer-recommended tape to prevent shifting during installation.
These steps provide a stable, moisture-resistant base, confirming your wood flooring lasts and performs beautifully.
Install the Wood Flooring Properly
Begin by carefully aligning the first row of wood planks along the longest wall, ensuring a straight and secure foundation for the entire floor. Your wood selection is essential—choose planks that complement your space and withstand concrete’s moisture. Employ precise installation techniques, such as leaving expansion gaps around the perimeter to allow natural wood movement. Use a moisture barrier and an appropriate adhesive or underlayment to prevent damage. When fitting subsequent rows, stagger the joints to enhance stability and aesthetics. Secure each plank firmly, checking alignment consistently to avoid gaps or uneven surfaces. Taking control of these details not only guarantees durability but also maximizes your freedom to enjoy a flawless wood floor that stands the test of time.


