When installing resilient flooring, start by evaluating your subfloor to confirm it's dry, clean, and free of damage. Choose durable, moisture-resistant materials suited for your space. Use essential tools like a utility knife, flooring roller, and a trowel for adhesive application. Properly measure your area using a tape measure and laser level, and prepare the space by clearing furniture and promoting ventilation. Roll out underlayment flat without wrinkles, then lay down the flooring while maintaining safety. Finally, seal seams and establish a maintenance routine to prolong flooring life. Following these tips can lead to a successful installation experience.
Assessing Your Subfloor
Before you begin your resilient floor installation, it's vital to evaluate your subfloor. The right appraisal not only guarantees a successful installation but also protects your investment. Start by identifying the subfloor types present in your space, which may include concrete, plywood, or oriented strand board (OSB). Each type has specific requirements and considerations for proper installation.
Next, focus on moisture control. High moisture levels can lead to serious issues like mold growth and damage to your new flooring. Use a moisture meter to check the moisture content of your subfloor. For concrete, verify the moisture level is below 3 pounds per 1,000 square feet in 24 hours. For wood subfloors, aim for a moisture content between 6% and 12%. If readings exceed these thresholds, you'll need to address the moisture problem before proceeding.
Inspect for any signs of damage, such as cracks, warping, or softness. If you find any issues, it's important to repair them before installation. For concrete, consider applying a moisture barrier or sealant if moisture levels are high. On wood subfloors, confirm they are level and free from debris.
Lastly, confirm your subfloor is clean and dry. Remove any dust, dirt, or contaminants that could interfere with adhesive or the locking mechanism of your flooring. By thoroughly evaluating your subfloor, you're taking the first important step to guarantee a safe and durable resilient floor installation.
Choosing the Right Materials
When choosing materials for your resilient floor, consider durability, design aesthetics, and the balance between cost and quality. You'll want options that withstand wear while complementing your space's overall look. Weighing these factors will help you make an informed decision that meets your needs and budget.
Material Durability Considerations
Choosing the right materials for resilient flooring is essential to ensuring long-lasting performance and durability. First, consider the material lifespan; high-quality options typically offer a longer lifespan, reducing the need for frequent replacements. Impact resistance is another critical factor, especially in high-traffic areas. Materials that can withstand heavy foot traffic and potential damage are preferable for safety and longevity.
Environmental factors, such as humidity and temperature fluctuations, also influence material choice. Opt for materials with moisture resistance to prevent mold and damage. Additionally, the surface texture can affect slip resistance, which is crucial for ensuring safety in wet or busy spaces.
You'll want to keep maintenance requirements in mind as well. Some materials require more upkeep, while others are easier to clean and maintain. Warranty considerations can provide peace of mind; always review what's covered and for how long. Finally, color fastness is important to maintain appearance over time, preventing fading from sunlight or wear. By evaluating these aspects, you can make informed decisions that prioritize durability and safety in your resilient flooring project.
Design Aesthetic Options
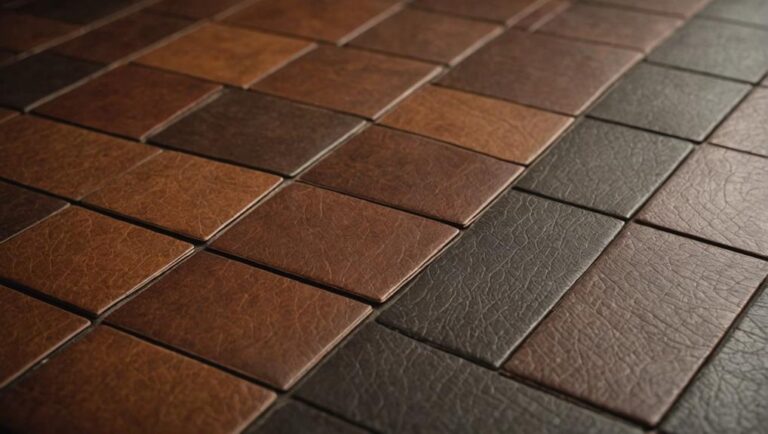
A well-designed space not only functions effectively but also reflects your style, and selecting the right resilient flooring can considerably enhance your aesthetic vision. When considering your options, pay attention to color schemes that harmonize with your overall design. Neutral tones create a calming atmosphere, while bold colors can add visual impact and energy to the space.
Texture combinations are equally important. Mixing smooth and textured surfaces can create a dynamic environment, enhancing both safety and aesthetics. Think about style contrasts as well; pairing modern tiles with rustic elements can provide a unique character.
Pattern selections should align with current design trends while also considering the functionality of your space. Large patterns can make a room feel expansive, while smaller patterns add intricacy and detail. Aim for design choices that promote space enhancement without sacrificing practical use.
Ultimately, you want to achieve functional aesthetics—where the beauty of the flooring complements its durability and safety features. By thoughtfully combining these elements, you can create a resilient floor that not only meets your needs but also elevates your environment.
Cost vs. Quality
While achieving the right design aesthetic is important, balancing cost and quality is equally essential when selecting resilient flooring materials. Start by conducting a thorough cost analysis to understand how your budget constraints affect material choices. Cheaper options might seem appealing initially, but they often come with higher maintenance costs and lower resale value.
When sourcing materials, prioritize those that offer quality assurance and durability. Consider long-term investment potential; higher-quality materials typically require less frequent replacement and can withstand the rigors of daily use better than their lower-cost counterparts.
Evaluate installation techniques as well—some materials may require specialized skills that can increase overall expenses. Additionally, warranty comparisons can provide insight into a product's expected lifespan and reliability.
Remember that aesthetic appeal should not overshadow functionality. Choose materials that not only meet design goals but also enhance safety and performance. By balancing cost with quality, you'll guarantee a resilient flooring choice that stands the test of time, ultimately providing satisfaction for years to come.
Tools Needed for Installation
Before diving into your resilient floor installation project, gathering the right tools is fundamental for guaranteeing a smooth process. The tools you'll need can vary based on the flooring types and installation methods you choose. Here's a practical list to get you started.
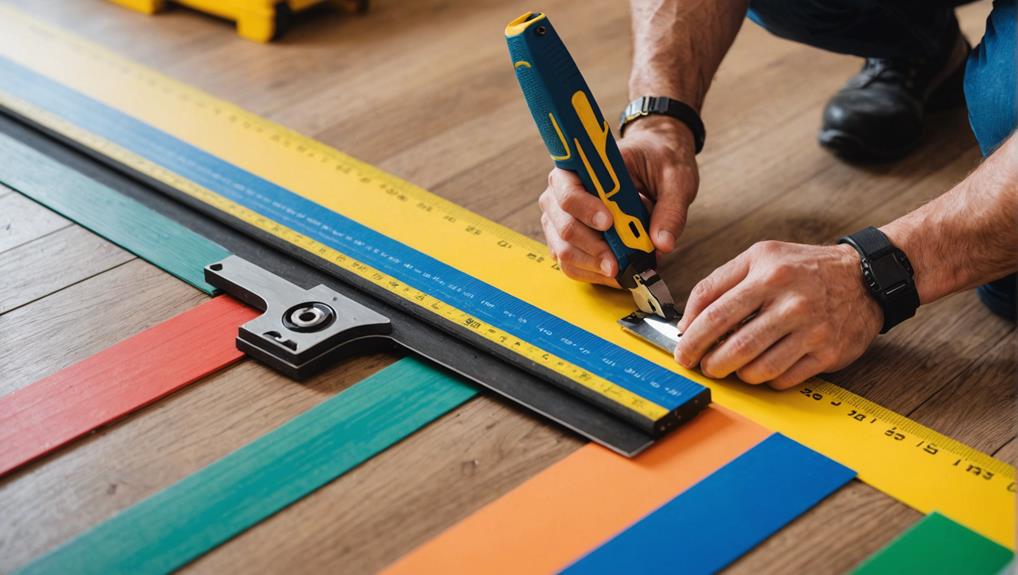
First, a utility knife is essential for cutting vinyl or linoleum. Make sure it's sharp for clean edges. You'll also need a straightedge to guide your cuts, guaranteeing precision. A tape measure is critical for accurate measurements; double-checking your dimensions can prevent costly mistakes.
Invest in a flooring roller for proper adhesion, especially if you're using glue-down installation methods. This tool helps eliminate air bubbles and guarantees a strong bond. Additionally, a trowel or spreader is necessary for applying adhesive if you're going that route.
For laminate and click-lock flooring types, a tapping block and pull bar will aid in fitting the pieces together without damaging the edges. A rubber mallet can also be handy to gently tap pieces into place.
Don't forget safety gear! Use knee pads for comfort during installation, and goggles if you're cutting flooring. Ear protection may be necessary if you're using power tools.
Lastly, having a clean, organized workspace will enhance safety and efficiency. Gather these tools before you start, and you'll be well-equipped to tackle your resilient floor installation project with confidence.
Properly Measuring Your Space
To guarantee a successful installation, you'll need the right tools for measuring your space accurately. Familiarize yourself with key measurement techniques to avoid costly mistakes. Proper measurements are essential for fitting your resilient flooring perfectly, so let's cover what you need to know.
Tools Needed for Measuring
When it comes to properly measuring your space for resilient floor installation, having the right tools at your disposal is vital. Accurate measurements guarantee a seamless installation and help prevent costly mistakes. Here are three must-have tools to get you started:
- Tape Measure: This is your go-to for measuring lengths and widths. A sturdy tape measure provides reliable measurements for any area.
- Laser Level: This tool guarantees that your measurements are perfectly aligned and level, which is essential for a professional finish.
- Square Tool: A square tool helps you check right angles in corners, guaranteeing that your flooring will fit correctly.
Additionally, a chalk line can be used to mark straight lines across larger areas, while a measuring wheel is excellent for longer distances. For more precise measurements, especially in tighter spaces, a caliper gauge can offer detailed readings. Using these tools will not only enhance your accuracy but also improve your overall safety during the installation process. Remember, taking the time to measure correctly will pay off in the long run.
Key Measurement Techniques
Accurate measurement techniques are essential for ensuring a successful resilient floor installation. To achieve measurement accuracy, you'll need to utilize reliable measurement tools and follow systematic steps. Start by measuring the length and width of the space. Record each dimension with precision to avoid costly errors later on.
Here's a table outlining key measurement tools and their functions:
| Measurement Tool | Purpose | Accuracy Level |
|---|---|---|
| Tape Measure | Measuring lengths and widths | High |
| Laser Measure | Long-distance accuracy | Very High |
| Square Tool | Checking corners | Precise |
| Spirit Level | Ensuring level surfaces | Vital for safety |
| Measuring Wheel | Large area measurements | Good for rough areas |
When measuring, always double-check your figures. It's important to account for any obstacles, such as doorways or built-in furniture, that might affect your measurements. A slight oversight can lead to significant issues during installation. By prioritizing measurement accuracy, you'll create a safer and more effective flooring solution that meets your needs.
Preparing the Installation Area
Before you begin installing resilient flooring, it is important to prepare the installation area properly. A clean, well-ventilated workspace is significant for a successful installation. Following these steps can help guarantee a safe and efficient process:
- Clear the area: Remove all furniture, appliances, and any other obstacles.
- Inspect the subfloor: Check for any damage or irregularities that need to be addressed.
- Promote ventilation: Open windows and doors or use fans to enhance airflow.
Start with cleaning the surfaces thoroughly. Sweep or vacuum the floor to remove dust, dirt, and debris. If the subfloor has any adhesive residues or stains, use an appropriate cleaner to guarantee a smooth and secure bond for your new flooring. It is crucial that the surface is dry before proceeding, as moisture can compromise your installation.
Next, inspect the subfloor for any signs of damage, such as cracks, squeaks, or uneven areas. If you notice any issues, repair them before moving forward. This step is fundamental, as an unstable subfloor can lead to complications down the line.
Lastly, don't forget about ventilation. Proper airflow not only helps reduce the concentration of potentially harmful fumes from adhesives but also aids in drying the surfaces if there's any moisture. Taking these precautions will not only enhance your safety but also contribute to the longevity and performance of your resilient flooring.
Installing Underlayment
With the installation area prepared, the next step involves laying down the underlayment. This essential layer serves multiple purposes, including acting as a moisture barrier to protect your resilient flooring from potential water damage. Choose the right underlayment type based on your specific needs; options range from foam to rubber, each offering unique insulation properties.
When selecting underlayment, consider thickness. Thicker underlayment can enhance sound absorption and noise reduction, creating a quieter living environment. However, be mindful of compatibility issues with your chosen flooring material, as some types may not work well together.
Installation techniques can vary, but generally, you'll want to roll out the underlayment, ensuring it lies flat and covers the entire area. Overlap seams according to the manufacturer's guidelines to maintain the integrity of the moisture barrier. If surface leveling is a concern, use a self-leveling compound before laying the underlayment for a smooth base.
Moreover, account for temperature regulation. A well-chosen underlayment can help maintain comfortable floor temperatures, especially in homes with radiant heating systems.
Laying Down the Flooring
Laying down the flooring requires careful attention to detail to guarantee a flawless finish. This step is essential, as improper installation can lead to significant issues down the line. You'll want to use effective installation techniques to make certain your resilient flooring adheres properly and looks great.
Before you start, consider the following:
- Plan your flooring patterns: Decide on the design and orientation that best suits your space.
- Use appropriate tools: Make sure you have a utility knife, straightedge, and adhesive as needed.
- Maintain safety standards: Always wear safety gear and follow manufacturer guidelines.
Begin by measuring your room carefully, marking a starting line that aligns with your chosen pattern. This will help you lay the first plank or tile accurately. For vinyl sheets, unroll them and let them acclimate to room temperature. When using adhesive, apply it evenly without over-saturating.
As you lay each section, keep an eye on the alignment according to your planned flooring patterns. Use spacers as needed to maintain consistent gaps, especially around walls for expansion. When cutting pieces for edges or corners, make sure your cuts are precise to prevent gaps or overlaps.
Lastly, take your time during the installation process. Rushing can lead to mistakes that compromise the integrity and appearance of your flooring. Following these steps will set the foundation for a durable, beautiful floor that enhances your space.
Finishing Touches and Maintenance
Completing your flooring project involves adding the finishing touches and implementing a maintenance routine to guarantee longevity. Start by verifying all seams are sealed properly. Use a quality caulk designed for flooring to fill gaps around edges, which helps prevent moisture damage and enhances the overall appearance.
Once you've sealed the edges, it is crucial to establish a regular cleaning routine. Use appropriate cleaning techniques, like sweeping or vacuuming to remove dirt and debris. For deeper cleaning, a damp mop with a mild pH-neutral cleaner is recommended. Avoid harsh chemicals, as they may damage the resilient surface. Always check manufacturer guidelines for specific cleaning products.
Next, consider establishing a periodic maintenance schedule. Inspect your floors regularly for signs of wear or damage. If you notice scratches or dents, employ repair strategies such as using a touch-up kit specifically made for your flooring type. For more significant issues, consult with a professional to assess and repair the damage correctly.
Lastly, be mindful of furniture placement. Use felt pads under furniture legs to prevent scratching, and avoid dragging heavy items across the floor. By taking these steps, you'll not only enhance the appearance of your resilient flooring but also preserve its durability and safety for your household. Regular maintenance and timely repairs are key to preserving the quality and extending the life of your flooring investment.
Frequently Asked Questions
How Do I Remove Old Flooring Before Installation?
To remove old flooring effectively, you'll need the right installation tools, such as a pry bar, utility knife, and floor scraper. Start by clearing the area and ensuring safety gear is on. Cut the flooring into manageable strips with the utility knife. Use the pry bar to lift the edges, and then the floor scraper to remove any adhesive residue. Finally, dispose of the old flooring properly, ensuring a clean surface for your new installation.
Can I Install Resilient Flooring Over Existing Tiles?
You can certainly install resilient flooring over existing tiles, but it's essential to guarantee tile compatibility first. Make sure the tiles are in good condition, without cracks or loose pieces. Flooring preparation is key; clean the surface thoroughly and fill any grout lines to create a smooth base. If you skip this step, you might end up with a bumpy ride. Always prioritize safety to avoid any accidents during installation.
What Is the Best Way to Clean Resilient Flooring?
To clean resilient flooring effectively, start with dry methods like sweeping or vacuuming to remove dirt. For deeper cleaning, use a damp mop with a mild, pH-neutral cleaner. Avoid harsh chemicals, as they can damage the surface. Regular maintenance tips include promptly wiping spills to prevent stains and using felt pads under furniture to avoid scratches. Following these cleaning methods guarantees your flooring stays in top condition while prioritizing safety and longevity.
How Long Does Resilient Flooring Typically Last?
Resilient flooring typically lasts between 10 to 30 years, depending on the type and maintenance practices. To maximize your flooring's lifetime expectations, make certain you follow proper maintenance tips, like regular cleaning and avoiding harsh chemicals. This not only preserves the appearance but also enhances safety by preventing slips and falls. With the right care, you can guarantee your flooring remains durable and functional for years to come, providing peace of mind in your space.
Is Professional Installation Recommended for Beginners?
Imagine setting sail on a vast ocean with little experience—it's thrilling but risky. Just like steering through those waters, professional installation for resilient flooring offers significant benefits, especially for beginners. It minimizes the chance of costly mistakes that could arise from inexperience. A trained installer guarantees safety and precision, transforming your space efficiently. So, if you're unsure, it's wise to trust the experts; they'll guide you smoothly towards a successful installation.


