Repairing chipped tiles in your flooring is simpler than you might think. Start by cleaning the damaged area to guarantee good adhesion. Use epoxy resin to fill the chip, overfilling slightly to allow for sanding later. Once it's cured—about 24 hours—gently sand the area with fine sandpaper for a smooth finish. Finally, match the tile color using a touch-up glaze, applying a couple of coats for durability. To keep your tiles in great shape, regular maintenance is key. If you're curious about more tips and techniques, there's plenty more to explore on keeping your tiles looking new!
Understanding Tile Damage
When you notice a chip in your tile, it's crucial to understand the different types of damage that can occur. Chipped tiles often show localized damage, typically at corners or edges, usually caused by physical impacts from heavy objects. These minor chips might not seem like a big deal at first, but they can lead to further issues if not addressed promptly.
On the other hand, if you find a cracked tile, you're dealing with a more significant problem. Cracks can penetrate the surface and may indicate underlying foundation issues that need assessment. Ignoring these cracks could lead to more extensive damage down the line.
Discoloration in tiles can also affect the aesthetic appeal of your space. This often comes from staining or fading due to prolonged exposure to moisture or sunlight, which can impact your property value. It's crucial to keep an eye out for these changes.
Pitting is another form of tile damage you might encounter. These small depressions or holes can develop over time, often due to wear and tear or the use of harsh cleaning materials.
Lastly, moisture infiltration due to improper installation can weaken tile adhesion, making your tiles more susceptible to damage. Understanding these different types of tile damage can empower you to take the necessary steps for repair, ensuring your ceramic tile remains beautiful and functional for years to come.
Essential Repair Materials
To successfully repair chipped tiles, you'll need a few vital materials that make the process straightforward and effective. Gathering the right tools not only simplifies your repair but also guarantees that your tiles look great when you're done. Here's a quick list of what you'll need:
- Porcelain Touch-Up Glaze: This is your best friend for blending the repair with the existing tile color. Make sure to choose a glaze that matches your tile color perfectly for a seamless look.
- 220-Grit Sandpaper: After applying the glaze, use this sandpaper to smooth out the repaired area. This step is essential for achieving a seamless finish that integrates nicely with your surrounding tiles.
- Painters Tape: Before you start the repair, applying painters tape around the damaged area will help protect adjacent tiles. It keeps the repair materials contained and prevents any overflow or mess.
Other useful items include wooden toothpicks for precise application and color adjustments, and a metal or plastic straight razor blade to level the glaze for an even surface. By having these vital repair materials on hand, you'll be well-equipped to tackle those pesky chips in your tiles and restore your flooring's beauty. Remember, taking the time to gather the right tools will make all the difference in your repair project!
Step-by-Step Repair Process
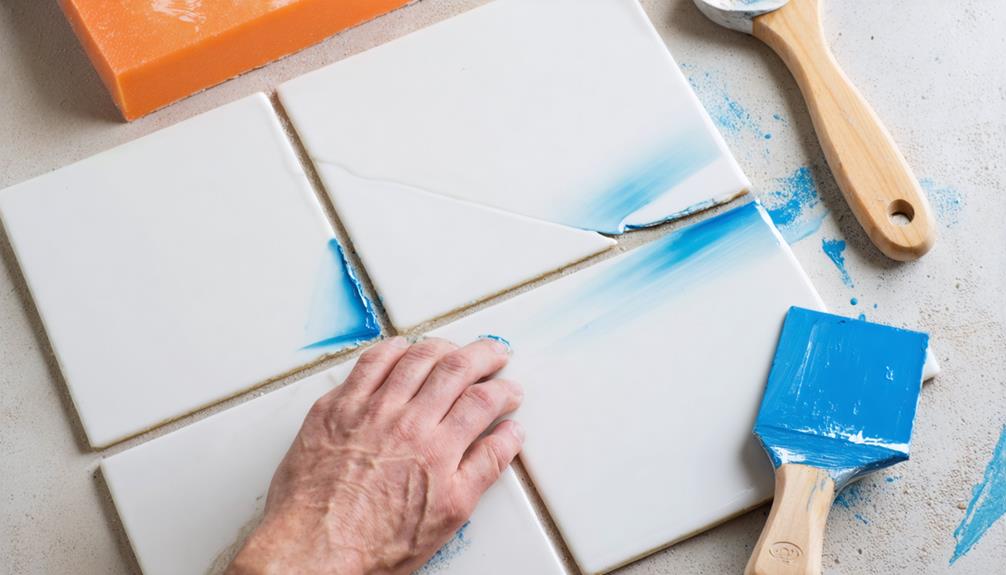
With your repair materials gathered, you're ready to tackle the chipped tiles. Start by thoroughly cleaning the chipped area. Use a damp cloth to wipe away any dust or grime, guaranteeing ideal adhesion for your repair materials. A clean surface is key to a solid fix!
Next, prepare the epoxy resin according to the manufacturer's instructions. Once it's ready, carefully apply the epoxy to the chipped tile, making sure to slightly overfill the area. This guarantees you have enough material to level out later. Allow the epoxy to cure for at least 24 hours. Patience here pays off!
After the epoxy has cured, grab some fine-grit sandpaper. Gently sand the repaired area to create a smooth, seamless finish that blends well with the surrounding tile. Take your time to get it just right.
Now it's time to match the tile color. Using a suitable touch-up paint, apply at least two coats to the repaired area. This not only enhances the look but also adds durability to the repair.
Maintenance and Prevention Tips
Protecting your tiled floors from damage is essential for maintaining their beauty and longevity. By incorporating a few simple maintenance practices into your routine, you can effectively prevent issues like minor chips and cracks from becoming major problems. Here are some practical tips to help you maintain the integrity of your flooring:
- Sweep and Mop Regularly: Regularly sweeping and mopping your tiled floors helps prevent dirt buildup, which can exacerbate the visibility of chips and cracks. A clean surface not only looks better but also reduces wear on your tiles.
- Use Soft Pads Under Furniture: To minimize impact and prevent chipping, especially in high-traffic areas, place soft pads under furniture. This simple step can save your tiles from unnecessary damage.
- Inspect Periodically: Make it a habit to inspect your tiles periodically. Early detection of minor chips or cracks allows you to address them promptly, preventing further damage down the line.
Additionally, avoid using abrasive cleaning tools and harsh chemicals that can scratch or erode tile surfaces. Instead, opt for gentle cleaning methods to maintain their integrity over time. Finally, don't forget to reseal grout lines periodically. This protects against moisture penetration, which can lead to more significant issues in your flooring.
Community Resources for DIYers
Finding the right resources can make all the difference for DIYers tackling tile repairs. Community resources are invaluable for those looking to repair chipped tiles or replace the tile entirely. Platforms like Bunnings Workshop provide project assistance and advice, creating a space where you can connect with fellow DIY enthusiasts. By registering on community forums, you can ask questions and seek guidance from experienced members, which fosters a supportive environment for learning.
Engaging in these communities not only boosts your knowledge but also gives you access to tools for hire, like tile cutters. Having the right tools is essential for your Home Improvement projects and can save you a lot of time and frustration. Plus, sharing insights and techniques with others enhances your understanding of repair methods, especially when it comes to selecting the best tile adhesive.
Regularly participating in these community discussions can inspire creativity, offering new ideas to tackle flooring challenges effectively. You might discover innovative techniques or shortcuts that industry experts recommend, making your repairs even easier.
Frequently Asked Questions
Can a Chipped Floor Tile Be Fixed?
Yes, a chipped tile can definitely be fixed! You've got several chipped tile solutions at your disposal, like DIY tile repair methods or tile restoration techniques. For a cost-effective fix, consider using epoxy or a touch-up glaze. If you prefer going professional, there are services that can handle it. Don't forget flooring maintenance tips like regular cleaning and timely repairs to keep your tiles looking their best and extend their lifespan.
How to Repair Chips Floor?
Imagine your floor as a canvas, showcasing beauty with every step. When chips mar its surface, you can embrace DIY tile fixes to restore its charm. Start with chip repair techniques that involve proper cleaning and adhesive options. Use color matching solutions to blend repairs seamlessly. Explore tile restoration methods like epoxy filling, ensuring you're equipped with flooring maintenance tips for lasting results. With patience, your floor can shine brightly once more!
Why Are My Floor Tile Chipping?
If your floor tiles are chipping, it could be due to several factors. Common tile materials like ceramic and porcelain can chip from impact damage, especially if they're of lower durability. Humidity effects may weaken tile adhesion if moisture penetrates. Additionally, improper tile installation techniques or an uneven foundation can create stress points. To prevent further damage, consider floor maintenance tips like regular cleaning and addressing any humidity issues that arise.
What to Do When You Can't Match Floor Tiles?
When you can't match floor tiles, consider clever color matching techniques. Explore tile replacement options, like remnants or contrasting tiles for a creative twist. Implement pattern integration strategies using decorative rugs to unify your space. Alternatively, DIY repair kits can help blend imperfections. If you're feeling adventurous, try alternative materials for a unique flair. For a flawless finish, don't hesitate to call in professional restoration services to guarantee a stunning solution!


