To fix squeaky floors below, start by locating the exact squeak spots by walking and pressing on the floor. Clear nearby furniture, then access the crawl space or basement to inspect from underneath. Secure loose floorboards by inserting shims with wood glue between joists and boards, then fasten them tightly with screws. Test by walking on the vloer to catch any remaining creaks, adjusting shims or fasteners as needed for silence and stability. For a complete fix, you’ll want to explore more repair details.
Identifying the Source of the Squeak

Before you can fix a squeaky floor, you need to pinpoint exactly where the noise is coming from. Start by walking slowly across the floor, paying close attention to each step. The squeak causes usually stem from floor movement where boards rub against each other or the subfloor. To identify the exact spot, apply pressure with your foot and listen carefully for the squeak. You can also try pressing down on sections one at a time to see if movement triggers noise. Mark the noisy areas with painter’s tape for easy reference. Understanding these floor movement points will help you target the repair effectively, giving you the freedom to move without that annoying creak interrupting. This precise approach saves time and effort when you’re ready to fix the problem.
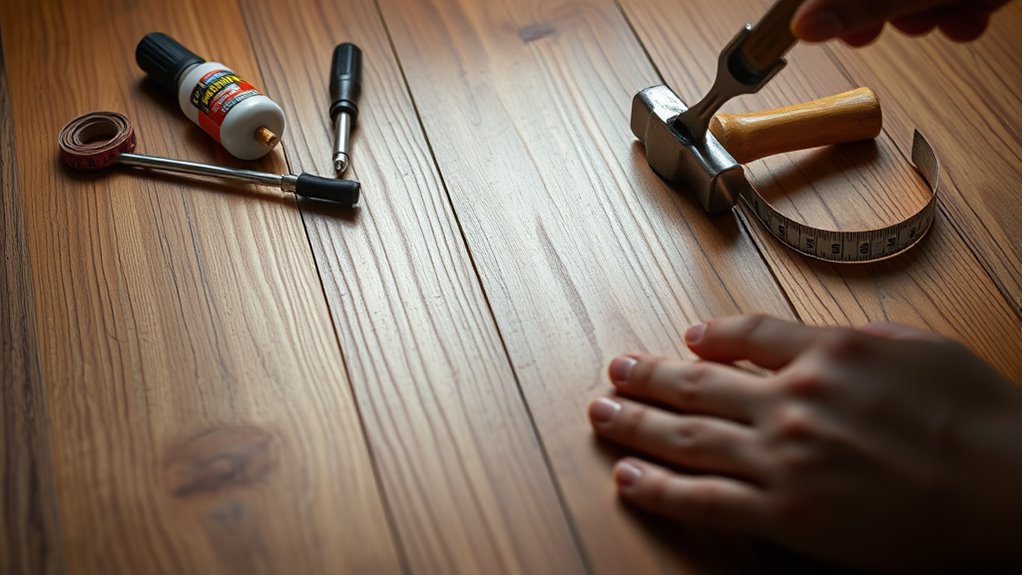
Gathering Tools and Materials Needed
To fix squeaky floors effectively, you’ll need a specific set of tools and materials at hand. Your tools checklist should focus on precision and accessibility, while material selection guarantees durability and ease of use. Here’s a practical overview:
| Tool | Doel | Recommended Type |
|---|---|---|
| Drill & Screws | Secure loose floorboards | Wood screws, #8 or #10 |
| Hammer & Nails | Fasten joists or plates | Finishing nails |
| Carpenter’s Glue | Reinforce joints | Wood glue, waterproof |
Beyond tools, gather shims or wedges to stabilize joists if needed. Choosing quality materials means your repair lasts, freeing you from repeated fixes. Before starting, double-check this tools checklist and material selection to work efficiently and confidently.
Using Powdered Graphite or Talcum Powder
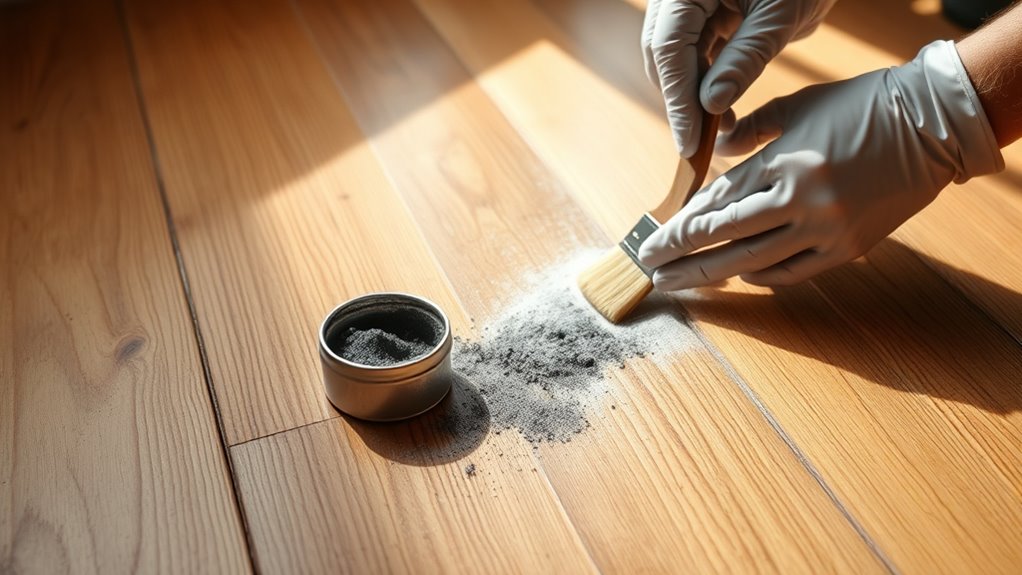
You can reduce floor squeaks by applying powdered graphite or talcum powder between the floorboards to lubricate friction points. Make certain to sprinkle the powder carefully and wipe away any excess to avoid mess and guarantee safety. Regular application helps prevent future squeaks by keeping joints smooth and quiet.
Benefits of Powdered Graphite
Although there are several methods to quiet squeaky floors, using powdered graphite or talcum powder stands out for its simplicity and effectiveness. Powdered graphite, in particular, offers unique lubricant advantages that make it ideal for this purpose. Its dry, fine particles easily penetrate tight spaces between floorboards and joists, reducing friction without creating a mess. Graphite applications are long-lasting; once applied, it continues to lubricate, preventing squeaks from returning quickly. Unlike wet lubricants, it won’t attract dust or dirt, preserving your floor’s condition. You’ll appreciate how powdered graphite provides a low-maintenance solution, freeing you from constant repairs. If you want a straightforward, efficient way to restore quiet and comfort beneath your feet, powdered graphite is a practical choice that respects your time and space.
Applying Talcum Powder Safely
How exactly should you apply talcum powder or powdered graphite to guarantee safety and effectiveness? First, choose a well-ventilated area to minimize inhaling fine particles—this is key for talcum powder safety. Gently sprinkle the powder directly into the gaps between floorboards where friction causes squeaks. Use a soft brush or cloth to work it evenly into the joints without creating a mess. Avoid over-application; a thin layer suffices for floor squeak prevention. After applying, walk over the area lightly to help the powder settle and reduce noise. Finally, clean excess powder from the surface to prevent slipping hazards. By following these precise steps, you’ll maintain your freedom to move quietly and safely across your floors without worry.
Preventing Future Floor Squeaks
Since squeaky floors can gradually return if left untreated, regularly applying powdered graphite or talcum powder is essential to keep your floors quiet over time. For effective floor maintenance, sprinkle the powder generously along seams and where floorboards meet joists. Use a soft brush or broom to work the powder into cracks, reducing friction that causes noise. This simple step supports ongoing noise reduction without major repairs. Remember to clean excess powder to prevent buildup that attracts dust. Make this a routine every few months, especially in high-traffic areas or during seasonal changes that cause wood to expand or contract. By committing to this practical approach, you maintain your floors’ freedom from annoying creaks and enjoy lasting quiet beneath your feet.
Securing Loose Floorboards With Screws or Nails

When you notice a floorboard shifting underfoot, securing it with screws or nails is often the most effective way to stop the squeak. First, pick the right fastener: screw types like wood screws provide a strong grip, while nail options such as finish nails offer a quicker fix. Next, follow these steps:
- Locate the joist beneath the loose board using a stud finder or tapping method.
- Pre-drill holes to avoid splitting the wood, then drive screws or nails through the floorboard into the joist.
- Countersink screws slightly below the surface and fill holes with wood filler for a smooth finish.
Installing Blocking Between Joists
To stop your floor from squeaking, you’ll want to install blocking between the joists to add stability and reduce movement. This involves cutting and fitting sturdy wood pieces tightly between the joists, then securing them with nails or screws. Properly placed blocking helps distribute weight evenly and prevents the joists from twisting or shifting over time.
Purpose of Blocking
Although your floor joists provide the main support, installing blocking between them is essential for reducing squeaks and enhancing stability. Blocking acts as a brace, preventing joists from twisting and moving independently. When you choose your blocking materials, opt for sturdy lumber or engineered wood that matches your joists’ strength. Using proper blocking techniques guarantees a snug fit, minimizing gaps that cause noise.
Here’s why blocking matters:
- Distributes weight evenly across joists, reducing floor movement.
- Prevents joist twisting that leads to squeaky friction.
- Adds rigidity, making your floor feel solid and secure.
Installatietechnieken
Since proper installation is key to effective blocking, you’ll want to measure the joist spacing accurately before cutting your lumber. Start by identifying the exact distance between joists to guarantee your blocking fits snugly. When installing blocking between joists, maintain consistent joist alignment to support the floor evenly and reduce movement that causes squeaks. Cut your blocking pieces to length, then fit them tightly between joists at intervals that reinforce the floor adequately—usually every 4 to 6 feet. Use construction adhesive and screws for a secure connection, avoiding nails that can loosen over time. This precise approach to floor installation stabilizes the subfloor, locking joists in place. Taking these steps gives your floor a solid, squeak-free foundation without restricting your freedom to move or renovate later.
Applying Wood Glue and Shims for Stability
A squeaky floor often signals loose joints between the subfloor and joists, which you can fix by applying wood glue and inserting shims for added stability. Begin by cleaning the gap between the subfloor and joist to guarantee strong wood glue application. Next, carefully apply a generous bead of wood glue along the joist where the subfloor rests. For shim placement, gently tap thin wooden shims into any gaps between the joist and subfloor, but avoid forcing them too tightly to prevent damage. Finally, trim any protruding shim ends flush with the joist surface. This method reinforces the floor structure and eliminates movement causing the squeak, giving you a sturdy, silent floor without major renovations.
Testing and Final Adjustments
Once you’ve secured the shims and allowed the wood glue to set, it’s time to test the floor for any remaining squeaks. Conduct a thorough squeak assessment by walking over the repaired area, noting any unstable spots. If you detect movement, tighten fasteners or add more shims where necessary to improve floor stability. Repeat testing until the floor feels solid and silent.
| Stap | Actie | Result |
|---|---|---|
| 1. Initial Walk | Walk over the floor | Identify squeak spots |
| 2. Inspect Joints | Check shim placement | Confirm stability |
| 3. Adjust Shims | Add or reposition shims | Eliminate squeaks |
| 4. Final Test | Walk with varied pressure | Verify no movement |
This precise approach guarantees your floor feels secure, granting you freedom from annoying squeaks.