To fix a scratch in your laminate flooring, first identify whether it’s a surface or deep scratch by feeling with your fingernail. Clean the area thoroughly with a damp cloth and mild cleaner, then choose a repair kit matching your floor color. For minor scratches, apply a wax pencil, filling evenly. Deeper scratches need wood filler or putty, smoothed with fine sandpaper after drying. Finish by protecting the repair and maintaining your floor properly. You can explore more precise techniques and upkeep tips ahead.
Identify the Type and Depth of the Scratch

Before you start repairing, you need to identify the type and depth of the scratch on your laminate vloeren. Scratch identification is vital because it determines the repair method you’ll use. First, closely examine the scratch under good lighting. Is it a surface scratch that only affects the finish, or does it penetrate deeper into the laminate layer? Use your fingernail to feel the scratch depth gently. If your nail catches, the scratch is likely deeper and requires more intensive repair. Surface scratches can often be treated with simple polishing or markers, while deeper ones might need filling or replacement of the affected plank. Taking the time for accurate scratch identification guarantees you choose the right fix, giving you freedom from trial-and-error and preserving your floor’s look.
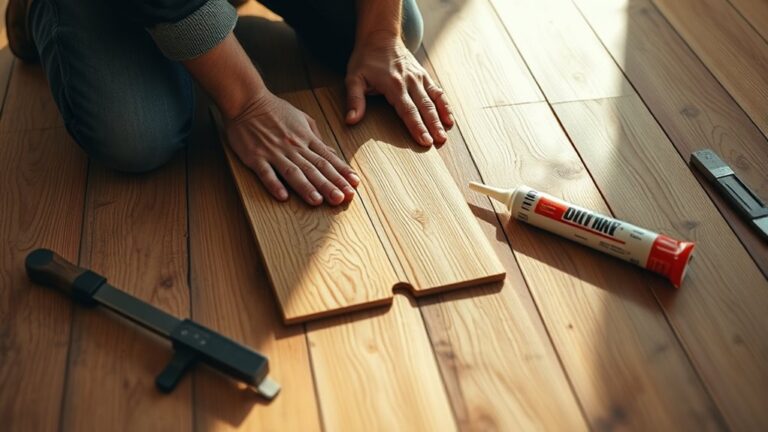
Gather Necessary Tools and Materials
Before you start fixing the scratch, make certain you have the essential tools like a putty knife, clean cloth, and laminate repair kit. Choose materials that match your floor’s color and finish to blend the repair seamlessly. Clear and prepare your work area to guarantee you can work comfortably and avoid introducing dirt into the scratch.
Essential Repair Tools
To effectively fix a scratch in your laminate flooring, you’ll need a few essential tools and materials at hand. Having the right items guarantees a smooth repair process and helps maintain your floor’s appearance over time. Before you begin, gather these key tools:
- Laminate floor repair kits, which often include wax sticks or putty matching your floor color
- Fine-grit sandpaper to smooth rough edges around the scratch
- A clean cloth for wiping away dust and excess material
- A putty knife or plastic scraper to apply and smooth filler
Using these tools properly, along with following maintenance tips, will help you restore your floor’s finish without hassle or damage. Preparing well sets you free from costly professional repairs later on.
Choosing Correct Materials
Once you’ve gathered the basic tools, the next step is selecting the right materials that match your laminate flooring. Choosing the correct material types is vital to guarantee your repair blends seamlessly and lasts long. You can find repair kits tailored for various laminate colors and finishes, simplifying the process. Here’s a quick guide to help you pick:
| Materiaaltype | Beste gebruik | Notities |
|---|---|---|
| Wax Filler Sticks | Minor scrapes and shallow scratches | Easy to apply and blend |
| Laminate Repair Pens | Surface scratches | Great for color matching |
| Putty or Paste | Deep scratches or gouges | Requires smoothing for finish |
| Colored Markers | Quick touch-ups | Temporary, less durable |
| Heldere afwerking | Protective layer post-repair | Seals and protects repaired area |
Select repair kits based on your floor’s color and damage depth for maximum freedom and results.
Preparing Work Area
Although it might seem straightforward, preparing your work area properly is essential to guarantee an efficient and clean laminate floor repair. Start by clearing the space around the scratch to give yourself ample room to work without interruptions. Next, gather all necessary tools and materials to avoid frequent trips, which can disrupt your workflow. Don’t forget to implement safety precautions like wearing gloves and eye protection to keep yourself safe throughout the process.
Here’s what you’ll need in your work space:
- Laminate repair kit (includes putty, marker, or wax sticks)
- Fine-grit sandpaper or a soft cloth
- Clean cloth and mild cleaner
- Protective gloves and safety glasses
Setting up your work space with these essentials guarantees a smooth, safe repair experience.
Clean the Affected Area Thoroughly
Before you start repairing the scratch, make certain you clean the affected area thoroughly so the repair materials adhere properly. Begin by sweeping or vacuuming to remove loose dust and debris. Next, use a damp cloth with a mild cleaner specifically designed for laminate floors to wipe the scratched surface. Avoid harsh chemicals or abrasive tools that could worsen the damage. Focus on removing dirt, oils, and residues with gentle cleaning techniques to guarantee the surface is spotless. After wiping, let the area dry completely—any moisture left can interfere with the repair’s effectiveness. Proper surface preparation is essential; a clean, dry, and smooth surface allows repair compounds or fillers to bond securely, ensuring a longer-lasting fix and preserving the freedom to enjoy your floor without worry.
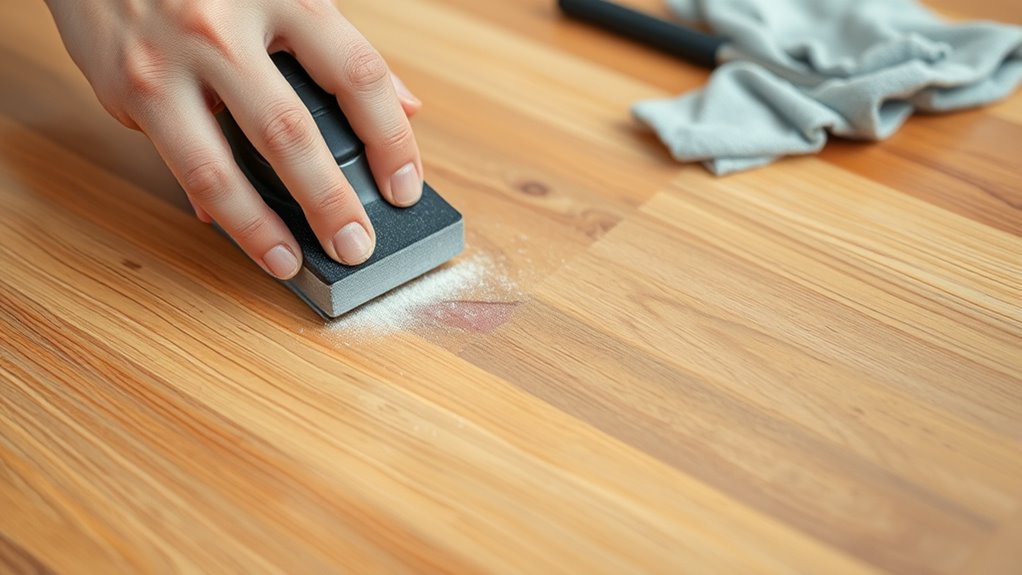
Use a Laminate Floor Repair Kit
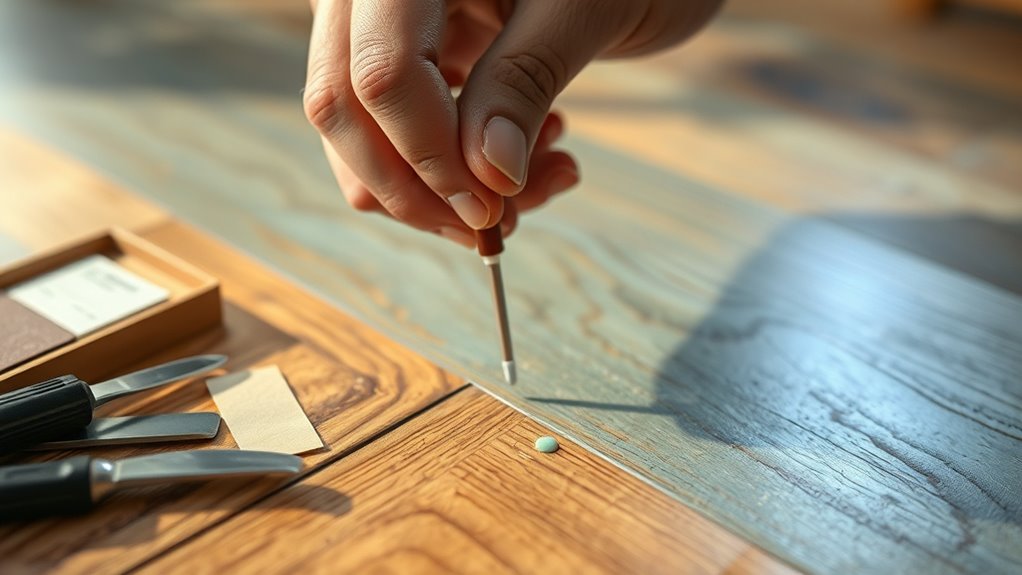
A laminate floor repair kit is a convenient and effective solution for fixing scratches without replacing entire planks. These kits include everything you need to restore your floor’s appearance quickly and easily. To use one, follow these laminate repair techniques:
- Select a repair kit that matches your floor’s color and finish.
- Clean the scratched area thoroughly to guarantee proper adhesion.
- Apply the filler or putty carefully into the scratch using the included tools.
- Allow the repair to dry completely before lightly sanding or buffing for a smooth finish.
Using a repair kit not only fixes damage but also supports scratch prevention strategies by maintaining the floor’s protective layer. This approach offers a practical way to keep your laminate flooring looking pristine while enjoying the freedom to handle repairs yourself.
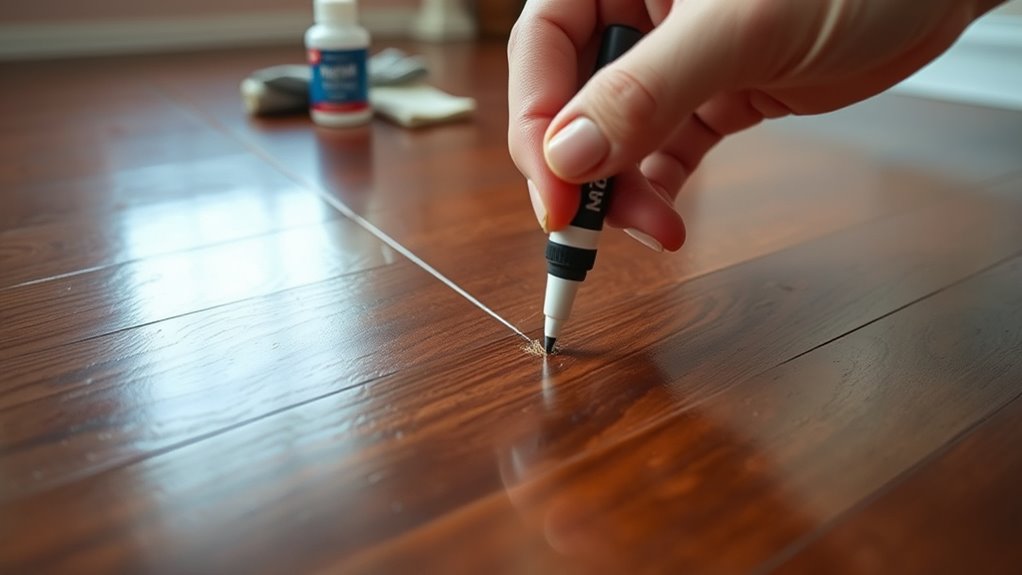
Apply a Wax Pencil or Crayon to Minor Scratches
You’ll want to start by selecting a wax pencil or crayon that closely matches your laminate floor color for the best results. Before applying, clean and dry the scratched area thoroughly to guarantee the wax adheres properly. Then, carefully fill in the scratch with the wax and blend it smoothly to make the repair less noticeable.
Choosing the Right Color
How do you guarantee the wax pencil or crayon you choose blends seamlessly with your laminate flooring? The key lies in careful color matching and thoughtful stain selection. Start by examining your floor under natural light to identify the dominant tones. Then, consider these tips:
- Test several wax pencil or crayon shades on a hidden spot to compare.
- Match the color to the wood grain pattern, not just the surface tone.
- Choose a slightly darker shade if uncertain, as it hides scratches better.
- Avoid overly bright or artificial colors that clash with your flooring.
Preparing the Scratch Area
Before applying a wax pencil or crayon, clean the scratched area thoroughly to remove dirt, dust, and oils that could prevent proper adhesion. Use a soft cloth dampened with mild soap and water, then dry the spot completely. This step guarantees that the wax will bond well to the laminate surface, providing a seamless finish. Taking the time to prepare the area properly is key to effective scratch prevention and maintaining your laminate care routine. Avoid using harsh chemicals or abrasive tools, as they can worsen the damage or dull the finish. By carefully prepping the scratch, you set yourself up for a successful repair that blends naturally with your floor’s texture, helping you regain that sense of freedom in your space without constant worry about visible flaws.
Applying and Blending Wax
Once the scratch area is clean and dry, you can apply the wax pencil or crayon to fill in the damaged spot. Start by selecting a wax color that matches your laminate floor, then use precise wax application techniques to cover the scratch evenly. Here’s how to get it right:
- Use short, controlled strokes to fill the scratch thoroughly
- Apply gentle pressure to avoid wax buildup
- Blend color options by layering wax shades if needed for a natural look
- Smooth the wax with a soft cloth to blend it seamlessly into the floor
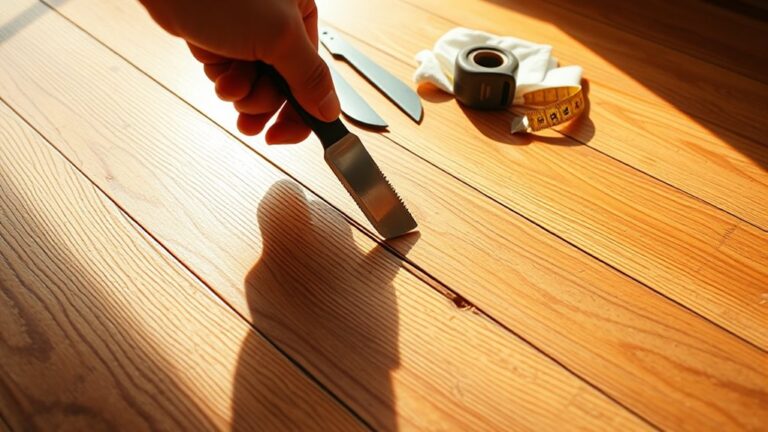
Fill Deeper Scratches With Wood Filler or Putty
If your laminate flooring has scratches that are too deep to be concealed by simple touch-up markers or crayons, using wood filler or putty is the best approach to restore a smooth surface. Start by choosing the right filler option that matches your floor’s color—many stores offer premixed wood fillers designed specifically for laminate. Clean the scratched area thoroughly and let it dry before applying. Using a putty knife, press the filler firmly into the scratch, ensuring no air pockets remain. This step is essential for a lasting repair. These repair techniques not only fill the gap but also reinforce the damaged area, preventing further deterioration. Take your time to apply the filler evenly; this precision will set you free from unsightly scratches and extend your floor’s life.
Smooth the Repair Area and Remove Excess Material
Two key tools you’ll need to smooth the repair area are a fine-grit sandpaper and a soft cloth. Start by gently sanding the filled scratch using light, circular motions to blend it seamlessly with the surrounding laminate. Use these sanding techniques to avoid damaging the floor’s surface or removing too much filler. Once smooth, wipe away any dust or excess material with the soft cloth to prepare for finishing. Remember, a clean surface guarantees better adhesion of repair finishes. Here’s how to proceed:
- Select 220-grit sandpaper for gentle smoothing
- Sand lightly to maintain surface levelness
- Remove all dust with a microfiber or soft cloth
- Inspect the area to confirm smoothness and blend
This approach gives you a flawless repair, letting your floor look free and flawless again.
Protect and Maintain the Floor After Repair
Although the repair may look complete, protecting and maintaining your laminate floor afterward is essential to guarantee the fix lasts and the surface stays pristine. Start by placing protective pads under furniture legs to prevent new scratches. Use rugs or mats in high-traffic areas to add an extra layer of floor protection. Avoid excessive water when cleaning; instead, use a damp mop with a laminate-safe cleaner to preserve the finish. Regularly sweep or vacuum to remove dirt and debris that can cause wear over time. Follow these maintenance tips consistently, and your repaired floor will hold up beautifully. By taking these simple steps, you’ll enjoy a durable, scratch-free laminate floor that keeps your space looking fresh and inviting.