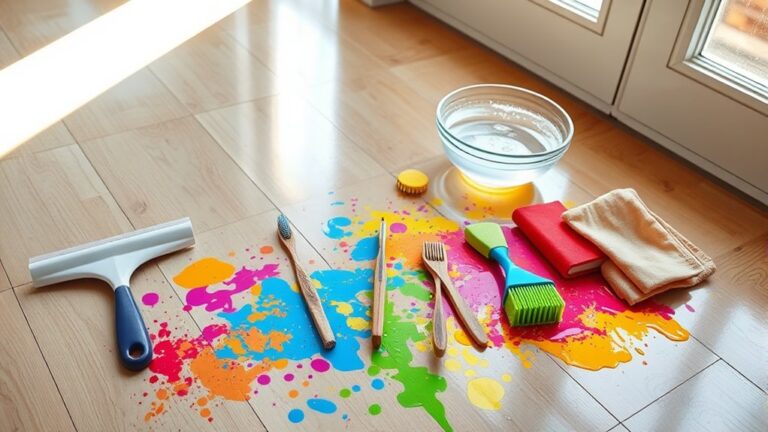
You can remove scuff marks from hardwood floors easily by first identifying the mark type and gathering supplies like a soft cloth, pencil eraser, baking soda, and non-gel toothpaste. Start by wiping with damp cloth, then gently rub light scuffs with a pencil eraser. For tougher marks, try a baking soda paste or toothpaste. Finish by polishing with olive oil or furniture polish and buffing the vloer. Following these simple steps will help restore your floor’s shine and durability—there’s more useful advice to explore.
Identify the Type of Scuff Mark
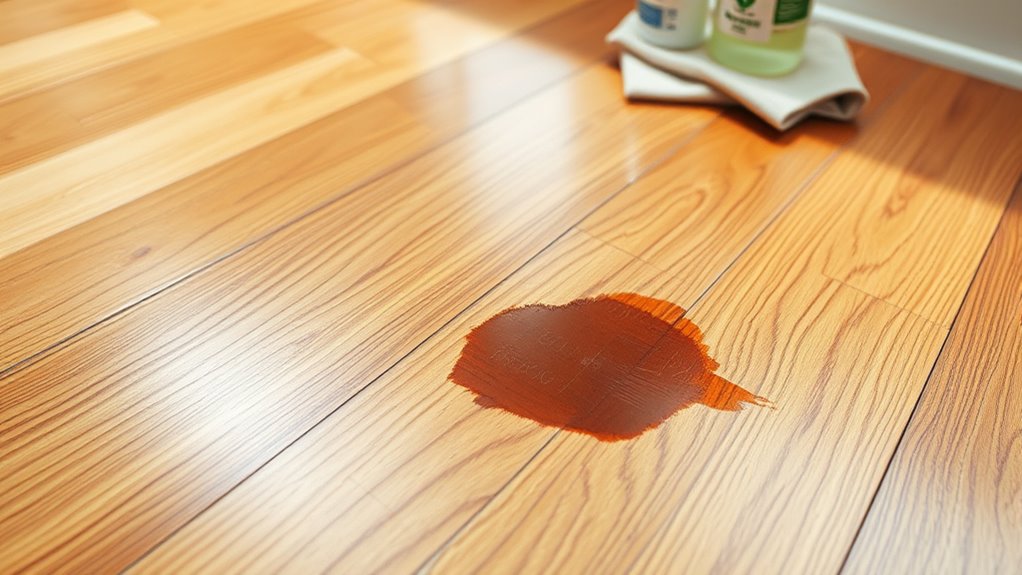
Before you start cleaning, it’s important to identify the type of scuff mark on your hardwood floor. Scuff mark types generally fall into two categories: surface marks caused by rubber soles or furniture, and deeper scratches caused by harder materials. Knowing which type you’re dealing with guides your approach and prevents damage. Use simple identification methods like running your fingernail over the mark—if it feels raised or rough, it may be a scratch, not just a scuff. Also, observe the mark’s color; black or gray marks often come from rubber, while wood-toned marks suggest deeper abrasions. Accurate identification methods save you time and effort, allowing you to choose the right cleaning technique and maintain your hardwood’s pristine condition with confidence and freedom.
Verzamel uw schoonmaakbenodigdheden
Before you start, make sure you have essential tools like a soft cloth, a gentle scrub brush, and an appropriate hardwood floor cleaner. Choosing the right cleaner is vital to avoid damaging the finish. Clear your workspace by removing furniture and debris to work efficiently and protect surrounding areas.
Essential Cleaning Tools
Although removing scuff marks from hardwood floors may seem straightforward, having the right cleaning tools on hand makes the process much more effective and efficient. Start by gathering a soft microfiber cloth to avoid scratching the floor’s surface. A gentle, non-abrasive sponge is essential for applying cleaning products without damaging the finish. You’ll also want a soft-bristle brush to reach those stubborn marks in crevices. Keep a bucket nearby for rinsing and diluting solutions, ensuring you don’t over-saturate the wood. For ongoing floor maintenance, consider a dust mop or vacuum with a hardwood floor attachment to prevent dirt buildup that causes scuffs. Having these tools ready empowers you to tackle scuff marks quickly while preserving your floor’s natural beauty and longevity.
Choosing the Right Cleaner
With the right tools ready, the next step is picking a cleaner that’s tough on scuff marks but safe for your hardwood floors. Opt for cleaning solutions specifically designed for hardwood maintenance—they effectively break down marks without damaging the finish. Avoid harsh chemicals or abrasive cleaners, as they can strip protective coatings and dull your floor’s shine. Look for pH-neutral formulas or products labeled as safe for hardwood. If you prefer natural options, diluted vinegar or a mild soap solution can work, but test a small area first. Choosing the right cleaner not only removes scuff marks efficiently but also preserves your floor’s integrity, giving you the freedom to maintain its beauty without worry. Selecting the proper cleaning solution is key to hassle-free hardwood maintenance.
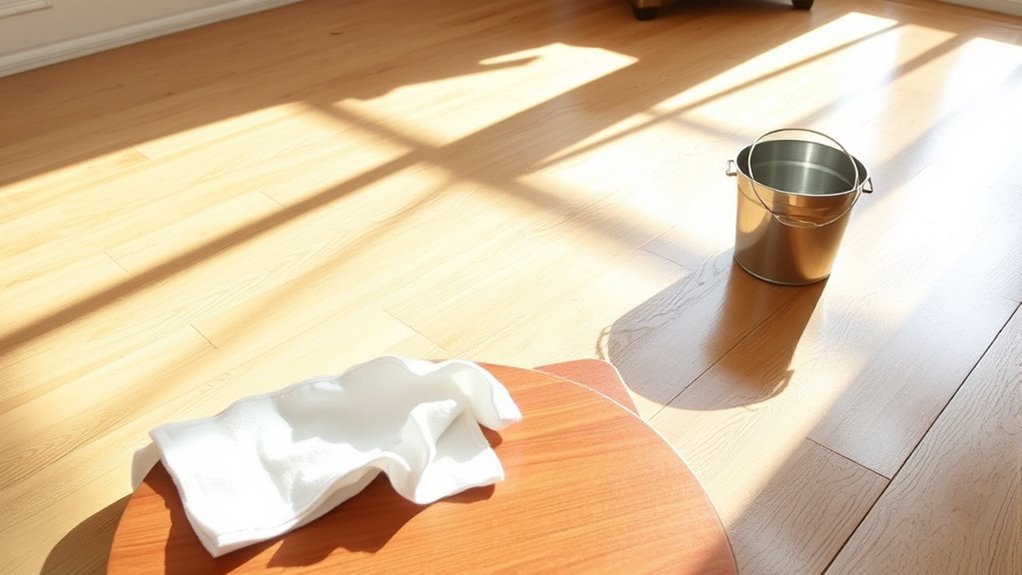
Preparing Your Workspace
As you prepare to tackle scuff marks on your hardwood floors, gathering the right cleaning supplies is crucial for an efficient and effective job. Start by organizing your workspace to keep everything within reach—this saves time and helps maintain focus. Essential items include a soft cloth or microfiber towel, a gentle hardwood floor cleaner, a magic eraser, and a bucket of warm water. Don’t forget gloves to protect your skin and a small brush for stubborn marks. Workspace organization isn’t just about convenience; it promotes cleaning safety by preventing spills and accidents. Clear the area of furniture and debris to guarantee you have ample room to work freely. With your supplies ready and your workspace set, you’re prepared to restore your floors without hassle or risk.
Start With a Soft Cloth and Warm Water
Start with a soft microfiber cloth to prevent scratching your hardwood floors. Fill a bucket with warm water, ensuring it’s not too hot to avoid damaging the finish. This gentle solution is your first step in safely lifting scuff marks without harsh chemicals.
Choose Soft Cloth Type
One of the simplest tools you’ll need to remove scuff marks from hardwood floors is a soft cloth. Choosing the right soft cloth type is essential because the cloth material affects how gently and effectively you can clean without damaging the floor. You want a cloth that’s absorbent, non-abrasive, and durable. Microfiber cloths are often the best choice due to their fine fibers and excellent dirt-trapping ability. Cotton cloths work well too but may be less soft. Avoid rough fabrics like towels that might scratch.
| Cloth Type | Materiaal | Beste gebruik |
|---|---|---|
| Microfiber | Synthetic | Gentle, effective cleaning |
| Cotton | Natural fiber | Soft, absorbent |
| Flannel | Cotton blend | Delicate surfaces |
| Terry cloth | Cotton | Absorbent but potentially rough |
Prepare Warm Water Solution
Before tackling scuff marks, you’ll want to prepare a warm water solution to loosen dirt without harming your hardwood floors. Start by filling a bucket with warm water—not hot—to avoid damaging the wood’s finish. Use a soft cloth, like microfiber or cotton, and dip it into the solution, wringing out excess water so the cloth is damp, not soaked. This method aligns with safe cleaning techniques that protect your floor’s integrity while effectively loosening grime. Applying too much water can cause warping or discoloration, so precise dampness is key. This warm water solution is a foundational step in floor maintenance, allowing you to gently address scuff marks without harsh chemicals or abrasives. Mastering this simple prep gives you the freedom to maintain your hardwood floors confidently and effectively.
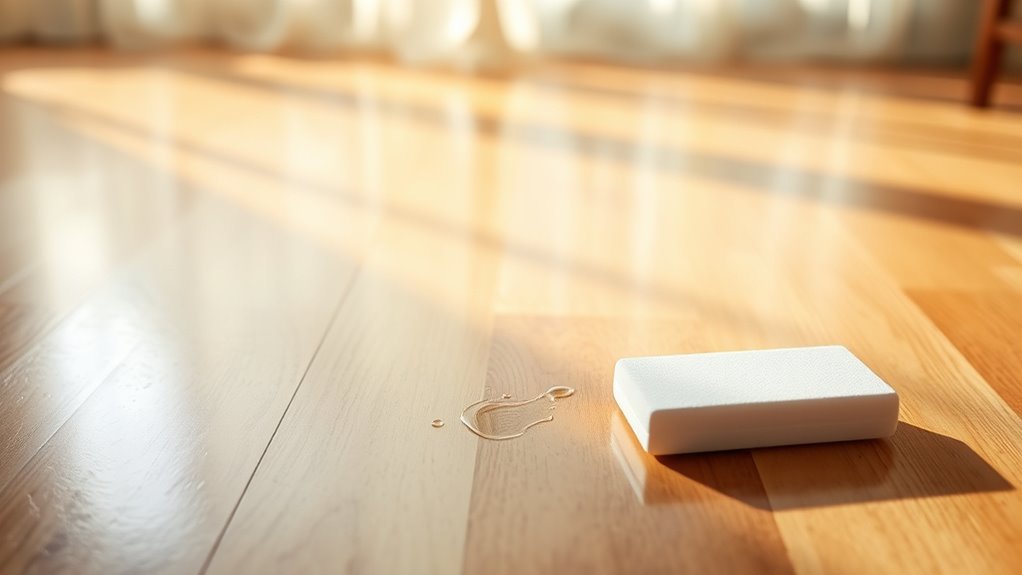
Use a Pencil Eraser for Light Scuffs
Although it may seem simple, using a pencil eraser can effectively remove light scuff marks from hardwood floors without damaging the finish. This method offers impressive pencil eraser effectiveness for light scuff removal, making it a go-to solution when you want quick, gentle results. To start, choose a clean, white eraser to avoid transferring color onto your floor. Gently rub the eraser over the scuff mark in a circular motion, applying light pressure. You’ll notice the mark gradually fading as the eraser lifts the scuff without scratching the wood. This technique saves you from harsh chemicals and extensive scrubbing, allowing you to maintain your floor’s natural beauty effortlessly. Keep a pencil eraser handy—it’s a simple tool that delivers reliable light scuff removal whenever needed.
Apply Baking Soda Paste for Stubborn Marks
If scuff marks won’t budge with a pencil eraser, you can turn to a baking soda paste for a more powerful yet safe cleaning solution. Baking soda benefits include its gentle abrasiveness and natural ability to lift stains without damaging hardwood floors. Start by mixing baking soda with a small amount of water to form a thick paste. When applying paste, use a soft cloth or sponge, gently rubbing the scuff mark in a circular motion. Avoid excessive pressure to prevent scratching the finish. Once the mark fades, wipe the area with a damp cloth to remove any residue. This method gives you control and confidence, letting you restore your floor’s appearance while maintaining its integrity. Baking soda is an effective, budget-friendly choice for stubborn scuffs.
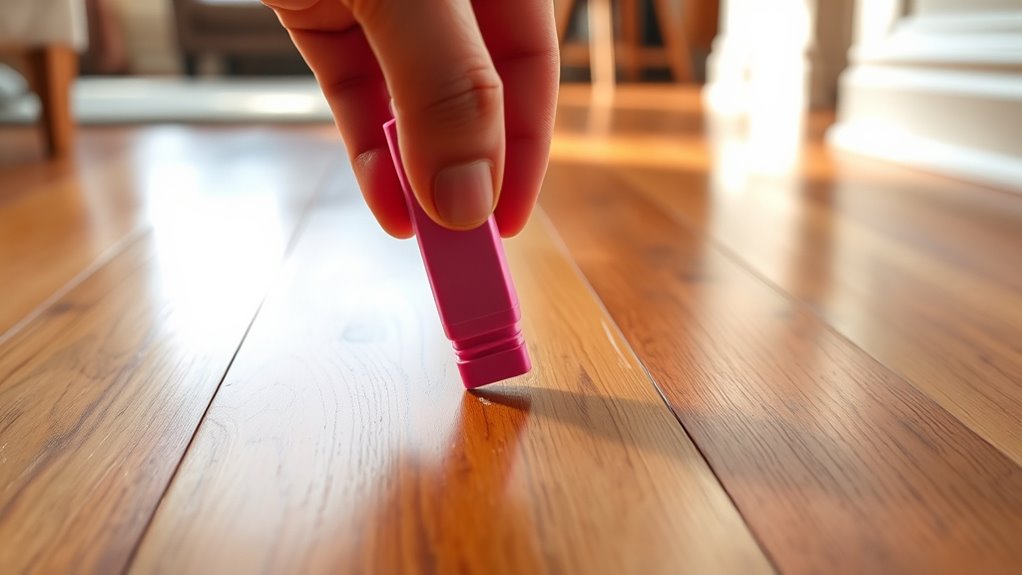
Try a Magic Eraser Carefully
When you need a quick fix for scuff marks that resist gentler methods, a Magic Eraser can be an effective tool. However, you should use it carefully since its abrasive texture might dull or damage your hardwood floor’s finish. Start by dampening the Magic Eraser slightly—avoid soaking it. Test it on a hidden area first to verify it won’t harm the surface. Gently rub the scuff mark with light pressure, applying only as much force as necessary. Follow these magic eraser tips to protect your floors while maximizing scuff removal techniques. Remember, frequent or harsh scrubbing can wear down the finish, so reserve this method for stubborn marks only. With careful use, the Magic Eraser offers a quick, reliable way to restore your hardwood’s clean look.
Use Toothpaste to Remove Tough Scuffs
If you’re dealing with tough scuff marks, non-gel toothpaste can be a simple and effective solution. Apply it gently with a soft cloth to avoid damaging your floor’s finish. After rubbing, make sure to wipe the area clean thoroughly to remove any residue.
Choose Non-Gel Toothpaste
One effective way to tackle tough scuff marks on hardwood floors is by using non-gel toothpaste. Unlike gel varieties, non-gel toothpaste contains mild abrasives that gently lift marks without damaging your floor’s finish. This makes it a smart cleaning alternative when you want to avoid harsh chemicals. The toothpaste benefits extend beyond oral care; it’s affordable, readily available, and safe for most hardwood surfaces. When choosing toothpaste, pick a plain, white, non-gel type—avoid whitening or colored options that might leave residue. With these cleaning alternatives, you gain control over how you maintain your floors, preserving their natural beauty while eliminating scuffs effectively. Embrace this simple, accessible method and enjoy the freedom of DIY floor care without relying on specialized products.
Apply Gently With Cloth
Although toothpaste is effective at removing scuff marks, you’ll need to apply it carefully to avoid damaging your hardwood floor. Start by squeezing a small amount of non-gel toothpaste onto a soft cloth material. Using gentle application, rub the toothpaste directly onto the scuff mark in circular motions. Avoid pressing too hard; the goal is to lift the mark without wearing down the finish. This method gives you control, preventing scratches or dull spots often caused by harsh scrubbing. Stick to a cloth material that’s soft and non-abrasive to maintain the floor’s integrity. By applying toothpaste gently with the right cloth, you preserve your floor’s freedom to shine while effectively removing tough scuffs, keeping your space looking fresh and polished.
Wipe Clean Thoroughly
After gently applying toothpaste to the scuff marks, you’ll want to wipe the area clean thoroughly to remove any residue. Use a damp microfiber cloth to wipe the spot in gentle circular motions. This step guarantees no toothpaste remains that could dull your hardwood’s finish. Follow up with a dry cloth to absorb excess moisture, preventing water damage. Incorporating this into your cleaning tips helps maintain your floors’ natural shine and durability. Regularly wiping clean after spot treatments should become part of your maintenance routine, preserving your hardwood’s beauty and extending its life. By mastering this simple step, you gain freedom from stubborn marks without harsh chemicals or expensive products, keeping your floors pristine with minimal effort.
Polish the Area With Olive Oil or Furniture Polish
Apply a small amount of olive oil or furniture polish to the scuffed area to restore shine and minimize the appearance of marks. Olive oil benefits include moisturizing and nourishing the wood, which helps conceal scuffs naturally while enhancing the floor’s luster. When choosing furniture polish types, pick one designed specifically for hardwood floors to avoid buildup or damage. Avoid silicone-based or wax-heavy polishes that can create a slippery surface. Apply sparingly to prevent residue, giving you control over the shine without overdoing it. This step not only covers imperfections but also protects the wood, extending the floor’s lifespan. Using olive oil or the right furniture polish lets you maintain your hardwood floor’s freedom to look vibrant and fresh without harsh chemicals or expensive treatments.
Buff the Floor With a Soft Cloth
Grab a soft cloth and gently buff the treated area to blend the polish or oil evenly into the wood. Choosing the right cloth type is essential; microfiber or cotton cloths work best because they’re gentle yet effective. Use circular buffing techniques with light to moderate pressure to avoid damaging the finish. Keep your movements consistent to evenly distribute the product and enhance the floor’s natural shine. Avoid using abrasive cloths or harsh scrubbing, as they can worsen scuff marks. Mastering proper buffing techniques not only restores your hardwood floor’s appearance but also extends the life of your treatment. With the right approach, you’ll regain a smooth, polished surface that reflects your freedom to maintain your home effortlessly.
Prevent Future Scuff Marks With Floor Protectors
Buffing your floor restores its shine, but protecting it prevents new scuff marks from appearing. To keep your hardwood floors looking pristine, consider these scuff prevention tips focused on floor protector types:
- Viltkussentjes: Easy to attach under furniture legs, they reduce friction and prevent scratches when you move items around.
- Rubber Caps: Ideal for heavier furniture, they offer cushioning that absorbs impact and stops scuffing.
- Floor Mats and Rugs: Place them in high-traffic areas to shield your floors from dirt and abrasive particles.