スムーズな床面移動のためのスロープの設置は、安全性とアクセシビリティの確保に不可欠です。まず、高低差を測り、スロープを滑らかなエッジでサイズに合わせて切断します。接着が適切に行われるよう、設置場所が清潔で乾燥していることを確認してください。適切な接着剤を使用し、メーカーの傾斜と位置合わせのガイドラインに従って、スロープを慎重に押し込んで設置してください。硬化後は定期的に水平を確認し、障害物があれば対処してください。適切に設置することで、スロープはつまずきの危険を排除し、すべての人の移動性を向上させます。最適な設置方法をお探しの方は、この後、さらに役立つヒントをご紹介します。
ランプの概要
スロープは、異なる階の高さ間のスムーズな移動を可能にし、誰もが安全に移動できるようにするために不可欠です。パン屋でカートを押して移動する場合や、病院で患者を押す場合など、スロープは、つまずきの危険がある可能性のある床面間の重要な段差を解消します。スロープを緩やかな傾斜(通常は10~15度が推奨されます)で設計することで、これらの段差がスムーズになるだけでなく、あらゆる能力を持つ人々が利用しやすくなります。
スロープの設置を検討する際には、適切な素材とデザインを選ぶことが不可欠です。例えば、Schluter®-RENO-RAMPは、タイルとプロファイル間の目地間隔を均一に保つための一体型ジョイントスペーサーを備えており、機能性と美観の両方を向上させます。こうした細部へのこだわりにより、スロープは実用的であるだけでなく、見た目にも美しいものとなっています。
スロープの設置は、単に設置するだけでなく、ベストプラクティスに従うことも重要です。設置時の適切な位置合わせ、適切な接着剤の使用、そして十分な硬化時間を確保することは、理想的な結果を得るために不可欠です。これらの手順を踏むことで、動きやすさと自由さを育む、安全で魅力的な環境を作り出すことができます。
ランプを使用する利点
床の高さが異なる空間を移動する際に、スロープの有無は大きな違いをもたらします。スロープは緩やかな傾斜を提供し、つまずきの危険を排除することで、特に移動に困難を抱える方にとって、より安全な移動を可能にします。これは、わずかな踏み外しが重大な事故につながる可能性のある、人通りの多い場所では特に重要です。
さらに、スロープは公共スペースのアクセシビリティを向上させ、アメリカ障害者法(ADA)に準拠しています。この準拠により、身体能力に関わらず、誰もが異なる階の高さの間を快適かつ自立して移動できるようになります。スロープは安全性を高めるだけでなく、インクルーシブな環境を育み、より多くの人が共有スペースを楽しみ、交流を深めることにもつながります。
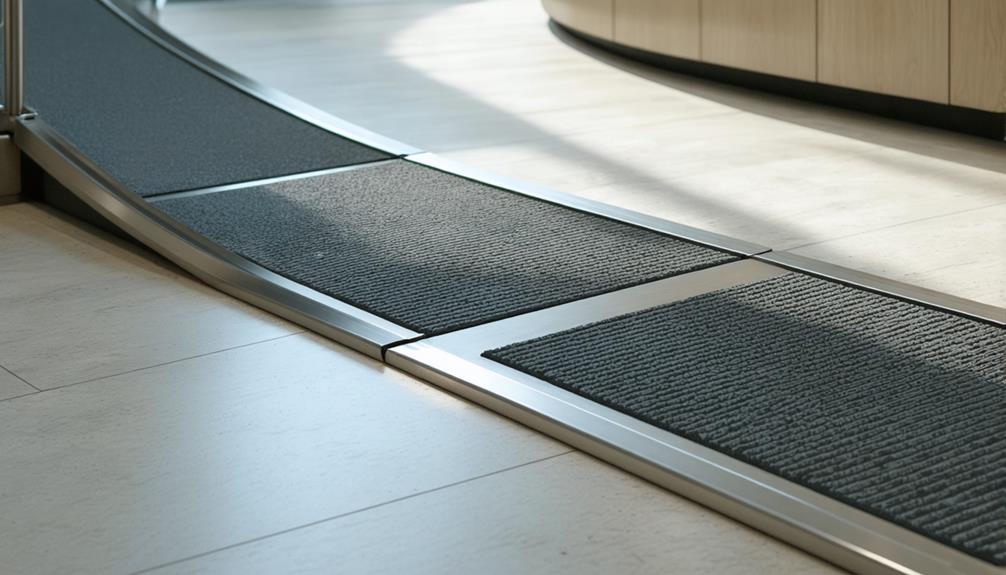
安全性とアクセシビリティに加えて、スロープは 床材 タイルのエッジの摩耗や損傷を最小限に抑えることで、接合部を滑らかにします。これは、重い台車が頻繁に使用される商業施設では非常に重要です。スロープを設置することで、無垢材とタイルなどの床材の接合部がスムーズになり、統一感があり、見た目にも美しいインテリアデザインに貢献します。
スロープは、特定の高低差や設計要件に合わせてカスタマイズできるため、様々な建設プロジェクトに最適なソリューションを提供します。住宅や公共施設の外観を美しくしたい場合でも、スロープのサイズと素材をお客様のニーズに合わせて設計できます。スロープを使用することで、安全性とアクセシビリティが向上するだけでなく、空間全体の美観が向上し、誰もが自由に自信を持って移動できるようになります。
インストール要件
異なる床高間でのシームレスな切り替えを実現するには、綿密な計画と設置時の細部への配慮が不可欠です。スロープの設置をスムーズに進めるために、以下の重要な要件にご留意ください。
- 清潔で乾燥した基板: スロープを設置する表面が清潔で乾燥していることを確認してください。これにより、接着力が高まり、特にタイルと既存の床材の間で移動させる際に、スロープの寿命が長くなります。
- 適切なツールカッターナイフ、メジャー、コテ、水平器など、必要な工具を用意してください。これらの工具を使うことで、正確な設置が可能になり、高額な費用がかかるミスを防ぐことができます。
- 接着剤の選択: 薄型モルタルや建築用接着剤など、適切な接着剤をメーカーの指示に従ってお選びください。適切な接着剤は、スロープと床の強固な接着を保証するために不可欠です。
- 高さの差を測定する設置前に、隣接する床材の高さの差を測定してください。これにより、スロープの適切な仕様を決定し、スムーズな切り替えを実現し、アクセス性と移動の自由度を向上させます。
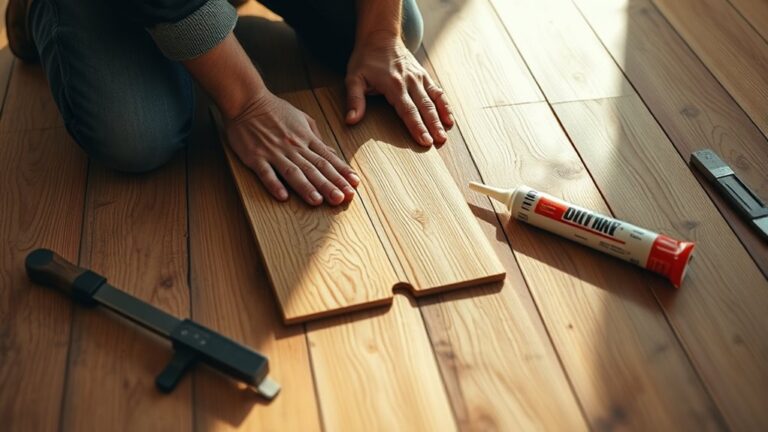
準備手順
スロープの設置を始める前に、適切なスロープの高さと傾斜を決定するために、床面の高低差を測ることが重要です。寸法が分かったら、Schluter®-RENO-RAMPを必要な長さに切断し、端が滑らかであることを確認してください。最後に、設置場所を徹底的に清掃し、スロープのしっかりとした基礎を作りましょう。
高さの差を測定する
異なる床面間のスムーズで効果的な切り替えを確実に行うには、まず隣接する2つのエリアの高低差を測定することから始めます。このステップは、必要なスロープの高さを決定するために不可欠です。メジャーを使って、高低差を正確に測定してください。正しく測定するためのヒントをいくつかご紹介します。
- 慎重に測定する: 高い方の床材の最上部から低い方の床材の最上部までの高さを測ります。
- 違いを記録する: 高さの差をインチ単位で書き留めます。これは、適切なランプを選択するために重要になります。
- 追加の床材を検討する: 下層階に床材を追加する予定がある場合は、計算にその厚さを考慮してください。
- 測定値を再確認する: ランプの材料を切断する前に、高価な間違いを避けるために測定値を確認してください。
希望の長さにカット
床面間のスムーズな切り替えには、スロープを必要な長さに慎重に切断することが不可欠です。まず、隣接する床材の高さの差を測り、切断する長さを決定します。スロープをタイル部分よりも高くする必要がある場合は、その高さも考慮して測定してください。
カッターナイフを使って、RENO-RAMPを希望の長さに切断します。まっすぐに切ることで、しっかりとフィットします。切断後は、スロープの端を滑らかに仕上げることが重要です。この作業により、設置時に床材を傷つけるのを防ぐことができます。
接着剤を使用する前に、設置場所でスロープの仮組みを行ってください。これにより、位置合わせを確認し、必要な調整を行うことができます。安全でアクセスしやすい段取り替えを実現するために、スロープの切断長さが適切な傾斜になっていることを確認するには、メーカーのガイドラインに従うことが重要です。また、安定した基礎を作るために、スロープの下の空洞を埋める必要がある場合もあります。これらの手順を踏むことで、シームレスで機能的な床の段取り替えを実現できます。
クリーンな設置エリア
スロープの設置を成功させるには、準備が鍵となります。設置場所が清潔であることを確認することは、まず不可欠なステップです。設置場所が清潔であれば、スロープの接着が効果的に行われ、将来の問題を防ぐことができます。そのためには、以下の手順を踏む必要があります。
- 破片を取り除く: 作業スペースから物、工具、家具などを片付けてください。そうすることで、邪魔されることなく設置作業に集中できます。
- ほこりと湿気設置場所にほこりや湿気がないことを確認してください。表面を拭き、スロープの設置に適した土台を作りましょう。
- 正確に測定する: スロープを設置する場所のスペースを測るために、メジャーテープを使用してください。正確な測定は、正確な切断と位置合わせに役立ちます。
- 滑らかなエッジ設置場所に粗い部分がないか確認してください。スロープや隣接する床材を傷つけないように、滑らかに整えてください。
インストールプロセス
設置作業は、スロープを設置する清潔で乾いた下地に接着剤を塗布することから始めます。このステップは、スロープが効果的に接着し、異なる床材間でスムーズに移動できるようにするために重要です。接着剤が塗布されたら、カッターナイフを使ってSchluter®-RENO-RAMPを必要な長さに切断します。端が滑らかであることを確認してください。そうすることで、床材への損傷を防ぐことができます。
次に、スロープを接着剤にしっかりと押し付けます。スロープが水平で、隣接する床材ときちんと揃っていることを確認することが重要です。そうすることで、目指すシームレスな移動を実現できます。この作業には時間をかけてください。慎重に行うほど、より良い結果が得られます。
スロープを設置した後は、接着剤メーカーの指定に従って十分な硬化時間を確保してください。このステップは必須です。焦らずに行ってください。硬化したら、スロープの高さを確認し、必要に応じて調整してください。動きを妨げる可能性のある障害物があれば、それを下げるようにしてください。
最後に、設置したスロープに摩耗や損傷がないか定期的に点検してください。状態を注意深く確認することで、機能性と外観を維持することができます。清掃の際は、中性洗剤を使用することで、常に清潔な状態を保てます。これらの手順に従うことで、空間の移動性とアクセシビリティを向上させるタイルシフトをうまく設置できます。
メンテナンスとケア
ランプのメンテナンスは、安全性と耐久性の両方を保証するために不可欠です。定期的なメンテナンスは、ランプの外観を美しく保つだけでなく、事故を防ぎ、安心してスムーズなシフト操作をお楽しみいただけます。以下に、メンテナンスに関する重要なヒントをいくつかご紹介します。
- 定期的に検査するスロープに摩耗や損傷の兆候がないか確認してください。既存の床材に悪影響を与える可能性のある箇所があれば、安全性と機能性を確保するために速やかに対処してください。
- 適切に掃除する: 洗浄には中性洗剤をご使用ください。表面を傷つける可能性のある研磨剤入りの洗剤は使用しないでください。ランプの外観を維持することは、寿命にもつながります。
- 緩いエッジを監視して対処する: ランプのエッジが緩んでいたり、浮き上がっていたりしないよう注意してください。これらの点に注意することで、つまずく危険を防ぎ、誰もがスムーズに移動できるようになります。
- メーカーの推奨事項に従うメーカーが提供するお手入れ方法に従ってください。構造の健全性に関する定期的な点検が含まれる場合があります。この手順は、ランプの効果を長期間維持するために非常に重要です。
さらに、特に人通りの多い場所では、スロープにゴミや障害物が落ちていないことを確認してください。これらの対策を講じることで、スロープへの投資を無駄にしないだけでなく、ご自身と周囲の人々にとって安全な環境を作ることができます。適切にメンテナンスされたスロープは、誰もが自由に自信を持って移動できることを保証し、空間のアクセシビリティと移動性を向上させます。
一般的な用途
スロープは非常に汎用性が高く、住宅と商業施設の両方に最適です。住宅では、異なる床材間のスムーズな移動を可能にし、商業施設では、移動に困難を抱える方を含むすべての人々のアクセシビリティを確保します。これらの一般的な用途を理解することで、ニーズに最適なスロープソリューションを選ぶことができます。
住宅用フローリングソリューション
安全でアクセスしやすい住環境を作るには、異なる床材間のスムーズな変化が不可欠です。スロープは、特にフローリングからタイル、カーペットからコンクリートへ移る際に、つまずきの危険性を効果的に軽減します。通常、2.5~5cm程度の高低差にはスロープが適しており、急な階段よりも安全な緩やかな傾斜部分を確保できます。
住宅用スロープの一般的な用途は次のとおりです。
- 玄関: タイルの端が堅木やカーペットと接する出入り口のアクセシビリティを向上させます。
- バスルームへのアクセス: 異なる床材間を安全に移動し、移動を容易にします。
- ガレージエントリー: コンクリートと他の床材が接する部分に滑らかな入口を作成します。
- リビングエリア: さまざまな床スタイルの部屋間のシームレスな流れを実現します。
Schluter®-RENO-RAMPは、ADA(米国障害者法)に準拠しながら住宅用に設計された優れた選択肢です。これらのスロープは様々な素材と幅5~6インチ(約13~15cm)のラインナップがあり、歩行者を効果的に通行させます。スロープのエッジをわずかに内側に傾けて設置することで安定性が向上し、清掃には非研磨性の素材を使用することでスロープの美観を保てます。様々なデザインの好みやニーズに合わせて、様々なプロファイルをご用意しています。
商業スペースのアクセシビリティ
安全でアクセスしやすい環境づくりは、住宅空間だけでなく、人通りの多い商業施設にも当てはまります。パン屋、病院、小売店といった賑やかな場所では、商業用スロープの設置が不可欠です。これらのスロープは、カートのスムーズな乗り換えを可能にし、ADA(アメリカ障害者法)のアクセシビリティ基準を満たすのに役立ち、誰もが快適に空間内を移動できるようにします。
スロープを設置することで、つまずきの危険性を大幅に軽減し、従業員と顧客の両方を事故から守ります。これは、常に安全を最優先に考えなければならない、通行量の多いエリアでは特に重要です。さらに、スロープはタイルの端の欠けを防ぎ、人の往来や機器の移動が多い環境でも床を保護することができます。
さらに、商業用スロープを設置することで、移動に困難を抱える方々のアクセシビリティが向上し、よりインクルーシブで魅力的なビジネス空間を実現できます。Schluter®-RENO-RAMPのような製品は、様々な床材に対応できるよう特別に設計されており、床材の設置にプロフェッショナルな仕上がりを提供します。スムーズな移動とアクセシビリティ基準への準拠を最優先することで、居心地の良い空間を創造するだけでなく、誰もが自由に移動できる環境を育むことができます。
成功のための専門家のヒント
スムーズな階の移動を可能にするスロープの設置は、アクセシビリティと安全性に大きな違いをもたらします。スロープの設置を効果的かつ耐久性のあるものにするために、以下の専門家のヒントを参考にしてください。
- 幅は重要スロープの幅は5~6インチ(約13~15cm)を目指してください。この幅は、乗り換え時の安定性と安全性を確保し、誰もがスムーズに移動できるようにします。
- エッジに角度をつけるスロープの端を10~15度の内側にカットします。これにより、スムーズな乗り換えが可能になり、つま先をぶつけるリスクが軽減され、ユーザーの安全性が向上します。
- 強さで安全を確保薄型モルタル、釘、接着剤を組み合わせて、スロープを下地に固定します。この方法により、日常的な使用にも耐えられる強固な接着が保証されます。さらに強度を高めるために、アンカー脚を追加することもお忘れなく。
- グリップ用の溝: ランプボードに溝を刻み、床面への固定力を高めました。これにより、経年変化によるズレを防ぎ、安定した移動を実現します。
スロープに摩耗や損傷の兆候がないか、定期的に点検してください。問題があれば迅速に対処することで、スロープの安全性と機能性を維持できます。また、一体型ジョイントスペーサーをご使用の場合は、位置合わせとサポートを向上させるために、正しく取り付けられていることを確認してください。
よくある質問
リノランプとは何ですか?
凹凸のある床の対策には、Reno Ramp が頼りになります。つまずき防止やタイルのエッジ保護など、多くのメリットがあります。様々な素材からお選びいただけるので、耐久性とスタイリッシュさを兼ね備えています。設置も簡単なので、空間をグレードアップしたい方ならどなたでも簡単に設置できます。パン屋でも病院でも、Reno Ramp があればスムーズな段差解消とスムーズな移動が実現します。
床の高さをどのように切り替えますか?
階高の切り替えをご検討の際は、安全かつスムーズな移動を保証するアクセシビリティソリューションをご検討ください。スムーズな移動のために、緩やかな傾斜のスロープの設置もご検討ください。美観を考慮し、インテリアに調和する素材を選びましょう。高さの差を正確に計測し、スムーズな切り替えが行えることを確認してください。こうすることで、機能性とスタイルを兼ね備えた、居心地の良い空間を実現できます。