Imagine transforming your dull cement floor into a stunning tile masterpiece. It sounds like a dream, right?
But here’s the exciting part: You can do it yourself, and it might be easier than you think. Whether you’re looking to refresh your kitchen, bathroom, or any other space, laying tile on a cement floor can elevate the entire room.
But how do you start? What tools do you need? And how can you ensure the tiles last for years without cracking or shifting? By mastering this skill, you’re not just upgrading your home; you’re also boosting its value. In this guide, you’ll discover step-by-step instructions, expert tips, and insider secrets to get it right the first time. Ready to roll up your sleeves and start your project? Let’s dive into the world of tiling and unlock the potential of your floors.
 床: Step-by-Step Guide”/>
Choosing The Right Tiles
Ceramic tiles are popular for their durability. They are suitable for kitchens and bathrooms. Porcelain tiles are denser and less porous. They resist moisture and stains well. Glass tiles add elegance and are easy to clean. They are perfect for walls and backsplashes. Stone tiles offer natural beauty and texture. They are great for patios and living rooms. Each type has unique features. Choose based on your needs and style.
Tile Size And Design
Small tiles create intricate patterns. They make rooms look spacious. Large tiles provide a sleek look. Less grout lines mean easier cleaning. Square tiles are classic and versatile. Rectangular tiles can elongate spaces. Colors and patterns enhance the room’s vibe. Neutral colors are timeless. Bold colors make a statement. Consider the room’s lighting. Bright tiles lighten dark spaces. Mix sizes and designs for a unique look.
必要なツールを集める
Start with a メジャーテープ. It helps to measure the floor. A ノッチ付きこて is needed to spread the adhesive. A tile cutter is essential. It cuts tiles to the right size. スペーサー ensure even gaps between tiles. Use a ゴムハンマー to tap tiles into place. A sponge cleans excess adhesive. A level keeps tiles straight.
Use a tile saw for cutting tough tiles. A tile leveling system can help prevent uneven tiles. A laser level ensures perfect alignment. Knee pads protect your knees while working. A mixing paddle helps mix adhesive smoothly. A バケツ is handy for holding water or mix. Having these tools can make the job easier and faster.
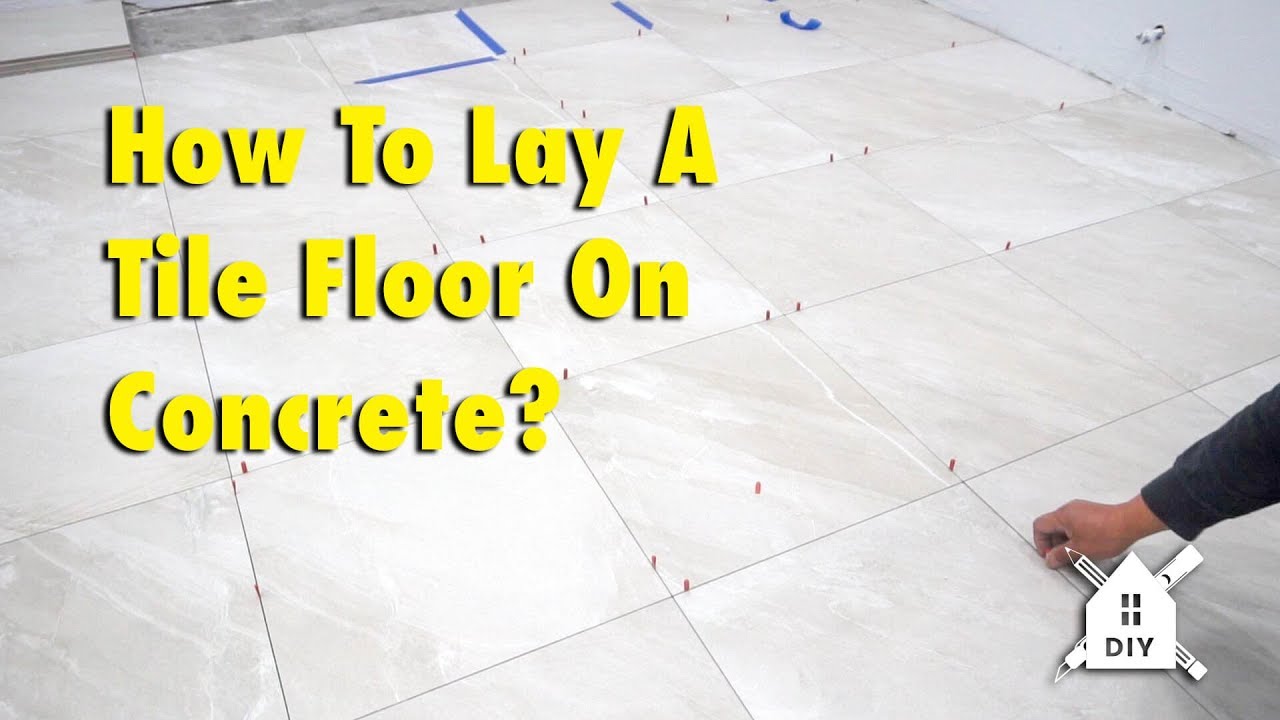
Preparing The Cement Floor
First, you need to make the floor clean. Remove all dirt and dust. Use a broom or a vacuum cleaner. A clean floor helps tiles stick well. Wet the floor with water. Scrub with a brush to remove stains. Let it dry completely. A dry floor prevents tile damage.
Check the floor for cracks and holes. Use a filler to fix them. Mix the filler according to instructions. Apply it with a trowel. Smooth it out with a spatula. Let it dry properly. A smooth surface is essential for tiles.
A level floor is important for tiling. Use a レベリングコンパウンド. Mix it as per the guide. Pour it on the floor. Spread it evenly with a trowel. Check with a level tool. A level floor ensures tiles lay flat. Let it dry before tiling.
Planning The Layout
Start by measuring the room. Use a tape measure to find the length and width. Write these numbers down. Multiply them to get the total square footage. This helps you know how many tiles you need. Be sure to measure corners and odd spaces. Keep track of any changes in width or length. This ensures you have enough tiles for the entire area. Avoid mistakes by double-checking measurements. Accuracy is important. A small error can cause big problems later.
Mixing The Adhesive
Picking the right adhesive is crucial. Tiles need strong support. Use cement-based adhesive for cement floors. It holds tiles firmly. Check the adhesive label before buying. Some are for specific tiles. Others work for all types.
First, gather your mixing tools. You need a bucket and a paddle mixer. Start by pouring water into the bucket. Add adhesive powder slowly. Stir the mix with the paddle. Keep mixing until smooth. No lumps should be present. The paste should be like peanut butter. Thick, but easy to spread.
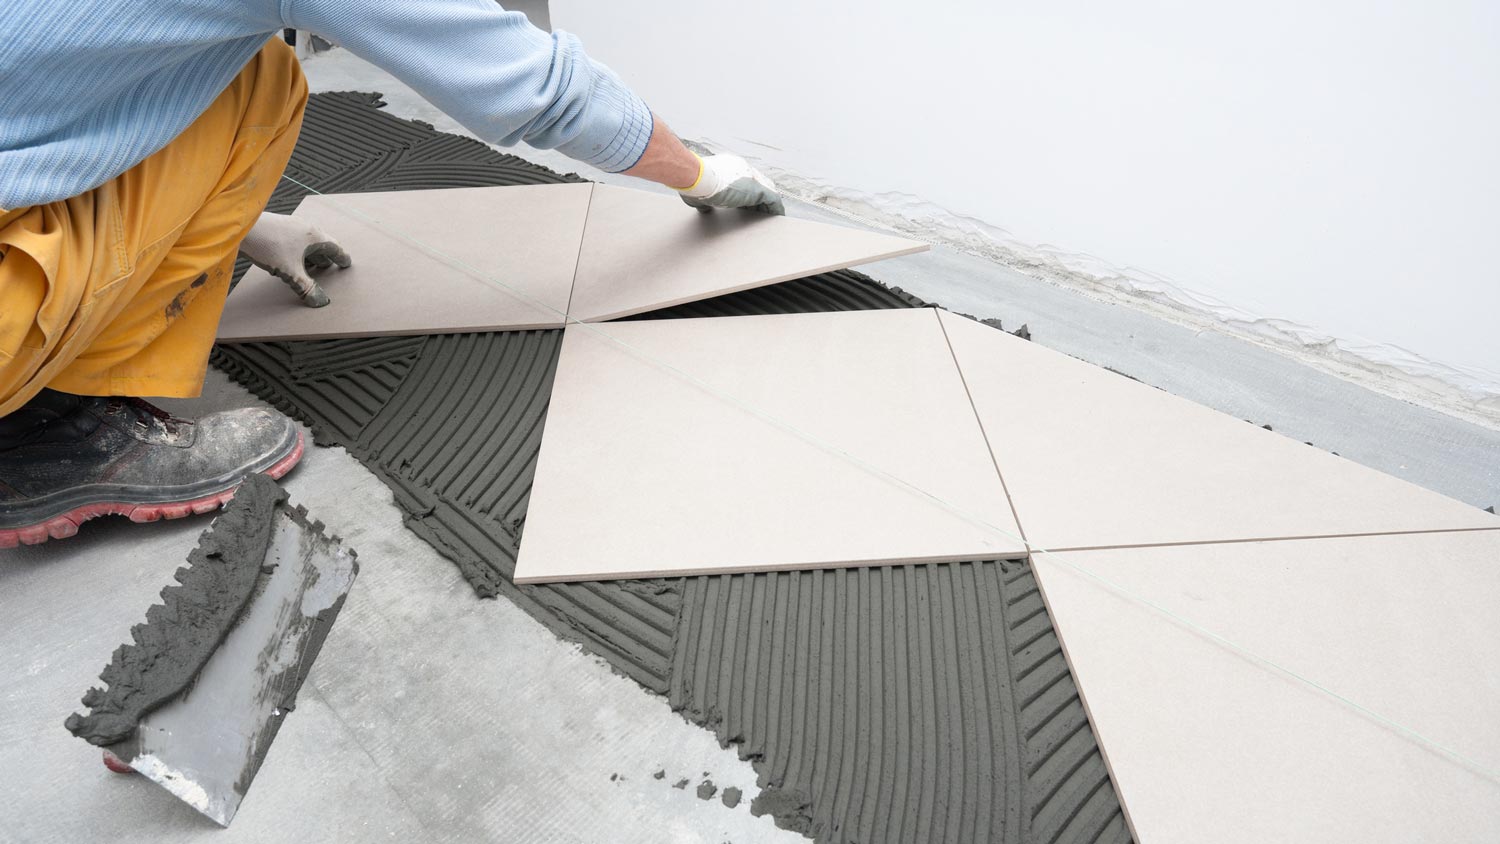
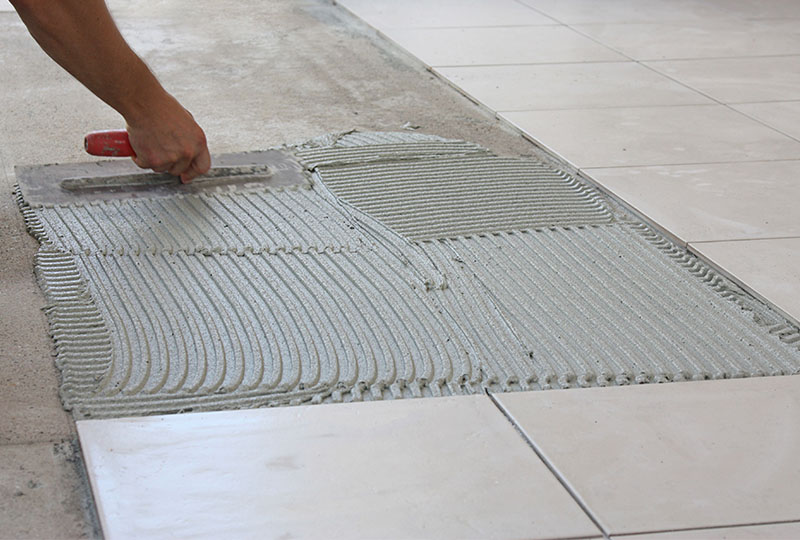
Installing The Tiles
Spread the 接着剤 on the floor. Use a notched trowel. The trowel helps make the adhesive even. Work in small areas. This keeps the adhesive from drying out. Press the trowel at a 45-degree angle. This creates grooves. Grooves help the tiles stick better. Be careful not to spread too much. Less is more here.
Start placing tiles in the corner. Press each tile firmly into the adhesive. Make sure each tile is even. Use a level to check. Adjust if needed. Work one tile at a time. This keeps things straight. Double-check your pattern as you go. Mistakes are hard to fix later.
Put tile spacers between each tile. Spacers keep tiles evenly spaced. This helps when grouting later. Use small spacers for tight lines. Use big spacers for wider lines. Spacers are easy to remove. Just pull them out after tiles set.
Cutting Tiles To Fit
Always use the right tools for cutting tiles. A tile cutter is essential. It’s easy to use. A wheel blade scores the tile. You then snap it. For tough cuts, use a wet saw. It cuts through thick tiles. Safety gear is important too. Wear 手袋 そして ゴーグル. Protect your hands and eyes. Keep tools clean. Dirty tools don’t cut well. Check blades often. Replace if dull. Proper tools make the job easier.
Precision is key in tile cutting. Mark the tile with a pencil. Draw lines where you need cuts. Use a ruler for straight lines. Cut slowly. Don’t rush. A steady hand keeps cuts clean. For curves, a tile nipper is handy. Take small bites. Check your work as you go. Adjust if needed. Practice on spare tiles. Gain confidence. Precise cuts make the floor look neat.
Grouting The Tiles
Picking the right grout color is important. Grout can change the look of tiles. Bright colors make tiles stand out. Dark colors make them blend in. Grout colors can match or contrast tiles. For modern rooms, gray or beige works well. White grout looks clean but shows dirt. Test grout colors before deciding. Sample colors on a small tile area. This helps see how they look together.
Grout should be spread evenly. Use a rubber float to apply it. Press grout firmly into spaces. Make sure all gaps are filled. Wipe off extra grout quickly. Use a damp sponge for cleaning. Be careful not to remove grout from gaps. Rinse sponge often to keep it clean. Let grout dry fully before walking on tiles. Drying can take a day or two. Follow grout package instructions.
Sealing And Finishing
Applying sealant and finishing the tile surface ensures durability and a polished look. Sealant prevents moisture damage, while finishing enhances tile color and texture. Proper sealing and finishing protect the tiles, extending their lifespan and maintaining their beauty.
Applying Sealant
Sealant keeps tiles safe from water. Choose a good quality sealant. Read instructions on the bottle. Clean the tile surface first. Use a clean cloth to wipe. Make sure tiles are dry. Pour a small amount of sealant into a tray. Use a brush or roller. Apply evenly over all tiles. Start at one corner. Work across the floor. Cover every tile. Avoid leaving gaps. Let the sealant dry completely. Check the drying time on the bottle. Some sealants dry fast. Others take longer.
Final Touches
After drying, inspect the tiles. Look for any missed spots. Apply sealant again if needed. Ensure every tile has sealant. Clean tools used for sealing. Store leftover sealant safely. Make sure the floor is ready for use. Walk on the tiles carefully at first. Enjoy your new tile floor. It should last a long time. Keep it clean and dry.
メンテナンスのヒント
Proper preparation of the cement floor is essential for laying tiles. Clean the surface and ensure it’s smooth. Use a quality adhesive to secure tiles in place. Allow sufficient drying time to prevent shifting.
Cleaning Routine
Regular cleaning keeps your tile floor looking fresh. Sweep the floor daily to remove dust. Use a damp mop once a week to clean it. A mild cleaner works best. Avoid harsh chemicals that can damage tiles. Spot cleaning is important for spills. Wipe them immediately with a soft cloth.
Preventing Damage
Protecting your tile floor is crucial. Place mats at entrances to trap dirt. Use felt pads under furniture legs to prevent scratches. Heavy items can crack tiles if dropped. Be careful when moving furniture. Avoid dragging heavy items across the floor. Keep pets’ nails trimmed to prevent scratching.
よくある質問
What Tools Do I Need To Lay Tile?
To lay tile on a cement floor, you’ll need a trowel, tile spacers, a tile cutter, and a level. Also, have grout, adhesive, and a rubber float. Safety gear like gloves and goggles is essential. Prepare your tools before starting to ensure a smooth tiling process.
How Do I Prepare A Cement Floor?
First, clean the cement floor thoroughly to remove debris and dust. Next, ensure the surface is level and smooth. Repair any cracks or holes. Apply a primer if needed to improve adhesion. Proper preparation of the cement floor ensures a long-lasting tile installation.
Can I Lay Tile Over Old Cement?
Yes, you can lay tile over old cement floors. Ensure the surface is clean and level. Remove any loose tiles or adhesive. Repair cracks or damages. Use a suitable adhesive to ensure proper bonding. Proper preparation is key to successful tiling over old cement.
How Long Does Tile Adhesive Take To Dry?
Tile adhesive typically takes 24 to 48 hours to dry completely. The drying time can vary based on temperature and humidity. It’s crucial to wait before walking on the tiles or grouting. Following the manufacturer’s instructions ensures optimal adhesion and durability.
結論
Laying tile on a cement floor is straightforward. Start with planning. Choose quality materials for lasting results. Measure carefully for a perfect fit. Prepare the cement floor well. Clean and smooth it thoroughly. Use mortar to set tiles securely. Space them evenly for a neat look.
Allow time for drying before grouting. Seal the tiles to protect them. Maintenance is easy with regular cleaning. Follow these steps for a beautiful tile floor. Enjoy your new space! With patience and care, anyone can lay tile. Transform your floor with this DIY project.