To install vinyl flooring in three simple steps, start by preparing your subfloor—make sure it’s clean, dry, and level, and fix uneven spots with a leveling compound. Next, unroll the vinyl to acclimate, measure carefully, and cut along straight lines using a sharp utility knife for clean edges. Finally, seal the cut edges with a clear vinyl sealant to protect against moisture and wear. Following these basics sets you up for a successful, long-lasting floor; there’s more to explore for a professional finish.
床下地の準備
Before laying vinyl 床材, you need to verify the subfloor is clean, dry, and level. Start by removing debris and vacuuming thoroughly to clear dust and dirt. Check for moisture using a moisture meter; excessive dampness can ruin your flooring. If needed, apply a moisture barrier installation to prevent future damage. Use self-leveling compound on uneven spots to create a flat surface. Sand any high areas and fill gaps or cracks with patching compound. These subfloor preparation techniques verify your vinyl lays flat and lasts long. Take your time here—proper prep gives you the freedom to enjoy a flawless finish without worrying about wrinkles or bubbles later. A well-prepared subfloor is the foundation of your successful vinyl flooring project.
Lay and Cut the Vinyl
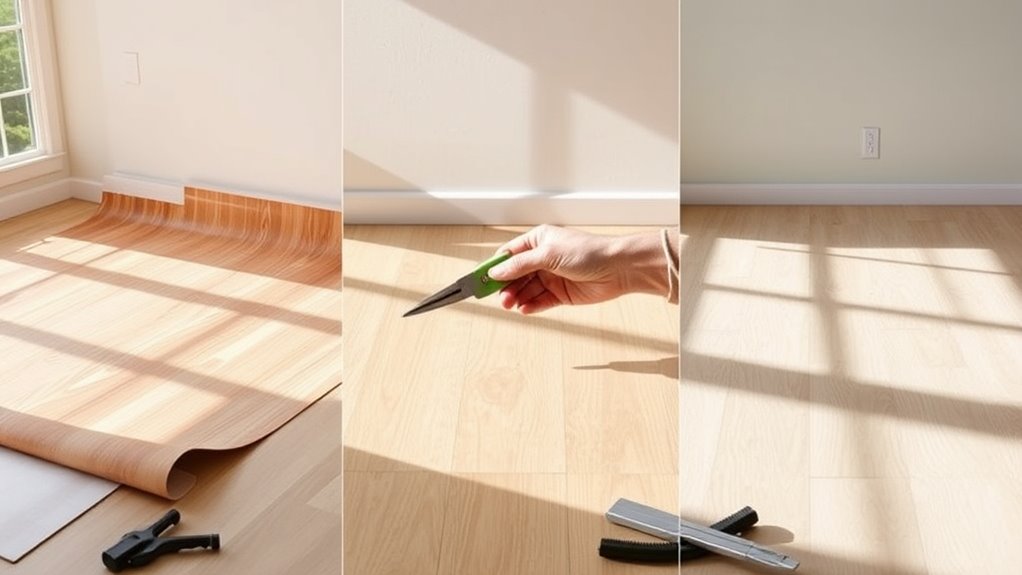
Once your subfloor is fully prepared, you can start laying the vinyl by unrolling it and letting it acclimate to the room temperature for at least 24 hours. This prevents shrinking or buckling later. Use precise laying techniques to guarantee the vinyl lies flat and smooth. When you’re ready to cut, grab sharp cutting tools like a utility knife or vinyl cutter for clean edges.
Keep these points in mind:
- Measure and mark carefully before cutting
- Cut slowly along straight lines or templates
- Use a straightedge to guide cuts
- Leave a small expansion gap around the perimeter
Seal and Finish the Edges
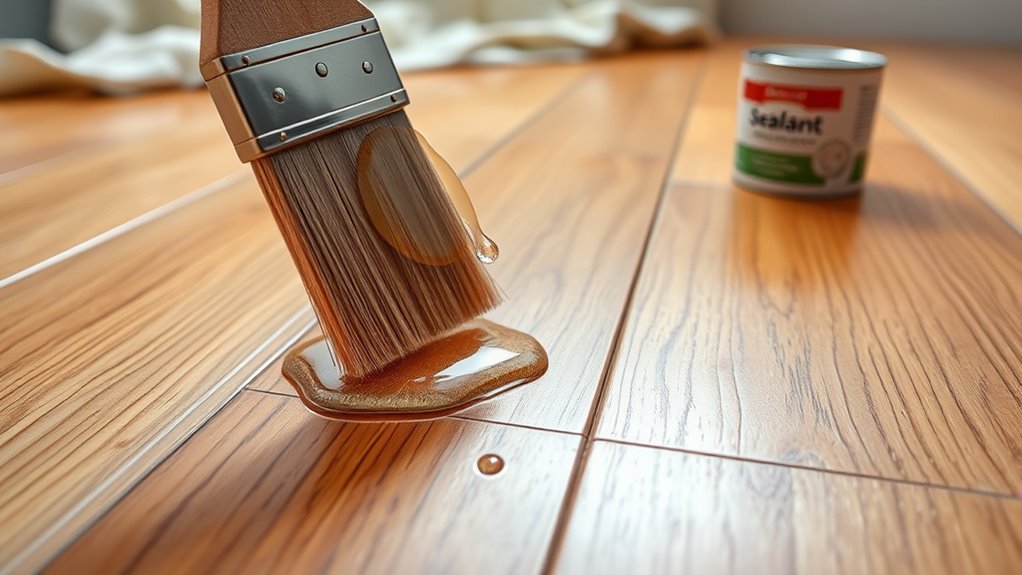
After laying and cutting your vinyl, you’ll need to seal and finish the edges to protect them from moisture and wear. Start by cleaning the edges thoroughly, removing any dust or debris. Use a clear vinyl edge sealer or a compatible adhesive as part of your edge sealing techniques to create a waterproof barrier. Apply it evenly along the cut edges with a small brush or applicator. For vinyl edge treatments, consider installing passage strips or trim molding at doorways and along walls to secure edges and enhance appearance. Allow the sealant to dry completely before walking on the floor. Proper edge sealing not only extends your vinyl flooring’s lifespan but also preserves its look, giving you the freedom to enjoy a durable, low-maintenance surface without worry.