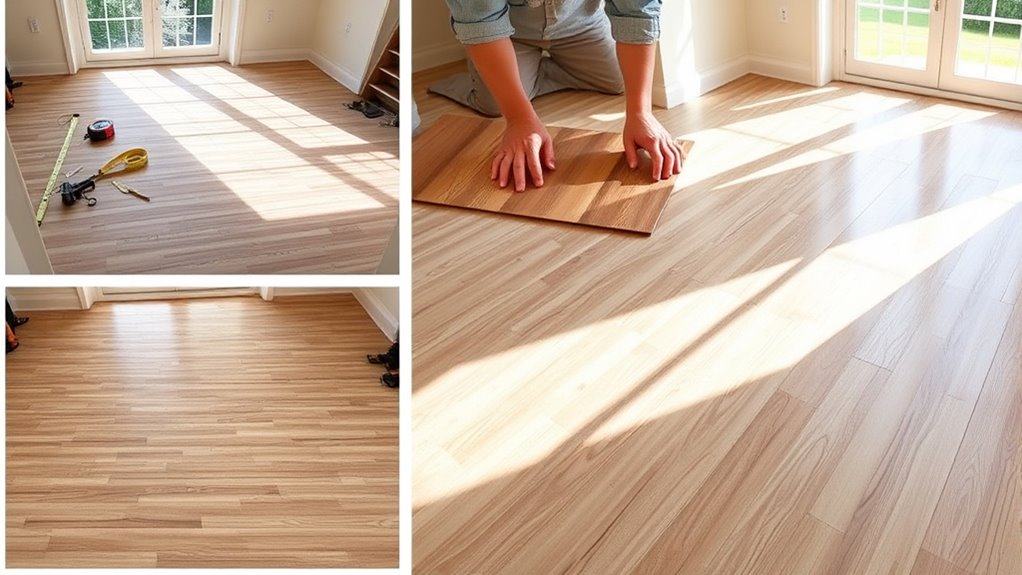
Installing vinyl plank flooring typically takes several hours, depending on your room size and prep work. You’ll start by gathering tools and materials, then prepare a clean, level subfloor. Acclimate the planks for 48 hours before measuring and planning your layout. Cutting and installing each row carefully guarantees a tight fit, with spacers for expansion gaps. Finally, you’ll finish with baseboards and cleanup. Follow these steps closely, and you’ll understand the process from start to finish.
Gathering Materials and Tools
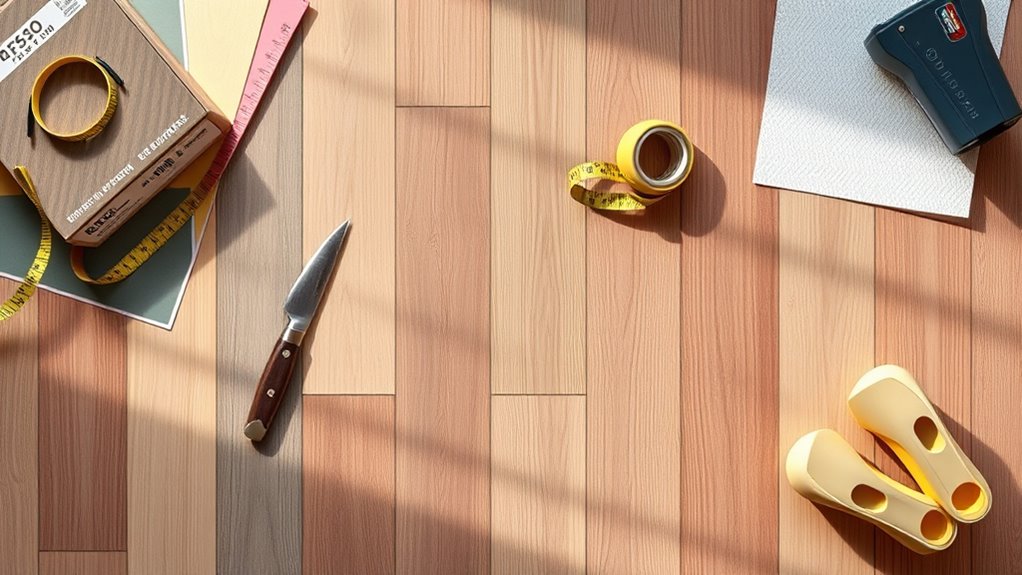
Before you begin installing vinyl plank flooring, you’ll need to gather all necessary materials and tools to guarantee a smooth process. Start by selecting the appropriate vinyl type for your space—options include glue-down, click-lock, and loose lay. Each type requires slightly different handling, so knowing which one suits your needs is essential. Key tools include a utility knife for precise cuts, a tape measure for accurate measurements, spacers to maintain expansion gaps, a tapping block, and a rubber mallet to secure planks without damage. Additionally, a straightedge or carpenter’s square will help confirm straight cuts and alignment. Having these materials and tools ready will streamline your installation, giving you the freedom to work efficiently without interruptions or delays.
床下地の準備
A clean, level subfloor is critical for a successful vinyl plank installation. Begin by identifying your subfloor type—commonly plywood, concrete, or existing vinyl. Each requires specific preparation steps. Remove debris, nails, or adhesive residues to create a smooth surface. Conduct moisture testing regardless of subfloor type; moisture can cause warping or adhesive failure. For concrete, use a moisture meter or perform a plastic sheet test to detect dampness. If moisture levels exceed manufacturer recommendations, address the issue before proceeding. Check for uneven areas with a level; fill low spots with patching compound and sand rough patches. Ensuring your subfloor is dry, flat, and secure provides the freedom to lay vinyl planks confidently, avoiding future problems and ensuring a durable, attractive 床.
Acclimating the Vinyl Planks
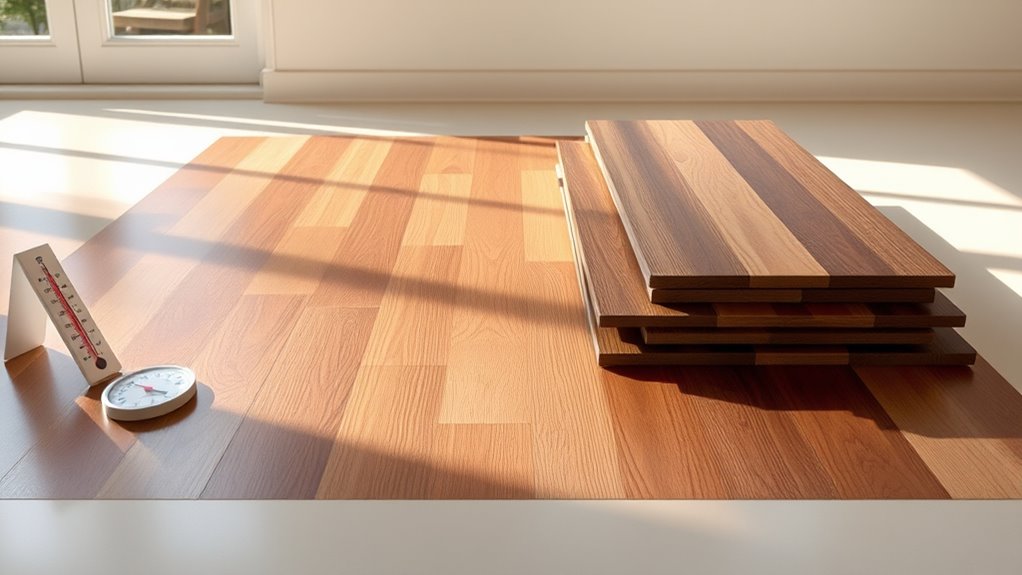
Before installation, you need to acclimate the vinyl planks to your room’s temperature and humidity to prevent expansion or contraction after laying. Place the unopened planks flat in the installation area for at least 48 hours. This step guarantees dimensional stability and a smooth installation process.
順応の重要性
Why is acclimation essential when installing vinyl plank flooring? Acclimation benefits include moisture reduction and dimensional stability, preventing warping or buckling after installation. By allowing planks to adjust to the room’s temperature and humidity, you guarantee the flooring performs as intended, maintaining its durability and appearance.
| Acclimation Benefits | Impact on Flooring |
|---|---|
| Moisture Reduction | Prevents expansion/shrinkage |
| Temperature Adjustment | Guarantees proper fit |
| Dimensional Stability | Avoids gaps and buckling |
| Enhanced Adhesion | Promotes secure installation |
Skipping acclimation risks damage and shortens flooring lifespan. To achieve freedom from future issues, always prioritize this step before installation.
Recommended Acclimation Time
Since vinyl planks need time to adjust to their environment, you should acclimate them for at least 48 hours prior to installation. Lay the unopened boxes flat in the room where they’ll be installed, maintaining normal temperature and humidity levels. This acclimation period allows the vinyl to stabilize, minimizing vinyl expansion or contraction after installation. The acclimation benefits include preventing gaps, buckling, and guaranteeing a longer-lasting floor. If conditions vary considerably, extend acclimation to 72 hours. Avoid exposing planks to extreme temperatures or moisture during this time, as it can distort the material. Proper acclimation is crucial for a smooth, professional finish and preserves the freedom to enjoy your new floor without future issues. Don’t rush this step—it guarantees your vinyl planks perform effectively.
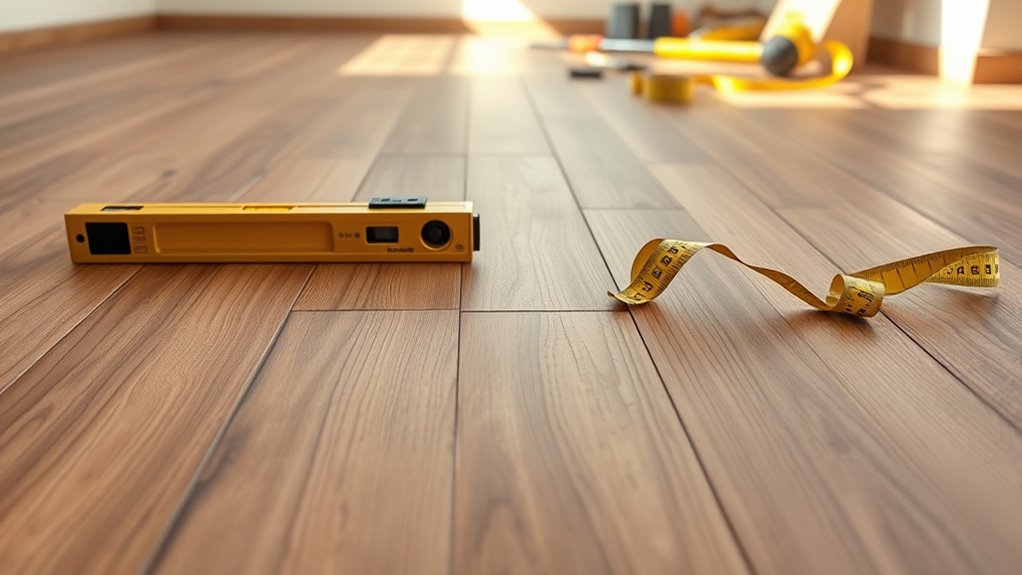
Measuring and Planning the Layout
First, measure the room accurately to determine the total square footage and identify any irregularities. Next, choose your starting point carefully, typically along the longest, straightest wall. Finally, plan the plank orientation to guarantee a balanced layout and minimize visible seams.
Accurate Room Measurements
Accurate measurements are essential to guarantee your vinyl plank flooring fits perfectly and minimizes waste. Start by capturing precise room dimensions—length, width, and any alcoves or recesses. Use a reliable tape measure and record measurements twice to avoid errors.
Keep these tips in mind:
- Measure each wall separately for accurate dimensions
- Note doorways, vents, and obstacles that affect layout
- Calculate total square footage to estimate material needs
- Account for expansion gaps as per manufacturer guidelines
- Sketch the room layout to visualize plank placement
Identifying Starting Point
With your room measurements complete, pinpointing the best starting point sets the foundation for a seamless vinyl plank installation. Begin by examining your starting point options: typically, you’ll choose either along the longest straight wall or the most visible area. This decision influences your floor layout and minimizes awkward cuts. Use a chalk line to mark your starting line, ensuring it’s perfectly straight and parallel to the chosen wall. Confirm that the first row of planks will be uniform in width, adjusting the line if necessary to avoid narrow strips at edges. This precise planning prevents installation issues and enhances the overall appearance. Taking time now to identify the ideal starting point streamlines your workflow and supports a professional, clean finish.
Planning Plank Orientation
Since plank orientation affects both aesthetics and structural integrity, you’ll need to measure your space carefully and plan the layout accordingly. Proper planning guarantees your vinyl plank flooring looks seamless and lasts longer. Focus on these key steps before starting:
- Measure room dimensions accurately to minimize waste.
- Choose plank patterns that complement room shape and lighting.
- Align planks parallel to the longest wall for a natural flow.
- Consider installation techniques like staggered seams to enhance stability.
- Plan for expansion gaps around edges per manufacturer guidelines.
Cutting the Vinyl Planks to Size
Measure each vinyl plank carefully before cutting to guarantee a precise fit around corners and edges. Use a tape measure to mark the exact length needed, ensuring measuring accuracy to prevent gaps or overlaps. Employ reliable cutting techniques such as scoring with a utility knife and snapping the plank along the score line for clean cuts. For intricate cuts around door jambs or vents, use a jigsaw or fine-tooth saw to maintain control and avoid chipping. Always double-check measurements before cutting to minimize waste and maintain a seamless appearance. Proper cutting techniques combined with precise measuring accuracy will give you freedom to customize your flooring layout perfectly, ensuring each plank fits snugly without unnecessary adjustments later.
Installing the First Row
After cutting your vinyl planks to the correct size, you’ll want to begin laying the first row along the longest, straightest wall in the room. Ensuring precise first row alignment is essential, as it sets the foundation for the entire floor. Remember to leave an expansion gap around the perimeter to accommodate plank expansion due to temperature and humidity changes.
Begin your vinyl plank installation along the longest, straightest wall, leaving an expansion gap for proper flooring movement.
Follow these steps for installing the first row:
- Position the first plank with the tongue side facing the wall.
- Maintain a consistent expansion gap (typically 1/4 inch) using spacers.
- Lock each subsequent plank securely into place.
- Check straightness frequently with a chalk line or level.
- Trim the last plank of the row as needed for a perfect fit.
This approach guarantees a solid, free-moving floor installation.
Completing the Remaining Rows
Continue laying the vinyl planks row by row, guaranteeing each plank locks securely into the previous one. Maintain consistent row alignment to prevent gaps and guarantee a smooth surface. Use precise installation techniques like tapping with a rubber mallet to secure joints without damaging the planks. Stagger end joints by at least 6 inches for structural stability and visual appeal. Measure and cut planks as needed to fit edges without forcing.
| ステップ | 必要なツール | ヒント |
|---|---|---|
| Lock plank edges | Rubber mallet | Tap gently to avoid damage |
| Check row alignment | Straightedge | Maintain consistent spacing |
| Stagger joints | メジャーテープ | Offset by 6+ inches |
Following these steps grants you freedom to finish with precision and confidence.
Finishing Touches and Cleanup
Once all planks are securely installed, focus on finishing touches to confirm durability and a polished appearance. Proper cleanup and attention to detail guarantee your flooring lasts and looks professional. Follow these steps for effective finishing touches and cleaning tips:
After installation, prioritize finishing touches and thorough cleaning for a durable, professional-looking floor.
- Install baseboards or quarter-round molding to cover expansion gaps.
- Seal any seams or edges if recommended by the manufacturer.
- Inspect for loose planks and secure them immediately.
- Remove adhesive residue or dirt with a damp cloth and mild cleaner.
- Vacuum and mop the floor using a vinyl-safe cleaner to remove dust and debris.