Are you ready to transform your bathroom into a stunning space? Laying floor tiles can make a huge difference in both style and functionality.
Imagine stepping into a bathroom that not only looks amazing but also feels fresh and clean every day. Whether you’re upgrading your bathroom or starting from scratch, learning how to lay floor tiles is a skill that will pay off.
With the right approach, you can achieve professional-looking results without breaking the bank. This guide is designed to empower you with simple steps and tips to make your tiling project a success. You’ll find that tiling your bathroom floor is not only doable but also satisfying. Let’s dive in and discover how you can create the bathroom of your dreams with perfectly laid floor tiles. Keep reading to unlock the secrets to mastering this DIY project!

Preparation And Planning
Planning the layout is crucial for bathroom tile installation. Gather all necessary tools and materials beforehand. Accurate measurements and surface preparation ensure a smooth and successful tiling process.
Choosing The Right Tiles
Picking the perfect tiles is important. Piastrelle should be water-resistant E easy to clean. Ceramic and porcelain are good choices. They come in many colors E patterns. Choose a style that matches your bathroom. Consider the size of the tiles too. Large tiles make small bathrooms look bigger.
Gathering Necessary Tools And Materials
You need tiles, adesivo per piastrelle, E malta. Also, get a tile cutter, metro a nastro, E livello. A cazzuola dentata E martello di gomma are helpful. Don’t forget sponges E buckets for cleaning. Wear occhiali di sicurezza to protect your eyes.
Measuring The Bathroom Space
Measure your bathroom with a metro a nastro. Note the length E width. Multiply to find the area. This tells you how many tiles to buy. Add 10% more for mistakes or cuts. Don’t forget to measure around toilets E sinks. Plan where the tiles will go.
Preparazione del pavimento
Preparing the bathroom floor for tile involves cleaning and leveling the surface. Ensuring a smooth base avoids tile shifts. Proper installation requires measuring and cutting tiles accurately for a seamless finish.
Removing Old Flooring
Begin by taking out the old tiles. Use a chisel E martello. Wear gloves to protect hands. Dispose of the debris properly. Ensure all tiles are removed completely. Check for stubborn pieces. These need extra care.
Cleaning And Leveling The Surface
Sweep the floor thoroughly. Remove dust E debris. Utilizzare un vuoto for stubborn dirt. Next, check for uneven spots. Use a composto livellante. Apply it to any dips. Make sure the surface is smooth. This helps tiles stick better.
Repairing Subfloor Issues
Inspect the subfloor for damages. Look for crepe E holes. Use a repair kit. Follow instructions carefully. Fill cracks and holes. Let the repair dry fully. A solid subfloor is crucial. It supports your new tiles well.
Laying Out The Design
Begin by placing tiles on the floor without glue. This helps see how they fit. Adjust tiles until they look good. Space tiles with small plastic spacers. This keeps gaps even. Check corners for tight fits.
Find the middle of the bathroom. Use a tape measure to find the center of each wall. Draw lines from one wall to another. The lines cross at the center point. This point is important. It helps align tiles correctly.
Start laying tiles from the center point. Work outward to the walls. This makes sure tiles are straight. Plan ahead so you have no tiny tiles at the edges. Tiny tiles can look bad. Cut tiles to fit well. Measure twice, cut once.

Mixing And Applying Adhesive
Selezione del correct adhesive is crucial. Look for one made for bathroom floors. It should be water-resistant E strong. Check the label for tile type compatibility. Read reviews and ask experts.
Gather the tools needed. A bucket e un mixing tool are essential. Pour the adhesive into the bucket. Add water gradually. Stir until smooth. Follow the instructions on the package. Don’t rush the process. Ensure there are no lumps.
Use a cazzuola dentata. Spread the adhesive on the pavimento. Keep it even. Cover small areas at a time. Check for lacune O uneven spots. Smooth them out. Ensure the adhesive is ready for tile placement.
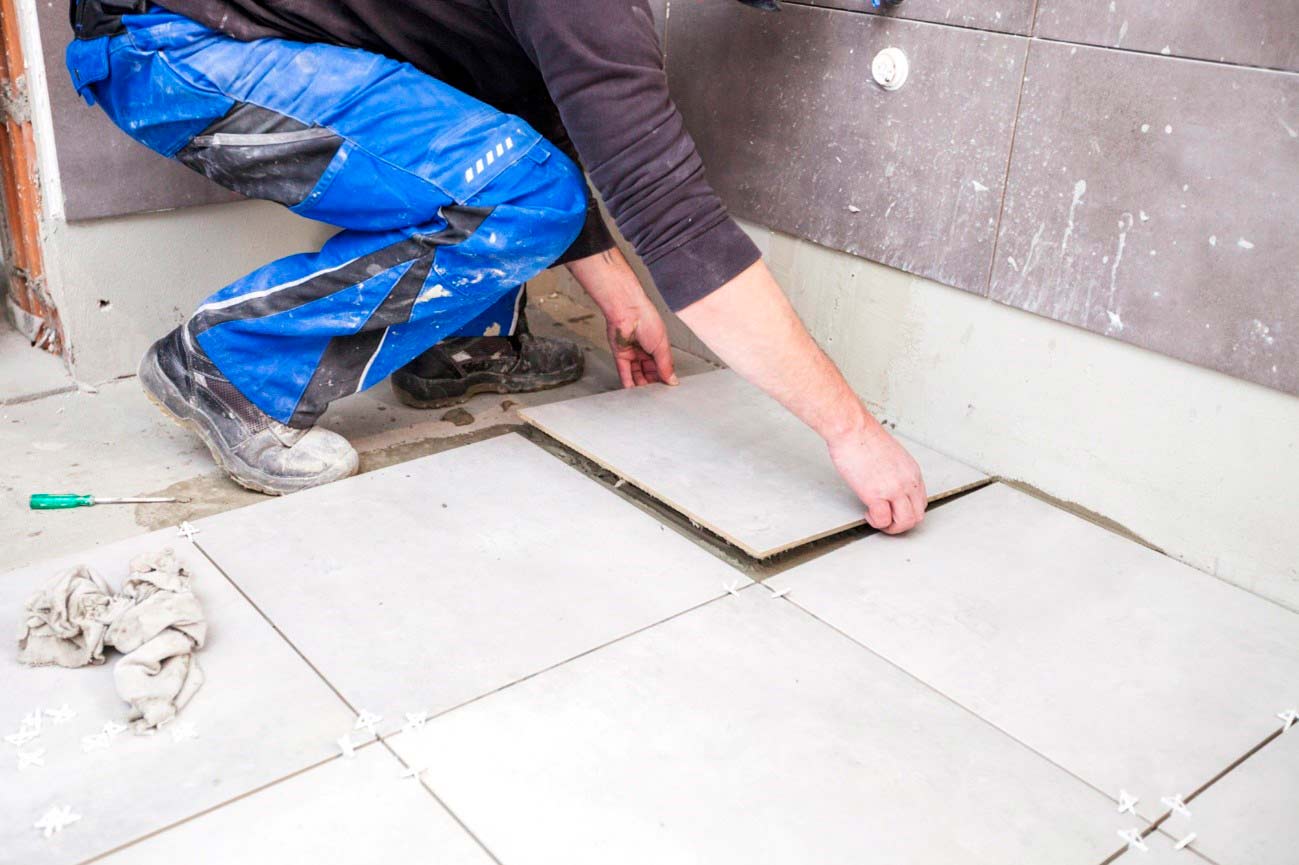
Installing The Tiles
The first tile is very important. Start at the center of the room. This helps with balance. Use a chalk line as a guide. This line helps keep tiles straight. Align the first tile with this line. Press it gently into the adhesive. Make sure it stays even and flat.
Tile spacers help keep gaps even. They make sure tiles don’t touch each other. Place them between each tile. This keeps lines straight. Controllo each tile with a level. Adjust if needed. Spacers make sure grout lines are neat. Remove them before grout dries.
Not all tiles fit perfectly. Some need cutting. Use a tile cutter or saw. Measure the gap first. Mark the tile where it needs cutting. Cut slowly to avoid breaking. Test the fit before placing. Adjust if needed. Edges should look neat and tidy.
Grouting The Tiles
Grouting tiles ensures a smooth bathroom floor. Apply grout evenly between the tiles with a rubber float. Clean excess grout quickly with a damp sponge to prevent stains.
Choosing The Right Grout
Grout holds tiles together. It fills the spaces between them. Choose grout that matches your tile color. Light tiles need light grout. Dark tiles need dark grout. This makes the floor look neat and tidy. Read the grout package. It shows if grout is for wide or narrow spaces. Check if the grout is waterproof. This is important for bathroom tiles.
Applying Grout To Joints
Mix the grout in a bucket. Use a grout float to spread it. Push grout into the spaces between tiles. Hold the float at a 45-degree angle. Make sure all joints are filled. Work in small sections. This helps manage the grout better. Let the grout sit for a few minutes. This helps it set well.
Cleaning Excess Grout
Use a damp sponge to clean extra grout. Wipe the tiles gently. Rinse the sponge often. Do not let grout dry on the tiles. It becomes hard to remove. Check the tiles carefully. Make sure they are clean and shiny. This makes your bathroom look beautiful. Let the grout dry completely before walking on the tiles.
Final Touches
Achieving a professional finish in bathroom tile installation requires careful attention to final touches. Ensure tiles align perfectly and grout evenly fills gaps for a smooth surface. Proper sealing prevents moisture damage, enhancing durability and appearance.
Sealing The Grout
Use a special sealant to protect the grout. This keeps water out. Fare domanda a it with care. Make sure all grout lines are covered. Let it dry fully before using the bathroom. This step helps prevent stains and keeps your tiles looking new.
Inspecting For Flaws
Check the tiles for any cracks or chips. Look closely at each tile. Fix any issues you find. Use a small tool to smooth out any rough edges. Ensure all tiles are firmly in place. This makes your floor safe and looks nice.
Cleaning And Polishing The Surface
Wipe the tiles with a clean cloth. Use a gentle cleaner to remove dust. Polish the tiles to make them shine. This gives the bathroom a bright and fresh look. Pulizia regolare keeps the tiles beautiful and long-lasting.
Suggerimenti per la manutenzione
Sweep the bathroom floor every week. Use a soft broom for best results. Mocio the floor with warm water. Add a mild cleaner for extra shine. Avoid strong chemicals that can harm tiles. Dry the floor with a soft towel.
Macchie can make tiles look dirty. Use a gentle scrub brush on stains. Apply baking soda on tough spots. Let it sit for 10 minutes. Rinse with water and dry. Aceto can also help with stubborn stains. Mix with water for a natural cleaner.
Acqua can damage tiles over time. Check for leaks in the bathroom. Fix them quickly. Use bath mats to absorb water. Wipe spills immediately to protect tiles. Keep bathroom well-ventilated. Open windows or use a fan to reduce moisture.

Domande frequenti
How Do I Prepare Bathroom Floor For Tiling?
Start by cleaning the floor thoroughly. Remove any debris and old flooring. Ensure the subfloor is level and dry. Use a waterproofing membrane to prevent moisture damage. Measure the area carefully to plan tile layout. Proper preparation ensures tiles adhere well and last longer.
What Tools Do I Need To Lay Floor Tiles?
You’ll need a tile cutter, trowel, and spacers. A level and measuring tape are essential for accuracy. Use a rubber mallet for setting tiles. Safety goggles and gloves protect you while working. Having the right tools makes the process easier and efficient.
How Long Does It Take To Tile A Bathroom Floor?
Tiling a bathroom floor typically takes two to three days. Preparation is crucial and may take a day. Laying tiles takes another day. Allow adhesive and grout to dry for 24 hours. Time may vary based on room size and experience level.
Can I Tile Over Existing Bathroom Floor Tiles?
Yes, you can tile over existing tiles if they’re in good condition. Ensure the old tiles are clean and level. Use a bonding agent for better adhesion. This method saves time on tile removal. However, check for structural issues before starting.
Conclusione
Laying bathroom tiles is simple with the right steps. Start with planning. Measure your space carefully. Choose tiles that fit your style and budget. Prepare the floor with care. Use a level and spacers for accuracy. Apply adhesive evenly. Place tiles gently and press down.
Ensure gaps are consistent. Grout and seal for a polished finish. Regular cleaning keeps tiles looking fresh. Enjoy your bathroom’s new look and feel. With patience and precision, anyone can lay tiles successfully. Your bathroom will shine with pride after your hard work.