To fix gaps in your floors, first identify the cause—temperature, humidity, or installation issues. Clean and dry the area thoroughly. For small gaps, use a color-matched wood filler, pressing it firmly to avoid air pockets. Larger gaps may require inserting rope or wood strips, carefully trimmed and secured. For laminate, realign planks or apply specialized fillers. Maintaining proper humidity helps prevent future gaps. If you want effective, lasting repair results, understanding these methods and precautions is key.
Identifying the Cause of Floor Gaps

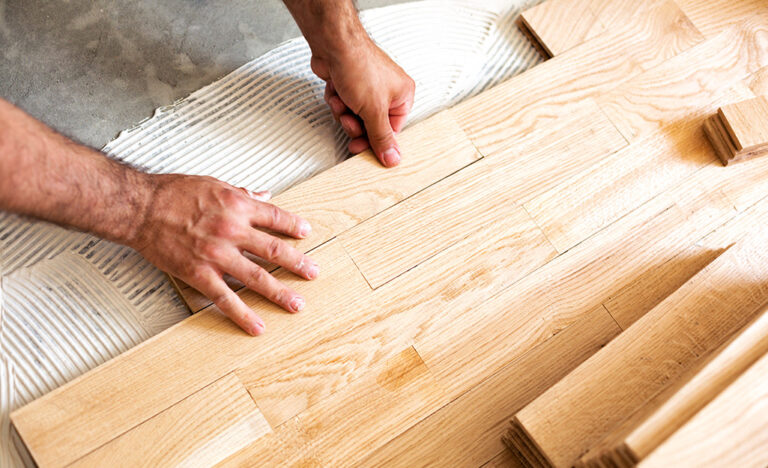
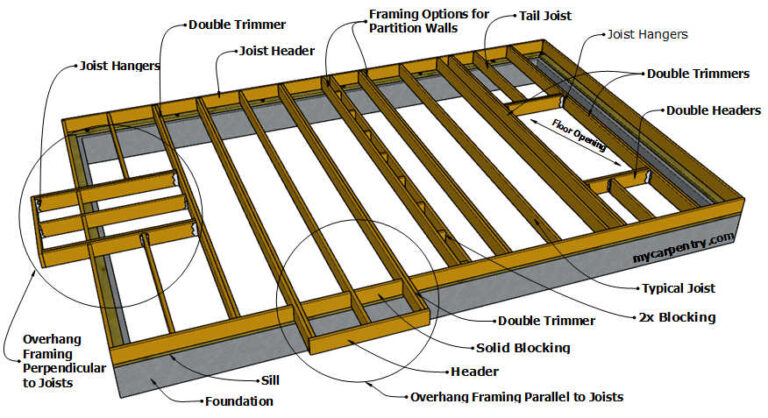
Before you can effectively repair gaps in your floors, you need to determine what’s causing them. The primary causes of gaps often stem from floor movement, which can result from fluctuations in humidity, temperature changes, or structural shifts in your home’s foundation. Wood floors expand and contract naturally, so seasonal moisture variations lead to visible spacing. Additionally, improper installation or subfloor issues might contribute to persistent gaps. By understanding these causes of gaps, you can tailor your repair approach to address the root problem rather than just the symptoms. Assess whether the gaps appear seasonally or progressively worsen, as this insight helps you anticipate floor movement and select a lasting solution. Identifying the precise cause gives you the freedom to repair effectively and prevent recurring issues.
Tools and Materials Needed for Repair
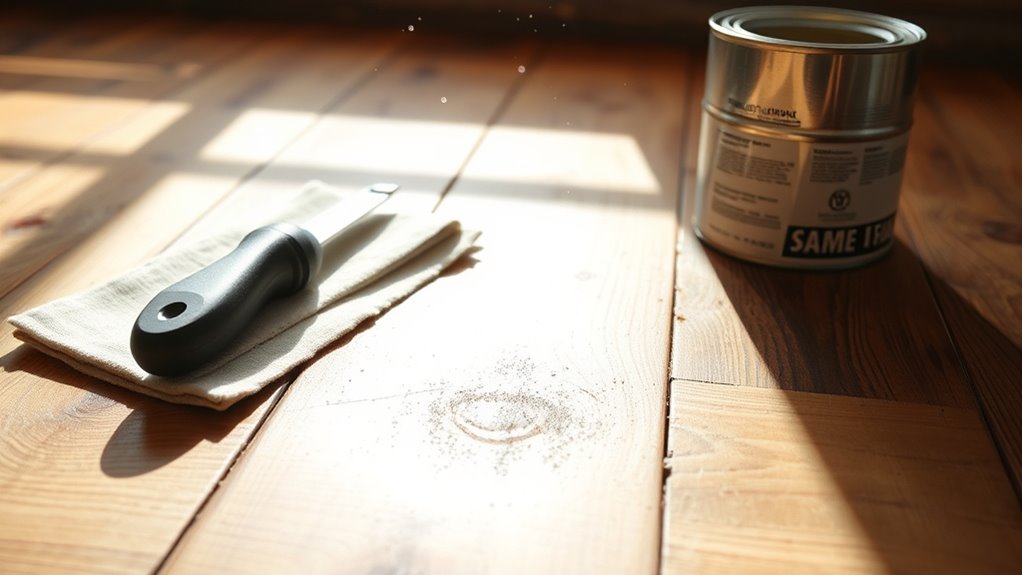
You’ll need a few essential tools like a putty knife, wood filler, and a sanding block to guarantee a clean, effective repair. Choosing the right materials—such as wood putty or flexible floor gap filler—depends on your floor type and gap size. Having these ready before starting will streamline the process and improve your results.
Strumenti di riparazione essenziali
A well-prepared toolkit is essential when addressing gaps in floors, ensuring the repair process is efficient and effective. Your tool selection dictates the quality and speed of the fix, so choosing the right repair tools is vital. Precision instruments and durable hand tools will allow you to work confidently and freely without unnecessary struggles.
| Tool | Scopo |
|---|---|
| Martello | Securing floorboards |
| Scalpello | Cleaning out debris |
| Measuring Tape | Accurate gap measurement |
| Spatola | Applying filler or sealant |
| Taglierino | Trimming repair materials |
Select tools that suit your floor type and gap size to maintain control and achieve a seamless finish.
Recommended Repair Materials
Several key materials are necessary to effectively repair gaps in floors, each selected based on the floor type and gap dimensions. For wood floors, choosing the right wood filler types is essential; water-based fillers suit small gaps, while epoxy-based fillers handle larger voids and offer durability. Flexible caulk options are ideal for areas subject to movement or temperature changes, such as gaps near doorways or exterior walls. Silicone or polyurethane caulks provide elasticity and long-lasting adhesion. Additionally, you’ll need putty knives for precise application and sandpaper to smooth filled areas. Make sure the materials you pick match your floor’s finish to maintain aesthetics. Selecting the appropriate wood filler types and flexible caulk options empowers you to restore floor integrity efficiently while preserving freedom in your living space.
Preparing the Floor for Gap Repair
Before starting gap repair, thoroughly clean the floor to remove all dust, dirt, and debris that could prevent proper adhesion. Begin with a detailed floor inspection to identify the exact location and size of each gap. Use a vacuum or broom to clear loose particles, then proceed with surface cleaning using a damp cloth or mop and a mild detergent solution. Avoid excess water, as moisture can compromise repair materials. Ascertain the floor is completely dry before moving on. This preparation phase is critical—it guarantees that fillers or sealants bond effectively, resulting in a durable, long-lasting repair. Taking these precise steps empowers you to restore your floor’s integrity, maintaining both its function and aesthetic without unnecessary complications.
Using Wood Filler to Seal Small Gaps
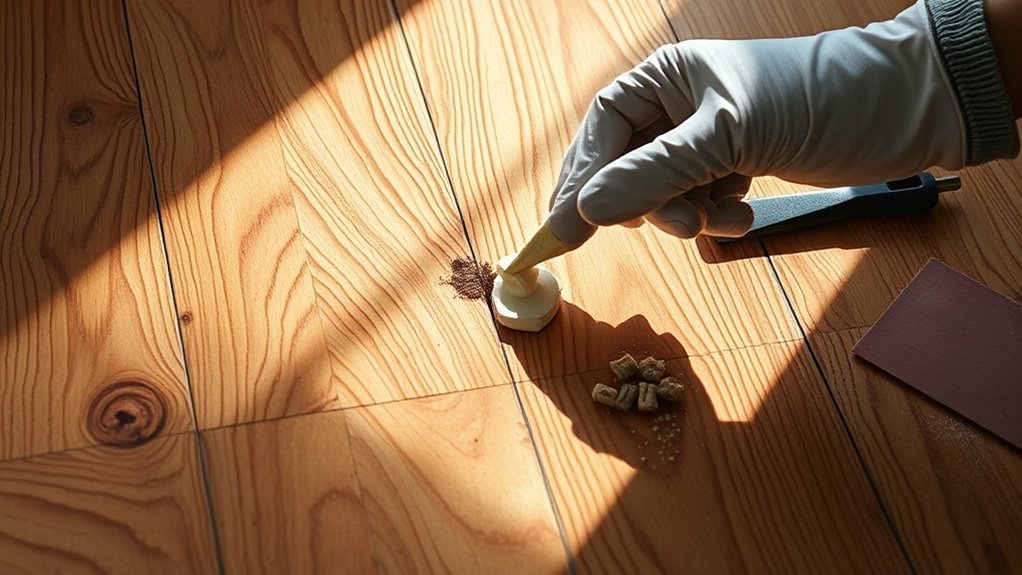
Once your floor is clean and dry, you can move on to filling the small gaps with wood filler. This step is essential for effective gap sealing techniques that restore floor integrity and aesthetics. For precise wood filler application, follow these steps:
Start with a clean, dry floor before filling small gaps with wood filler for a flawless finish.
- Choose a wood filler that matches your floor’s color and texture for a seamless look.
- Use a putty knife to press the filler firmly into each gap, ensuring no air pockets remain.
- Allow the filler to dry completely, then sand the surface smooth to blend with the surrounding wood.
This method offers a durable, flexible seal that accommodates wood expansion and contraction, giving you freedom from drafts and debris infiltration without complex repairs. Proper wood filler application is key to a clean, long-lasting floor finish.
Applying Rope or Wood Strips for Larger Gaps
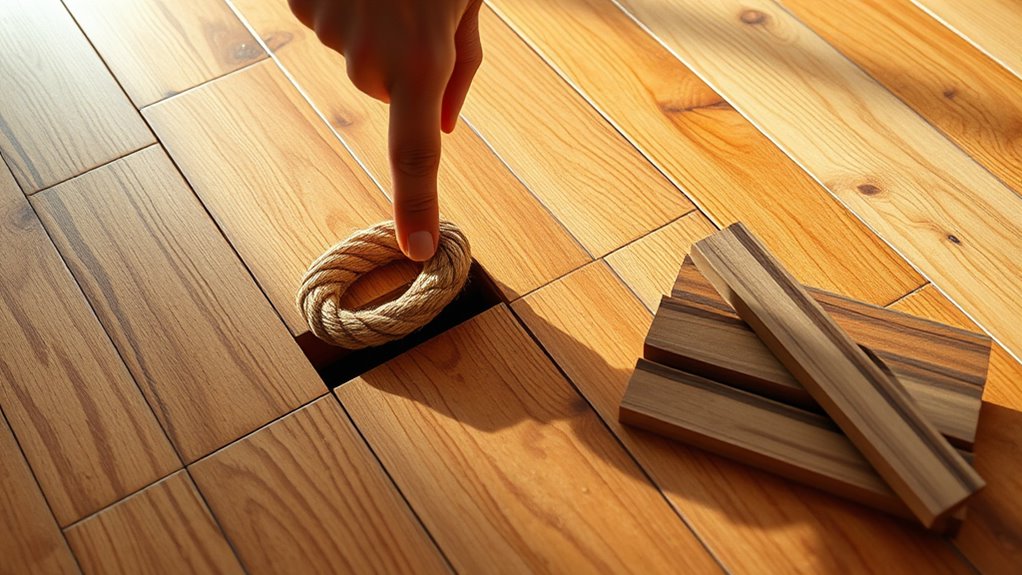
For gaps wider than a quarter inch, applying rope or wood strips provides a sturdy and effective solution. Begin by measuring the gap to select the correct diameter of rope for rope application; natural fiber ropes compress easily, ensuring a tight fit. Press the rope firmly into the gap using a putty knife or similar tool, trimming excess flush with the floor surface. Alternatively, cut wood strips to match the gap dimensions, sanding edges for a precise fit. Secure wood strips within the gap using wood glue or finishing nails, ensuring they sit level with the floor. Both methods offer durability and maintain structural integrity while allowing you freedom from unsightly gaps. Choose rope application for flexibility or wood strips for a more permanent, solid repair.
Installing Floor Gap Cover Strips
If rope or wood strips don’t suit your needs, floor gap cover strips offer a quick and clean alternative. These strips provide an efficient solution among gap cover options, blending durability with aesthetic appeal. For effective floor strip installation, follow these steps:
- Measure the gap width and length precisely to choose the correct strip size.
- Clean the floor surface thoroughly to guarantee strong adhesion.
- Align the strip over the gap and press firmly; secure with adhesive or screws if needed.
This method grants you control and freedom to customize your floor’s look without extensive remodeling. Floor gap cover strips are ideal when you want a streamlined finish while maintaining functionality. Their installation is straightforward, making them a practical choice for DIY enthusiasts seeking reliable results.
Utilizing Flexible Caulk for Minor Cracks
When addressing minor floor cracks, selecting a flexible caulk compatible with your pavimentazione material is essential for durability. You’ll need to thoroughly clean and dry the area before application to guarantee proper adhesion. Apply the caulk smoothly and evenly, then tool it to fill gaps completely and create a seamless finish.
Choosing the Right Caulk
How do you guarantee a durable seal for minor floor cracks without compromising flexibility? Choosing the right caulk is key. Not all caulk types perform equally; flexible caulk designed for floors accommodates movement and prevents future gaps. When selecting, consider:
- Compatibilità dei materiali: Ascertain the caulk bonds well with your floor type—silicone or polyurethane caulk often excels for wood or tile.
- Elasticity: Opt for caulk with high elongation properties to absorb floor expansion and contraction without cracking.
- Ease of Caulk Application: Choose caulk with smooth flow and manageable curing times for precise filling without mess.
Preparing Floor Surface
Before applying flexible caulk to minor floor cracks, you’ll need to thoroughly prepare the surface to secure ideal adhesion and longevity. Begin with detailed floor cleaning: remove all dust, dirt, grease, and loose particles using a vacuum and a damp cloth. Avoid using harsh chemicals that might interfere with caulk bonding. Next, perform a thorough surface inspection to identify any hidden debris or damage around the cracks. Ascertain the crack edges are dry and free from old filler or paint residues. If necessary, gently scrape or sand the area to create a clean, slightly roughened surface. Proper preparation eliminates barriers to adhesion, allowing the flexible caulk to effectively seal minor cracks and withstand floor movement. Taking these precise steps guarantees your repair lasts longer and maintains floor integrity.
Applying Caulk Properly
Although applying flexible caulk to minor floor cracks might seem straightforward, achieving a clean, durable seal requires careful technique. First, select the appropriate caulk type—silicone or latex-based flexible caulks are ideal for floors due to their elasticity and adhesion. Next, prepare your workspace by cleaning the crack thoroughly to remove dust and debris. Finally, apply the caulk evenly using precise caulking techniques:
- Cut the nozzle at a 45-degree angle for controlled flow.
- Steadily squeeze the tube, filling the crack without overfilling.
- Smooth the bead immediately with a damp finger or tool to guarantee proper adhesion and a neat finish.
Mastering these steps guarantees your floor remains gap-free while retaining freedom of movement and resilience.
Repairing Gaps in Laminate Flooring
When you notice gaps in your laminate flooring, addressing them promptly is crucial to prevent further damage or moisture infiltration. First, assess whether laminate expansion has caused the gaps; laminate flooring requires space to expand and contract with humidity changes. If gaps result from shrinkage due to low flooring moisture, gently remove affected planks if possible. Clean the subfloor and verify it’s dry before reinstalling or replacing boards. Use a tapping block and mallet to realign planks tightly, respecting the manufacturer’s recommended expansion gap at the perimeter. For minor gaps, specialized laminate floor gap fillers can be applied. Avoid forcing planks, which risks damage. Properly repairing gaps maintains structural integrity and prevents moisture from seeping beneath, preserving your laminate’s durability and your freedom to enjoy a flawless floor.
Preventative Measures to Avoid Future Gaps
To prevent gaps from forming in your floors, you need to control indoor humidity levels carefully, as fluctuations cause wood to expand and contract. Choosing quality materials with proper acclimation before installation also reduces the risk of future gaps. Finally, regular maintenance like cleaning and inspecting for early signs of damage will help keep your flooring stable and intact.
Control Indoor Humidity
Because wood floors expand and contract with changes in moisture, maintaining consistent indoor humidity is essential to prevent gaps from forming. Effective humidity control guarantees your floors remain stable, preserving both appearance and structural integrity. To manage moisture effectively, you should:
- Monitor indoor humidity levels regularly using a hygrometer, aiming for 30-50% relative humidity.
- Use humidifiers during dry winter months and dehumidifiers in humid summer conditions to maintain balance.
- Confirm proper ventilation in areas prone to moisture buildup, such as basements and kitchens, to prevent excess humidity.
Utilizzare materiali di qualità
A critical step in preventing gaps in your floors is selecting high-quality materials that offer durability and dimensional stability. Opt for high quality wood with low moisture content to minimize expansion and contraction caused by environmental changes. Engineered wood flooring is a practical choice, as its layered construction resists warping better than solid wood. When installing, use durable adhesives specifically designed for flooring; they guarantee a firm bond that reduces movement between planks. Avoid inferior glues that degrade quickly, leading to loose boards and gaps. By prioritizing materials engineered for stability and strength, you preserve the integrity of your floors and maintain a seamless appearance. This approach empowers you to enjoy a reliable, gap-free surface that withstands time and fluctuating conditions.
Regular Floor Maintenance
Selecting quality materials sets a solid foundation, but maintaining your floor regularly is what keeps gaps from forming over time. To guarantee your flooring remains gap-free, establish a maintenance schedule that includes regular inspections. This proactive approach helps you catch early signs of wear or moisture issues. Follow these steps:
- Perform regular inspections every 3-6 months, checking for loose boards or expanding gaps.
- Control indoor humidity to prevent wood contraction and expansion, using dehumidifiers or humidifiers as needed.
- Clean floors with appropriate products to avoid damaging finishes that protect against moisture.
When to Consult a Professional for Floor Repairs
Even if you’re experienced with basic repairs, certain floor issues demand professional expertise to guarantee safety and long-term durability. You should know when to consult a flooring specialist, especially if you notice signs of damage like persistent creaking, uneven surfaces, or widening gaps that worsen over time. Structural concerns such as water damage, rot, or compromised subfloor integrity require expert assessment. Attempting repairs beyond your skill level might lead to costly mistakes or safety hazards. Professionals use specialized tools and materials ensuring precise repairs that maintain your floor’s stability and appearance. Trusting an expert when these signs of damage appear means you’re safeguarding your home’s foundation and extending the life of your floors, allowing you to enjoy your space freely and confidently.