Are you planning to build a shed and wondering how to create a sturdy floor for it? You’re in the right place!
The foundation of any shed is its floor, and getting it right is crucial to ensure durability and stability. Imagine having a shed that stands strong against the elements and provides a solid base for all your storage needs. Whether you’re storing tools, gardening supplies, or even using it as a workshop, a well-built floor is essential.
In this guide, we’ll walk you through the steps to construct a shed floor that lasts. You’ll learn about materials, techniques, and tips to make the process simple and efficient. We know you’re eager to get started, so let’s dive into the practical advice that will make you confident in your shed-building skills. Keep reading to discover how you can transform your backyard space with a shed that stands the test of time.
Choosing Materials
Wood is very popular for shed floors. Pine E oak are strong choices. Pine is soft and easy to cut. Oak is hard and lasts long. Both are good for shed floors.
compensato is made of many thin wood layers. It is strong and doesn’t bend easily. OSB, a type of plywood, is cheaper. But regular plywood lasts longer. Choose according to your budget.
Pressure-treated lumber resists rot and bugs. It is perfect for outdoor use. This wood lasts a long time. It’s strong and safe for shed floors. Make sure to use it in damp places.
Preparing The Site
Remove all rocks and sticks from the area. Clear away any grass or plants. Ensure the space is clean and open. This will make the next steps easier.
Utilizzo a shovel to flatten the area. Controllo with a long board and level tool. Adjust the ground as needed. This step is very important. A flat ground keeps the shed strong.
Place stakes at each corner of the shed. Connect them with string. Ensure the lines are straight. This shows where the floor will go. It helps you keep the shape right.
Laying The Foundation
Concrete blocks make a strong base. They keep the shed firm. Place blocks evenly. Use a level to check. Blocks should align well. This helps balance the shed. Proper alignment is key. A stable shed lasts long. Blocks resist movement. They support weight well.
Gravel base drains water. It stops water pooling. Spread gravel evenly. Compacting the gravel is crucial. Use a tamper for this. Gravel prevents moisture damage. It keeps the floor dry. Shed floors stay strong. Gravel adds stability. It is easy to set up.
Slopes need care. Use more blocks on low sides. This balances the shed. Measure the slope first. Adjust block height as needed. Slopes need extra support. Blocks must be level. Uneven sheds can tilt. Safety comes first. A balanced shed is a safe shed.
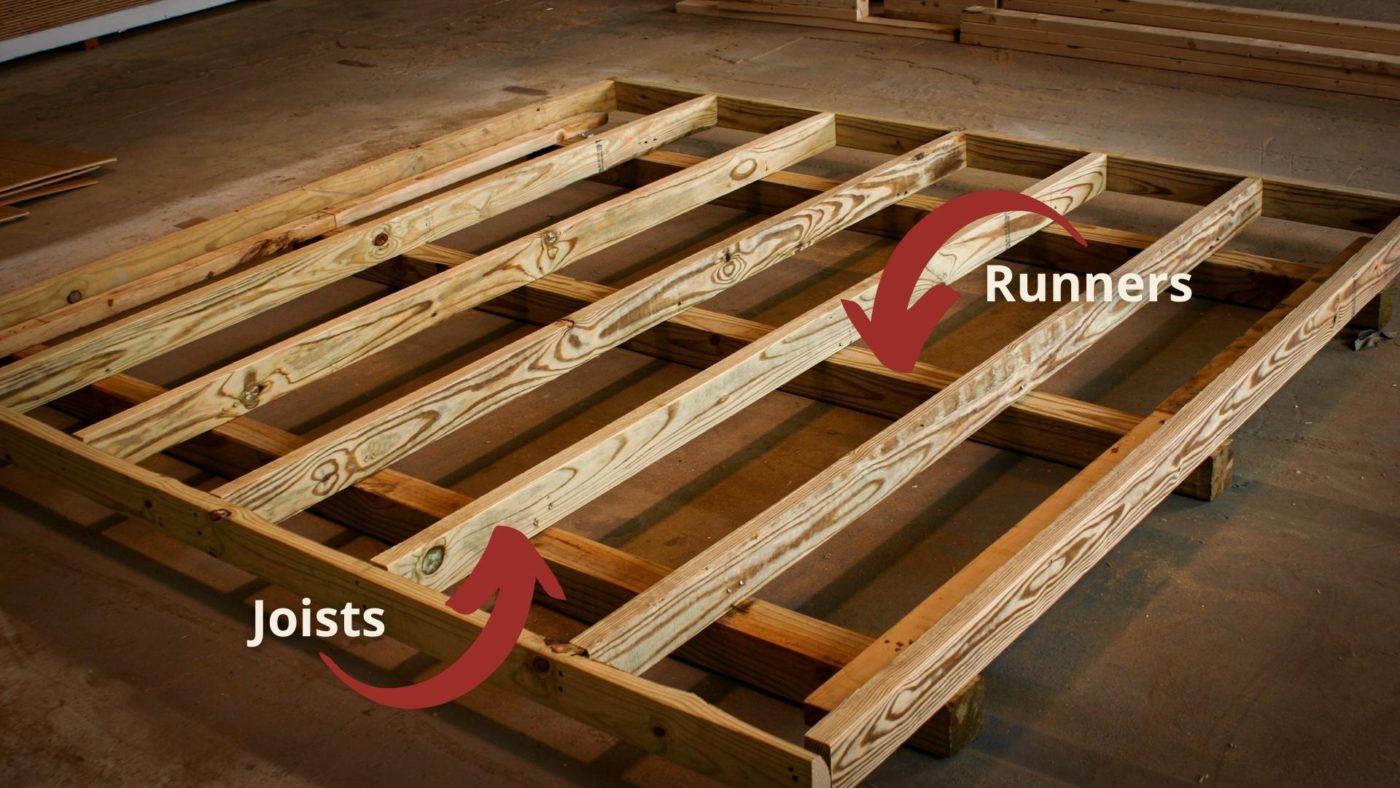
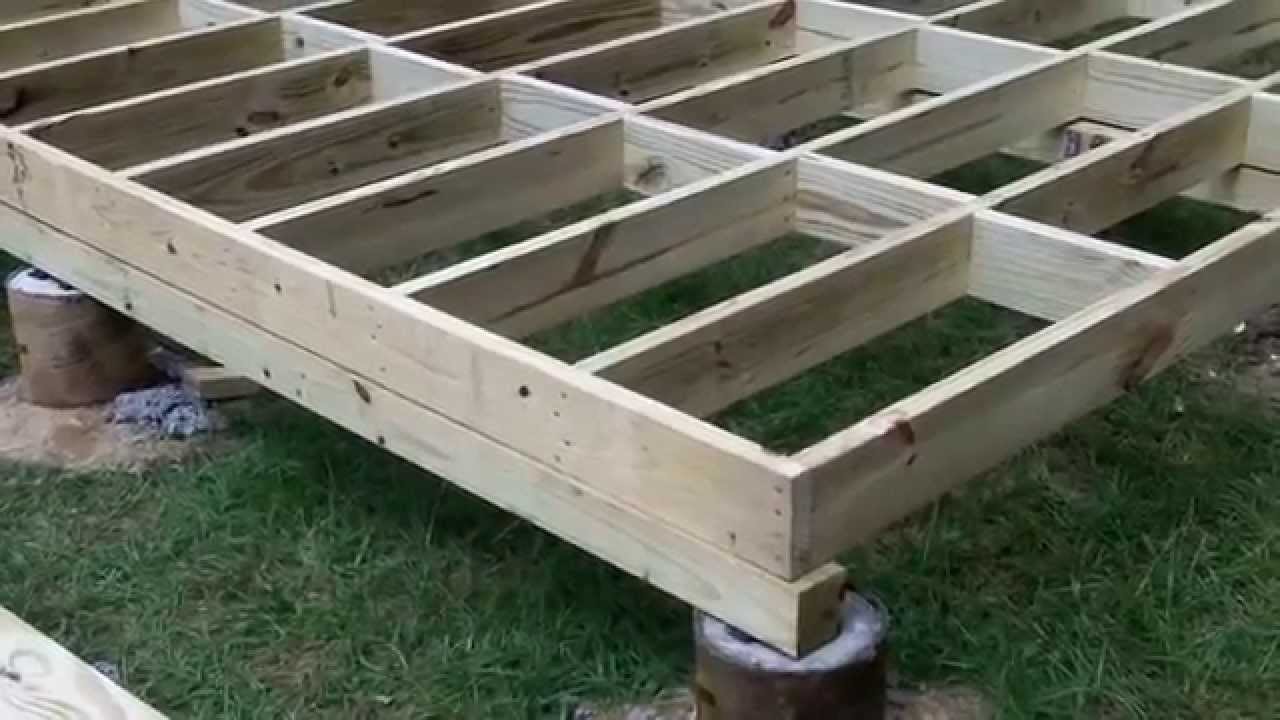
Constructing The Frame
Choose strong, straight lumber for your shed floor. Measure the length E width of your shed plan. Mark each piece with a pencil. Use a saw to cut the lumber to the correct size. Double-check measurements to ensure accuracy. Incorrect cuts waste time and resources.
Place the cut pieces on the ground. Arrange them to form a rectangle. Ensure each piece is allineato properly. Use a square to check corners. Joists support the floor. Keep them evenly spaced. This prevents bending and sagging. A balanced frame lasts longer.
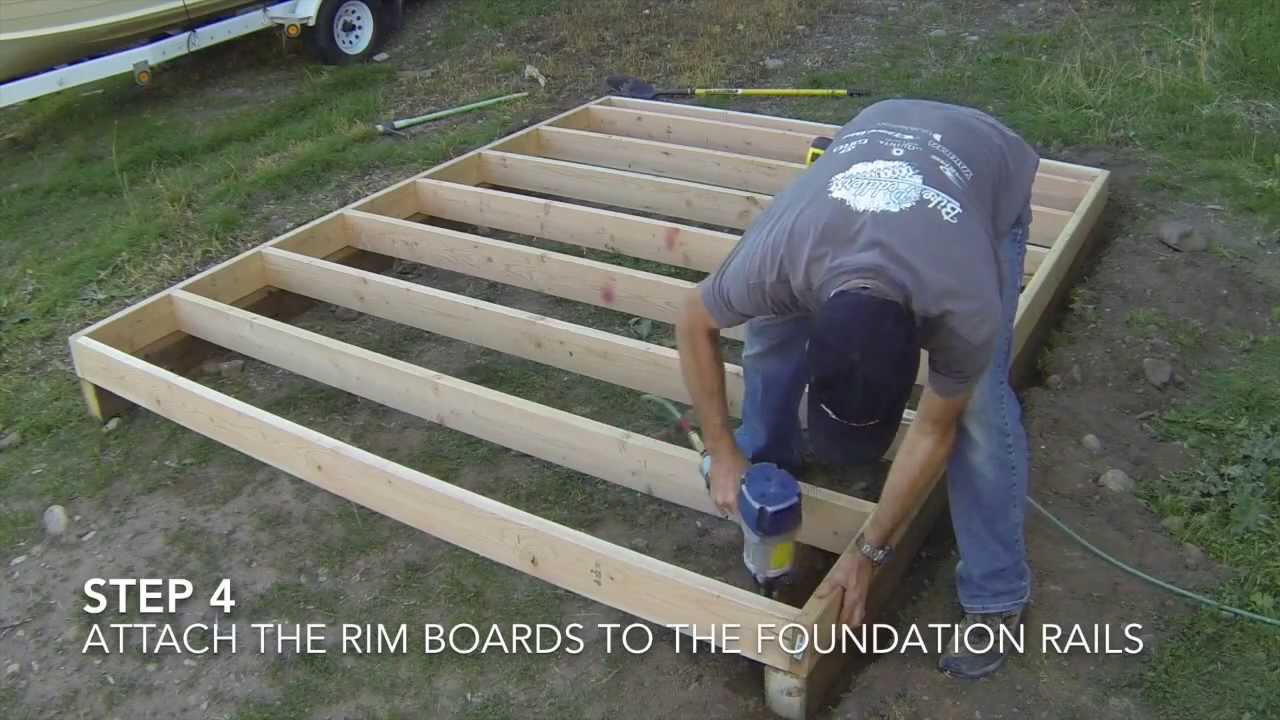
Use strong nails O screws to hold the frame together. Start at one corner. Work your way around the frame. Secure each joint tightly. Loose joints can cause problems later. Choose galvanized nails or screws. These resist rust and wear.
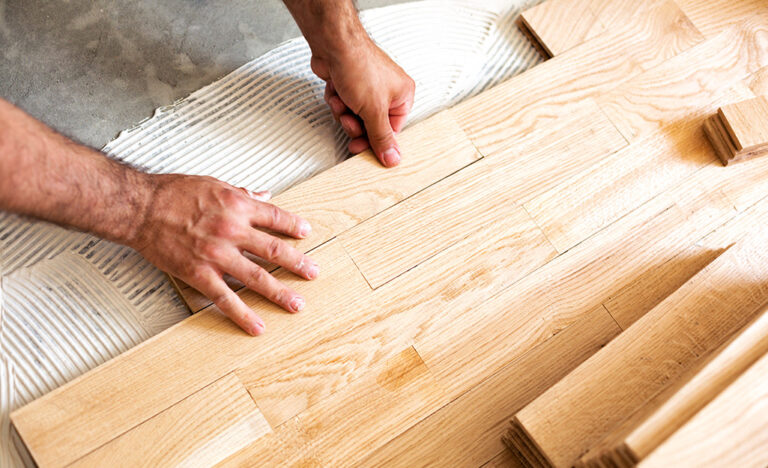
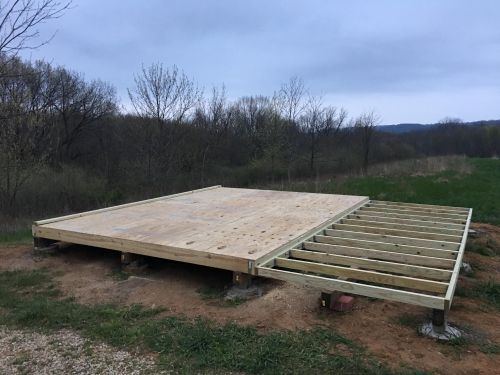
Installing The Floor Decking
Place the plywood sheets on the floor frame. Make sure the edges match. Each sheet should fit perfectly. Leave a small space between the sheets. This helps with expansion and contraction. Use a tape measure to check alignment. Correct any gaps or overlaps. A well-aligned floor is strong and stable.
Choose between nails or screws to secure the sheets. Screws hold tighter, but nails are quicker. Begin at one corner of the sheet. Work your way across. Place a fastener every 6 inches. Ensure each fastener is secure. Check each connection for tightness. A well-fastened floor lasts longer.
Check the floor for any bumps. Use a livello to ensure flatness. Adjust any uneven areas. Sand down any high spots. Fill in any low spots. A flat floor prevents tripping hazards. It also looks nice and neat. Take your time for a perfect finish.
Adding A Moisture Barrier
UN barriera contro l'umidità keeps water away from your shed floor. Picking the right type is important. Plastic sheets and tarps are common choices. They are easy to find and use. Plastic sheets are strong and last long. Tarps are cheaper but less strong. Some people use rubber membranes. They are good for very wet places. Always check the weather in your area. This helps in choosing the best barrier.
Installing a moisture barrier needs care. First, clear the ground. It must be flat and clean. Next, lay the barrier on the ground. Make sure it covers all parts under the shed. Overlap the edges by at least 6 inches. This stops water from sneaking in. Use staples or heavy rocks to hold it in place. Secure all corners well. Your shed floor stays dry this way.
Ritocchi finali
Building a sturdy shed floor starts with a solid foundation. Measure and cut floor joists to fit the space. Secure with nails or screws for stability.
Sealing The Wood
Seal the wood to protect it from water and weather damage. Use a good wood sealer. This keeps the floor strong and lasts longer. Apply the sealer with a brush or roller. Let the sealer dry well. Two coats are best for full protection. The wood looks shiny and new with sealer. It also keeps bugs away.
Inspecting For Stability
Check the floor for stability and safety. Walk on it to see if it feels strong. Fix any loose boards. Tighten screws if needed. Make sure the floor does not wobble. This ensures the shed is safe. A stable floor keeps your shed in good shape. It also protects your items inside.
Common Mistakes
Building a shed floor often involves errors like ignoring ground leveling or using weak materials. These can lead to instability. Proper measurements and choosing the right wood ensure a sturdy base.
Avoiding Uneven Surfaces
Uneven surfaces can cause problems for shed floors. Leveling the ground is important. Use a spirit level to check. Remove rocks E roots from the area. These can create bumps. Compact the soil to make it firm. A flat surface is best for stability. Check regularly for any changes in the ground.
Preventing Water Damage
Danni causati dall'acqua can ruin a shed floor. Proper drainage is key. Elevate the shed slightly to keep water away. Install gutters to guide rainwater. Seal the wood to protect from moisture. Check seals often for cracks. Repair leaks quickly to avoid damage. Ispezionare il pavimento regularly for signs of water issues. Take action if you see water marks.
Domande frequenti
What Materials Are Best For Shed Flooring?
Choosing the right materials is crucial for durability. Pressure-treated plywood is a popular choice due to its strength and resistance to moisture. Concrete slabs offer a solid base but require more work. Consider your shed’s purpose and budget when selecting materials.
How To Ensure Shed Floor Stability?
To ensure stability, start with a leveled ground. Use gravel or concrete blocks for foundation support. Securely fasten floor joists and check alignment regularly. Proper installation prevents shifting and damage, extending your shed’s lifespan.
Can I Use Pallets For Shed Flooring?
Pallets can be an economical option, but they require careful preparation. Ensure they’re treated to resist rot and pests. Reinforce them with plywood for added stability. While cost-effective, pallets might not offer the longevity of traditional materials.
How Thick Should Shed Floor Be?
Floor thickness depends on your shed’s use. Typically, ¾-inch plywood is recommended for standard use. For heavier equipment, opt for thicker materials. Ensuring adequate thickness helps in maintaining structural integrity and prevents sagging.
Conclusione
Building a shed floor is simpler than you think. Start with a solid foundation. Measure correctly. Use quality materials for durability. Precision is key in each step. Remember to level the ground well. Choose strong plywood for pavimentazione. Secure it tightly.
This ensures stability for your shed. Follow these steps for a sturdy floor. Your shed will stand firm through time. A well-built floor supports everything above. Take your time for best results. You’ll have a reliable floor ready for use.
Enjoy your new shed space!