To install a subfloor over your existing floor, start by evaluating the current floor’s condition for damage and levelness. Gather all necessary tools and materials, then clean and prep the surface thoroughly. Measure and plan your layout carefully before installing any vapor barrier or insulation. Position and secure the first panel, then continue laying and fastening others, checking for level as you go. Finish edges smoothly and prepare the surface for your final flooring. Following this method guarantees a strong, even base—keep going to master each step.
Assess the Condition of the Existing Floor
Before you install a new subfloor, you need to thoroughly assess the condition of the existing floor. This existing floor evaluation is vital to guarantee a stable foundation for your subfloor. Start by inspecting for any visible signs of floor damage—warping, rot, or soft spots. Use a probe or screwdriver to test suspect areas; any weakened spots should be noted. Check for moisture issues or mold that could compromise the new subfloor’s integrity. Evaluate the floor’s levelness, as uneven surfaces may require correction before proceeding. This floor damage assessment helps you decide if repairs or reinforcements are necessary, preventing future problems. Taking these steps ensures that your subfloor installation stands strong and lasts long, giving you the freedom to move forward confidently.
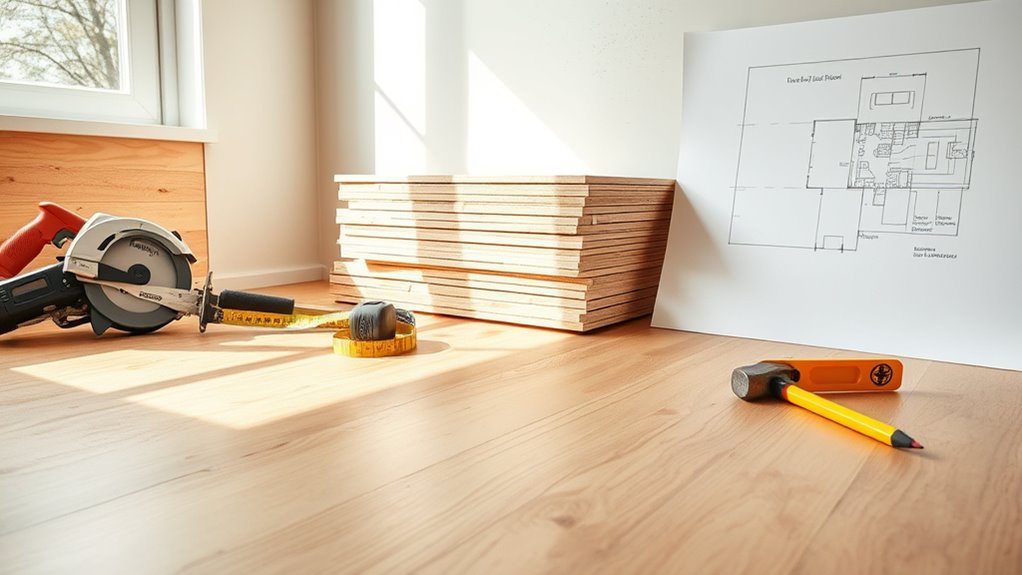
Gather Necessary Tools and Materials
To install a subfloor efficiently, you’ll need a specific set of tools and materials at hand. Choosing quality subfloor materials guarantees durability and stability, while having the right installation tools simplifies the process and saves time. Prepare by gathering everything before you start.
| Subfloor Materials | Installation Tools | Accessories |
|---|---|---|
| Plywood or OSB sheets | Circular saw | Measuring tape |
| Construction adhesive | Drill with bits | Chalk line |
| Screws or nails | Hammer or nail gun | Safety glasses |
This setup gives you freedom to work confidently and efficiently. Each item plays a critical role, so don’t skip or substitute. With these essentials, you’re ready to move forward on your subfloor installation.
Clean and Prepare the Surface
Start by thoroughly cleaning the floor surface where the subfloor will be installed. Effective surface cleaning removes dust, dirt, and debris that can interfere with adhesion and leveling. Use a broom or vacuum to clear loose particles, then wipe down with a damp cloth for any stubborn spots. Next, inspect the floor for damage, such as cracks or uneven areas, and address these before moving forward. Preparation techniques like filling gaps with a suitable floor patch or sanding high spots guarantee a flat, stable base. Taking these steps not only assures a durable subfloor installation but also prevents future issues like squeaking or warping. Proper surface cleaning and preparation techniques set the foundation for a successful project that gives you the freedom to build with confidence.
Measure and Plan the Layout
Although cleaning and preparing the surface is essential, measuring and planning the layout guarantees your subfloor fits perfectly. You’ll want to be precise with layout considerations to avoid costly mistakes and ascertain a smooth installation. Use accurate measurement techniques to capture the room’s exact dimensions, including any irregularities.
Here’s how to approach it:
- Measure the length and width of the room at multiple points to account for uneven walls.
- Sketch a scaled layout of the existing floor, marking obstacles and doorways.
- Plan your subfloor panels’ placement, staggering joints for strength and cutting to fit around obstructions.
Taking these steps lets you work confidently, giving your subfloor a solid foundation that matches your space perfectly.
Install Vapor Barrier or Insulation
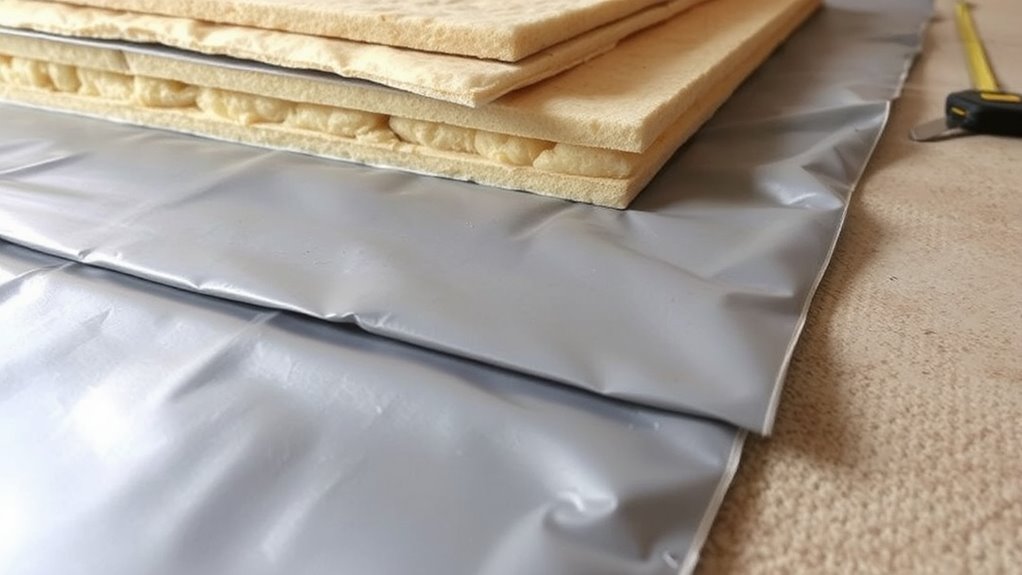
Before laying down your subfloor panels, you’ll need to install a vapor barrier or insulation to protect against moisture and improve energy efficiency. Vapor barrier installation is crucial, especially over concrete or damp surfaces, to prevent mold and structural damage. Choose a high-quality polyethylene sheet, laying it flat and overlapping seams by at least six inches, sealing edges with waterproof tape for a tight fit. If insulation is necessary, select the right insulation types based on your climate and floor type—rigid foam boards provide excellent thermal resistance without bulk, while fiberglass batts fit between joists for added warmth. Proper installation of these materials guarantees your subfloor stays dry and energy-efficient, giving you a durable foundation for your flooring project and the freedom to enjoy a comfortable, long-lasting space.
Cut Subfloor Panels to Size
To guarantee a precise fit, you’ll need to measure and cut each subfloor panel carefully. Accurate panel measurements are essential to avoid gaps or overlaps that compromise stability. Use reliable cutting techniques to achieve clean, straight edges.
Ensure each subfloor panel is measured and cut accurately for a stable, gap-free foundation.
Here’s how to approach it:
- Measure twice, mark once: Use a tape measure and pencil to mark exact dimensions on the panel.
- Choose the right cutting method: A circular saw with a fine-tooth blade offers clean cuts; a jigsaw works for curves or irregular shapes.
- Secure the panel: Clamp it down firmly to prevent movement while cutting, ensuring safety and accuracy.
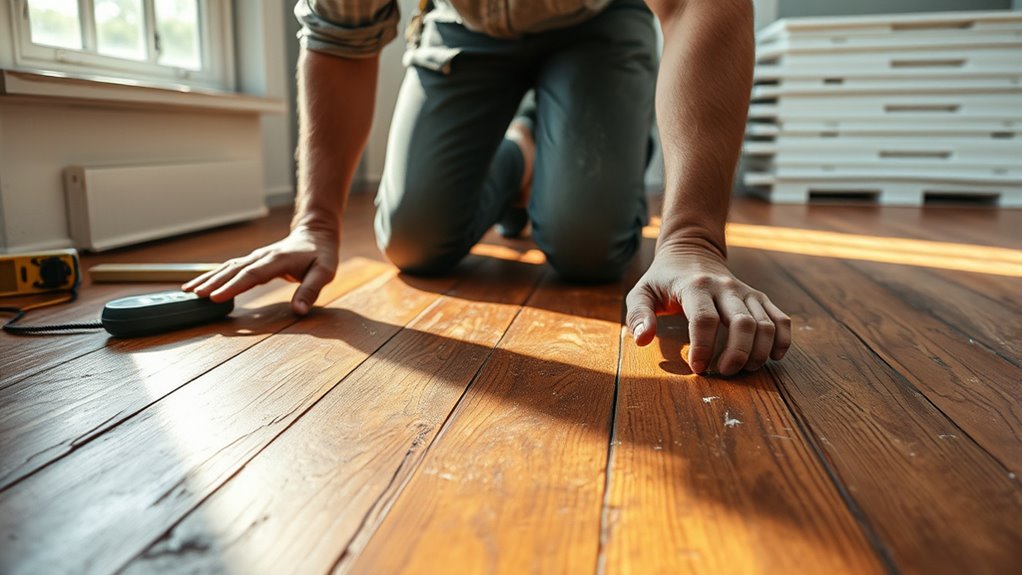
Position and Secure the First Panel
Start by carefully aligning the edges of your first panel with the framing to guarantee a straight, even base. Once positioned, fasten the panel securely using the appropriate screws or nails to prevent any movement. Proper alignment and fastening are essential for a stable and level subfloor.
Align Panel Edges
Although precise alignment might seem tedious, it’s essential to position the first subfloor panel carefully along the starting edge. Perfect panel alignment guarantees a solid foundation and prevents gaps that could cause movement or squeaks later. Before moving on, focus on these key steps:
- Position the panel so its edges line up flush with the room’s perimeter and adjoining panels.
- Check that the panel sits flat, with no rocking or uneven spots.
- Apply edge sealing along the seams to protect against moisture infiltration and enhance durability.
Fasten Panels Securely
Secure the first panel firmly to the floor joists to prevent shifting and squeaking. Begin by selecting appropriate fastening techniques based on the panel materials you’re using—commonly plywood or oriented strand board (OSB). Use screws or ring-shank nails designed for subfloor installation, spacing fasteners about 6 inches apart along joists. Drive fasteners flush without over-tightening to avoid damaging the panel surface. Start fastening at one edge and work your way across, ensuring each panel stays aligned with adjacent ones. This solid attachment not only stabilizes the subfloor but also reduces noise and movement. Taking the time to fasten panels securely gives you a subfloor that’s durable and reliable, setting the foundation for freedom to build and design without future hassles.
Continue Laying and Fastening Panels
Continue laying the panels by aligning each sheet carefully with the previous one, ensuring the edges are tight but not forced. Different panel types require specific installation techniques, so choose wisely for durability and ease. Fasten each panel securely with screws or nails, spacing them evenly to avoid movement. Follow these steps for efficient progress:
Align panels carefully, fasten securely, and choose the right technique for lasting, stable installation.
- Stagger seams between adjacent rows for structural strength.
- Leave a small gap (about 1/8 inch) between panels to allow for expansion.
- Use a chalk line to keep rows straight and maintain alignment throughout.
Check for Level and Adjust as Needed
Before moving on, you’ll want to check the level of your subfloor panels to confirm a flat, even surface. Start with a thorough floor assessment using a long level, straightedge, or laser level. Identify any high or low spots that could cause problems later. For leveling techniques, you can use shims to raise low areas or sand down high spots for a uniform plane. Make sure to check multiple points across the floor to verify consistency. This step is critical because an uneven subfloor can lead to warped flooring or structural issues. Taking the time to level now saves you headaches and costly repairs down the line. Trust your floor assessment and adjust as needed before proceeding to the next phase.
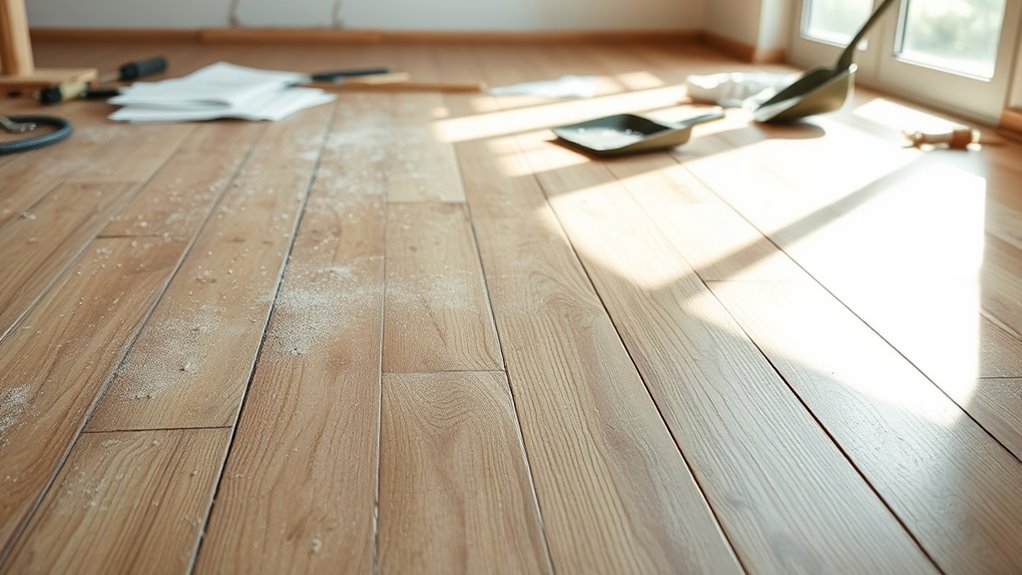
Finish Edges and Prepare for Final Flooring
You’ll want to trim and sand the edges of your subfloor to create a smooth, even surface. Next, seal any gaps or cracks to prevent moisture and drafts from causing damage. Finally, double-check that the entire surface is level before installing your final flooring.
Trim and Sand Edges
Although the subfloor is firmly in place, trimming and sanding the edges is essential to secure a smooth shift to your final flooring. To achieve a flawless transition, apply precise trim techniques and effective sanding methods.
- Use a circular saw or jigsaw to trim any overhanging edges, keeping cuts straight and even.
- Employ a belt sander or sanding block with medium-grit sandpaper to smooth rough edges.
- Finish with fine-grit sandpaper to guarantee a seamless surface ready for your final flooring.
Seal Gaps and Cracks
Since gaps and cracks can compromise the stability and appearance of your flooring, sealing them is an essential step before installation. Start by inspecting the subfloor thoroughly to identify any gaps or cracks that could affect the final surface. Use a high-quality gap sealing foam or caulk to fill these spaces, ensuring a tight, secure fit. For larger cracks, apply a durable crack filling compound that bonds well with the existing material, preventing movement and moisture intrusion. Smooth the filled areas for a uniform surface, allowing the sealants to cure fully according to manufacturer instructions. Proper gap sealing and crack filling not only enhance the subfloor’s integrity but also create a solid foundation, giving you the freedom to install your final flooring with confidence.
Ensure Level Surface
After sealing gaps and cracks, the next step is to guarantee your subfloor is perfectly level. Proper surface preparation is essential to confirm a smooth final flooring installation and to prevent future issues like squeaks or uneven wear. Use proven leveling techniques to achieve a flat, stable base.
Follow these steps:
- Use a long level or straightedge across the subfloor to identify high and low spots.
- Sand down any raised areas and fill depressions with a leveling compound, allowing it to dry thoroughly.
- Finish edges by trimming or sanding to confirm all changes are smooth and flush with adjoining surfaces.
Taking these measures gives you the freedom to install your final flooring confidently, knowing the foundation is solid and even.


