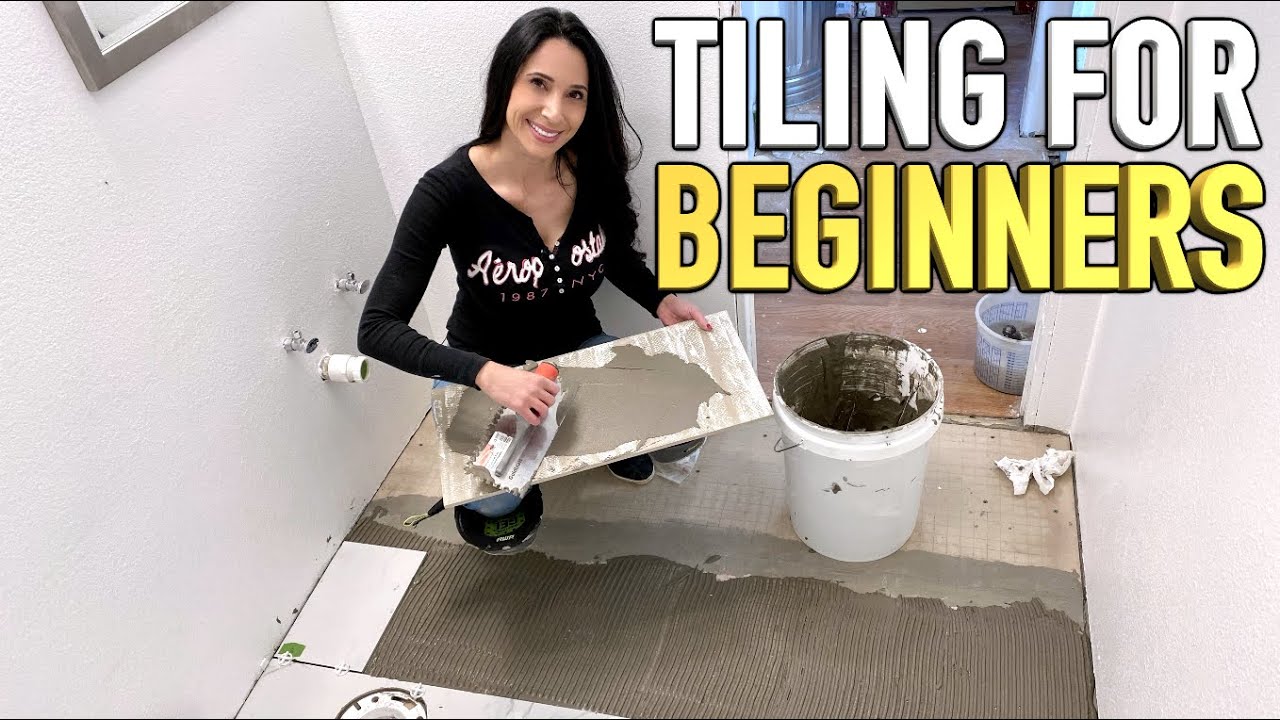
Are you ready to transform your space with a fresh, new look? Tiling a floor might seem like a daunting task, but with the right guidance, even beginners like you can achieve professional results.
Imagine the satisfaction of walking on a floor you’ve tiled yourself—one that not only enhances the beauty of your home but also boosts its value. In this guide, we’ll simplify every step of the tiling process, breaking it down into manageable tasks.
You’ll gain the confidence to tackle this project head-on. Say goodbye to hiring expensive professionals and hello to mastering this DIY skill. Ready to roll up your sleeves and create something amazing? Let’s get started!
Choosing The Right Tiles
Floor tiles come in many types. Ceramic tiles are popular. They are affordable and easy to clean. Porcelain tiles are strong and look nice. They resist water very well. Stone tiles are natural and unique. They can be slippery when wet. Vinyl tiles are soft and warm. They are also budget-friendly.
Think about the room’s purpose. Kitchens need durable tiles. Bathrooms need water-resistant tiles. Check the tile’s size. Large tiles make rooms look big. Small tiles are good for small spaces. Look at the tile’s color. Light colors make rooms bright. Dark colors hide dirt. Feel the tile’s texture. Smooth tiles are easy to clean. Rough tiles prevent slipping.
Gathering Necessary Tools
Before tiling, gather all tools first. You need a tape measure. It helps you measure the floor. You also need a tile cutter. This tool cuts tiles to size. A notched trowel is important too. It spreads the adhesive evenly. Use a sponge for cleaning. It wipes away excess adhesive. A tile spacer keeps tiles even. It helps with straight lines. Finally, don’t forget a rubber mallet. It taps tiles into place gently.
Safety is very important. Wear goggles to protect your eyes. Gloves keep your hands safe. They protect from sharp tile edges. Use knee pads. They protect your knees while working. Ensure you have a dust mask. It helps you breathe safely. Dust can harm your lungs. Safety gear helps prevent accidents. Always use them.
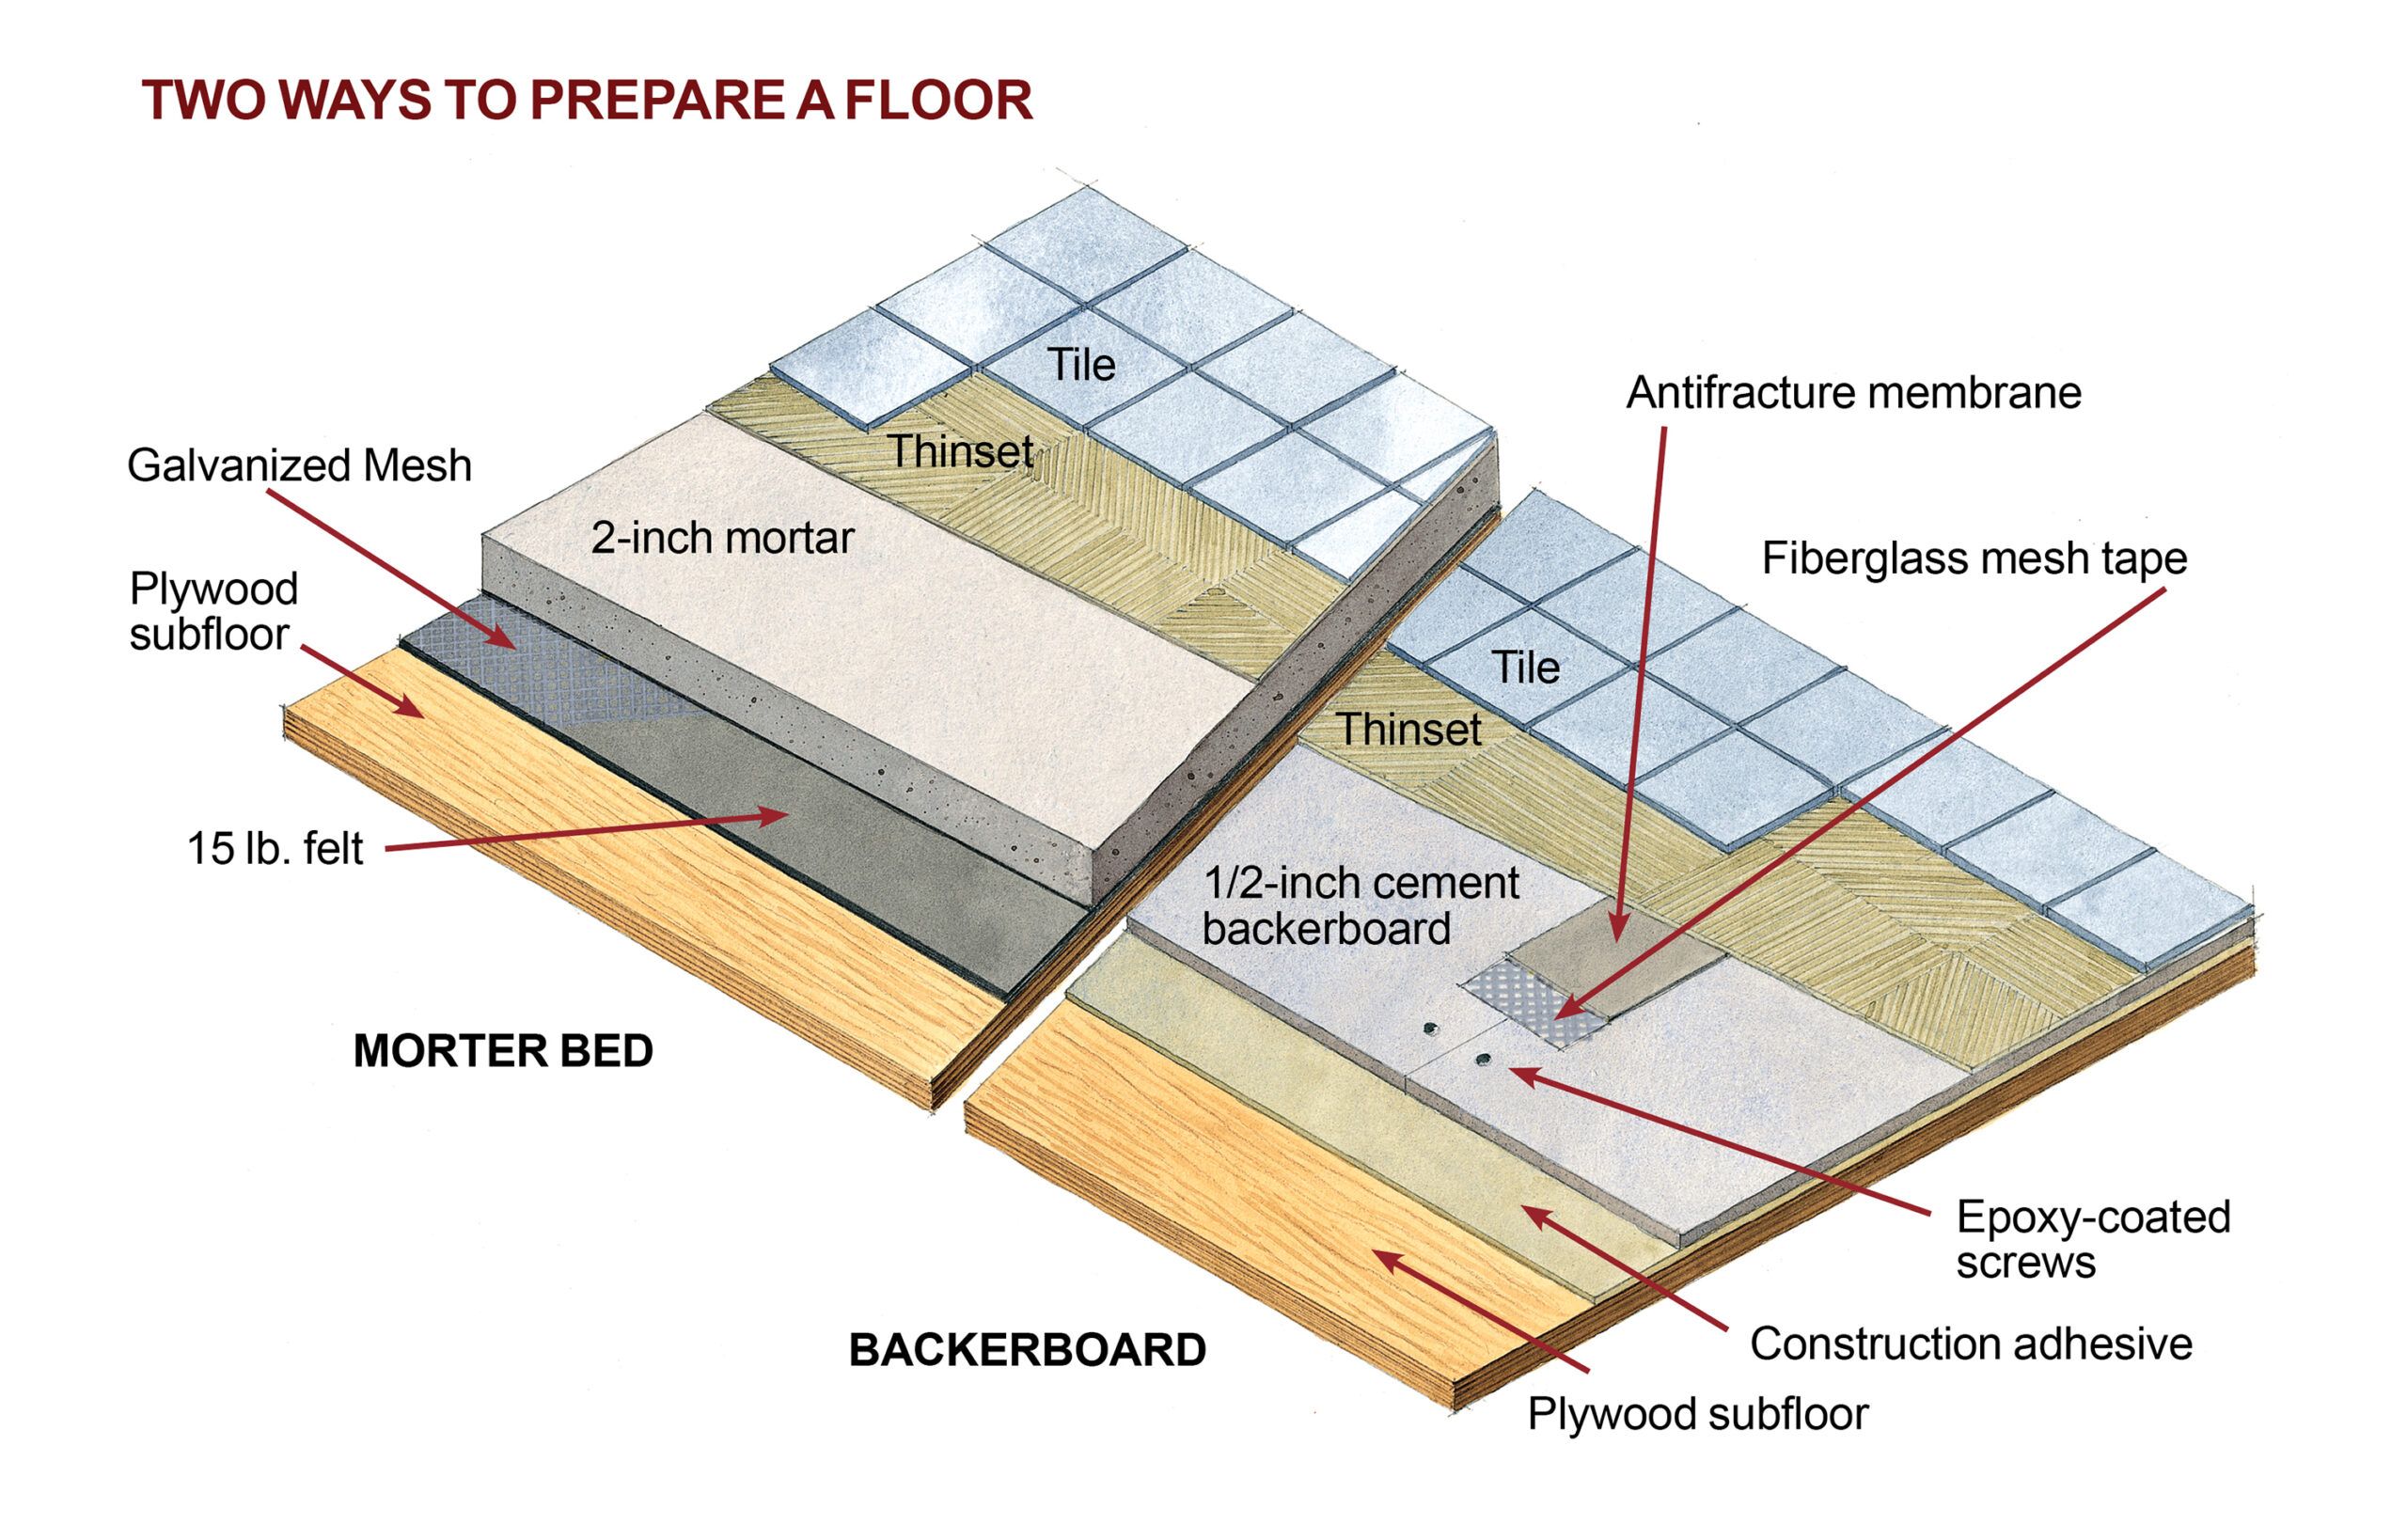
Preparing The Floor Surface
Start by sweeping the floor. Remove all dirt and dust. This ensures a clean surface. Use a mop with warm water. This helps remove any sticky residue. Check for bumps on the floor. Use a level tool to find them. Mark these spots. Sand them down if needed. Ensure the floor is flat. This will help the tiles lay evenly.
Look for any cracks in the floor. Fill them with floor filler. Use a putty knife for this. Smooth the surface after filling. Let it dry completely. Inspect for other imperfections. Use a sanding block to smooth uneven areas. The floor must be smooth and even. This helps the tiles stick well. A well-prepared surface is key to a great floor.
Planning The Layout
Measure the room’s length and width with a tape measure. Write down the numbers. This will help you know how much tile you need. It’s important to measure twice to be sure. Check your notes to avoid mistakes. Keep your measurements handy when shopping.
Lay tiles on the floor to see how they fit. Start from the center of the room. Work your way out to the edges. This helps in seeing what cuts you need. Use a pencil to mark the tiles that need cutting. Make sure tiles are even and aligned. Adjust as needed for a neat look.
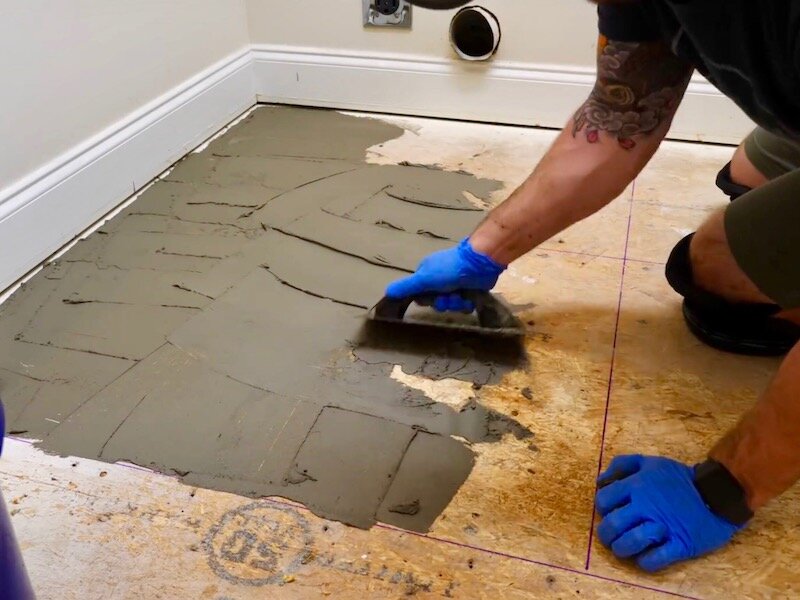
Mixing And Applying Adhesive
Mixing adhesive requires careful measuring and thorough blending to ensure strong tile bonding. Apply the adhesive evenly across the floor using a notched trowel. This ensures tiles adhere securely, minimizing future movement or gaps.
Types Of Adhesive
Choosing the right adhesive is crucial for tiling. Ceramic tiles often need cement-based adhesive. Glass tiles work well with epoxy adhesive. Always read the tile package for recommended adhesive. Powder adhesives need mixing with water. Ready-to-use adhesives save time. They come in buckets. Adhesive strength is important for tile stability.
Application Techniques
Spread adhesive with a notched trowel. Create even lines across the floor. Press down to ensure adhesive sticks. Check coverage by lifting a tile. Too little adhesive is bad. Adjust as needed. Work in small areas. This keeps adhesive fresh. Use spacers for even gaps. Tiles must be aligned properly. Wipe excess adhesive quickly. It dries fast.
Cutting The Tiles
A tile cutter is a helpful tool. It makes straight cuts easy. Place the tile in the cutter. Align the cutting wheel with your mark. Push down on the handle to score the tile. After scoring, press down to snap the tile. Always wear safety goggles. They protect your eyes from sharp pieces. Practice on a spare tile first. This helps you learn the tool.
Some areas need irregular cuts. These include corners or around pipes. Use a tile nipper for these cuts. It lets you chip away small bits. For curves, draw the shape on the tile first. Then nip small pieces until you reach the line. This takes patience. Always check the fit before placing the tile.
Laying The Tiles
Choose a spot in the center of the room. This is your starting point. It helps keep the tiles even. Use a chalk line to mark the floor. This line guides you while laying the tiles. Check the tiles fit well in the space. Adjust as needed. This prevents small cuts at the edges.
Make sure each tile lines up with the chalk line. Use tile spacers between each tile. Spacers help keep even gaps. This is important for grout later. Check each row is straight. Use a level to ensure tiles are flat. Adjust tiles if they are not. Proper alignment gives a neat look.

Grouting The Tiles
Picking the right grout is crucial. Grout keeps tiles in place. It also fills gaps. There are many grout types. Sanded grout works well for wide spaces. Unsanded grout is ideal for narrow spaces. Choose a color that matches your tiles. Or pick a contrast for a bold look. Always read the grout package. It tells you how to mix it. Follow the instructions carefully.
Start with clean tiles. Mix the grout until smooth. Use a grout float to apply it. Spread it over the tiles. Press it into the gaps. Work in small sections. This helps keep the grout wet. Wipe away extra grout with a damp sponge. Be gentle. Don’t pull grout out of the gaps. Let it dry. This can take a few hours. Finally, polish the tiles with a dry cloth. This removes any haze.
Cleaning And Sealing
Prepare surfaces by cleaning thoroughly. Sealing tiles prevents moisture damage. Master these basics to tile a floor smoothly.
Removing Excess Grout
Excess grout can make tiles look messy. Use a damp sponge to wipe away grout. Be gentle. Press lightly on the tiles. Rinse the sponge often. This helps keep it clean. You might need to repeat this a few times. Check for grout lines. Make sure they are neat. Let the grout dry for a day. It should be firm before sealing.
Sealing The Tiles
Sealing keeps tiles safe from stains. Choose a good tile sealer. Read instructions carefully. Apply the sealer with a clean brush. Cover each tile evenly. Avoid gaps. Let the sealer dry completely. This usually takes a few hours. After drying, check the tiles. They should look shiny and new. Sealing helps tiles last longer.
Troubleshooting Common Issues
Tiling a floor can be straightforward with basic tools and patience. Beginners often face issues like uneven surfaces or incorrect grout application. Careful preparation and a level surface are key to avoiding common mistakes and ensuring a smooth finish.
Dealing With Uneven Tiles
Uneven tiles can be tricky. First, check if the floor is level. Use a spirit level to find high or low spots. You might need to sand or fill these spots. Lay tiles starting from the center. This helps balance the floor. Use spacers between tiles. They keep the gap even. If a tile is too high, press gently. For low tiles, add a bit more glue. Always check your work as you go.
Fixing Grout Problems
Grout can crack or crumble. Mix grout to a thick paste. It should not be too watery. Use a rubber float to fill gaps. Press firmly to avoid air pockets. If grout cracks, remove the broken part. Reapply fresh grout and smooth it out. Seal the grout once it dries. This keeps it strong and clean. Wipe away extra grout with a damp sponge. It stops tiles from looking dull.
Frequently Asked Questions
What Tools Do I Need To Tile A Floor?
To tile a floor, you’ll need a tile cutter, spacers, notched trowel, grout float, and a level. Additionally, have a bucket, sponge, and safety gear like gloves and goggles. These tools help ensure precise cuts, even spacing, and a smooth grout finish.
How Do I Prepare The Floor Surface?
Start by cleaning the floor thoroughly, removing dust and debris. Ensure the surface is level and dry. Repair any cracks or uneven areas with a leveling compound. Proper preparation is crucial for a lasting and professional tile installation.
Can I Tile Over Existing Flooring?
Yes, you can tile over existing flooring if it’s in good condition and level. Ensure the old surface is clean and free of grease. Remove any loose tiles or flooring. Using a quality adhesive ensures the new tiles bond well to the old surface.
How Do I Choose The Right Tile Size?
Choose tile size based on room dimensions and design preference. Larger tiles suit spacious areas, while smaller tiles fit compact rooms. Consider the tile pattern and grout lines. Larger tiles mean fewer grout lines, creating a seamless look. Balance aesthetics and functionality in your choice.
Conclusion
Tiling a floor may seem challenging at first. With practice, it becomes easier. Start with small projects to build confidence. Always prepare your tools and materials beforehand. Measure twice, cut once for accuracy. Pay attention to detail for a flawless finish.
Remember to let the adhesive dry fully. Patience is key for lasting results. Regular cleaning keeps tiles looking fresh. Follow these steps, and your floors will look amazing. Tiling is a skill anyone can learn. Take it one step at a time.
Your new tiled floor will be the pride of your home.


