To take up floor tiles, start by evaluating their condition for cracks or looseness. Gather essential tools like a pry bar, hammer, chisel, and safety gear. Prepare your workspace by clearing furniture and laying down drop cloths, ensuring proper ventilation. Use the pry bar and hammer to lift the tiles, employing a floor scraper for any stubborn pieces. After tile removal, identify and tackle adhesive residue with a heat gun or chemical remover. Check the subfloor for damage afterward. You'll find additional tips on handling specific challenges as you continue your process.
Assessing Your Tile Situation
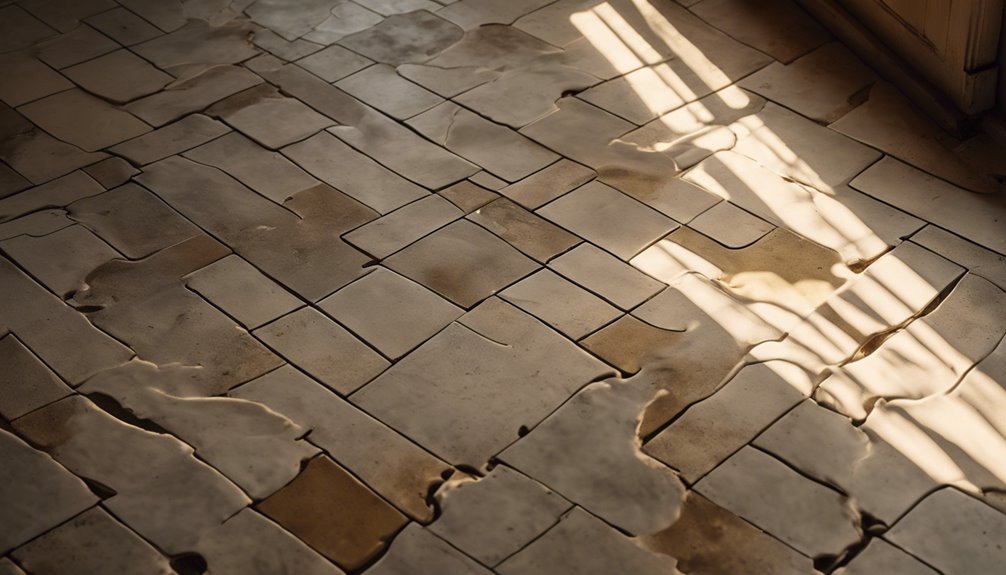
Before you start removing floor tiles, it's crucial to evaluate your tile situation. Begin by examining the tile condition. Check for cracks, chips, or loose tiles, as these factors can influence your removal strategy. Next, consider the tile age; older tiles may adhere differently compared to newer varieties. If tiles are stuck firmly, they might require a more aggressive approach. Make sure you identify the type of adhesive used—some may need special handling or tools. Also, take note of the subfloor condition; any damage here could impact your project. By thoroughly evaluating both the tile condition and age, you'll set yourself up for a smoother removal process, paving the way for the freedom to create your desired flooring.
Gathering Necessary Tools
To successfully remove floor tiles, you'll need a few essential tools on hand. Start with a pry bar and a hammer; these are important for lifting tiles without damaging the subfloor. Depending on the tile types—ceramic, vinyl, or stone—you might also need a chisel for stubborn pieces. A floor scraper will help in removing adhesive residue efficiently. For safety, gloves and goggles are necessary to protect from sharp edges and debris. If you're dealing with larger areas, consider a power scraper for quicker results. Finally, a dust mask is essential to minimize inhalation of dust and particles. Gather these tools based on your specific tile types for an effective removal process.
Preparing the Area
As you prepare the area for tile removal, it's important to clear the space of furniture and any other obstacles that could hinder your progress. Start by removing all items from the floor, including rugs and decorations. Next, protect your floors by laying down drop cloths or old sheets in adjacent areas to prevent any debris from causing damage. Confirm your workspace organization is on point; designate a specific area for tools and removed tiles to maintain efficiency. If possible, seal off the area to minimize dust spreading to other rooms. Finally, consider using a vacuum or broom to eliminate any debris beforehand, setting the stage for a smoother tile removal process.
Removing the Tiles
With the area prepared and cleared, you can begin removing the tiles. Start by selecting the right tile removal techniques for your flooring type. Use a chisel and hammer to gently pry up the edges of the first tile. If tiles are stubborn, a floor scraper can help. Work systematically, removing each tile one at a time, while ensuring that you're not damaging the underlying surface. If you're facing large areas, consider using a power tool specifically designed for tile removal. Remember to keep safety in mind—wear gloves and goggles. Finally, follow surface preparation tips by inspecting the subfloor for damage after all tiles are removed, ensuring it's ready for the next step in your flooring project.
Dealing With Adhesive Residue
Once you've removed the tiles, you'll likely encounter various types of adhesive residue that need addressing. To effectively tackle this, you'll need specific tools and to follow safety precautions to protect yourself and your workspace. Understanding these elements is essential for achieving a clean surface before installing new flooring.
Types of Adhesive Residue
Understanding the types of adhesive residue you might encounter is essential for a successful tile removal process. Common adhesive types include mastic, thin-set mortar, and epoxy. Mastic typically leaves a soft residue that's easier to scrape off, while thin-set mortar can harden, making it tougher to remove. Epoxy adhesives are the most challenging, often requiring specialized removal techniques.
To effectively deal with these residues, you'll need to identify the type before proceeding. For mastic, a solvent may suffice, while thin-set often requires mechanical removal methods. Epoxy may necessitate heat or chemical agents. Knowing these adhesive types allows you to choose the right removal techniques, ensuring you can free your space efficiently and effectively.
Tools for Removal
Removing adhesive residue from floor tiles requires the right tools to guarantee an efficient process. You'll want to arm yourself with the following equipment to effectively implement tile removal techniques:
- Putty Knife: Use this for scraping off stubborn adhesive.
- Heat Gun: Softens adhesive for easier removal.
- Chemical Adhesive Remover: Helps dissolve residue.
- Scrub Brush: Effective for cleaning any remaining bits.
Don't forget to wear essential safety gear, including gloves and goggles, to protect yourself during the removal process. With these tools at your disposal, you can tackle adhesive residue confidently, ensuring a smooth surface for your new flooring.
Safety Precautions Needed
When dealing with adhesive residue, taking safety precautions is essential to protect yourself from potential hazards. First, wear personal protective equipment (PPE), including gloves, goggles, and a mask, to shield against harmful substances. Verify your workspace is well-ventilated to minimize inhalation risks. If you encounter aggressive adhesive, follow proper emergency procedures, like having a first aid kit nearby and knowing how to treat chemical exposure. Avoid using harsh solvents without checking compatibility with the adhesive, as they could release toxic fumes. Finally, dispose of any waste materials according to local regulations to prevent environmental harm. By implementing these safety measures, you can work confidently and efficiently while minimizing risks associated with adhesive residue removal.
Cleaning Up the Space
Before you begin the process of removing floor tiles, it's essential to clean up the space to guarantee a safe and efficient work environment. Proper space organization and cleaning techniques will help you avoid accidents and streamline your workflow. Follow these steps:
- Clear the Area: Remove furniture, rugs, and any obstacles that might impede your progress.
- Dust and Sweep: Thoroughly dust surfaces and sweep the floor to eliminate debris that can hinder tile removal.
- Protect Surrounding Areas: Use drop cloths or plastic sheeting to safeguard adjacent surfaces from damage.
- Gather Tools: Assemble necessary tools like a pry bar, hammer, and safety equipment to keep everything within reach.
Frequently Asked Questions
Can I Reuse the Tiles After Removal?
Absolutely, you can reuse the tiles after removal, but it's not as simple as flipping a switch. Think of it like a puzzle; each piece must be carefully handled. After extraction, you'll need to focus on tile cleaning and adhesive removal. Use a gentle cleaner for the tiles and a scraper for the adhesive. With patience and the right tools, you'll have those tiles ready for a fresh start in no time.
How Long Does the Tile Removal Process Take?
When considering the tile removal process, time estimation is essential. Depending on the removal techniques you use—like manual scraping or power tools—it can take anywhere from a few hours to a couple of days. For smaller areas, expect to spend around four to six hours, while larger spaces may require more time. Always factor in preparation and cleanup, as these stages can also add to your overall time commitment.
What Are Signs of Water Damage Under Tiles?
When it comes to spotting water damage under tiles, think of it as a detective unraveling a mystery. Look for water stains on the surface, which can indicate moisture lurking beneath. Pay attention to any musty odors; they often signal mold growth. If you notice tiles that feel loose or are cracking, that's another red flag. Trust your instincts—addressing these signs early can save you from bigger problems down the road.
Do I Need to Wear a Mask During Removal?
Yes, you should definitely wear a mask during removal. Safety precautions are essential when dealing with flooring materials, as dust and debris can be harmful to your lungs. A mask provides respiratory protection, filtering out fine particles. Opt for a mask rated for construction work, ensuring it fits snugly. This way, you can focus on the task without worrying about potential respiratory issues. Prioritize your health and safety throughout the process.
Can I Hire Professionals for Tile Removal?
If you're looking to embrace a little help with tile removal, hiring professional services can be a wise choice. They possess the expertise and tools to efficiently handle the task, ensuring a smooth changeover without the hassle. By opting for professionals, you're freeing yourself from the heavy lifting and time-consuming work, allowing you to focus on other priorities. Just make sure to research and choose a reputable service for the best results.


