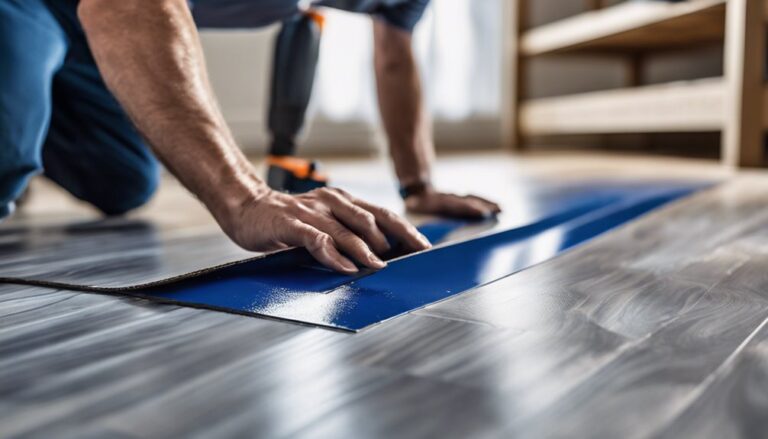
To stagger vinyl plank flooring, start by measuring your room and choosing a reference point, like the longest wall. You'll want to offset seams by at least 6 to 12 inches for a natural look and overall durability. Begin with your first row aligned using a chalk line, then cut planks to achieve the staggered effect in the following rows, varying plank lengths as necessary. Always measure twice before cutting, and guarantee you maintain consistent alignment throughout. This approach enhances aesthetics and stability, and if you want tips on tools and techniques, there's more to explore.
Understanding Staggering Patterns

When you're planning to install vinyl plank flooring, understanding staggering patterns is essential for achieving a professional look. Staggering patterns involve arranging the planks in a way that offsets the seams, creating a visually appealing flow. This technique not only enhances the aesthetic appeal of your flooring but also helps to distribute weight evenly, reducing the risk of wear and tear. You can choose from various staggering methods, such as a random stagger or a specific measurement, depending on your design preference. Remember, the key is to maintain a consistent pattern throughout the space. By mastering these staggering patterns, you'll guarantee your vinyl plank flooring looks polished and inviting, giving you the freedom to enjoy your beautiful new floors for years to come.
Preparing Your Space
Once you have a clear understanding of staggering patterns, it's time to prepare your space for installation. Start by clearing the area of any furniture, rugs, or obstacles to guarantee a smooth workflow. Sweep and vacuum the subfloor to remove dust and debris, as proper space preparation is essential for a successful installation. Check for any uneven surfaces or damage that might need fixing. Make sure you have the right flooring tools on hand, like a utility knife, measuring tape, and a square, to help you work efficiently. Lay down a moisture barrier if necessary, especially in basement areas. By organizing your space and tools, you'll create a hassle-free environment that encourages creativity and freedom while installing your vinyl plank flooring.
Measuring and Cutting Planks

To guarantee a precise fit for your vinyl plank flooring, it's important to measure and cut the planks accurately. Start by using reliable measuring techniques, such as a tape measure or a square, to determine the length and width of each area. Always measure twice to avoid mistakes. When it comes to cutting, select appropriate cutting tools like a utility knife, laminate cutter, or a saw for thicker planks. For straight cuts, a utility knife works well; just score the plank and snap it. For more complex cuts, a saw is ideal. Remember to wear safety gear and work on a stable surface to maintain freedom and precision in your project. Taking your time here will make the installation smoother.
Starting the First Row
Before you lay the first row of vinyl plank flooring, you need to measure the room accurately to determine the best starting point. Once you've got your measurements, cut the planks properly to guarantee they fit perfectly. Align the first row carefully, as this sets the foundation for the rest of your installation.
Measure the Room
As you prepare to install the first row of vinyl plank flooring, accurately measuring the room is vital for a successful outcome. Start by gathering your measuring tools—like a tape measure and a square. Measure the room dimensions carefully, noting the length and width. This'll help you determine how many planks you'll need and where to start. If the room isn't perfectly rectangular, make adjustments for any alcoves or irregularities. It's essential to make sure your first row is straight; this will set the tone for the entire installation. Don't rush this step; taking the time to measure accurately will give you the freedom to create a beautifully staggered look without any surprises down the road.
Cut Planks Properly
Once you've measured the room and gathered your tools, it's crucial to cut the planks properly for the first row to guarantee a seamless installation. Start by determining the required plank sizes based on your room dimensions. Use precise cutting techniques, like a utility knife or a saw, to guarantee clean edges. If your first plank needs to be shortened, measure and mark the cut accurately, then score it multiple times to create a clean break. Remember to stagger your cuts for a more natural look, avoiding uniformity that can weaken the structure. As you cut, keep in mind that each plank should fit snugly together, allowing for expansion gaps along the walls. This preparation sets the stage for an effortless installation.
Align the First Row
With your planks cut and ready, aligning the first row becomes the next important step in your vinyl plank flooring installation. Start by determining your first plank positioning. Ideally, you want to begin along the longest wall or a straight edge to create a clean look. Use a chalk line or a straightedge to mark where the first row will lie. This guarantees row alignment techniques are followed, preventing any misalignment as you progress. Lay your first plank down, making sure it's snug against the wall but not touching it—allowing for expansion. As you continue, double-check the alignment of each plank with the previous one. A well-aligned first row sets the tone for a stunning and professional finish.
Staggering the Subsequent Rows

Once you've completed the first row, it's essential to stagger the subsequent rows for a seamless look. You can achieve this by using various row offset techniques, like starting the next row with a plank that's cut to a different length. Just remember to maintain seam alignment throughout the process to guarantee a professional finish.
Row Offset Techniques
As you begin laying your vinyl plank flooring, it's crucial to stagger the seams of each row to enhance both the visual appeal and structural integrity of the installation. Using effective staggering techniques can help you achieve a beautiful finish while guaranteeing your floor lasts.
Here's a simple guide for plank alignment:
| Row Number | Start Plank Length | Offset Length |
|---|---|---|
| 1 | 48 inches | 0 inches |
| 2 | 36 inches | 12 inches |
| 3 | 24 inches | 24 inches |
Start with a full plank in the first row, then offset subsequent rows by at least 6 to 12 inches for a more natural look. This method prevents weak seams and guarantees a sturdy installation.
Maintaining Seam Alignment
While you're laying the subsequent rows of vinyl plank flooring, it is essential to maintain proper seam alignment to secure a seamless appearance and durability. Start by checking the plank orientation; adjacent rows should have staggered seams to avoid long, straight lines that can weaken the structure. Aim for a minimum of 6 to 12 inches between the seams of adjoining planks to minimize seam gaps. As you install each plank, consistently measure and adjust your placements to keep those seams aligned. Using a measuring tape can help you verify this spacing. By keeping a close eye on your seam alignment throughout the installation process, you'll guarantee a beautiful, long-lasting floor that feels free and open in your space.
Securing the Planks
Securing the planks properly is essential to guaranteeing a stable and long-lasting floor. To achieve this, start by applying a suitable adhesive to enhance plank adhesion. Focus on the seams and edges, guaranteeing they're adequately covered to prevent movement. As you lay each plank, press down firmly to secure edges properly and eliminate gaps. If you're using a floating floor method, guarantee the planks click together tightly, and avoid any shifting. For additional security, consider placing weights on the planks for a few hours after installation, allowing the adhesive to set. By taking these steps, you'll create a seamless and reliable surface that not only looks great but also stands the test of time. Enjoy your new floor!
Final Touches and Maintenance

Once you've installed your vinyl plank flooring, it's important to focus on the final touches and maintenance to secure its longevity and appearance. Start by applying baseboards or trim to cover any gaps and give a polished look. For cleaning, use a soft broom or vacuum with a hard floor attachment regularly, and mop with a damp cloth using a mild cleaner—avoid harsh chemicals. If you encounter any scratches or dents, employ repair strategies like using a vinyl repair kit or replacing individual planks if necessary. This way, you can maintain the beauty of your flooring effortlessly. Following these cleaning tips and repair strategies will guarantee your vinyl plank flooring remains a stunning feature in your space for years to come.
Frequently Asked Questions
Can I Stagger Vinyl Plank Flooring in a Small Room?
Absolutely, you can stagger vinyl plank flooring in a small room layout! Just make sure to take into account plank alignment carefully. Staggering helps create a more visually appealing design, even in tight spaces. Aim for a random pattern or a specific staggered sequence to avoid a repetitive look. This method not only enhances aesthetics but also strengthens the flooring's stability. So, feel free to experiment with different layouts—it's your space to enjoy!
What Tools Do I Need for Staggering Vinyl Planks?
Did you know that staggering vinyl planks can reduce the risk of seams showing by up to 50%? To achieve this, you'll need a few essential tools: a utility knife for precise cutting techniques, a straight edge for clean lines, and a measuring tape for accurate plank patterns. A tapping block can help lock planks in place, while a pull bar guarantees a snug fit. With the right tools, you'll create a stunning floor that flows beautifully.
How Do I Handle Transitions Between Rooms?
When handling changes between rooms, you'll want to use transition strips to create a smooth flow. These strips act as room dividers, ensuring your flooring looks cohesive while accommodating slight height differences. Measure the gap between the planks and the next room's flooring, then cut the transition strip to fit. Secure it down, and you'll have a neat, stylish change that enhances the freedom and beauty of your space.
Is It Necessary to Acclimate the Planks Before Installation?
Yes, it's crucial to acclimate the planks before installation. This step helps prevent issues with flooring expansion due to temperature and humidity changes. By letting the planks adjust to your home's environment for at least 48 hours, you'll minimize the risk of warping or gaps after the plank installation. Just stack them in the room where they'll be laid, ensuring air circulation. It's a simple practice that leads to a smoother, more durable floor.
How Can I Fix Mistakes in Staggering?
If you've made mistakes in staggering, don't worry—fixing them isn't too tough. Start by adjusting alignment; carefully lift the affected planks and check their placement. If they're too close together, shift them to create a more appealing stagger. In cases where the planks are damaged or misaligned beyond repair, consider replacing planks entirely. Just take your time, and you'll achieve a beautiful, harmonious look that gives your space the freedom it deserves.

