Are you tired of staring at those outdated tiles in your kitchen or bathroom? Maybe they’re chipped, cracked, or just don’t match your style anymore.
Replacing tile flooring can seem like a daunting task, but with a little guidance, you can transform your space into something fresh and beautiful. Imagine walking into your room and feeling a wave of satisfaction as you step onto your new floor, perfectly aligned with your vision.
This guide will walk you through the process of replacing tile floor, step by step, without overwhelming you with jargon or complicated techniques. Whether you’re a seasoned DIY enthusiast or a curious beginner, you’ll find valuable tips and tricks to make this project smooth and successful. Get ready to learn how to swap out those old tiles and bring a new look to your home. Keep reading, and let’s make your flooring dreams a reality!
Preparation
You need some important tools. A hammer and chisel are must-haves. A tape measure helps you cut tiles right. Tile spacers keep gaps even. Remember a notched trowel for glue. Buy enough tiles and glue. You don’t want to stop midway. A grout float is useful too. It helps spread the grout. Safety gear is also important. Like gloves and goggles.
Safety comes first. Wear gloves to protect your hands. Use goggles for your eyes. Flying bits can hurt. Wear sturdy shoes to protect your feet. Knee pads help when kneeling. Ensure proper ventilation in the room. Dust can be harmful. Keep a first aid kit nearby. Better safe than sorry.
Move all furniture away. You need a clean, clear space. Remove rugs and mats. Sweep the floor clean. No dirt or debris should remain. Check for any loose tiles. Remove them carefully. Use a broom for final cleaning. Make sure the area is dry. Wet floors can be slippery. Now you’re ready to start.
Removing Old Tiles
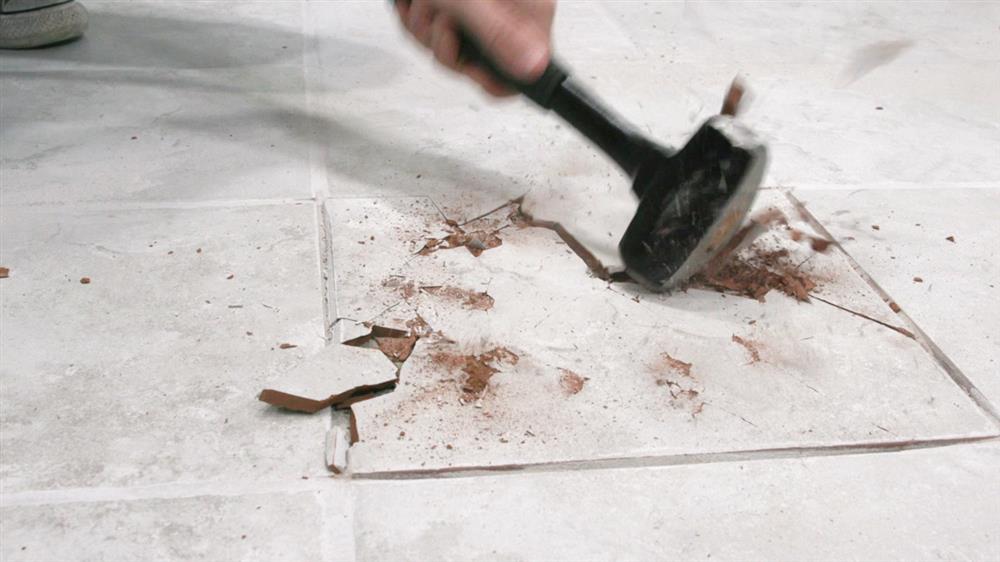
Use a hammer to break the old tiles. Tap gently to avoid damage. Once tiles crack, use a chisel. This helps to pry them up. Be careful not to hurt yourself. Work slowly to avoid mistakes. Wear gloves to protect your hands. Safety goggles are also important. Keep your work area clean. It helps to see your progress.
Sweep the broken pieces into a pile. Use a dustpan to collect them. Place debris into a strong trash bag. Make sure the bag is not too heavy. Check local rules for disposing of tiles. Some places have special guidelines. Follow them to avoid trouble. Dispose of everything properly. A clean area makes the next step easier.
Surface Inspection
Start by checking the subfloor under the tiles. It must be strong and dry. Look for cracks or soft spots. Any damage can cause problems later. Use a flashlight to see clearly. Make sure the floor is even. This helps tiles to sit flat.
If you find any damage, fix it first. Replace any broken parts with new ones. Use a patch kit for small holes. For bigger areas, you might need professional help. Make sure the repair is firm and smooth. This will make the new tiles last longer.
Laying New Tiles
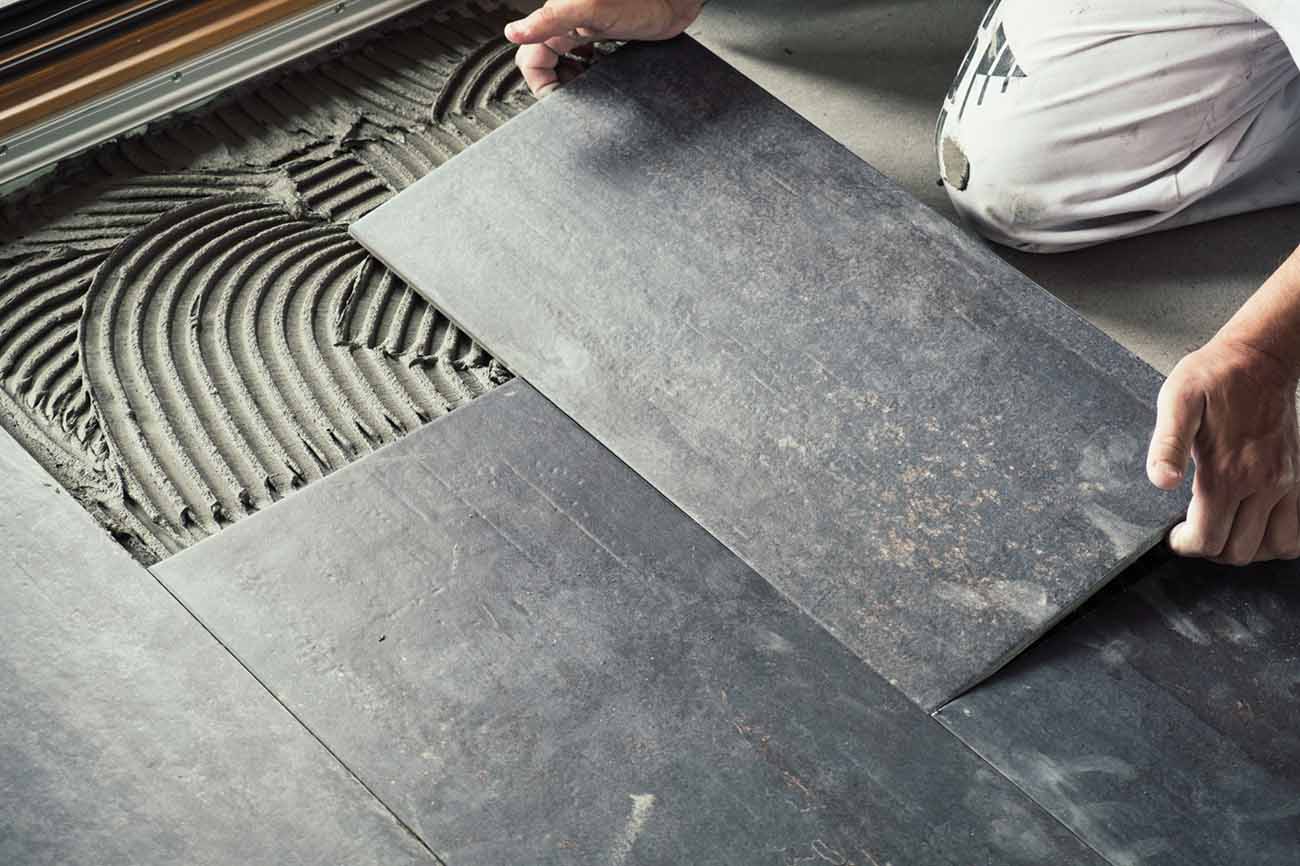
Draw the room on paper. Use a pencil and ruler. Mark where each tile will go. This helps in avoiding mistakes. Arrange tiles on the floor first. Check for a nice pattern. Make sure the edges look neat. This step is very important. It ensures your tiles fit well. Adjust as needed before using glue. Take your time and do it right. It will save you trouble later.
Use a trowel to spread the adhesive. Only cover a small area first. This keeps it from drying too fast. Place the tile on the adhesive. Press it gently. Make sure it sticks well. Use spacers between tiles. They help keep even spaces. Check tiles are level. Adjust if needed. Work in small sections. This ensures better control. Clean any excess adhesive quickly. This keeps your work tidy.
Setting Tiles
Tiles need to be placed with care. Spacers are very helpful. They keep tiles evenly spaced. This helps the floor look neat. Always use the same size spacers. It ensures even spacing across the floor. Check the alignment often. Adjust tiles if needed. Precision is key for a good-looking floor.
Spacers come in different sizes. Choose the right size for your tiles. Bigger tiles need bigger spacers. Smaller tiles need smaller spacers. Using the right spacers makes the job easier. It also makes the floor look better. Always have extra spacers handy. It ensures you don’t run out while working.

Grouting Process
Mix grout with water in a clean bucket. Stir until it’s smooth. It should be thick like peanut butter. Use a rubber float to apply the grout. Hold the float at a 45-degree angle. Press grout into the tile gaps. Work slowly and cover all spaces. Make sure grout fills every gap. This keeps tiles strong and in place.
After applying grout, wait a few minutes. Use a damp sponge to clean tiles. Wipe in a circular motion. Rinse the sponge often with clean water. Remove all grout from the tile surfaces. Leave grout only in the gaps. Be gentle to avoid removing grout from gaps. Let the grout dry for at least 24 hours. This ensures it sets properly.
Final Touches
Giving your tile floor a fresh look involves careful final touches. Ensure tiles are aligned, secure, and evenly grouted. Clean the surface thoroughly to reveal a polished finish.
Seal The Tiles
Sealing the tiles is crucial. It keeps them safe from water and stains. First, clean the tiles. Ensure they are dry. Apply the sealant evenly. Use a soft brush or sponge. Let the sealant dry. Check the instructions for drying time. Sealing helps the tiles last longer. Repeat the process if needed. Sealed tiles are easier to clean.
Polish And Clean
Polishing makes tiles shine. Use a tile polish for this. Apply it with a clean cloth. Rub gently in circles. This will bring out the shine. After polishing, clean the tiles. Use a damp mop or cloth. Avoid harsh chemicals. They can damage the tiles. Clean tiles look bright and fresh. Regular polishing keeps them beautiful.
Frequently Asked Questions
How Do I Start Replacing Tile Floor?
Begin by removing old tiles using a chisel and hammer. Clean the subfloor thoroughly, ensuring it’s level and debris-free. Then, measure and cut new tiles to fit the space. Apply adhesive evenly on the subfloor, and carefully position tiles. Allow them to set and cure as per the adhesive’s instructions.
What Tools Are Needed For Tile Replacement?
Essential tools include a tile cutter, chisel, hammer, and trowel. You also need a level, grout float, and notched trowel. Additionally, safety gear like gloves and goggles are important. These tools help you efficiently remove old tiles and install new ones accurately, ensuring a smooth and professional finish.
Can I Replace Tile Floor Myself?
Yes, you can replace tile floor yourself with proper preparation. Gather necessary tools and materials before starting. Follow step-by-step instructions carefully for best results. If unsure, consult online tutorials or experts for guidance. With patience and attention to detail, DIY tile replacement is achievable for most homeowners.
How Long Does Tile Replacement Take?
Tile replacement typically takes 2 to 5 days. The duration depends on the room’s size and your experience level. Removing old tiles and preparing the subfloor can take a day. Installing new tiles and allowing them to set might take additional time.
Always follow adhesive and grout curing times for best results.
Conclusion
Replacing tile floors can transform your home. With patience, you can do it yourself. Start by gathering the right tools. Be sure to wear safety gear. Follow each step carefully for best results. Removing old tiles takes time. Clean the surface thoroughly before installing new tiles.
Choose tiles that fit your style and space. Consider hiring help if needed. A new tile floor adds beauty and value to your home. Enjoy the fresh look and feel underfoot. Happy tiling!


