Are your floors feeling a bit uneven or bouncy? You might be dealing with damaged floor joists.
Replacing floor joists is a task that might seem daunting at first, but with the right guidance, you can turn this challenge into a manageable project. Imagine walking across your living room with confidence, knowing your floors are safe and sturdy.
In this guide, we’ll walk you through each step of the process, ensuring you have the know-how to tackle this task successfully. From identifying the signs of trouble to executing the replacement, we’ve got you covered. Keep reading to discover how you can restore the strength and stability of your home, transforming your space into a haven of comfort and security. Let’s dive into the details and empower you to make your home safer and more reliable.
Assessing Joist Damage
Floor joists can fail due to several reasons. Sagging floors is a common sign. Another sign is the creaking sound when you walk. Visible cracks in the ceiling also hint at trouble. Uneven floors can be a clear indication. Doors that do not close properly are another clue. Water stains on the ceiling suggest damage.
Water exposure is a major cause of damage. Termites eat wood and weaken joists. Excess weight can lead to bending or breaking. Poor installation can cause early damage. Rot due to moisture can make wood weak. Age is also a factor; old joists wear out. Foundation shifts can harm joists. Each cause can lead to serious problems.
Gathering Necessary Tools
You will need some basic tools. A hammer is important for fixing nails. Get a saw for cutting wood. Use a measuring tape to measure lengths. A level helps keep things straight. A drill is for making holes. A wrench is needed for bolts. Keep these tools handy.
Safety is very important. Wear safety goggles to protect your eyes. Use ear protection if it’s noisy. Gloves protect your hands from cuts. A hard hat keeps your head safe. Dust masks help you breathe clean air. Make sure you have all this equipment before starting. Stay safe at all times.
Preparing The Work Area
First, remove all furniture and items from the room. This makes it easier to work. Check for any obstacles on the floor. Sweep the floor to ensure it’s clean. Keep tools and materials nearby for easy access. Organize them to avoid trips and falls. Label boxes if needed. Create a clear path to exit the area quickly. Consider safety gear such as gloves and goggles.
Before starting work, check the structure. Use a temporary support beam if needed. This prevents any collapse. Identify weak areas in the structure. Mark them for attention later. Consult a professional if unsure about safety. Place jack posts carefully to hold weight. Secure them tightly to avoid movement. Double-check support beams before removing old joists. Safety first!
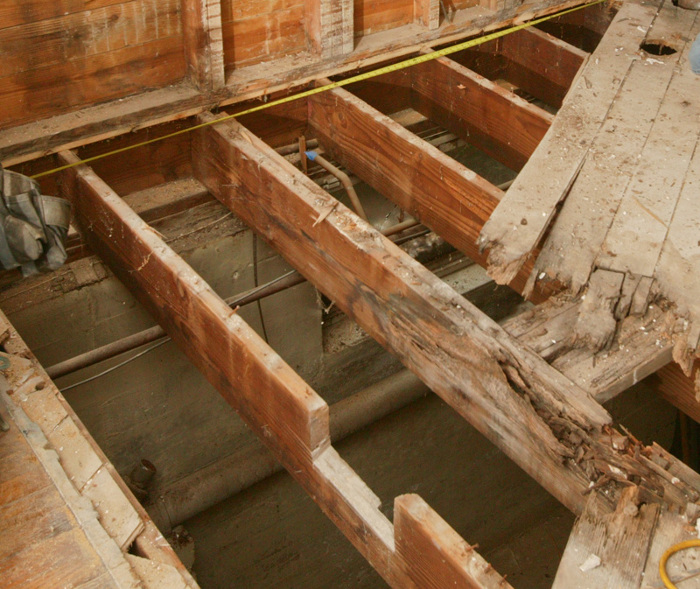
Removing Damaged Joists
First, check the condition of the floor joists. If they are damaged, they must be removed. Use a crowbar to gently pry them away from the subfloor. Be careful not to damage the surrounding areas.
Before working, check for any wiring or plumbing near the joists. Turn off the electricity to avoid accidents. Carefully move any wires or pipes out of the way. Make sure everything is secure before continuing.
Selecting New Joists
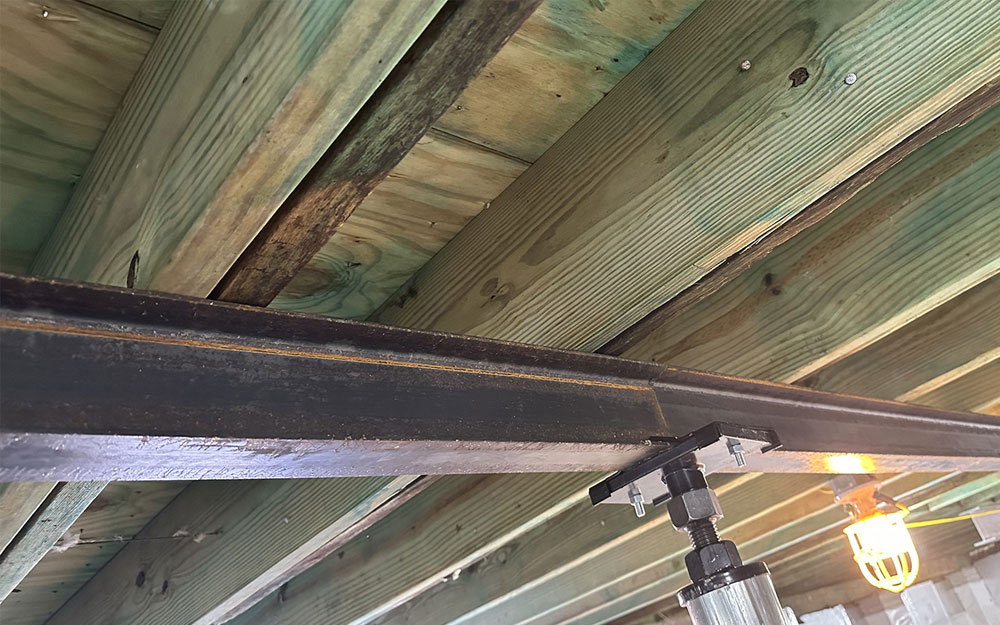
Picking the right material is very important. Wood is a common choice. It is strong and easy to find. Steel is another option. It is very strong and does not rot. But it can be heavy and costly. Engineered wood is also popular. It is made from wood fibers and glue. It can hold a lot of weight. Think about the cost and durability. Also, consider how long the joists will last. Each material has its own benefits.
Joists need the right size for strength. Measure the span of the area. Longer spans need larger joists. Use a joist span table to decide the size. The table shows the right joist for each span. The thickness of the joist matters too. Thicker joists can hold more weight. Ensure your joists are the correct size for safety.
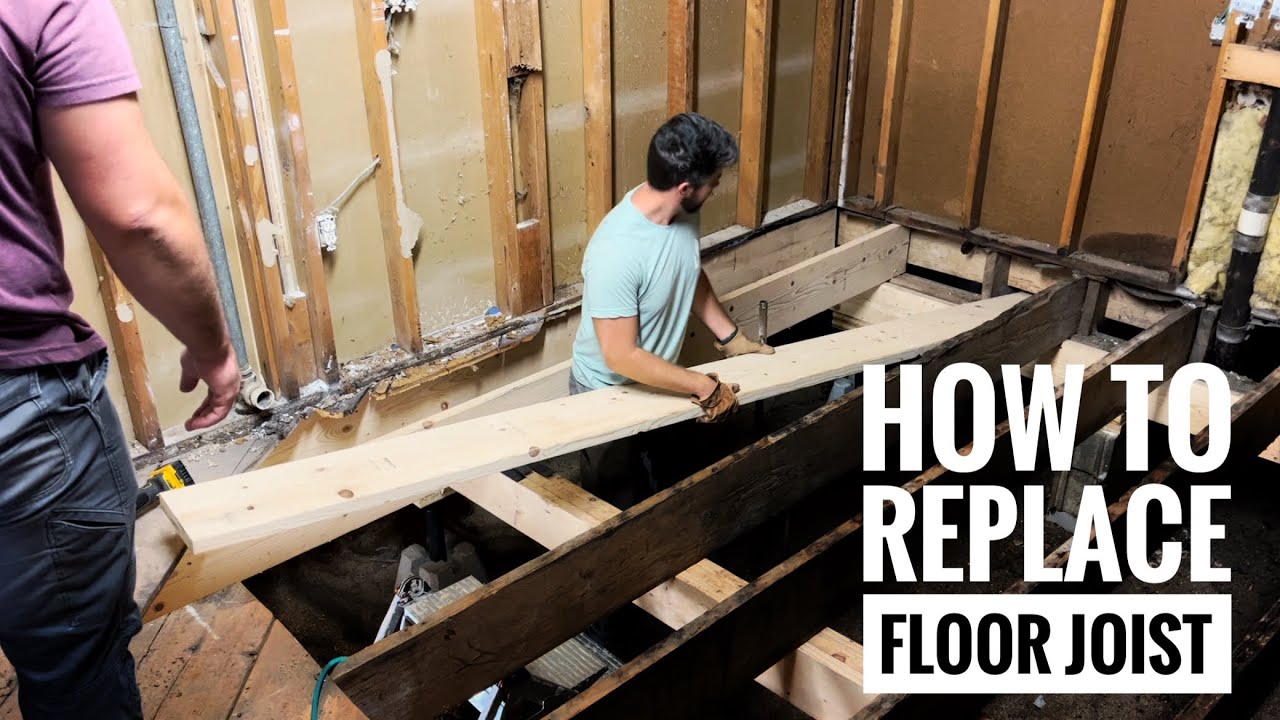
Installing New Joists
First, measure the space for each joist. Use a tape measure for accuracy. Place each joist in the correct spot. Make sure it is straight. A spirit level can help with this. Adjust the joist until it is perfect. This step is very important. The floor must be even.
Use a chalk line to guide your work. It helps keep the joist straight. Follow the line closely. Precision is key here.
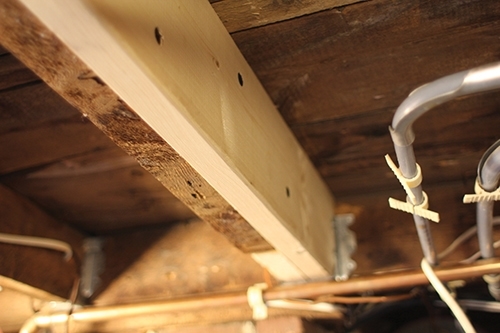
Once aligned, secure the joist. Use nails or screws to fasten it. A hammer or drill will be needed. Make sure everything is tight. Loose parts can cause problems later.
Check each joist after securing. Ensure it does not move. Everything should be firm and stable. Strong floors last longer.
Reinforcing The Structure
Joist hangers help in making floors strong. They hold the joists in place. This keeps the floor from moving too much. Using joist hangers is easy. First, measure the joists. Make sure each hanger fits right. After that, mark the spot for each hanger. Use a pencil to do this. Next, drill holes for the screws. This makes it easier to fix the hanger. Finally, use screws to attach the hanger. Make sure they are tight. This is important. It keeps the joist steady. With joist hangers, the floor is safer.
Strong connections make floors last longer. Use nails or screws to do this. First, check if they are tight. Tighten any loose ones. This helps the joists stay in place. Add extra nails if needed. Place them at an angle. This gives the best hold. Sometimes, brackets are useful too. They hold joists firmly. Look for any weak spots. Fix them quickly. This keeps the floor safe and strong.
Finalizing The Replacement
Inspecting the Installation is very important. Check if the joists are tight. Make sure they are aligned. Look for any gaps. Small gaps can cause problems. Use a flashlight to see better. Look for any damaged wood. Replace if necessary. Check the nails and screws. Tighten any loose ones. All parts should be secure and safe.
Restoring Flooring and Finishes comes next. Lay down the flooring again. Use the same pattern as before. Be careful with measurements. Check corners and edges. Make sure everything fits well. If using tiles, match the design. If using wood, match the color. Finish by adding trims. This gives a neat look. Make sure everything is smooth. Check for any uneven spots. Fix them before finishing.
Frequently Asked Questions
What Tools Are Needed To Replace Floor Joists?
Replacing floor joists requires essential tools like a circular saw, hammer, level, measuring tape, and safety gear. A pry bar and drill are also recommended. Ensure you have protective equipment like gloves and goggles. Accurate measurements and cuts are crucial for a successful replacement.
How Do I Identify Damaged Floor Joists?
Identifying damaged floor joists involves looking for signs like sagging floors, creaking sounds, and visible cracks. Water stains or mold indicate moisture issues. Inspect the joists for rotting or insect damage. Regular maintenance helps catch these problems early, ensuring a safe and stable floor structure.
Can I Replace Floor Joists Myself?
Replacing floor joists yourself is possible with the right tools and skills. However, it’s labor-intensive and requires structural knowledge. If unsure, hiring a professional ensures safety and quality. Always consider your experience level and the complexity of the project before attempting a DIY approach.
How Long Does Replacing Floor Joists Take?
Replacing floor joists can take several days, depending on the project’s complexity. Simple repairs might be quicker, while extensive replacements require more time. Factors like the number of joists and accessibility affect duration. Planning and preparation help streamline the process and minimize disruptions.
Conclusion
Replacing floor joists can seem daunting, but it’s manageable with patience. Start with safety precautions. Always wear protective gear. Identify damaged joists carefully. Measure and cut new joists precisely. Secure them tightly for stability. Check your work regularly. This ensures safety and longevity.
Seeking help? Consult a professional when unsure. This can save time and effort. Follow these steps for effective replacement. Your floor will be strong and safe. Enjoy your renewed space. Appreciate the sturdiness of your new floor. It’s worth the effort.
Stay proactive to prevent future issues.


