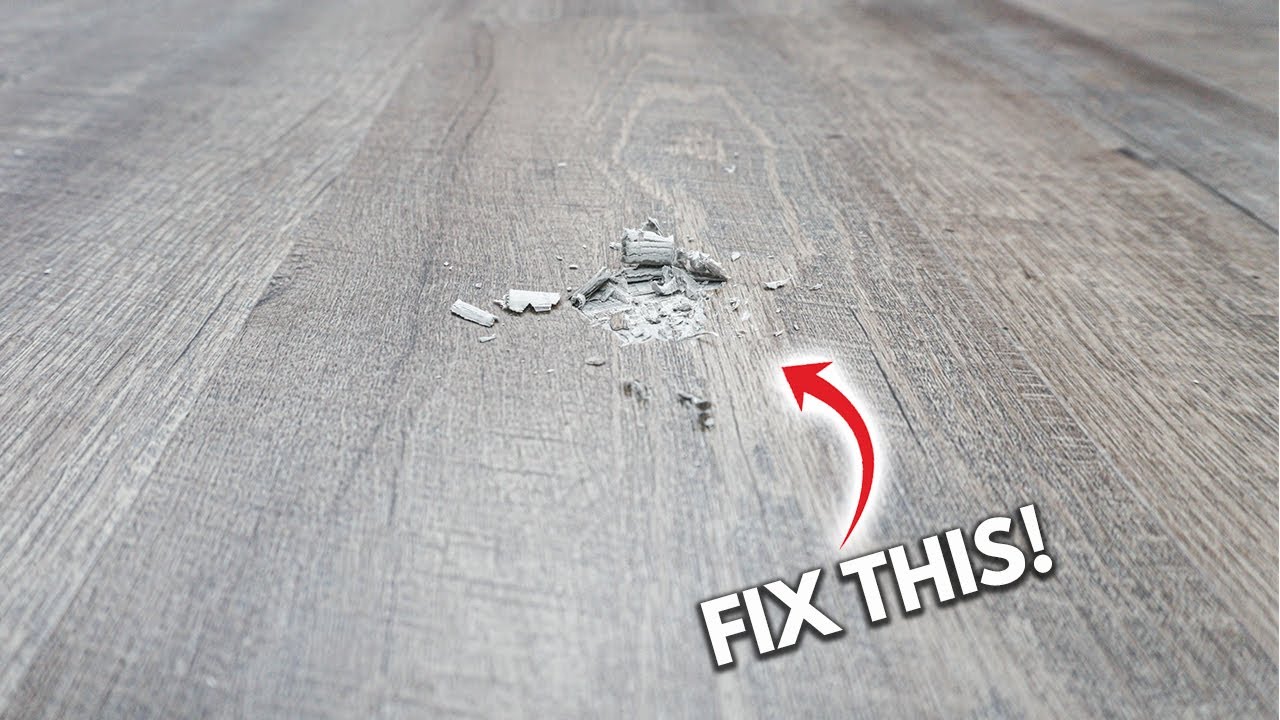
Have you noticed a scratch or a dent on your vinyl plank flooring? Maybe a stubborn stain that just won’t go away?
These common issues can be frustrating and may leave you wondering if your beautiful floor will ever look perfect again. You might even feel a bit overwhelmed, thinking about how to tackle these problems without spending a fortune on professional help.
But here’s the good news: you can repair your vinyl plank flooring yourself, and it’s easier than you think! This guide will walk you through simple, effective techniques to restore your floor to its original charm, saving you time and money. By the end of this article, you’ll have the confidence to fix those pesky issues and keep your floor looking pristine. Dive in to discover how you can easily maintain your vinyl plank flooring like a pro.
Tools And Materials Needed
Repairing vinyl plank flooring needs some basic tools. You will need a utility knife to cut the vinyl. A putty knife helps to lift damaged pieces. Adhesive is needed to stick the new planks. Keep a measuring tape for accurate cuts. A hammer can be useful for tapping planks in place. Cleaning cloths are good for wiping dust. Safety goggles protect your eyes from debris. Gloves keep your hands safe.
Materials include spare vinyl planks that match your floor. You may need a floor patch for holes. Sealant is helpful for sealing edges. Sandpaper might be needed for smoothing. Underlayment can be required for additional support. These tools and materials ensure a smooth repair.
Identifying Damage
Scratches on vinyl flooring can look ugly. Use a vinyl repair kit to fix them. Clean the area first. Apply the repair solution. Buff gently with a cloth. Scuffs are easier to manage. Baking soda can help. Mix it with water. Rub on the scuff. Wipe away with a damp cloth. Your floor should look better.
Dents are small but noticeable. A warm iron can help. Place a damp cloth on the dent. Run the iron over the cloth. The heat should lift the dent. For holes, use a vinyl patch kit. Clean the area and apply the patch. Press firmly. Let it dry. Your floor is fixed.
Water can cause big problems. Mold might grow. First, dry the area. Use a fan or towel. Check for loose planks. Replace damaged planks if needed. Always keep your floor dry. This stops future issues. Water can be sneaky. Be careful with spills.
Fixing Scratches And Scuffs
A scratch repair kit can fix small scratches. First, clean the area with a damp cloth. Make sure it’s completely dry. Apply the kit’s solution to the scratched spot. Use a cloth to gently rub it in. This hides the scratch and protects the floor. Let it dry for a few hours. Always follow the kit’s instructions for best results.
Polishing makes the floor shine. Use a vinyl floor polish for this task. Pour a small amount on the floor. Spread it evenly with a soft cloth or mop. Work in small sections for better control. Allow it to dry completely. Polishing can remove minor scuffs and make the floor look new. Repeat the process every few months.

Repairing Dents And Holes
A vinyl repair kit can fix small dents and holes. First, clean the area with a damp cloth. Then, follow the kit’s instructions. Usually, the kit includes a filler. Apply it to the dent or hole. Smooth it with a spatula. Wait for it to dry. Sand the area gently. This makes it smooth. Lastly, apply the color mix from the kit. This matches your floor’s shade.
Sometimes, planks get badly damaged. Then, you need to replace them. Start by removing the damaged plank. Lift it gently with a tool. Be careful not to damage nearby planks. Next, measure the space for the new plank. Cut the new plank to fit. Place it in the space. Press down firmly. Ensure it is level with other planks. Your floor will look new again.
Addressing Water Damage
Water can harm vinyl planks. Dry the area fast. Use towels to soak up water. Place a fan nearby. Let it blow air over the wet spots. Open windows for fresh air. This helps dry faster. A dehumidifier can also help. It pulls water from the air. Keep the area dry to prevent mold.
Damaged planks need replacing. Start by removing the bad planks. Gently lift them up. Check for any more water below. Place new planks in the empty spots. Make sure they fit well. Press them down firmly. This will make the floor look new again. Be sure to use the same type of planks. It helps the floor look even.
Replacing Vinyl Planks
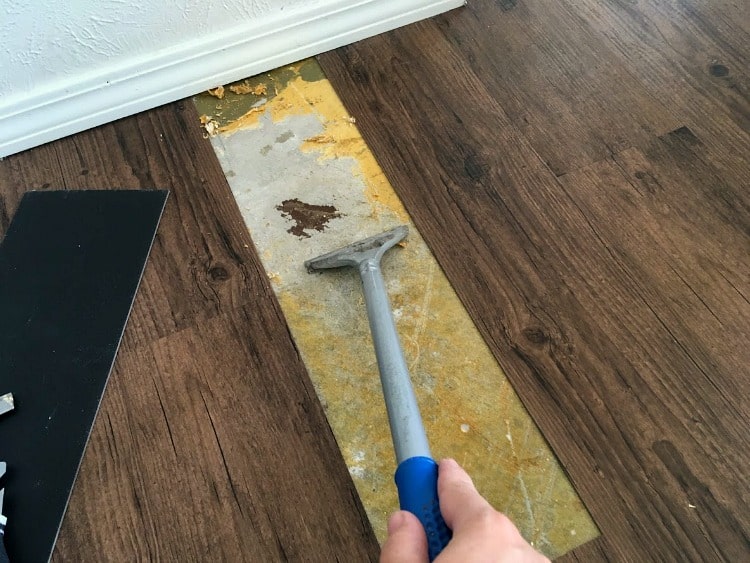
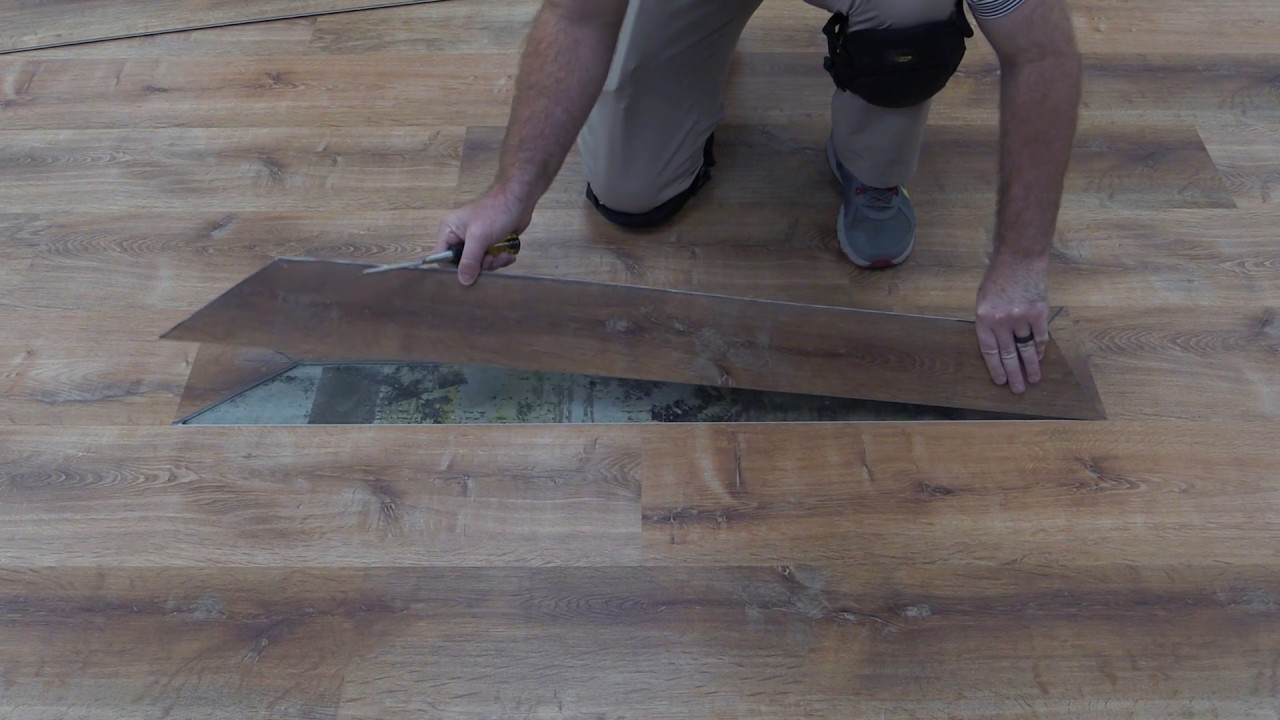
Start by clearing the area. Move furniture away from the damaged spot. Then, locate the damaged plank. Use a utility knife to cut along the edges. Be careful not to harm nearby planks. Lift the plank using a putty knife. Work slowly to avoid breaking it. Dispose of the old plank properly.
Measure the gap left by the old plank. Cut the new plank to fit. Ensure the edges are smooth. Place the new plank in the gap. Use a rubber mallet to tap it gently. This ensures a tight fit. Check that the new plank is level with others. Finally, return the furniture to its place.
Preventing Future Damage
Keep your vinyl plank floors clean and shiny. Use a soft broom daily. A vacuum can also work well, but ensure it does not have a beater bar. This can scratch the surface. Mop the floor weekly. Use a damp mop and a mild cleaner. Avoid harsh chemicals. They can damage the finish. Always dry the floor after mopping.
Place rugs at entry points. They help to trap dirt. Use felt pads under furniture. This prevents scratches. Heavy furniture can dent floors. Use furniture sliders to move them. Keep pet nails trimmed. They can scratch the surface. Avoid high heels on vinyl. They can cause dents.
Frequently Asked Questions
How Do You Fix Scratches On Vinyl Flooring?
To fix scratches, clean the area with a mild cleaner. Apply a vinyl floor scratch repair kit or use a wax stick. Buff the area gently to blend the repair. For deeper scratches, consider professional repair or replacement of the affected plank.
Can Vinyl Plank Flooring Be Patched?
Yes, you can patch vinyl plank flooring. First, identify the damaged area and clean it thoroughly. Cut a matching piece from leftover vinyl planks and adhere it with adhesive. Ensure it’s aligned perfectly. For a seamless finish, press the patch firmly and let it dry.
How Do You Replace A Damaged Plank?
To replace a damaged plank, remove the baseboards and lift the surrounding planks. Carefully extract the damaged piece and fit a new plank. Ensure it’s aligned and secure. Replace the baseboards and check for any gaps. This ensures a smooth and uniform look.
What Tools Are Needed For Vinyl Floor Repair?
For vinyl floor repair, you’ll need a utility knife, adhesive, a clean cloth, and a vinyl repair kit. A roller can help ensure a smooth finish. These tools assist in cutting, adhering, and blending repairs seamlessly, ensuring your flooring looks as good as new.
Conclusion
Fixing vinyl plank floors is simple with the right steps. Start by identifying the issue carefully. Small scratches need gentle sanding. For bigger problems, replace the affected plank. Ensure the replacement matches the existing floor. Always use proper tools to avoid damage.
Taking time to follow these steps ensures a smooth repair. Regular maintenance helps prevent future issues. Keeping your floor clean and dry preserves its look. Remember, fixing your floor adds beauty and value to your home. Easy repairs keep your space inviting and stylish.
Enjoy your refreshed flooring!


