To repair minor and major cracks in flooring, start by evaluating the crack's severity. For minor cracks, clean the area thoroughly and fill them with self-leveling polyurethane or epoxy, ensuring a smooth finish. Major cracks require more attention; you'll need to excavate and use acrylic bonding agents with suitable patching materials. Allow for proper curing time, keeping the area damp to prevent further cracking. Finally, seal the repaired sections to protect against future damage. By following these steps, you'll restore functionality and aesthetics while extending the life of your flooring. More advanced techniques and insights can follow.
Assessing Crack Severity
When evaluating crack severity in flooring, it's important to categorize them into minor or major types, as this directly influences your repair approach. Minor cracks, typically surface-level, are generally easier to fill and repair. You'll want to assess these cracks carefully to determine their width and length. Minor cracks, often less than 1/4 inch wide, usually don't indicate significant structural issues, and addressing them can often be done with simple patching compounds or fillers.
On the other hand, major cracks present a larger problem. When cracks exceed 1/4 inch in width, they may signal underlying issues that require serious attention. It's important to assess the location and direction of these cracks, as they can provide insights into potential causes like moisture intrusion or foundation movement. Regular assessments help you monitor these cracks over time, offering significant information about whether they're worsening or if your repairs are effective.
Documenting your findings is important. Keeping a record of the size, location, and changes in cracks allows you to track their progression and make informed decisions about repairs. If you find that cracks are expanding or new ones are forming, it may be time to consult a professional. By understanding the severity of the cracks in your concrete floors, you can take the necessary steps to maintain their integrity and longevity, allowing you to enjoy a safe and stable living environment.
Identifying Underlying Issues
To effectively address cracks in your flooring, you need to identify the underlying issues that may be contributing to the problem. Major cracks often stem from pressure, impact, or moisture intrusion, while the failure of expansion joints can exacerbate the situation. Understanding these factors is essential for implementing long-term solutions and maintaining the integrity of your flooring.
Causes of Major Cracks
Major cracks in flooring can often signal underlying issues that require immediate attention. These cracks usually arise due to external pressures, impacts, or thermal shock, which can compromise the structural integrity of the concrete. One critical factor to take into account is the failure of expansion joints; these joints are specifically designed to absorb movement and stress. When they fail, the risk of major cracks increases considerably.
Additionally, moisture intrusion plays a prevalent role in floor damage. When moisture seeps into the concrete, it weakens the material over time, making it more susceptible to cracking. This combination of factors can lead to extensive damage if not addressed promptly.
Identifying the root causes of major cracks is essential for implementing effective preventive measures. Without addressing the underlying issues, you could face recurring problems that compromise the longevity of your flooring. Solutions may include installing moisture barriers to prevent intrusion or utilizing thermal shock-resistant systems to mitigate the effects of temperature changes. By understanding these causes, you can take proactive steps to guarantee your flooring remains stable and intact.
Role of Moisture Intrusion
Identifying the root causes of major cracks is essential, especially considering the significant role that moisture intrusion plays in the deterioration of concrete flooring. Moisture intrusion is a prevalent issue that can lead to severe structural damage if not addressed swiftly. You'll often notice signs like dark brown stains and persistent dampness on your concrete floors, indicating underlying seepage problems that need immediate attention.
To effectively combat moisture intrusion, identifying its sources is important. Poor drainage or water infiltration can exacerbate these issues, making it critical to implement robust repair strategies. Start by inspecting your drainage systems and ensuring they function correctly. Installing moisture barriers can also be beneficial in preventing water from penetrating your concrete.
Regular monitoring of moisture levels is key to maintaining the longevity and durability of your concrete floors. If you spot any leaks or signs of seepage, address them immediately to avoid further damage. By taking proactive measures against moisture intrusion, you can protect the integrity of your flooring and minimize the risk of future cracks. Remember, a well-maintained floor is a long-lasting one.
Impact of Expansion Joints
Understanding the impact of expansion joints is essential for maintaining the integrity of your concrete flooring system. These joints are critical components designed to accommodate movement caused by temperature changes, shrinkage, and settling. Without properly functioning expansion joints, your concrete floors are at risk of significant cracking. They absorb stress, and when they fail, the pressure can lead to extensive damage.
Regular inspection of expansion joints is crucial. Look for signs of deterioration such as visible gaps, misalignment, or rust. These issues can exacerbate existing cracks and create new ones, undermining the durability of your flooring system. Properly installed and maintained expansion joints can mitigate the effects of thermal shock and moisture intrusion, ultimately prolonging the lifespan of your concrete floors.
If you notice any signs of expansion joint failure, address them promptly. Ignoring these issues can lead to costly repairs down the line. By staying vigilant and ensuring your expansion joints are in good condition, you can prevent serious cracking and maintain the structural integrity of your concrete flooring. Prioritizing these joints is key to enjoying the freedom of a stable and lasting flooring system.
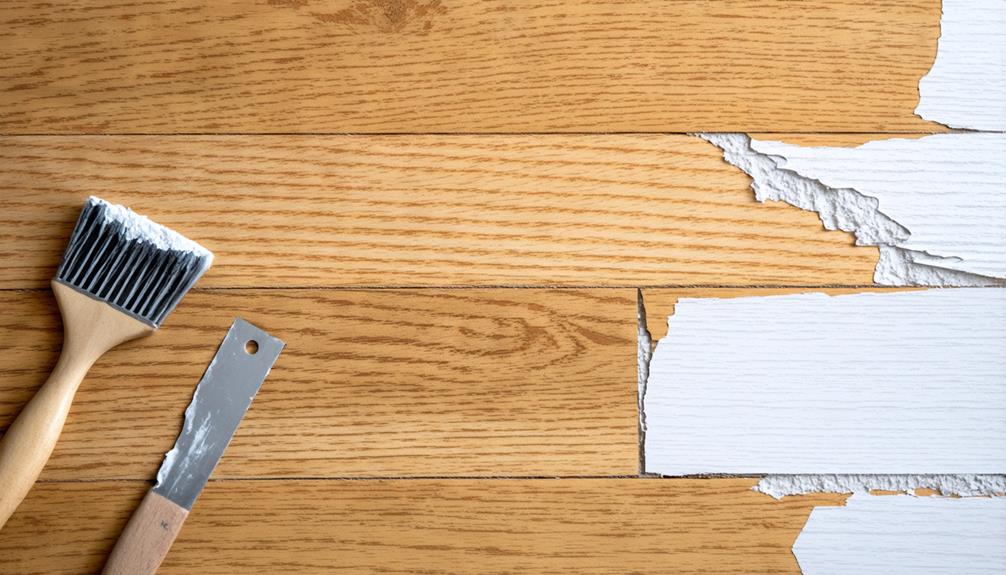
Cleaning the Floor
Cleaning the floor is an essential step before repairing cracks, as it guarantees that all oil, dirt, and debris are removed, which is crucial for proper bonding of repair compounds. When cleaning concrete floors, your primary goal is to eliminate contaminants that could hinder the adhesion of the filler materials used in crack repairs. Start by sweeping or vacuuming the area to remove loose debris.
Next, select appropriate cleaning agents that won't compromise the integrity of the concrete surface. Products specifically designed for concrete cleaning work best, as they effectively cut through grease and grime without causing damage. Apply the cleaner according to the manufacturer's instructions, allowing it to dwell for the recommended time to maximize its effectiveness.
After applying the cleaner, thorough scrubbing is necessary. Use a stiff-bristle brush or a floor scrubber to agitate the surface, ensuring you reach into any cracks or crevices where dirt may accumulate. Rinse the area with clean water, making sure to remove all cleaning agent residues. This step is crucial; trapped residues can also interfere with proper bonding.
Once you've cleaned the floor, allow it to dry completely before proceeding with any crack repairs. Moisture trapped beneath the repair materials can lead to future complications, undermining the effectiveness of your repairs. Ensuring a clean, dry surface sets the stage for successful crack repair and extends the lifespan of your flooring.
Filling Minor Cracks
When it comes to filling minor cracks, first assess the severity of the damage to determine the best approach. You'll want to choose a suitable filling material, such as self-leveling polyurethane, which offers both durability and ease of application. Proper application techniques are essential for achieving a smooth, flush finish that blends seamlessly with your flooring.
Assessing Crack Severity
Evaluating the severity of cracks in flooring is essential for determining the appropriate repair method. Start by examining the width and depth of the cracks. Minor cracks, typically less than 1/4 inch wide, can often be repaired easily with suitable fillers like self-leveling polyurethane or epoxy. It's important to verify these cracks are indeed minor; wider cracks may signal deeper issues that require more extensive preparation.
Before applying any filler, clean the area around the minor cracks thoroughly. Removing contaminants is significant to guarantee the filler adheres properly and effectively seals the crack. Once the area is clean, you can proceed to apply the chosen repair material. Press the filler into the crack firmly to eliminate any air bubbles and create a smooth surface that blends with the surrounding flooring.
Regular inspection and timely repair of minor cracks can prevent them from worsening into significant problems that could lead to costly repairs down the line. By being proactive and addressing minor cracks promptly, you maintain both the aesthetic and structural integrity of your flooring.
Choosing Filling Materials
Selecting the right filling material for minor cracks in flooring is fundamental to achieving a durable and visually appealing repair. For concrete surfaces, self-leveling polyurethane is a top choice due to its quick setting properties and ease of application. It adapts well to various crack widths, providing flexibility during repairs. You might also consider using acrylic bonding agents, which enhance adhesion and create a strong bond between the existing concrete and the filler.
When choosing filling materials, be mindful of the crack width. For smaller, shallow cracks, epoxy is appropriate, while cement-based products work better for larger imperfections. Proper surface preparation is essential; make sure you clean the crack thoroughly and let it dry completely before applying the filler. This step greatly improves the repair's long-term durability.
After filling minor cracks, smoothing the surface to match the surrounding floor level is crucial. This not only enhances aesthetic consistency but also helps prevent tripping hazards. By carefully selecting your filling materials and following these preparation tips, you can achieve a seamless repair that stands the test of time.
Application Techniques Explained
Once you've chosen the right filling materials for your flooring repairs, it's time to focus on the application techniques to guarantee a successful outcome. Start by thoroughly cleaning the cracked area of your concrete floor to eliminate any dirt, oil, or debris; this guarantees proper bonding of the repair material. For minor cracks, go ahead and use a self-leveling polyurethane filler, which sets quickly and is easy to apply with a caulking gun or putty knife.
Before applying the filler, chip out any loose material from the crack. This creates a clean edge that promotes better adhesion. Firmly press the filler into the crack to eliminate air bubbles, ensuring you achieve a solid bond. Once filled, smooth the surface with a trowel, leveling it to match the surrounding floor.
Repairing Major Cracks
Major cracks in flooring can compromise both the aesthetics and structural integrity of your space, making timely repairs crucial. To tackle these issues effectively, you'll first need to excavate the area surrounding the crack. Utilize tools like angle grinders, cold chisels, or mini jackhammers to create a clean surface. This step is critical, as it sets the stage for a successful repair.
Before applying any patching materials, be certain to maintain the original grade lines. This not only prevents future drainage issues but also guarantees the stability of your flooring. After excavation, thoroughly clean and dry the surfaces—this is essential for achieving a durable and long-lasting repair.
Next, apply acrylic bonding agents to enhance adhesion with the vinyl concrete patching material you'll be using. These agents create a strong bond that's critical for a smooth finish, especially in larger cracks. Once the bonding agent is set, you can proceed to fill the major cracks with a mix of self-leveling polyurethane. This material is advantageous due to its quick-setting properties, allowing for simpler application without compromising quality.
Be certain that the mixture is evenly distributed and level with the surrounding flooring. After the application, give it adequate time to cure properly. By following these steps meticulously, you'll restore both the functionality and appearance of your floors, ensuring they remain safe and visually appealing for years to come.
Curing and Finishing
After you've filled in the cracks and allowed the repair materials to settle, attention turns to the curing process. Proper curing is essential for achieving maximum strength and durability of the repair. The curing time can vary considerably; for instance, epoxy fillers typically require about 24 hours to fully cure, while cement-based products might take several days based on thickness and environmental conditions.
During this time, keeping the repaired area damp is important. A damp environment helps prevent cracking and guarantees a strong bond between the repair material and the surrounding flooring. Covering the area with plastic sheeting can aid in maintaining moisture levels, which is particularly important if the ambient conditions are dry or hot.
It's critical to follow the manufacturer's instructions regarding curing time and conditions. This adherence not only secures the longevity of your repairs but also optimizes the performance of the materials used. Once the curing period is complete, inspect the surface for any imperfections. If you notice any rough areas or irregularities, additional finishing techniques like sanding or polishing can be applied. These methods will help you achieve a seamless blend with the existing flooring, ensuring that your repairs are not only functional but also aesthetically pleasing. By paying close attention to the curing process, you'll set the stage for a durable and lasting repair that stands the test of time.
Sealing for Protection
To guarantee your repaired flooring lasts, sealing it is an important step that shouldn't be overlooked. Sealing concrete floors creates a protective layer that safeguards against spills, stains, and impact damage, greatly extending their lifespan. Without this vital step, your repairs may quickly deteriorate under everyday wear.
When choosing a sealing material, you have several options. 100% solids epoxy, urethane, and polyurea are common choices, each offering unique benefits regarding durability and ease of application. For instance, epoxy provides excellent resistance to chemicals, making it ideal for high-traffic areas, while urethane offers flexibility, which can be beneficial in environments where temperature fluctuations occur.
Before applying a sealant, proper surface preparation is essential. Thoroughly clean and dry the flooring to guarantee effective bonding. Any contaminants left on the surface can interfere with the sealant's performance, compromising the protective layer.
Regular sealing is also key to maintaining peak protection. Depending on traffic levels and exposure to chemicals, it's generally recommended to reseal your flooring every 1 to 3 years. Additionally, polished concrete serves as a low-maintenance sealing option that not only enhances the aesthetic appeal but also provides a robust shield against moisture and wear.
Long-Term Maintenance Tips
Regularly maintaining your flooring is fundamental for guaranteeing its longevity and performance. Start by evaluating the condition of your concrete floors. Document crack patterns and monitor for any signs of moisture intrusion. Catching potential issues early is essential to preventing more extensive damage. Implement a routine cleaning schedule to guarantee all contaminants are thoroughly removed before repairs or sealing. This step promotes ideal adhesion and prolongs the life of your flooring.
Applying a high-quality sealant, like 100% solids epoxy, every few years is crucial. This protective layer guards against spills, stains, and wear, greatly extending the lifespan of your flooring. Additionally, be vigilant about monitoring indoor humidity levels. High humidity can lead to moisture issues that compromise your flooring. Consider installing moisture barriers in areas prone to leaks or heavy moisture exposure.
Don't overlook the importance of professional inspections. Scheduling these every few years allows for a thorough evaluation of your foundation and drainage systems. Addressing any underlying issues promptly can prevent further cracking and deterioration.
Frequently Asked Questions
How to Fix Structural Cracks in Floors?
When tackling structural cracks in floors, start with a thorough crack assessment to determine their severity. Larger cracks may compromise structural integrity, requiring more advanced repair techniques. Clean the area meticulously, then use tools like angle grinders to prepare it. Fill smaller cracks with appropriate materials, while larger ones may benefit from self-leveling polyurethane for easier application. Always monitor the repairs for moisture intrusion or further cracking to guarantee lasting results.
How to Fill Floor Cracks?
When you're looking to fill floor cracks, consider the contrast between crack filler options available. For minor gaps, a quick-setting polyurethane works best, while major cracks may need a cement-based solution. To prevent future issues, keep your floors clean and dry. If you're repairing hardwood, make certain the filler matches the wood's color. Press the material firmly into the crack and smooth it out for a seamless appearance. Curing time's essential for durability.
How to Fix Foundation Floor Cracks?
To fix foundation floor cracks, start with a thorough floor stability assessment. Identify whether the cracks are minor or major, as this determines the foundation repair techniques you'll use. For minor cracks, simple filling may suffice, but for major ones, you'll need to excavate and apply bonding agents. Incorporate crack prevention methods post-repair to enhance durability. Always clean the area well before applying any compounds to guarantee proper adhesion and longevity.
Can a Badly Cracked Garage Floor Be Repaired?
Picture your garage floor as a battlefield, where cracks are the enemy. You can definitely repair a badly cracked garage floor, but first, you'll need a thorough crack assessment to determine the damage's extent. For minor cracks, consider repair options like epoxy or polyurethane fillers. Larger fractures might require concrete patching materials. Just remember, cleaning the area and allowing adequate curing time are essential for a long-lasting fix. Your garage deserves it!


