
First, assess your laminate floor for scratches, dents, or loose planks. Gather matching replacement planks, adhesive, sandpaper, and repair kits. Clean the area thoroughly without excess water. Use a repair kit to fill minor scratches and wood filler for deeper gouges. Secure any loose planks with adhesive and clamp them until dry. Sand repaired spots smooth, then apply finish matching your floor’s sheen. Maintain the floor with gentle cleaning and furniture pads to prevent damage. Follow these steps to restore your floor like new and protect it going forward.
Assess the Damage on Your Laminate Floor

How do you determine the extent of damage on your laminate floor? Begin by identifying the damage types—scratches, dents, water swelling, or cracks. Each requires a different repair approach. Use visual inspection and tactile assessment methods: look for discoloration or warping, and run your hand over the surface to detect unevenness. Tap the damaged area lightly to check for hollow sounds, indicating possible substrate issues. Measure the affected sections precisely to decide if partial or full plank replacement is necessary. Document the damage areas to prioritize repairs, ensuring you address critical spots first. By applying systematic assessment methods, you gain clarity on the scope of work, allowing you to plan repairs efficiently and regain control over your living space without unnecessary replacements or wasted effort.
Gather Necessary Tools and Materials
Before starting any repairs, you’ll need to gather specific tools and materials tailored to the damage you’ve assessed. Having a clear tools checklist guarantees you won’t interrupt your workflow, granting you the freedom to fix your laminate floor efficiently.
Here’s a practical list of essential materials and tools you’ll typically need:
- Replacement laminate planks matching your floor’s design and thickness.
- A tapping block and pull bar to fit planks snugly without damage.
- A utility knife and saw for precise cutting of planks.
- Wood glue or laminate adhesive for minor repairs or securing loose edges.
Clean the Area Thoroughly

A clean workspace is essential for effective laminate floor repairs. Before you begin, employ proper cleaning methods to remove dust, dirt, and debris from the damaged area. Use a vacuum with a soft brush attachment or a microfiber cloth to guarantee you’re not scratching the surface further. For sticky residues or stubborn grime, a mild detergent diluted in water works well—apply sparingly and avoid soaking the laminate. Thorough surface preparation assures better adhesion for repair materials and prevents imperfections. After cleaning, let the area dry completely to avoid trapping moisture beneath repair compounds. Taking these precise steps in cleaning and surface preparation will set you up for a seamless repair process, giving you the freedom to restore your floor confidently and efficiently.
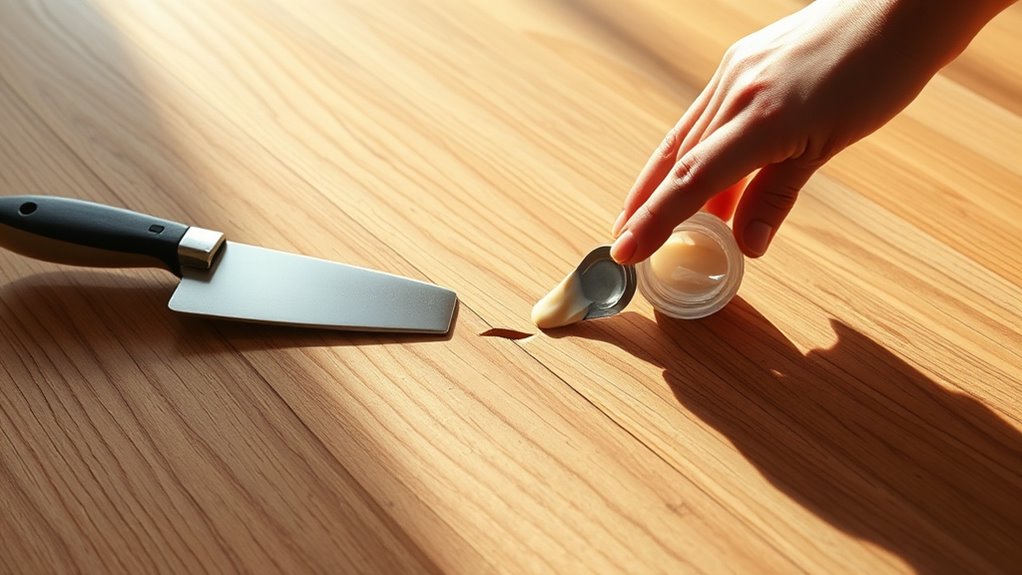
Fix Minor Scratches With a Laminate Floor Repair Kit
You’ll want to select a repair kit that matches your laminate’s color and finish exactly for the best results. Follow the manufacturer’s instructions carefully to apply the filler or wax evenly into the scratch. Proper application guarantees the repair blends seamlessly and restores the floor’s appearance effectively.
Choosing Repair Kit
Three essential components you’ll need when fixing minor scratches on laminate floors are color-matched fillers, sealants, and applicator tools, all typically included in a laminate floor repair kit. Choosing the right repair kit means understanding the different repair kit types and guaranteeing laminate color matching is accurate for a seamless finish. Here’s how to pick the best kit:
- Identify your laminate’s exact color and grain pattern.
- Select a kit offering multiple filler shades to mix.
- Confirm the sealant provides durable protection against wear.
- Opt for applicator tools that suit the scratch size and location.
This precision empowers you to restore your floor’s appearance confidently, keeping your space free from imperfections without compromising your independence or style.
Applying Kit Correctly
Before applying the repair kit, make certain the scratched area is clean and dry to secure ideal adhesion. Use a lint-free cloth to remove dust and debris thoroughly. When applying the kit, follow specific applying techniques: use the applicator provided to fill the scratch evenly without overfilling. Maintain repair consistency by spreading the compound smoothly across the scratch, matching the laminate’s texture and color. Avoid rushing; let the filler settle and dry completely as per the manufacturer’s instructions. If necessary, lightly sand the area once cured, then buff with a soft cloth to blend the repair seamlessly. These precise steps guarantee durability and visual uniformity, giving you freedom from worry about visible damage while preserving your laminate floor’s original look.
Repair Deeper Scratches and Gouges Using Wood Filler
Although minor surface scratches can often be buffed out, deeper scratches and gouges require filling to restore a smooth, even surface. Choosing the right wood filler types is essential for lasting results. Use repair techniques that match the laminate’s color and texture for seamless blending. Here’s how you can tackle it:
- Clean the damaged area thoroughly to remove debris and dust.
- Select a wood filler suitable for laminate floors, preferably water-resistant and stainable.
- Apply the filler using a putty knife, pressing firmly into the gouge, then smooth it flush with the surface.
- Allow it to dry completely, then sand lightly and finish with a laminate floor finish or stain to match.
This method frees you from unsightly floor damage without replacing planks.
Replace Damaged Laminate Planks
First, carefully inspect the floor to pinpoint planks with significant damage like warping or deep cracks. Next, you’ll need to remove the damaged laminate by releasing and lifting the boards without harming adjacent pieces. Finally, install the replacement planks by aligning the tongue-and-groove joints and securing them firmly in place.
Identifying Damaged Planks
How can you quickly determine which laminate planks need replacing? Start by recognizing wear and common issues that compromise your floor’s integrity. Look for these signs:
- Deep scratches or gouges disrupting the surface layer
- Swelling or warping caused by moisture exposure
- Cracked or chipped edges affecting plank stability
- Persistent discoloration indicating water damage beneath
Identifying damaged planks allows you to act precisely, avoiding unnecessary replacements. This focused approach guarantees you maintain the freedom to enjoy a flawless floor without extensive repairs. Keep your inspection methodical—use good lighting and a level to spot unevenness. By addressing only the affected planks, you preserve the aesthetic and structural integrity of your laminate floor efficiently and confidently.
Removing Old Laminate
Once you’ve pinpointed the damaged planks, you can proceed with their removal to prepare for replacement. Begin by carefully loosening the affected boards using a pry bar or pull bar, applying steady pressure to avoid damaging adjacent planks. If the damaged plank is in the middle of the floor, score along the edges with a utility knife and remove it in sections to minimize disruption. Employ precise removal techniques to maintain the integrity of surrounding flooring. After extraction, clear away any residual adhesive or underlayment debris. For laminate disposal, break the planks into manageable pieces and dispose of them according to local regulations. Proper removal and disposal not only guarantee a clean workspace but also allow you the freedom to replace planks efficiently and restore your floor’s appearance without unnecessary damage.
Installing Replacement Boards
Begin by inspecting the replacement planks to verify they match the existing flooring in size, color, and texture. Choosing the right replacement board options is essential to maintain seamless continuity with your laminate flooring styles. Once confirmed, follow these steps:
- Carefully align the replacement board with the groove of the adjacent plank.
- Gently angle and insert the plank, ensuring tight locking without gaps.
- Use a tapping block and mallet to secure the board firmly in place.
- Check for levelness and flush fit to avoid uneven surfaces.
This precise approach guarantees your repaired laminate floor retains its aesthetic and functional integrity, giving you the freedom to enjoy a flawless surface without visible damage or mismatch.
Secure Loose Planks to Prevent Further Damage
Although loose planks may seem minor, securing them promptly is essential to prevent gaps, warping, or further damage. Start by identifying the loose plank and clearing debris from underneath. Apply a high-quality wood adhesive designed for laminate flooring to the plank’s edges and underside. Press the plank firmly into place, ensuring it aligns precisely with adjacent boards. Use weights or clamps to hold the plank secure while the adhesive cures, usually for 24 hours. This method stabilizes the plank, preventing movement that can lead to more extensive damage. Avoid using nails or screws, as they can compromise the floor’s structure and void warranties. By taking these precise steps to secure loose planks, you maintain your floor’s integrity and extend its lifespan, giving you the freedom to enjoy your space without worry.
Sand and Smooth Repaired Areas
You’ll want to select sandpaper with a fine grit to avoid damaging the laminate surface while smoothing repaired spots. Use gentle, even strokes following the grain direction to guarantee a consistent finish without scratches. Focus on achieving a seamless shift between the repair and surrounding floor for a professional look.
Choosing the Right Sandpaper
When preparing to sand and smooth repaired areas on your laminate floor, selecting the appropriate sandpaper grit is essential to avoid damaging the surface further. Different sandpaper types and grit levels serve specific purposes, so you’ll want to be precise in your choice. Here’s what to take into account:
- Coarse Grit (40-60): Use only for heavy damage; avoid on laminate to prevent deep scratches.
- Medium Grit (80-120): Ideal for smoothing rough patches without excessive abrasion.
- Fine Grit (150-220): Perfect for final smoothing before finishing.
- Extra Fine (320+): Use sparingly for delicate touch-ups.
Choosing the right sandpaper lets you regain control over your floor’s surface, ensuring smoothness without sacrificing durability or appearance.
Sanding Techniques and Tips
Proper sanding techniques are essential to achieving a smooth, even surface on your repaired laminate floor. Start by lightly sanding with a fine-grit sandpaper, moving in the direction of the laminate grain to avoid scratches. Use gentle, consistent pressure to prevent damaging the laminate layer beneath. Focus on blending the repaired area seamlessly with the surrounding floor. Avoid excessive sanding, which can alter the floor’s texture or thickness. For edges and corners, use sanding blocks or folded sandpaper for better control. Keep the surface clean by wiping away dust frequently during sanding. Remember, using the right sanding tips—such as sanding incrementally and checking your progress often—ensures a durable repair. Master these sanding techniques to maintain your laminate floor’s integrity and aesthetic appeal.
Achieving a Smooth Finish
Although sanding lays the foundation, achieving a smooth finish requires careful smoothing of the repaired areas to eliminate any imperfections. Using precise sanding techniques, you’ll want to refine the surface gradually, ensuring it matches the surrounding laminate. Follow these finishing touches to regain your floor’s seamless look:
- Start with fine-grit sandpaper (220 grit) to gently smooth the repair without damaging edges.
- Use a sanding block or sponge to maintain even pressure and control.
- After sanding, wipe the area clean with a damp cloth to remove dust and inspect for uneven spots.
- Repeat sanding lightly if needed, then apply a matching laminate sealant to protect and blend the repair.
Apply Finish to Match the Existing Floor
To achieve a seamless repair, you’ll need to carefully select and apply a finish that matches the existing laminate floor’s texture and sheen. Start by identifying the finish type—whether it’s matte, semi-gloss, or high-gloss—as this affects how light reflects off the surface. Use a small sample area for color matching, blending different stain or finish products until you replicate the floor’s hue precisely. Apply the finish in thin, even layers with a fine brush or applicator, ensuring no pooling or streaks occur. Allow adequate drying time between coats to build up a consistent, durable surface. Precision in color matching and finish type selection is essential to maintain your floor’s aesthetic integrity and your freedom to enjoy a flawless, professional-looking repair.
Maintain Your Laminate Floor to Prevent Future Damage
Once you’ve restored the finish to match your laminate floor, keeping it in good condition becomes your next priority. Establish a consistent cleaning routine and implement protective measures to preserve your floor’s integrity and your freedom from costly repairs.
- Use a microfiber mop and a pH-neutral cleaner to maintain your cleaning routine without damaging the surface.
- Place felt pads under furniture legs to prevent scratches and dents.
- Avoid excessive water during cleaning; moisture can cause swelling and warping.
- Use area rugs in high-traffic zones to reduce wear and tear, ensuring long-term durability.


