To remove floor tiles from concrete, start by evaluating the tile type—ceramic or vinyl. Gather essential tools like a chisel, hammer, floor scraper, and safety gear like gloves and goggles. Clear your workspace and make sure it's well-ventilated. Use a grout saw to remove grout lines, and then gently pry the tiles off with a putty knife or tile scraper, avoiding excessive force. If you encounter adhesive, identify it for proper removal techniques. Finally, clean up the debris and disinfect the concrete surface. With the right steps, your project will go smoothly, and there's more to explore on effective techniques.
Assessing Your Tile Type
Before you tackle the task of removing floor tiles, it's vital to assess the type of tiles you're dealing with. Understanding whether you have ceramic tiles or vinyl tiles can greatly influence your approach. Ceramic tiles are typically harder and more brittle, requiring careful handling to prevent damage to the underlying concrete. You'll need to use a more forceful method, often involving chiseling or prying. On the other hand, vinyl tiles are generally easier to remove, often lifting up with less effort. Check for any adhesive used; if it's strong, you might need heat or a solvent to help. Knowing your tile type sets the stage for a smoother removal process, allowing you to work efficiently and confidently.
Gathering Essential Tools
Once you've determined the tile type, it's time to gather the essential tools for the job. You'll need a few tool types to efficiently remove the tiles. Start with a chisel and a hammer for prying up tiles. A floor scraper or a putty knife can help with stubborn pieces. Don't forget a pry bar for more leverage. Safety gear is vital, so grab some heavy-duty gloves to protect your hands and safety goggles to shield your eyes from debris. A dust mask is also a smart choice to avoid inhaling any dust particles. Having these tools and gear on hand will make the process smoother and safer, giving you the freedom to tackle your tile removal confidently.
Preparing the Workspace
Now that you've gathered your tools and safety gear, it's important to prepare your workspace for the tile removal process. A clean, organized area not only enhances efficiency but also guarantees workspace safety. Start by clearing away any furniture or obstacles, creating a wide-open space to work in.
- Lay down drop cloths to protect the floor.
- Guarantee good ventilation by opening windows or using fans.
- Keep your protective gear easily accessible, like gloves and goggles.
These steps will help you maintain focus and safety while you tackle the tile removal. Remember, a well-prepared workspace is key to a successful project, allowing you to enjoy the freedom of transforming your space without hassle.
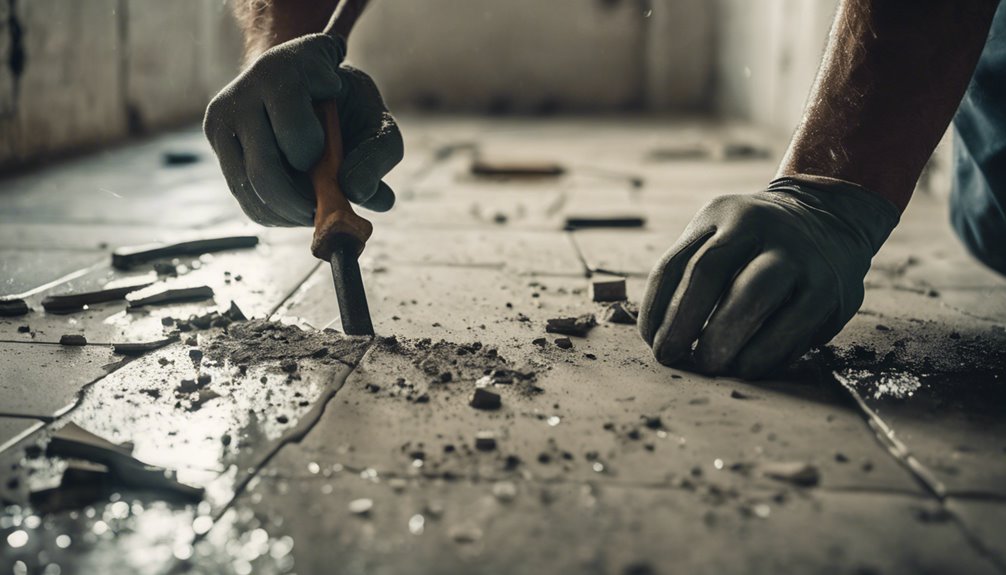
Removing Grout Lines
Removing grout lines is a crucial step in the tile removal process, and it's important to approach it carefully. Start by using grout removal techniques like a grout saw or oscillating multi-tool, which can efficiently cut through the grout without damaging the surrounding tiles. Make sure to wear safety goggles and a mask for protection. After cutting, you can use a chisel to pry out the loosened grout. If you encounter stubborn areas, dampening the grout can help soften it. Once you've removed the grout, inspect the lines for any damage. You can apply grout repair methods to fix any cracks or imperfections in the concrete underneath, ensuring a smooth surface for your next flooring project.
Lifting the Tiles
Lifting the tiles requires a careful approach to avoid damage to the underlying concrete. Start by evaluating the type of adhesive used, as this will influence your tile lifting techniques. For best results, use a putty knife or a tile scraper to gently pry up the edges of the tiles.
- Feel the satisfying pop as the tile releases.
- Hear the subtle creaks of the concrete beneath.
- See your progress as the tiles come away cleanly.
Always prioritize tile removal safety by wearing gloves and eye protection. If a tile resists, don't force it; instead, revisit your technique and try again. Taking your time will guarantee you preserve the concrete below for future projects.
Dealing With Adhesive Residue
After you've successfully lifted the tiles, the next challenge is tackling the adhesive residue left behind on the concrete. Different adhesive types require specific removal techniques, so it is vital to identify what you're dealing with.
| Adhesive Type | Removal Technique | Tools Needed |
|---|---|---|
| Thin-set Mortar | Scrape with a putty knife | Putty knife, chisel |
| Mastic Adhesive | Heat and scrape | Heat gun, scraper |
| Epoxy | Chemical solvent | Solvent, scrub brush |
For thin-set mortar, a putty knife can work wonders. Mastic adhesives respond well to heat, while epoxies may need specialized solvents. Understanding these techniques will empower you to reclaim your concrete surface effectively.
Cleaning Up the Area
Once you've tackled the adhesive residue, it's time to clean up the area to certify a safe and tidy workspace. Using effective cleaning techniques will help you get rid of debris and guarantee your environment is free from hazards. Here are some essential steps:
- Sweep up loose debris and dust.
- Mop the concrete with a mixture of warm water and a mild cleaner.
- Dispose of any waste materials responsibly.
Don't forget your safety precautions while cleaning! Wear gloves and a mask to protect yourself from dust and chemicals. A clean workspace not only enhances safety but also makes it easier to plan your next moves. By keeping the area organized, you'll feel freer to explore your next DIY project with confidence!
Frequently Asked Questions
Can I Reuse the Removed Tiles for Another Project?
Absolutely, you can reuse the removed tiles for another project! When you're planning your next project, consider these tile restoration tips: clean the tiles thoroughly to remove any adhesive, inspect for damage, and repair as needed. This can transform your old tiles into a fresh focal point. Just make sure they fit the new design. With some creativity, you'll have beautiful reused tiles that add character to your space!
How Long Does the Tile Removal Process Usually Take?
Imagine starting a garden project, only to realize it takes longer than you'd planned. The tile removal process can be a bit like that; it usually takes anywhere from a few hours to a couple of days. Your project duration depends on factors like the number of tiles, adhesive type, and your tools. For a smooth experience, proper time estimation is key, so make sure to set aside ample time to tackle the task effectively.
What Safety Gear Should I Wear During Tile Removal?
When you're tackling tile removal, safety's key. You'll want to wear protective eyewear to shield your eyes from debris and dust. Heavy duty gloves are also essential; they'll protect your hands from sharp edges and heavy materials. Don't forget about sturdy footwear to safeguard your feet. By gearing up properly, you're not just ensuring your safety, but also setting yourself up for a smoother, more efficient tile removal process.
Will Removing Tiles Damage My Concrete Floor?
Removing tiles can potentially damage your concrete floor, especially if the tile adhesive is strong. You might find that the adhesive impacts the concrete surface condition, leaving behind residue or even minor chips. To minimize risk, it's crucial to use proper tools and techniques. A careful approach can help preserve the integrity of your concrete, ensuring you can move forward with your project without unwanted damage. Always assess the surface afterward for any issues.
Can I Hire a Professional for Tile Removal Instead?
Sure, you can hire a professional for tile removal instead! Imagine transforming your space without lifting a finger—sounds dreamy, right? However, cost considerations are essential. Professional services can save you time and effort, but they come with a price tag. Weigh the benefits of convenience against your budget. If you're after freedom from the hassle, a pro might just be the ticket to a smooth, stress-free tile removal experience!


