To remove black stains from hardwood floors, first identify the cause, like moisture or mold. Gather supplies such as baking soda, hydrogen peroxide, a soft cloth, and mild detergent. Test solutions on a hidden spot before applying. Use a baking soda paste for mild stains and hydrogen peroxide for tougher ones. Lightly sand the area once dry, then apply wood stain or finish to restore color. Learn how to protect your floors and prevent future damage with proper care.
Identify the Cause of the Black Stains
Someone dealing with black stains on their hardwood floors first needs to pinpoint what’s causing them. Identifying the stain sources is essential because it guides your approach to removal and helps avoid recurrence. Common causes include water damage, mold, pet accidents, or metal furniture rust. You should inspect the affected areas closely, noting moisture presence or nearby pet activity. Understanding these sources allows you to implement effective prevention methods, such as controlling humidity, using protective pads under furniture, or promptly cleaning spills. By addressing the root cause, you protect your floors and maintain freedom from ongoing damage. Taking this methodical step guarantees your efforts to restore your hardwood are not wasted and you can enjoy a clean, stain-free surface long-term.
Gather Necessary Cleaning Supplies
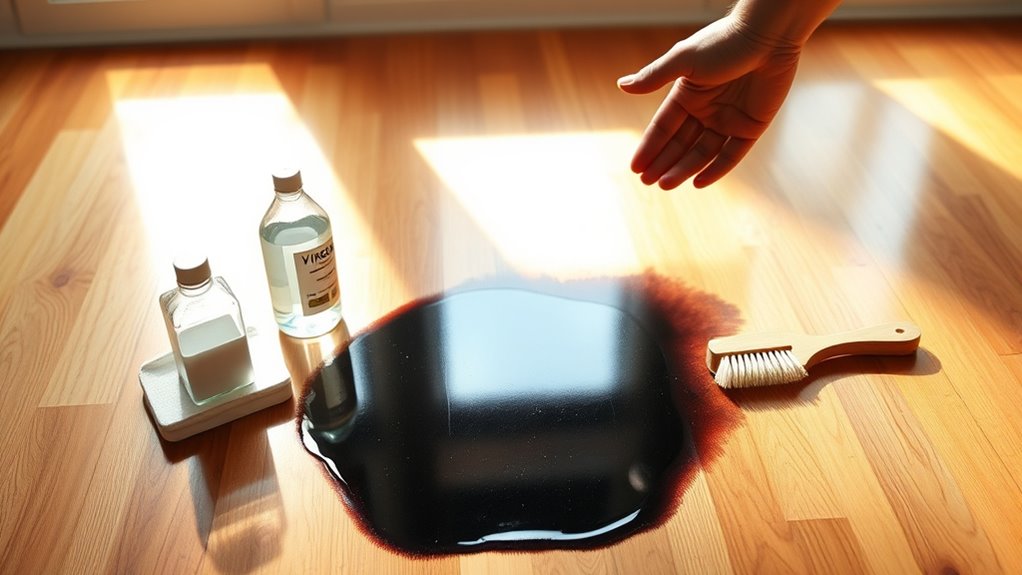
After identifying the cause of the black stains, the next step is to gather the right cleaning supplies to tackle the problem effectively. Having the proper cleaning tools guarantees you can address the stain removal efficiently without damaging your hardwood floors. Here’s a list of essentials you’ll want on hand:
Gather the right cleaning supplies to effectively remove black stains without damaging your hardwood floors.
- Soft-bristle brush or microfiber cloth – for gentle scrubbing without scratching.
- Mild detergent or specialized hardwood floor cleaner – to break down stains safely.
- White vinegar or hydrogen peroxide – effective natural stain removers.
- Bucket and clean water – for rinsing and diluting cleaning solutions.
With these cleaning tools ready, you can proceed confidently, targeting the black stains while preserving your floor’s finish and freedom from harsh chemicals.
Test Cleaning Solutions on a Small Area

Why should you test cleaning solutions on a small, inconspicuous area before applying them to the entire stain? Testing verifies the solution effectiveness without damaging your hardwood floor’s finish. It helps you avoid discoloration or surface damage, giving you confidence to proceed safely.
Here’s a quick guide to test cleaning:
| Step | Action |
|---|---|
| 1. Choose Area | Pick a hidden corner or baseboard |
| 2. Apply Solution | Dab a small amount of cleaner |
| 3. Wait | Let it sit for 5-10 minutes |
| 4. Observe | Check for discoloration or damage |
| 5. Decide | If safe, proceed; if not, try another solution |
Apply Baking Soda and Water Paste
Mix baking soda with water to create a thick paste that can effectively lift black stains from your hardwood floor. This baking soda and water mixture acts as a gentle abrasive and natural cleaner without harsh chemicals.
Follow these steps:
- Combine 3 parts baking soda with 1 part water until you get a spreadable paste.
- Apply the paste directly onto the stained area using a soft cloth or sponge.
- Let it sit for 10-15 minutes to penetrate the stain.
- Gently scrub in circular motions, then wipe clean with a damp cloth.
This method frees your floor from dark blemishes while preserving its finish, giving you control over a cleaner, stain-free surface.
Use Hydrogen Peroxide for Stubborn Stains
When tackling stubborn black stains, you’ll want to use the right concentration of hydrogen peroxide—typically 3% works best. Apply it carefully with a cloth or cotton ball, letting it sit briefly before wiping away. Remember to wear gloves and guarantee good ventilation to protect yourself during the process.
Choosing the Right Peroxide
Anyone dealing with stubborn black stains on hardwood floors knows that choosing the right peroxide is crucial. Hydrogen peroxide works best, but you need to take into account peroxide concentration and application methods for effective stain removal without damaging your floor. Here’s what you should keep in mind:
- Use 3% hydrogen peroxide for safe, gradual stain lifting.
- Avoid higher concentrations unless you’re experienced; they can harm wood finish.
- Select a peroxide form—liquid or gel—based on how you plan to apply it.
- Make sure your chosen peroxide suits your application method, whether spot treating or covering larger areas.
Picking the right peroxide lets you regain your floor’s natural beauty while maintaining control over the process and protecting your hardwood’s integrity.
Application Techniques
Although hydrogen peroxide is effective for stubborn black stains, applying it correctly is key to avoiding damage. Start by testing a small, inconspicuous area to verify your chosen cleaning method won’t discolor your hardwood. Next, pour a small amount of hydrogen peroxide onto a clean cloth or cotton ball rather than directly on the floor. Gently dab the stained area, allowing the peroxide to penetrate without saturating the wood. Let it sit for 5 to 10 minutes to break down the stain. Afterward, wipe the area with a damp cloth to remove residue. Repeat this stain removal process if necessary, but avoid over-wetting. Using hydrogen peroxide with precision verifies effective cleaning methods that preserve your floor’s integrity and free you from persistent black stains.
Safety Precautions
Since hydrogen peroxide is a powerful oxidizer, you’ll need to handle it with care to protect both yourself and your hardwood floors. Taking proper personal protective and cleaning precautions guarantees safety and prevents damage.
- Wear gloves and eye protection to avoid skin and eye irritation.
- Test a small, hidden area first to verify the peroxide won’t discolor your floor.
- Work in a well-ventilated space to avoid inhaling fumes.
- Avoid excessive use—only apply enough to treat the black stains without saturating the wood.
Following these steps lets you confidently remove stubborn stains while preserving your floors and your freedom to maintain your space safely.
Sanding the Affected Area Lightly
Start by gently sanding the stained area with fine-grit sandpaper to avoid damaging the hardwood. Choose a grit between 180 and 220; this range balances effective stain removal with surface preservation. Use smooth, even strokes following the wood grain—this sanding technique prevents scratches and uneven wear. Avoid pressing too hard; let the sandpaper do the work. Check your progress frequently to guarantee you’re removing just the stain without going too deep. If the stain persists, you can carefully increase grit coarseness but stay cautious to maintain the floor’s integrity. After sanding, clean the area thoroughly to remove dust. Mastering these sanding techniques and proper grit selection gives you control, helping you restore your hardwood floor while preserving its natural beauty and your freedom to customize.
Apply Wood Stain or Finish to Restore Color
You’ll want to start by selecting a wood stain that matches your floor’s original color. Make certain the surface is clean and dry before applying the stain to guarantee even absorption. Apply thin, even coats, allowing each to dry fully to restore your floor’s appearance effectively.
Choosing the Right Stain
How do you select the right stain to effectively restore your hardwood floor’s color? Choosing the proper stain is essential after stain removal to regain your floor’s natural beauty and guarantee durability. Consider these key factors:
- Identify Stain Types: Oil-based stains penetrate deeply, offering rich color; water-based stains dry faster and have less odor.
- Match Original Color: Test a small area to verify the new stain blends seamlessly.
- Consider Wood Species: Different woods absorb stain uniquely; tailor your choice accordingly.
- Durability Needs: For high-traffic areas, pick a stain with good wear resistance to maintain freedom of movement without frequent touch-ups.
Selecting the right stain empowers you to restore your hardwood floor’s color effectively, preserving its charm and your freedom to enjoy your space.
Preparing the Surface
Before applying any stain or finish, you need to make certain the hardwood surface is clean, dry, and free of dust or residue. Proper surface preparation is essential to guarantee the stain adheres evenly and restores the floor’s natural beauty. Start by using effective cleaning techniques, such as vacuuming and wiping with a slightly damp cloth, to remove all dirt and debris. Avoid harsh chemicals that could damage the wood. Once clean, let the floor dry fully to prevent trapping moisture under the stain. Lightly sanding the area can help smooth imperfections and open the wood’s pores for better stain absorption. By carefully preparing the surface, you set the stage for a flawless finish that revives your hardwood floor and frees you from worrying about imperfections.
Applying Even Coats
Start by applying the wood stain or finish in thin, even coats to guarantee consistent color and avoid blotching. Focus on applying layers carefully for even distribution, which is key to restoring your hardwood floor’s natural beauty. Here’s how to do it:
- Use a high-quality brush or cloth to spread the stain smoothly.
- Work along the wood grain, ensuring each stroke overlaps slightly.
- Allow each coat to dry completely before applying the next.
- Lightly sand between coats if necessary for a uniform surface.
Prevent Future Stains on Hardwood Floors
Although removing black stains is important, preventing them from returning is even more essential to maintain your hardwood floors’ appearance. Start with preventive maintenance by regularly cleaning your floors using a soft broom or vacuum to remove dirt and debris that can cause damage. Wipe up spills immediately to avoid moisture seeping into the wood. Applying protective coatings, such as polyurethane or wax, creates a barrier against stains and wear. Reapply these coatings periodically based on manufacturer recommendations. Use furniture pads to prevent scratches and place rugs in high-traffic areas. Avoid harsh chemicals that can degrade the finish. By following these steps, you’ll extend your hardwood floors’ life and keep them looking pristine without constantly worrying about black stains returning.


