Are you tired of looking at your old, worn-out tile floor? Maybe it’s chipped, cracked, or simply doesn’t fit your style anymore.
You’re not alone in wanting a change, and the good news is that removing a tile floor can be simpler than you think. Imagine stepping into a space that reflects your personality and taste, where every step feels like a fresh start.
With the right guidance, you can transform your room and boost its appeal, creating a place you’ll love to spend time in. You’ll discover straightforward steps to effectively remove your tile floor without the hassle. Whether you’re a DIY enthusiast or just want a change, these tips are designed to make the process smooth and stress-free. Let’s get started on turning your vision into reality!
Preparation
Start by gathering the right tools for the job. A hammer and chisel are basic tools. You also need a pry bar for lifting tiles. Get a scraper for removing old glue. A bucket will help keep the area clean. A broom and dustpan are also useful. These tools will make the job easier and faster.
Safety is very important. Wear safety goggles to protect your eyes. Dust masks keep harmful dust away. Gloves protect your hands from cuts. Knee pads make working on the floor comfortable. Safety gear is a must-have for this task. Always be careful and stay safe.

Assessing The Floor
Start by looking at the tiles. Are they cracked or loose? This can make removal easier. Loose tiles might come off with just a gentle tap. Use a hammer or chisel for tiles that are stuck. Be careful not to break them further. Wear safety goggles to protect your eyes.
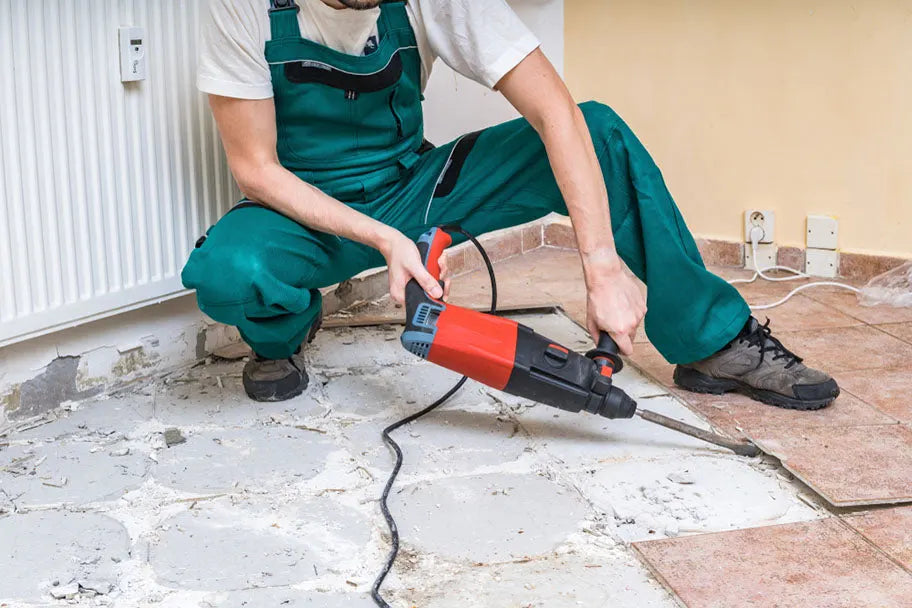
The subfloor is under the tiles. It can be wood or concrete. Each needs different tools. Wood might need a screwdriver or drill. Concrete is tougher. You might need a jackhammer. Knowing the type helps you plan better. It keeps things safe and easy.
Clearing The Area
Remove furniture from the room first. This makes space for work. Move chairs, tables, and sofas out. Be careful with heavy items. Ask a friend to help you. Make sure the floor is empty.
Next, cover vents and outlets. Use plastic or paper to block dust. Dust can cause problems. Tape the plastic in place. Cover all vents in the room. This keeps dust from spreading. Be sure to cover electrical outlets too. This keeps them safe and clean.
Removing Grout
A grout saw helps remove grout easily. Hold the saw firmly. Move it back and forth. This cuts through the grout lines. Be careful not to scratch tiles. Work slowly for better results. Wear gloves to protect hands. Safety goggles protect eyes from dust. Clean tools after use. This keeps them working well.
Grout dust can be messy. Use a wet cloth to clean. Wipe the dust off tiles gently. Vacuum picks up dust faster. It also helps keep the air clean. Do not leave dust behind. Dust can make the floor slippery. A clean floor is safer to work on. Always clean up after removing grout.
Lifting The Tiles
Begin by choosing a corner or edge of the tile floor. It’s easier to start there. Make sure you have a chisel and hammer ready. Hold the chisel at a slight angle under a tile edge. Tap gently with the hammer. This will help loosen the tile. Work slowly and carefully to avoid breaking tiles. Once the tile is loose, remove it with your hands. Repeat the process for each tile.
The chisel and hammer make the job easier. Place the chisel under the tile edge. Tap with the hammer to lift the tile. Keep your hands safe. Wear gloves to protect them from sharp edges. Use a dust mask too. This keeps you safe from dust and debris. Always clean as you go. This helps keep the area tidy and safe.
Handling Stubborn Tiles
Use a hairdryer to warm the tiles. The heat helps loosen the glue. Keep the hairdryer close to the tile. Hold it for a few minutes.
After heating, the tiles might come off easily. Try to pull up one corner. If the tile still sticks, apply more heat.
Insert the pry bar under the tile edge. Gently push down on the bar. This helps lift the tile from the floor.
Use slow and steady pressure. Avoid breaking the tile. Move the bar around the tile edge. This helps lift all sides evenly.
Cleaning Up Debris
Removing a tile floor involves breaking and lifting tiles, then clearing away debris. Use a chisel and hammer for stubborn tiles. Ensure proper disposal of materials to keep the area clean.
Dispose Of Broken Tiles
Gather all the broken tiles. Use a broom or a shovel. Place them in a sturdy bag or container. Make sure the bag is strong. Broken tiles can be sharp. They might cut through thin bags. Dispose of them safely. Check local rules for disposal. Some places have special rules.
Vacuum The Area
Use a vacuum to clean small bits. This helps remove dust too. A shop-vac works best. It has strong suction. Keep the area tidy. This prevents accidents. Wear a mask to avoid dust. Cleaning makes the place safe.

Inspecting The Subfloor
Before removing tiles, check the subfloor. Look for cracks or holes. These can cause problems later. Wooden subfloors may have rot. Concrete might have chips or cracks. Use a flashlight for dark spots. A sound test helps too. Tap the floor gently. A hollow sound might mean damage. It’s crucial to find all problems early.
Fix any damage before proceeding. Fill cracks in concrete with a patching compound. Replace any rotted wood with new boards. Use screws to secure loose wood. This makes the floor stable. Ensure everything is dry before moving on. A solid base helps with future flooring. Safety first. Always wear protective gear while working.
Preparing For New Flooring
Make the floor even and ready for new tiles. Use a scraper to get rid of bumps. Work slowly to avoid damage. Keep the floor clean and smooth. Check for uneven spots. These can cause problems later. Smooth them out with sandpaper or a grinder. This step is crucial for a neat finish.
Leftover adhesive makes the surface sticky. Use a solvent to dissolve it. Apply the solvent and wait. Scrape the residue off carefully. Be patient. Ensure all adhesive is gone before moving on. Clean the area with soap and water. Let it dry completely. Proper cleaning helps the new tiles stick well.
Frequently Asked Questions
How To Start Removing Tile Floor Safely?
Begin by wearing safety gear such as gloves and goggles. Ensure your tools are ready, including a hammer and chisel. Clear the area of furniture and debris. This will help prevent accidents and make the removal process smoother and more efficient.
What Tools Are Needed For Tile Removal?
You’ll need a hammer, chisel, and pry bar. A floor scraper can be useful for stubborn tiles. Consider using a rotary tool for grout removal. Be sure to have a dust mask and safety goggles to protect yourself from debris.
Can Tiles Be Reused After Removal?
Tiles can be reused if removed carefully without damage. Use gentle techniques to preserve the tiles. Avoid excessive force during removal to keep tiles intact. Clean them thoroughly before reinstallation to ensure they adhere properly.
How Long Does Tile Removal Take?
Tile removal can take several hours to a day. The duration depends on the area size and tile type. Larger areas and stubborn tiles will require more time. Proper preparation can speed up the process significantly.
Conclusion
Removing a tile floor can be challenging, but you can do it. Start with the right tools and safety gear. Hammer and chisel for stubborn tiles. Pry bar helps lift them. Be patient. Work slowly to avoid damage. Clean debris as you go.
Check for any cracks underneath. Repair if needed. Preparing the area for new flooring is important. Take your time. Plan ahead. Have a disposal plan ready. Enjoy your new space. Your hard work will pay off. Feel proud of your efforts.
You tackled a tough job. Now, your room is ready for a fresh look.


