Are you tired of looking at the grimy, worn-out grout between your floor tiles? Does your once-stunning floor now seem dull and lifeless?
You’re not alone. Many homeowners face this common issue, but there’s a simple solution: regrouting. This process can breathe new life into your tiled floors, making them look as fresh and vibrant as the day they were installed. Imagine walking into your room and feeling the satisfaction of a pristine, polished floor beneath your feet.
In this guide, we’ll show you how to regrout floor tile easily and effectively. With just a few tools and a bit of patience, you can transform your space and enjoy a cleaner, more appealing home. Ready to discover the secret to beautiful floors? Let’s dive in!
Why Regrouting Is Necessary
Grout keeps tiles in place. Over time, grout gets old and weak. Cracked grout allows water to seep in. This can harm the floor. Mold can grow in these wet areas. Mold is bad for health.
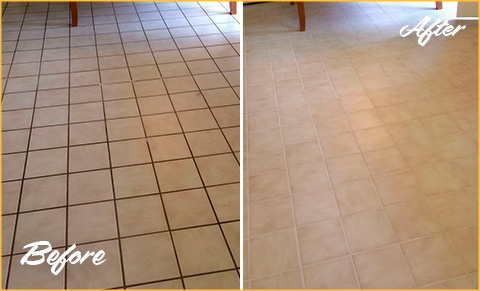
New grout makes tiles look nice again. It also makes floors last longer. Regrouting is cheaper than replacing tiles. It saves money in the long run. It is a smart choice.
Tools And Materials Needed
Regrouting floor tiles needs some important tools. A grout saw is used to remove old grout. A grout float helps spread new grout. You will need a sponge for cleaning. A bucket is needed for mixing and rinsing. Use safety glasses to protect your eyes. Knee pads will help you stay comfortable on the floor. Don’t forget grout and sealer. The grout comes in many colors. Pick one that matches your tiles. Sealer keeps grout safe from water and dirt. Having these tools makes the job easier. Be sure to have everything before starting.
Preparing The Area
Move all furniture and items away from the floor. Create a clear area to work. This makes it easier to see the tiles. It also keeps your things safe. Use tape to mark the work area. This helps others avoid it. Safety comes first. Wear shoes to protect your feet. Gather tools like a scraper and a brush. These will help you clean the space.
Use a damp cloth to wipe the tiles. This removes any dust or dirt. A gentle cleaner can help with tough spots. Be sure to rinse the tiles well. Leftover soap can make tiles slippery. Dry the tiles with a soft towel. Clean tiles make the grout stick better. Check each tile for cracks or chips. Fix these before regrouting. This ensures a smooth surface.
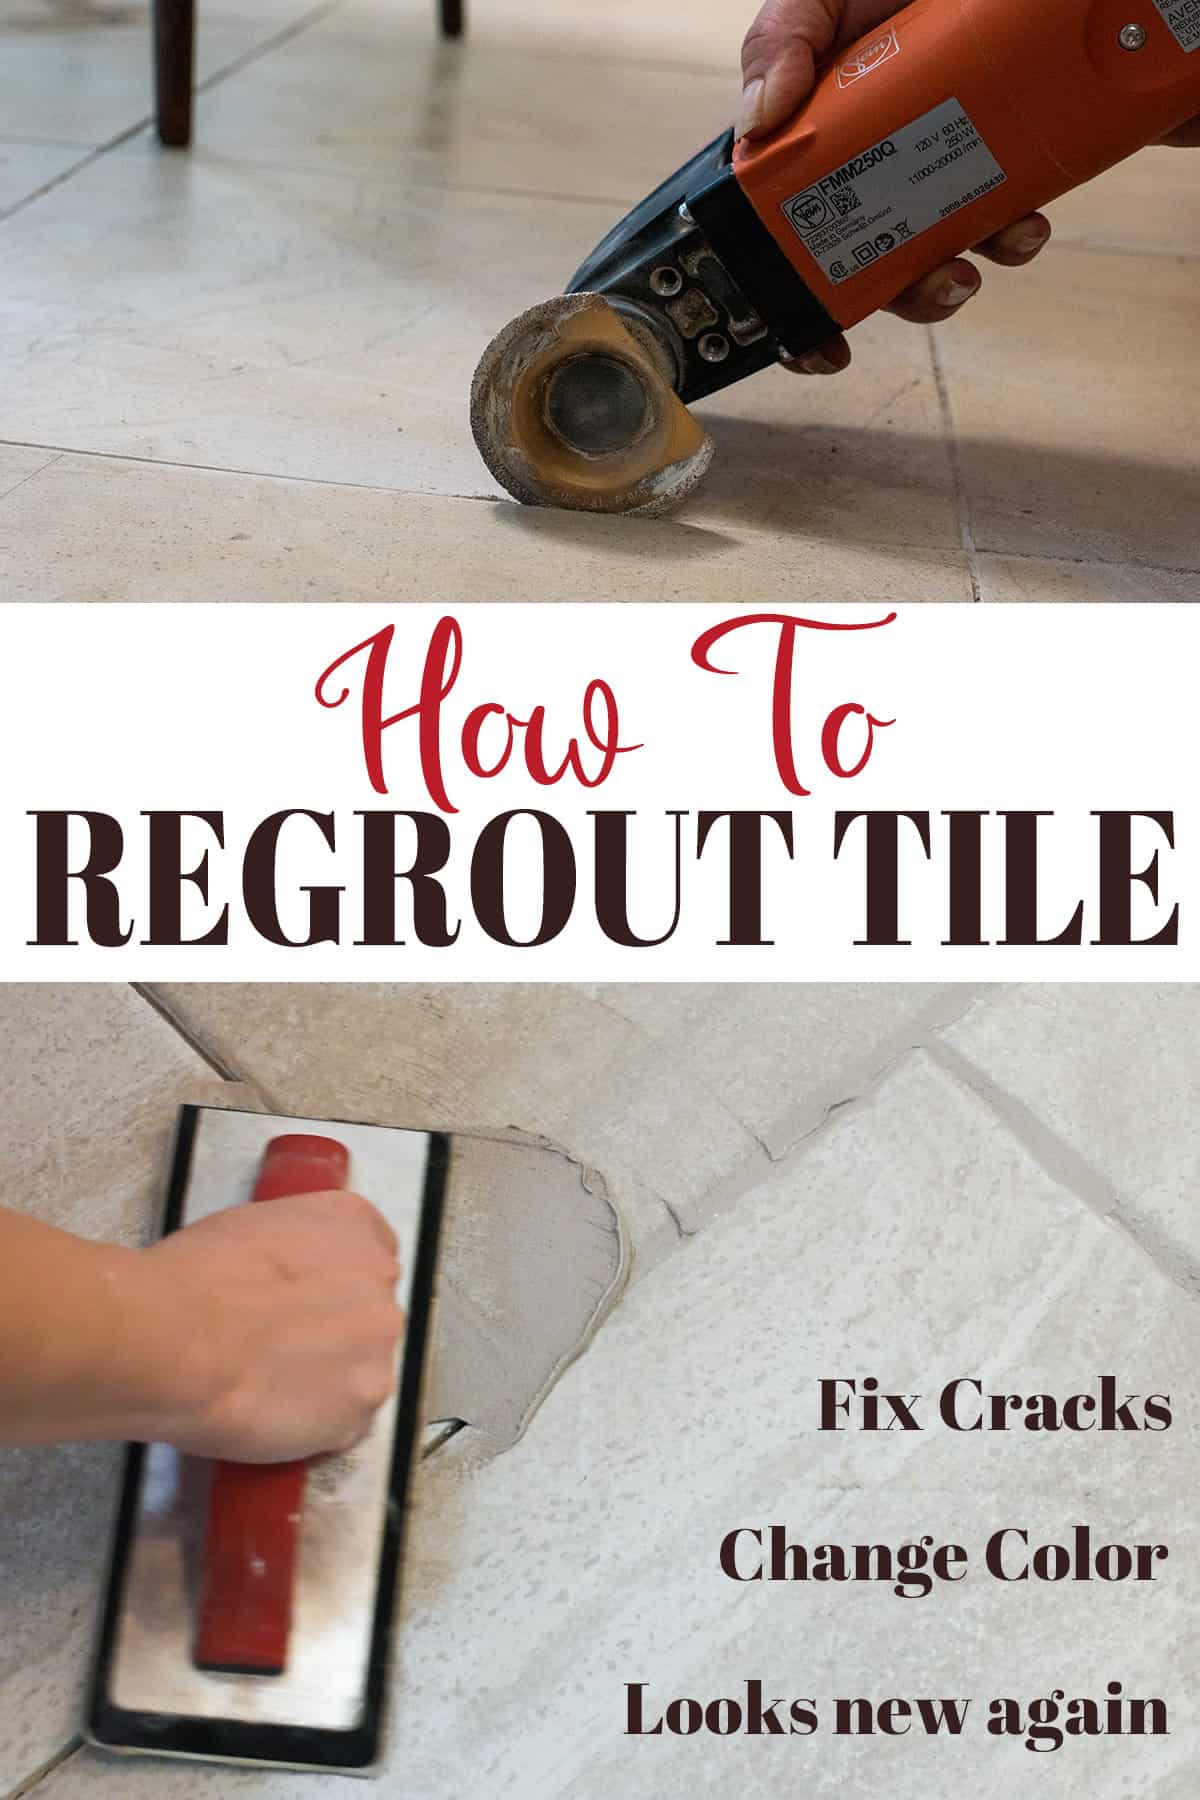
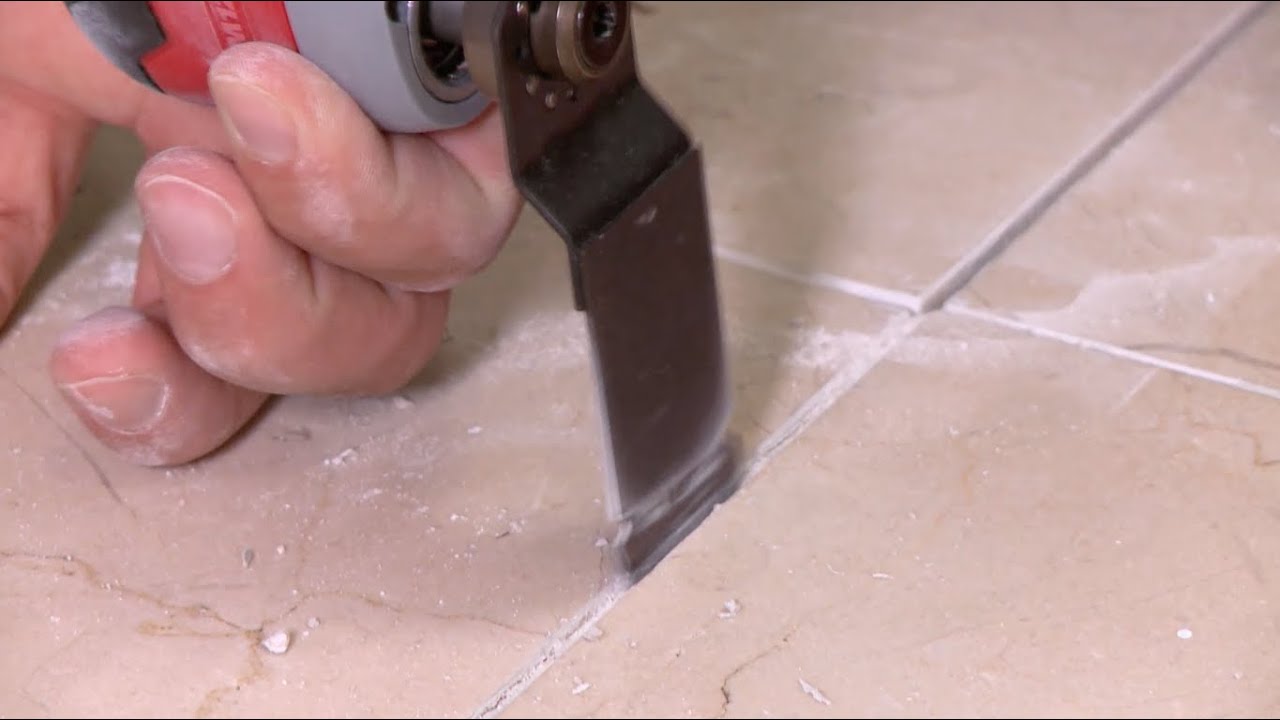
Removing Old Grout
A grout saw is a small tool. It has a sharp blade. Use it to cut into old grout. Hold the saw firmly. Move it back and forth. This will break the grout. Be careful not to scratch the tiles.
Always wear safety goggles. This protects your eyes. Grout pieces can fly around. Gloves are important too. They protect your hands. Be sure to work in a well-lit area. Good light helps you see better.
Mixing New Grout
Pick the right grout for your tile. Sanded grout is for wide spaces. Unsanded grout is for narrow spaces. Grout comes in many colors. Choose a color that matches your tiles. Check the grout package for instructions. This helps you know what type you need.
Use a clean bucket to mix grout. Add water slowly. Stir with a stick or mixer. Make sure there are no lumps. The grout should feel like smooth peanut butter. Let it sit for a few minutes. Stir again before using. Follow all the package directions for best results.
Applying New Grout
Using a grout float is easy. Hold it at an angle. Push the grout into the tile joints. Make sure the joints are full. This helps the grout stick well. Move the float in different directions. This fills the joints evenly. Keep doing this until all joints are full. Check for any empty spots. Fill them with more grout.
Filling joints evenly is important. It makes the floor look nice. Use a damp sponge to clean extra grout. Do not use too much water. Too much water can damage the grout. Let the grout dry for a day. Then, your floor will look new again. Enjoy the fresh look of your tiles.
Finishing Touches
Regrouting floor tiles involves removing old grout and applying new grout for a fresh look. This process restores the tile’s appearance and prevents water damage. With patience and the right tools, you can achieve professional-looking results at home.
Cleaning Excess Grout
Use a damp sponge to wipe the tiles. Make sure to remove all the extra grout. Be gentle to avoid removing grout from joints. Rinse the sponge often to keep it clean. Do this several times. The tiles should look clean and neat.
Let it dry for 24 hours. Check for any leftover grout haze. Use a soft cloth to polish the tiles. This will give them a shiny look.
Sealing The Grout
Choose a good grout sealer. It protects the grout from stains and water. Apply the sealer with a small brush. Cover all the grout lines carefully. Avoid spilling on the tiles. Let it dry as per the instructions.
Reapply the sealer every year. It keeps the floor looking fresh. A sealed grout lasts longer and stays clean.
/How_to_Regrout_Ceramic_Tile_64434_08-63a0298cea2a47ba985a0a17ed65d278.jpg)
Common Mistakes To Avoid
Not cleaning the tiles before regrouting is a big mistake. Dirt can stop new grout from sticking well. Always clean tiles first. Use a mild cleaner and a sponge. Make sure there is no dust left behind.
Using the wrong type of grout can cause issues. Choose grout that matches your tiles. Some tiles need special grout. Always check what is best for your tiles.
Another mistake is mixing grout too thin. Grout should be thick, like peanut butter. If too thin, it won’t stay in place. Follow mixing instructions carefully.
Skipping the step of sealing the grout can lead to stains. Seal grout after it dries. Sealing keeps water and dirt away. It helps grout last longer.
Maintenance Tips
Clean tiles often. Use a soft mop and warm water. This helps keep grout fresh. Dirt can stick to grout. This makes it look dirty. Mix a little soap with water. Wipe the tiles gently. Rinse with clean water. Dry the floor with a towel. This stops water spots.
Check grout lines every year. Look for cracks or holes. These need fixing. Replace grout every 3-5 years. This keeps tiles safe. Old grout can break. It can let water under tiles. This can damage the floor. New grout keeps tiles strong.
Frequently Asked Questions
What Tools Are Needed To Regrout Tile?
To regrout tile, you’ll need a grout saw, mixing bucket, float, sponge, and grout. These tools help remove old grout and apply new grout effectively. Ensure to wear protective gloves and goggles for safety during the process.
How Long Does Regrouting Take?
Regrouting typically takes a few hours depending on the area size. Smaller projects might only take two hours, while larger areas may require more time. Allow the grout to cure fully, usually within 24 to 48 hours.
Can I Regrout Over Old Grout?
Regrouting over old grout is not recommended. Removing the old grout ensures a strong bond and prevents future cracking. Use a grout saw to carefully remove old grout before applying new grout for best results.
How Often Should Tile Be Regrouted?
Regrouting is usually needed every 10-15 years. High-traffic areas may require more frequent maintenance. Regular cleaning and sealing can extend grout life, but watch for signs of wear or discoloration.
Conclusion
Regrouting floor tiles can refresh your home’s look easily. With simple steps, you can save money and time. Clean the old grout, apply new grout, and wipe excess. This process is straightforward but requires patience. Regular maintenance keeps tiles looking new.
Pay attention to drying times for better results. Enjoy the improved appearance of your floors. You now have the skills to tackle this home project confidently. Keep practicing, and your tile skills will improve. Happy regrouting, and enjoy your renewed space!


