To refinish your hardwood floor, start by evaluating the condition for damage like scratches or stains. Remove furniture and gather essential tools, including a drum sander and sandpaper of varying grits. Make certain your workspace is well-ventilated and organized. Sand the floor by moving with the grain, starting with coarse grit and progressing to finer grits, cleaning between passes. After sanding, apply your chosen stain evenly and follow with a durable finish, allowing proper drying time between coats. For long-lasting results, consider protective measures for maintenance. There's more to perfecting this process, guaranteeing your floors shine beautifully.
Assessing Your Hardwood Floors
Before diving into refinishing your hardwood floors, it's essential to assess their current condition. Start by examining the floor for any signs of damage, like scratches, dents, or water stains. Take note of the wood type, as different species have varying durability and refinishing requirements. If your floors are made of softer woods like pine, they may need more frequent attention than harder woods like oak. Additionally, check the thickness of the remaining finish; this helps you determine if sanding is necessary. Look for areas where the finish has worn away completely, exposing raw wood. Understanding the floor condition allows you to plan your refinishing approach effectively, ensuring you achieve a beautiful, long-lasting result that enhances your space.
Gathering Necessary Tools
Before you start refinishing your hardwood floors, you need to gather the essential tools required for the job. This includes not only the sanding equipment and finishing products but also critical safety gear to protect yourself during the process. Ensuring you have everything on hand will make your refinishing project more efficient and safe.
Essential Tools Needed
To successfully refinish hardwood floors, you'll need a specific set of tools that guarantees efficiency and quality results. Start with a drum sander, essential for leveling the surface, and make certain to select the right grit sandpaper based on your wood types—coarser grits for deeper scratches and finer for finishing. A hand scraper is invaluable for edges and corners. You'll also need a vacuum to remove dust and debris. For applying stain, a high-quality brush or roller is vital. Don't forget a floor buffer for an even finish and a moisture meter to check wood integrity. Each tool's selection directly impacts your project's outcome, so choose wisely to guarantee a satisfying refinishing experience.
Safety Equipment Importance
While you focus on achieving a beautiful finish for your hardwood floors, prioritizing safety equipment is vital to protect yourself from the hazards associated with refinishing. First, invest in quality safety gear, including gloves and a dust mask to shield yourself from harmful particles. Protective eyewear is essential, as it guards your eyes against flying debris and chemical splashes. Make certain you're also using knee pads for comfort while working on the floor. Don't overlook ear protection; sanders and other tools can produce loud noises that may damage your hearing. By gathering and utilizing this safety equipment, you'll not only enhance your freedom to work effectively but also minimize risks, allowing you to focus solely on achieving that flawless finish.
Preparing the Work Area
As you prepare the work area for refinishing hardwood floors, it's essential to verify that the space is clean, well-ventilated, and free from any obstacles. Start by clearing furniture and other items from the area to guarantee you have a spacious environment to work in. Use drop cloths or plastic sheeting to protect surfaces like baseboards and walls from dust and scratches.
Here's a quick checklist to help you stay organized:
| Task | Purpose | Tips |
|---|---|---|
| Clear Furniture | Free up workspace | Move items to another room |
| Protect Surfaces | Prevent damage | Use drop cloths or tape |
| Ventilate Room | Reduce fumes | Open windows or use fans |
| Gather Tools | Stay organized | Keep tools within reach |
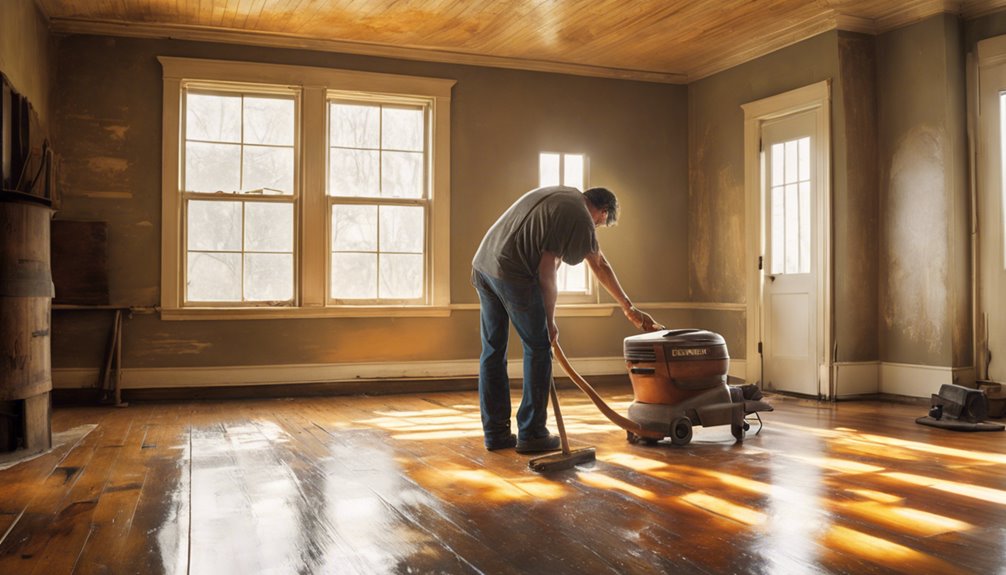
Sanding the Floor
When sanding the floor, you'll need to choose the right equipment, like a drum sander or orbital sander, to guarantee an even finish. Employing proper sanding techniques, such as working with the grain and using the correct grit sequence, is essential for achieving the best results. Don't forget to wear appropriate safety gear, including masks and goggles, to protect yourself from dust and debris during the process.
Choose the Right Equipment
Choosing the right equipment for sanding your hardwood floor is essential for achieving a smooth, even finish. Start by selecting a floor sander; you can choose between drum sanders, orbital sanders, or belt sanders, each offering distinct advantages. Drum sanders are powerful but require skill, while orbital sanders are user-friendly and less aggressive. You'll also need sandpaper, with various grits for different stages of sanding. Don't forget to take into account equipment costs; renting might be more economical than purchasing, especially for one-time projects. Make certain safety gear, like a dust mask and goggles, is included in your equipment list. By understanding equipment types and associated costs, you can optimize your sanding process and enhance your hardwood floor's appearance.
Proper Sanding Techniques
With your equipment ready, it's time to focus on proper sanding techniques to guarantee a flawless finish on your hardwood floor. Start with grit selection: use 36- to 40-grit sandpaper for initial sanding to remove old finishes and imperfections. Follow this with 60- to 80-grit for smoothing the surface. Always sand with the grain to avoid scratches and ascertain an even surface. Keep the sander moving to prevent gouging; overlapping your strokes by about one-third helps maintain consistency. After the coarse sanding, switch to finer grits, like 100- to 120-grit, to achieve a smooth, polished surface. Don't forget to vacuum and wipe down the dust between grits for best results. This meticulous approach will prepare your floor for a beautiful finish.
Safety Precautions Needed
Although sanding is crucial for achieving a smooth hardwood floor finish, prioritizing safety precautions is essential to protect yourself from potential hazards. Start by wearing protective gear, including a dust mask, safety goggles, and ear protection. This gear helps shield you from fine dust particles and loud machinery. Make sure your workspace is well-ventilated to minimize inhalation risks. Be aware of hazards like exposed electrical cords and loose floorboards that could cause trips or falls. Keep your tools in good condition, and avoid distractions while operating equipment. Finally, maintain hazard awareness, particularly regarding the dust generated during sanding; it can be flammable. By taking these precautions, you can confidently tackle your sanding project while safeguarding your well-being.
Applying Stain and Finish
Applying stain and finish to your hardwood floor transforms its appearance while providing essential protection. Begin with a thorough stain application, using a brush or cloth to guarantee even coverage. Choose the right stain type—oil-based stains offer deep penetration and rich color, while water-based stains provide quick drying and lower odor.
After the stain dries, select your finish type. Polyurethane is popular for its durability, while natural oils enhance the wood's character. Apply the finish with a clean applicator, following the manufacturer's guidelines for thickness and drying time. For the best results, consider multiple coats, sanding lightly between applications to achieve a smooth surface. This process not only enhances aesthetics but also extends the lifespan of your hardwood flooring.
Allowing for Proper Drying
After you've applied the stain and finish, allowing for proper drying is essential to achieving the best results. Proper drying time guarantees the longevity and beauty of your hardwood floors. Be mindful of the humidity levels in your space, as they can greatly affect the drying process.
- A well-dried finish enhances the wood's natural beauty.
- Prevents peeling or bubbling, saving you from future repairs.
- Guarantees a durable surface, giving you the freedom to enjoy your floors without worry.
Typically, you'll want to wait at least 24 hours before walking on your newly finished floors. In high humidity, consider extending that time to guarantee a flawless finish. Remember, patience now leads to freedom later.
Maintaining Your Refinished Floors
One of the most critical aspects of enjoying your refinished hardwood floors is understanding how to maintain them properly. Establishing a consistent cleaning routine is vital. Use a soft-bristle broom or a vacuum with a hardwood setting to remove dust and debris regularly. For deeper cleaning, a damp mop with a pH-neutral hardwood cleaner will preserve the finish without damaging the wood.
Floor protection is equally important. Place mats at entryways to trap dirt and moisture, and consider using felt pads under furniture to prevent scratches. Avoid using harsh chemicals or steam cleaners, as they can degrade the finish. By adhering to these maintenance practices, you'll guarantee your refinished floors remain beautiful and durable for years to come.
Frequently Asked Questions
How Often Should I Refinish My Hardwood Floors?
You should consider refinishing your hardwood floors every 7 to 10 years, depending on traffic and wear. To determine the right refinishing frequency, pay attention to scratches, dullness, or discoloration. Regular maintenance tips, like cleaning with a soft broom and using furniture pads, can prolong the finish. If your floors show significant damage or wear, it might be time to refinish sooner. Keeping an eye on their condition guarantees lasting beauty and durability.
Can I Refinish Engineered Hardwood Floors?
Yes, you can refinish engineered hardwood floors, but it depends on the thickness of the veneer. One of the engineered hardwood benefits is its durability, which allows for some refinishing. The refinishing process involves sanding down the top layer and applying a new finish. However, if the veneer is too thin, you might risk damaging the floor. Always check manufacturer guidelines to ascertain you're making the best choice for your flooring.
What Is the Best Time of Year to Refinish Floors?
The best time of year to refinish your floors hinges on seasonal considerations and humidity levels. Ideally, spring or fall is preferable, as temperatures are moderate and humidity is stable. High humidity in summer can prolong drying times, while winter's dryness might lead to quicker curing but can also exacerbate wood movement. By choosing the right season, you guarantee ideal conditions for a successful refinishing project, allowing your floors to shine beautifully.
How Do I Know if My Floors Need Refinishing?
Ever wonder if your beautiful hardwood floors are losing their charm? A thorough floor inspection is essential. Look for surface damage like scratches, dents, or discoloration. If you can see the wood grain's wear or if the finish appears dull, it's time to contemplate refinishing. You should also check for water stains or deep scratches that can affect the wood's integrity. Trust your instincts—if they're looking tired, they probably need some love.
Will Refinishing Remove Deep Scratches and Dents?
Refinishing can effectively address some surface-level issues, but it might not fully resolve deep scratches and dents. Scratch removal is achievable through sanding, yet if the damage penetrates deeply, dent repair may require additional techniques, like filling with wood putty before sanding. Keep in mind that the depth and severity of the damage will dictate the outcome. It's best to assess the condition of your floors before proceeding with refinishing.


