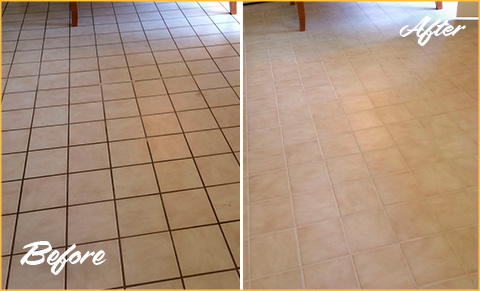
Are your floor tiles looking dull and tired? Does the grout seem to be crumbling away, leaving gaps that make the floor look worn out?
You’re not alone. Many homeowners face the challenge of maintaining the pristine look of their tiled floors. But here’s the good news: you can easily revive your tiles without a complete overhaul. Learning how to re-grout floor tiles is a simple and effective way to breathe new life into your space.
Imagine walking into a room where your floors gleam, adding a fresh and vibrant touch to your home. This straightforward process can transform your living areas, making them feel brand new. And the best part? You don’t have to be a DIY expert to achieve stunning results. Dive into the details below to discover how you can effortlessly tackle this home improvement task and enjoy the satisfaction of a job well done.
Tools And Materials
Gather the right tools for this task. A grout float is essential. Use it to spread grout evenly. A grout saw helps remove old grout. Sponge and bucket are important. They clean excess grout. Rubber gloves keep your hands safe. Safety goggles protect your eyes. Choose the right grout for your tiles. Epoxy grout is strong. Cement grout is popular. Tile spacers keep tiles in place. Sealant protects grout from stains. Mixing tools help blend grout. Brushes clean grout lines. Tape marks areas to avoid. Make sure all tools are ready. A vacuum removes debris. Rags wipe surfaces clean. With these tools, your grout job will be easier and safer.
Preparing The Area
Start by sweeping the floor. Remove all dust and dirt. Next, use a mild detergent mixed with warm water. Gently scrub the tiles with a soft brush. This will remove any stains and residue. Rinse the tiles with clean water. Let them dry completely. This ensures a clean surface for new grout.
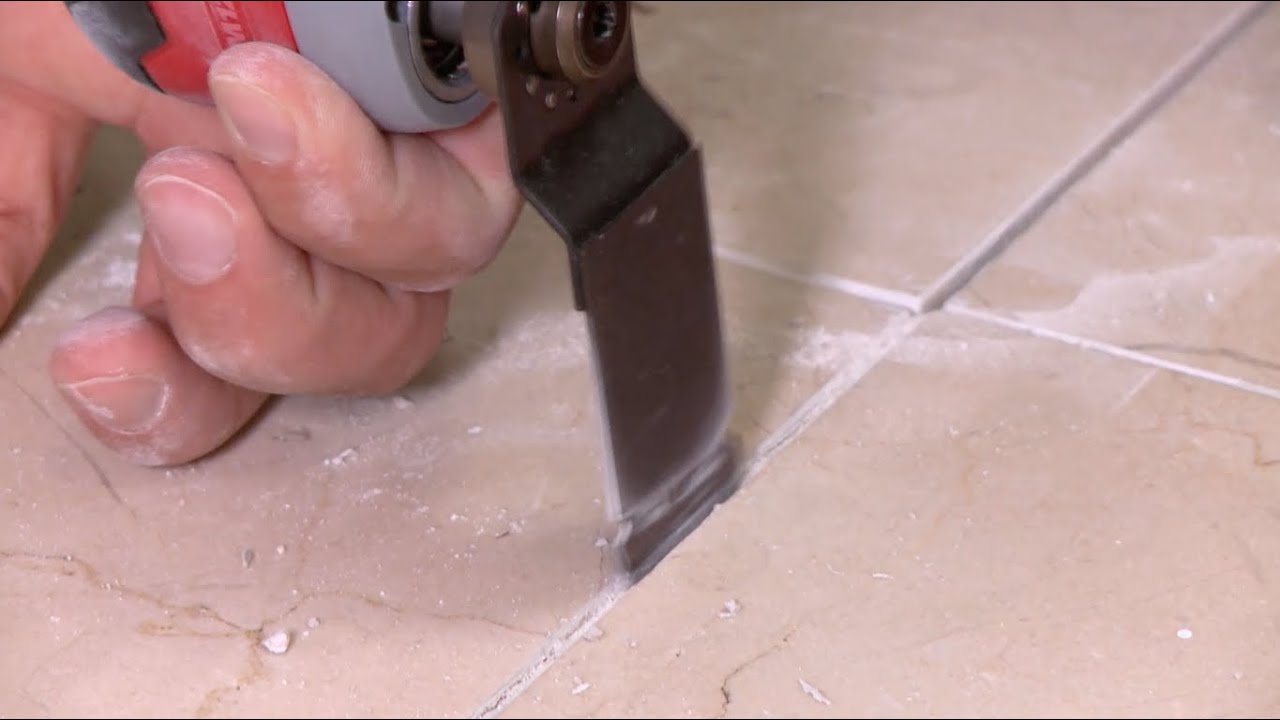
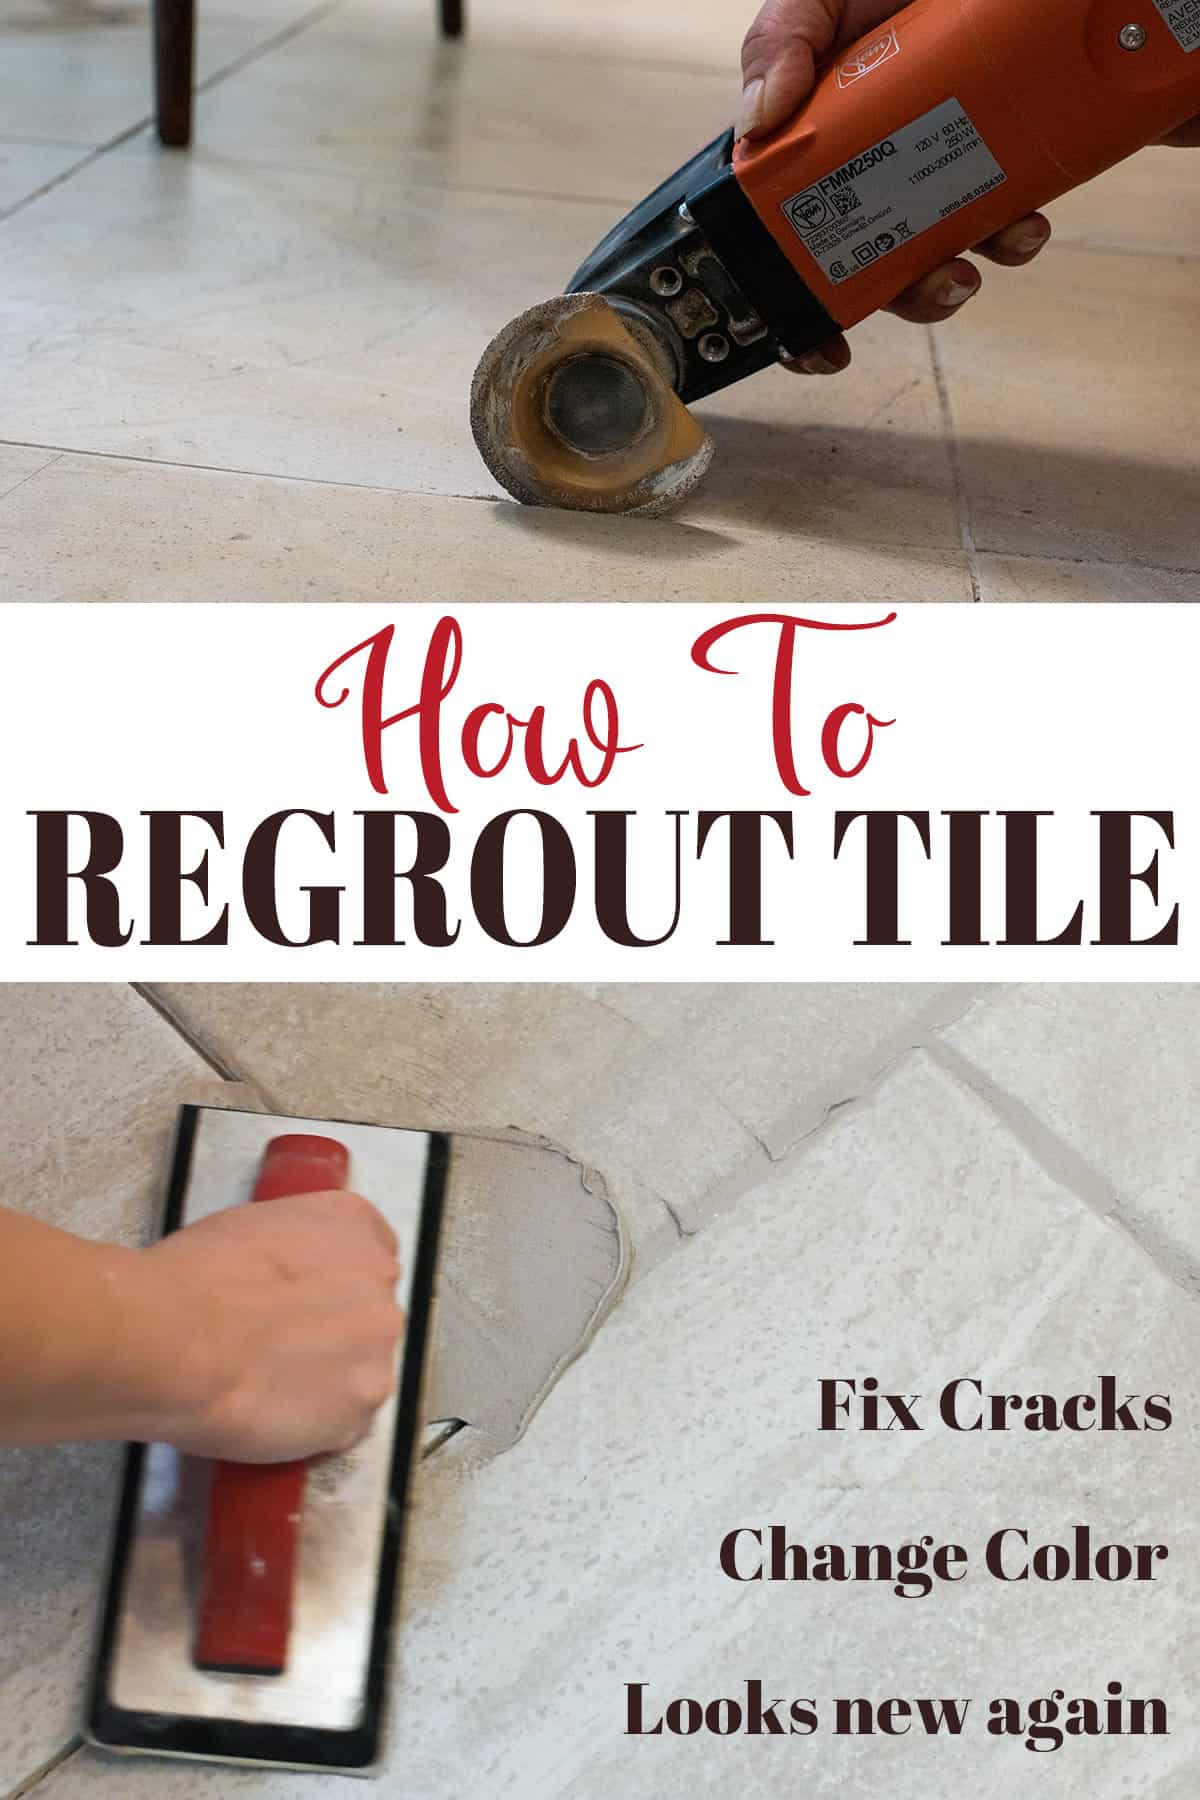
Use a grout saw or a utility knife. Carefully scrape away the old grout. Be gentle to avoid damaging the tiles. Work slowly and patiently. Remove all the old grout between the tiles. A vacuum can help clear out loose debris. Ensure every gap is clean. This step is crucial for a strong new grout.
Choosing The Right Grout
Cement-based grout is popular for floor tiles. It is easy to use and affordable. This type works well in dry areas. Choose epoxy grout for wet spaces. It resists water and stains. It is strong but costs more. Furan grout is used in industries. It is durable and handles chemicals well. Not for home use.
Grout color can change the look of tiles. Light colors make spaces feel bigger. Dark colors hide dirt better. Match grout color with tile color for a smooth look. Choose contrasting colors for a bold style. The right color can make tiles pop.
/How_to_Regrout_Ceramic_Tile_64434_08-63a0298cea2a47ba985a0a17ed65d278.jpg)
Mixing Grout
Following instructions on the grout package is very important. Read the package first. It tells how much water to use. Use a clean bucket for mixing. Add water slowly to the powder. Stir gently to mix well. The grout should be smooth. No lumps should be there.
For achieving the right consistency, check the mixture. It should be thick like peanut butter. If too watery, it won’t set right. If too dry, it won’t spread well. Adjust with water or powder as needed. Stir again to ensure it is mixed well. Let the grout sit for 5 minutes. Stir again before using. This helps it set better.
Applying New Grout
Begin by mixing the grout as per instructions. It should be smooth. Use a grout float to apply it. Hold the float at a 45-degree angle. Press the grout into the joints. Work diagonally across the tiles. This helps fill gaps well. Ensure no air bubbles remain. Gently wipe away excess grout. Use a damp sponge for this task. Rinse the sponge often. This keeps the tiles clean. Let the grout set for about 15 minutes. Then, polish the tiles with a dry cloth. This makes them shine. Ensure all joints are filled completely. Check for any gaps. Repeat the process if needed. Proper filling ensures a strong bond.
Cleaning Excess Grout
Removing excess grout is key for smooth floor tiles. Start by wiping with a damp sponge in circular motions. Once the surface dries, polish tiles with a soft cloth for a pristine finish.
Using A Damp Sponge
A damp sponge helps in wiping away extra grout. Gently press the sponge on the tile. Move it in circular motions. Rinse the sponge often. This prevents grout from sticking. Avoid scrubbing too hard. It may damage the tiles. Repeat the process until tiles look clean. Patience is key here.
Polishing The Tiles
Polish tiles to make them shine. Use a clean, dry cloth. Buff the tiles in a circular motion. This gives tiles a smooth finish. Check for leftover grout spots. Wipe them again if necessary. Admire your shiny tiles. They look brand new now.
Sealing The Grout
Choose a sealer to protect your grout. There are two main types: penetrating sealer and membrane-forming sealer. Penetrating sealer goes deep into the grout. It helps keep water out. Membrane-forming sealer makes a layer on top. This layer stops spills from going in.
Think about the area of the floor. Bathrooms and kitchens need strong protection. Look for sealers that are easy to apply. Some sealers need multiple coats. Others need only one coat. Always read the instructions on the bottle. Pick a sealer that is safe for your tiles. Some sealers can change the color of the grout. Be careful with colored tiles.
Clean the grout first. Make sure it is dry. Use a small brush or roller to apply the sealer. Start at the edge and work inward. Wipe off extra sealer with a cloth. Let the sealer dry completely. Wait at least 24 hours before using the floor. Check for any missed spots. Reapply if needed. Follow all safety tips on the sealer bottle.
Maintenance Tips
Regular cleaning keeps your floor tiles shiny. Use a soft mop and warm water. Avoid harsh chemicals. They can damage the grout. Clean spills quickly. This prevents stains. Dry the floor after mopping. Wet floors can be slippery. Regular cleaning makes your tiles last longer. It also keeps them looking new. Clean at least once a week. More if needed.
Stains on tiles look bad. Remove stains quickly. Use a mild cleaner or baking soda paste. Gently scrub with a soft brush. Do not scrub hard. It can damage the grout. Rinse with water after cleaning. Dry with a clean cloth. Stains can make tiles look old. Regular attention keeps them clean. Keep your tiles stain-free.
Frequently Asked Questions
What Tools Are Needed To Re-grout Tiles?
To re-grout floor tiles, you’ll need a grout saw or scraper, grout float, sponge, and bucket. Ensure you have protective gloves and safety glasses. These tools help remove old grout and apply new grout efficiently, ensuring a smooth and clean finish.
How Often Should Tiles Be Re-grouted?
Tiles typically need re-grouting every 10-15 years. This depends on the condition and usage of the tile. If grout shows cracks or stains, it might need attention sooner. Regular maintenance can extend the lifespan of your flooring.
Can I Re-grout Tiles Without Removing Them?
Yes, you can re-grout tiles without removing them. Start by removing the old grout using a grout saw. Clean the gaps thoroughly before applying new grout. This process refreshes the appearance without the hassle of removing tiles.
How Long Does Re-grouting Tiles Take?
Re-grouting tiles usually takes a few hours. The exact time depends on the area size and grout drying time. Plan for a full day, including preparation and cleanup. Ensure grout is completely dry before walking on the tiles.
Conclusion
Re-grouting floor tiles can refresh your space efficiently. It saves money and adds value. With patience and proper tools, anyone can do it. Clean the area thoroughly before starting. Choose the right grout color for your tiles. Follow instructions carefully for best results.
Let grout dry completely before using the floor. Regular maintenance will keep tiles looking new. This DIY project boosts home aesthetics and durability. Feel confident tackling small home improvements. Your floors will thank you for the care. Happy grouting!


