
To level a concrete floor, start by evaluating its condition for cracks and irregularities using a straightedge. Gather necessary tools like a concrete mixer, trowels, and a leveling compound. Clean the surface thoroughly, removing dust and debris, and perform a moisture test. Choose a leveling method, such as a self-leveling compound for larger areas or manual troweling for precise control. Mix and apply the compound according to the manufacturer's instructions, spreading it evenly while maintaining a wet edge. Finally, cure the surface for 24 to 48 hours before applying any sealant. There's more essential information ahead.
Assessing the Floor Condition

Before you begin leveling a concrete floor, it is crucial to assess its condition thoroughly. Start by checking for surface irregularities, such as cracks, dips, or raised areas, which can affect the leveling process. Use a straightedge or level to identify these imperfections accurately. Next, evaluate floor moisture; excess moisture can compromise your leveling material and lead to future issues. Conduct a moisture test by taping a plastic sheet to the concrete and monitoring for condensation. If moisture is present, address it before proceeding. Document any findings meticulously, as understanding the floor's condition will guide your leveling approach, ensuring a durable and effective finish. A well-prepared surface leads to ideal results, granting you the freedom to design your space without limitations.
Gathering Necessary Tools
With a thorough assessment of the floor condition complete, the next step involves gathering the necessary tools to guarantee a successful leveling process. You'll need a variety of tool types, including a concrete mixer, trowels, and a leveling compound. A floor scraper is essential for removing any old materials, while a measuring tape guarantees precision in your leveling efforts. Don't forget safety gear like goggles and gloves.
Before you start, make certain your tools are well-maintained; clean them thoroughly after each use to prevent any residue buildup. Checking for damage will guarantee they function effectively during the leveling process. Having the right tools in good condition not only enhances efficiency but also contributes to a smoother, more precise finish in your concrete floor leveling project.
Preparing the Surface
Properly preparing the surface is essential for achieving a level concrete floor. Begin with thorough surface cleaning; remove any dust, debris, or grease that could interfere with the leveling compound's adhesion. Use a strong vacuum or broom for this task. Next, conduct moisture testing to determine if your concrete slab has excess moisture, which can undermine the leveling process. You can utilize a moisture meter or simple plastic sheet test to assess moisture levels effectively. If moisture is present, consider allowing the slab to dry or applying a moisture barrier. Ensuring a clean, dry surface is vital; this foundation will support a successful leveling application and contribute to a long-lasting, even floor.
Choosing a Leveling Method
As you evaluate the best approach for leveling your concrete floor, it's essential to contemplate various methods that suit your specific needs and the condition of your slab. One option is using a self leveling compound, which can efficiently fill low spots and create a smooth, even surface. This method is especially advantageous for larger areas and requires minimal labor. Alternatively, manual leveling might be more appropriate for smaller, localized imperfections. This involves using a trowel or screed to adjust the slab's surface manually, allowing for greater control and precision. Consider factors such as the extent of the unevenness, desired finish, and your comfort level with each method to determine the right choice for your project.
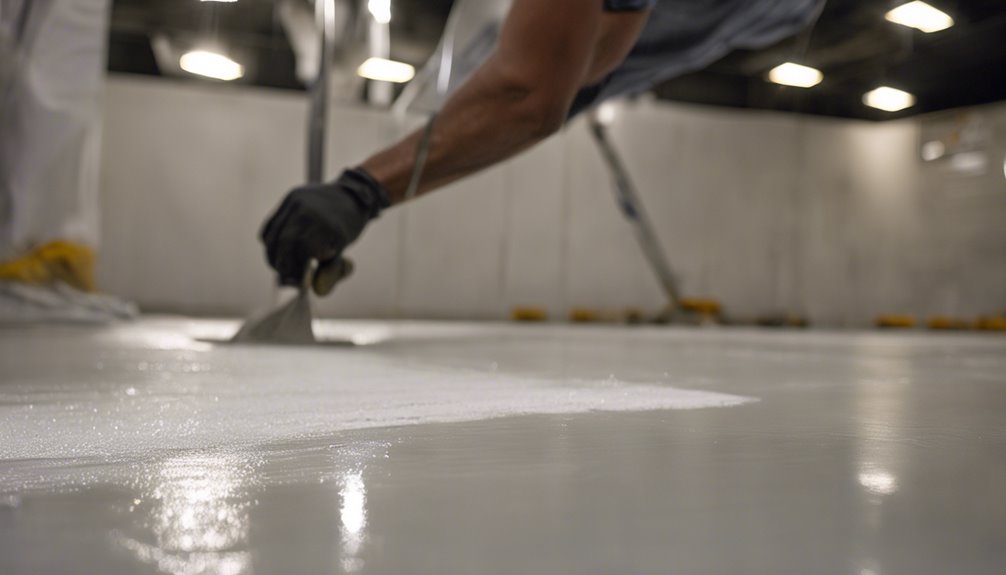
Applying Leveling Compound
After selecting the appropriate leveling method, the next step is applying the leveling compound to achieve a smooth surface. Begin by mixing the compound according to the manufacturer's instructions, guaranteeing a consistent texture. Various compound types are available, such as self-leveling and patching compounds, each suited to different leveling techniques. Pour the compound onto the floor, starting from the highest point, and use a trowel or squeegee to distribute it evenly. Maintain a wet edge to avoid seams and guarantee proper adhesion. As you work, check for low spots and fill them as necessary. It's essential to keep the area well-ventilated and allow the compound to settle without disturbance, allowing for a durable, level surface.
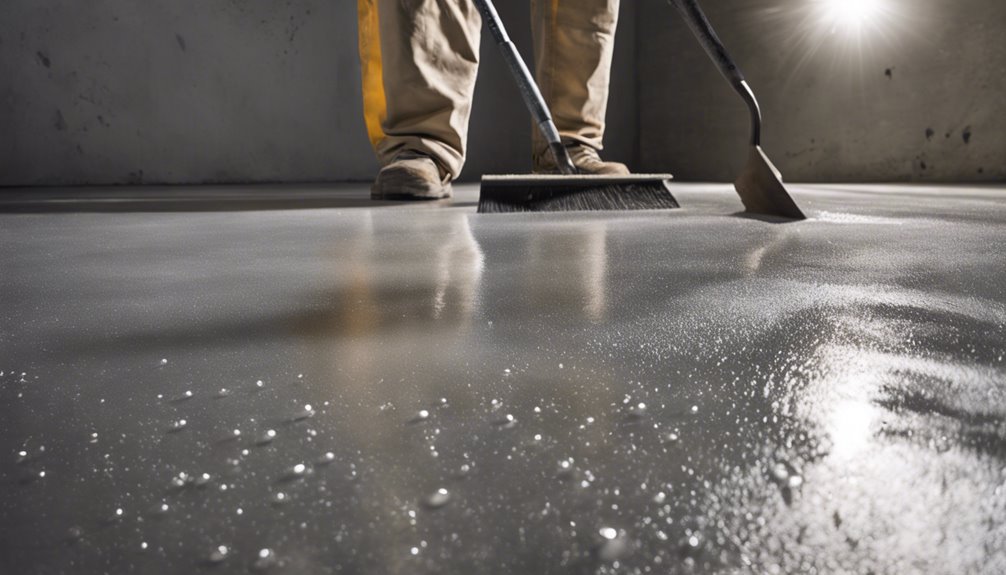
Finishing Touches and Curing
Once the leveling compound has set, you can focus on the finishing touches and curing process, which are essential for achieving a long-lasting surface. Start by employing smoothing techniques, such as using a trowel or floor sander, to guarantee the surface is even and free of imperfections. Pay attention to any rough areas that might affect the final appearance. After smoothing, allow the compound to cure properly; this typically takes 24 to 48 hours, depending on the product. During this period, avoid heavy foot traffic or placing objects on the surface. Finally, perform a final inspection once the curing is complete. Look for any discrepancies that need correction before applying any sealant or flooring material, guaranteeing a flawless finish.
Frequently Asked Questions
Can I Level a Concrete Floor Myself or Hire a Professional?
Imagine standing on a perfectly smooth surface, like a calm lake reflecting the sky. You can choose to tackle leveling your concrete floor yourself, using DIY techniques and tapping into your creativity, or hire a professional for expertise. Consider the cost comparison: DIY might save money, but it requires time and effort. Hiring a pro guarantees precision, but it'll take a bite out of your budget. Weigh your options based on your skills and needs.
How Long Does It Take for Leveling Compound to Cure Completely?
When considering curing time for leveling compounds, it typically takes about 24 to 48 hours for initial set under ideal drying conditions. However, complete curing can extend up to 28 days, depending on temperature and humidity. Ensuring favorable drying conditions—like maintaining consistent warmth and ventilation—can greatly influence the process. You'll want to allow ample time for the compound to fully cure before placing any load, ensuring durability and stability in your project.
What Are the Signs of an Uneven Concrete Floor?
Detecting an uneven concrete floor is like spotting a ship adrift on calm waters. During a floor inspection, look for visible dips, cracks, or bulges. These irregularities can cause pooling water, creating potential hazards. You may also notice difficulty in opening doors or uneven tile placement. Implementing appropriate leveling techniques can restore balance and guarantee a safe, functional surface. Addressing these signs early can save you time and prevent further complications down the road.
Is It Safe to Level a Floor Over Existing Tiles?
Yes, it's generally safe to level a floor over existing tiles, provided you verify tile stability first. Before proceeding, check for loose or cracked tiles and repair any damage. Utilize proper preparation techniques, like cleaning the surface thoroughly and applying a suitable primer to enhance adhesion. If done correctly, leveling over tiles can create a smooth surface without the need for removal, allowing you to maintain your desired aesthetic and functionality.
What Should I Do if My Floor Continues to Settle After Leveling?
If your floor's still settling, consider several significant settling causes. First, identify any underlying issues like moisture or inadequate support. Next, explore repair options such as reinforcing the foundation or applying self-leveling compounds. You might also want to consult a professional for precision and peace of mind. Addressing these problems promptly can prevent further frustration and facilitate a functional, flat floor that meets your needs while ensuring safety and stability.


