
Are you tired of walking on a basement floor that’s uneven and bumpy? You’re not alone.
Many homeowners face this common issue, and it can be frustrating. But don’t worry, because leveling your basement floor is easier than you might think. In this guide, you’ll discover simple steps to transform your basement into a smooth, stable surface that enhances your home.
Imagine having a basement that’s not just functional but also a space you can truly enjoy. Whether you’re planning to finish your basement or simply want a safer, more comfortable area, leveling the floor is the perfect starting point. Ready to make the change? Let’s dive in and see how you can achieve a level basement floor without breaking a sweat!
Importance Of A Level Basement Floor
A level basement floor keeps your home safe and strong. It helps prevent water leaks and foundation issues. If the floor is uneven, furniture might not sit properly. It can be hard to place things on an uneven floor. A level surface is easier to clean. Dirt and water can collect in low spots.
Uneven floors can lead to tripping hazards. People might fall or get hurt. Fixing the floor helps make your home safer. It also makes your basement a better place to use. You can build rooms or store things without worry.
A level floor also helps in selling your home. Buyers look for homes with good floors. It helps your home have a better value. Fixing the floor can save you money in the future. You might avoid big repair costs later.
Tools And Materials Needed
Use a leveling compound to smooth the floor. A trowel helps spread the compound evenly. A mixing paddle connects to your drill. It blends the compound properly. A bucket holds the mixture. Use a measuring tape to check the floor. Ensure it is flat. Use a broom to clean the surface. Dust can cause problems. Safety is important. Wear gloves and goggles.
| Materials | Purpose |
|---|---|
| Leveling Compound | Fills gaps and makes floor smooth |
| Trowel | Spreads compound evenly |
| Mixing Paddle | Mixes compound well |
| Bucket | Holds the mixture |
| Measuring Tape | Checks floor for flatness |
| Broom | Cleans the surface |
| Gloves and Goggles | Protects hands and eyes |
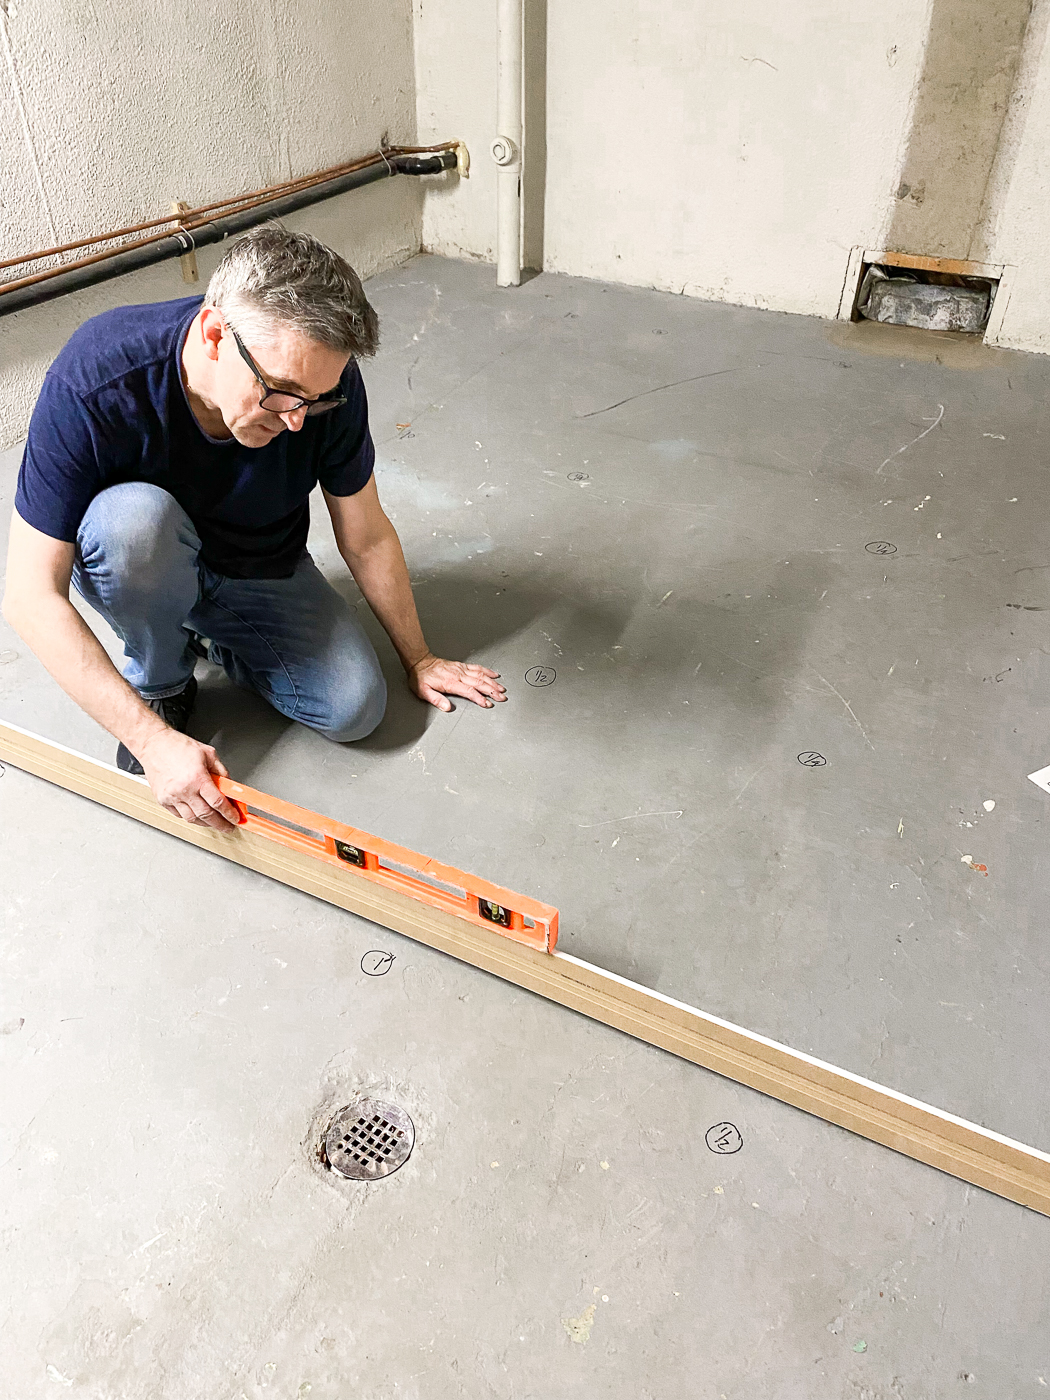
Preparing The Basement
Start by moving furniture and boxes out. Sweep the floor to remove dust and debris. Check for cracks or holes in the floor. Seal them with concrete filler. Make sure the area is clean and dry. This helps the leveling process go smoothly.
Use a straightedge to find uneven spots. Place it on the floor and look for gaps. Mark low spots with chalk or a marker. High spots need to be sanded down. A level tool can help check the floor’s evenness. Keep checking until the floor is flat.
Choosing The Right Leveling Method
Self-leveling compound flows easily. It fills gaps and cracks. Pour it on the floor. It spreads on its own. Make sure to follow the instructions. It dries quickly. Use a trowel for smooth edges. It works best for small uneven areas. Not suitable for big dips. Keep the room warm for better results. Protect the surface during drying.
Concrete leveling fixes large uneven spots. Mix the concrete well. Pour it evenly. Use a long board to spread. Smooth out the surface. Wait for it to dry. Check for bumps before it sets. Concrete is heavy. Get help if needed. Make sure to wear gloves. Protect your eyes too. This method is durable. Best for big projects.
Steps To Level The Floor
Start by getting a large bucket. Add the leveling compound powder. Then, pour water into the bucket. Stir it well with a sturdy stick. The mixture must be smooth. No lumps should be there. Keep stirring until it’s like pancake batter. Follow the instructions on the package. The right mix is very important.
Pour the mixture onto the floor. Use a trowel to spread it. Spread it quickly. The compound sets fast. Move from one corner to another. Cover all low spots. Make sure it’s even. Work in small sections. This helps in spreading better.
Use a long-handled smoothing tool. Glide it over the wet compound. Make the surface flat and even. Remove any bumps. Check for uneven spots. Go over them again. Keep the tool clean. Wipe it often for best results.
Curing And Finishing Touches
Curing and finishing touches ensure a smooth basement floor. Proper leveling reduces bumps and prevents water issues. Choose quality materials for a durable finish.
Drying Time
The floor needs time to dry. Patience is key. It might take a few days. Keep the room well-ventilated. Use fans if needed. Avoid walking on the floor. This helps in proper drying. Check the instructions on the product. They often give the best drying time.
Final Surface Check
Once dry, look for any bumps. Use a level tool. Make sure the floor is smooth. If not, sand the rough spots. Safety gear is important here. Wear a mask and goggles. Dust can be harmful. Clean the floor after sanding. A clean floor looks better.
Common Mistakes To Avoid
Skipping preparation steps can cause big issues. Always clean the floor first. Remove all dust and debris. Make sure the floor is dry. Moisture can ruin your work. Check for cracks or holes. Fix them before starting. Use a level to find uneven spots. Mark these areas for leveling. Proper preparation saves time and effort later.
Mixing materials the wrong way makes a weak floor. Follow the instructions on the bag. Use the right amount of water. Not too much, not too little. Stir the mix until smooth. Clumps mean you need to stir more. Use a mixing paddle for best results. A good mix makes the floor strong and flat.

Tips For Long-lasting Results
Achieve a level basement floor by using a laser level for accuracy. Mix and pour self-leveling concrete for a smooth finish. Allow proper curing time to ensure lasting results.
Regular Maintenance
Regular cleaning helps keep the basement floor in good shape. Dust and dirt can cause damage over time. Use a soft mop or broom often. Small cracks might appear. Fix them quickly to avoid bigger problems.
Moisture Control
Moisture can harm your basement floor. Keep it dry to prevent damage. Use a dehumidifier to reduce dampness. Check for leaks often. Fix any leaks quickly to stop water from spreading.

Frequently Asked Questions
What Tools Are Needed For Leveling A Basement Floor?
To level a basement floor, you’ll need a concrete grinder, self-leveling compound, a trowel, and a mixing paddle. Ensure you have safety gear like gloves and goggles. These tools help smooth uneven surfaces and fill low spots effectively, ensuring a flat, stable floor ready for further finishing.
How Long Does Leveling A Basement Floor Take?
Leveling a basement floor typically takes a few days. Preparation and cleaning may take a day. Applying self-leveling compound requires another day, allowing it to cure properly. Depending on room size and complexity, the timeframe can vary. Always follow manufacturer instructions for drying times to ensure a successful job.
Can I Level A Basement Floor Myself?
Yes, you can level a basement floor yourself. It requires proper tools and patience. Follow instructions carefully and ensure safety precautions. DIY leveling can save costs, but consider hiring professionals for complex projects. Assess your skill level and the task difficulty before proceeding with a DIY approach.
What Is The Cost Of Leveling A Basement Floor?
The cost of leveling a basement floor varies based on size and materials. DIY solutions are cheaper, costing around $2 to $5 per square foot. Professional services range from $500 to $2,500. Factors like labor, tools, and the compound used influence the final price.
Always budget for unexpected expenses.
Conclusion
Leveling a basement floor can seem challenging. But with patience, it’s doable. Gather your tools. Follow the steps carefully. Prepare your surface well. Mix your leveling compound right. Pour and spread smoothly. Allow it to dry fully. Check for any uneven spots.
Fix them promptly. This process creates a stable, level base. A level floor enhances your space. It improves safety and looks. You can now add flooring of your choice. Enjoy your transformed basement. Embrace the satisfaction of a job well done.
Your basement floor is ready for use.


