To lay sheet vinyl flooring, start by gathering your tools: a utility knife, straightedge, measuring tape, and roller. Prepare the subfloor by cleaning it thoroughly and repairing any imperfections. Measure and cut the vinyl with precision, ensuring pattern alignment. Plan your layout, then apply the appropriate adhesive evenly. Begin installation from the center, using a roller to eliminate air bubbles. Trim edges for a snug fit, securing with border strips or molding for a polished finish. Regular maintenance will keep your floor looking great, and there's more to explore on best practices and tips for successful installation.
Gather Necessary Tools

Before you plunge into laying sheet vinyl flooring, it's essential to gather all the necessary tools to guarantee a smooth installation process. Start by collecting essential tool types: a utility knife for cutting, a straightedge for precision, and a roller for ensuring proper adhesion. You'll also need a measuring tape, chalk line, and a seam roller for flawless seams. Don't forget safety equipment; a pair of safety goggles can protect your eyes from debris, while knee pads will keep you comfortable as you work on your knees. Having these tools on hand not only enhances your efficiency but also empowers you to tackle the project confidently, giving you the freedom to create a beautiful floor without unnecessary setbacks.
Prepare the Subfloor
Before you lay your sheet vinyl flooring, you need to assess the subfloor condition to guarantee it's structurally sound. Clean and level the surface thoroughly, removing any debris or imperfections that could affect the installation. If you find any damages, repair them promptly to create a stable foundation for your new flooring.
Assess Subfloor Condition
When tackling the installation of sheet vinyl flooring, it is crucial to assess the condition of the subfloor first. Start with a thorough subfloor inspection to identify any damage or irregularities. Look for signs of moisture, which can lead to mold and vinyl failure. Conduct a moisture assessment using a moisture meter or simple plastic-sheet test.
| Inspection Aspect | Recommended Action | Notes |
|---|---|---|
| Cracks or Holes | Fill with patching compound | Confirm it's smooth |
| Moisture Issues | Dry out or replace subfloor | Control humidity |
| Uneven Surfaces | Use leveling compound | Confirm flatness |
| Debris or Dirt | Sweep or vacuum | Clean surface confirms adhesion |
Clean and Level Surface
Achieving a clean and level surface is essential for a successful sheet vinyl flooring installation. Start with thorough surface preparation—removing dirt, debris, or any existing flooring materials. Use a vacuum or broom to guarantee no remnants are left behind. Next, inspect for any uneven areas; this is where leveling techniques come in. For minor dips, a leveling compound can be applied, smoothing out the surface. If you encounter significant irregularities, consider using a floor patching product to restore the subfloor's integrity. After applying these compounds, allow adequate drying time before proceeding. This meticulous approach will create a stable foundation for your vinyl flooring, ensuring it adheres properly and lasts longer, granting you the freedom to enjoy your space without concerns.
Repair Damages Promptly
Address any damages in your subfloor promptly to guarantee a solid base for your sheet vinyl flooring. Ignoring issues like cracks, holes, or water damage can lead to further deterioration and compromise the integrity of your installation. Begin by inspecting the entire subfloor for imperfections. For minor cracks, use a floor patching compound to fill them in, ensuring it's level with the surrounding area. Larger damages may require replacing sections of the subfloor. Prompt repairs not only enhance the aesthetic but also contribute to damage prevention, extending the lifespan of your flooring. Always allow any repair materials to cure fully before proceeding with your vinyl installation. A well-prepared subfloor is essential for achieving a durable and beautiful finish.
Measure and Cut Vinyl
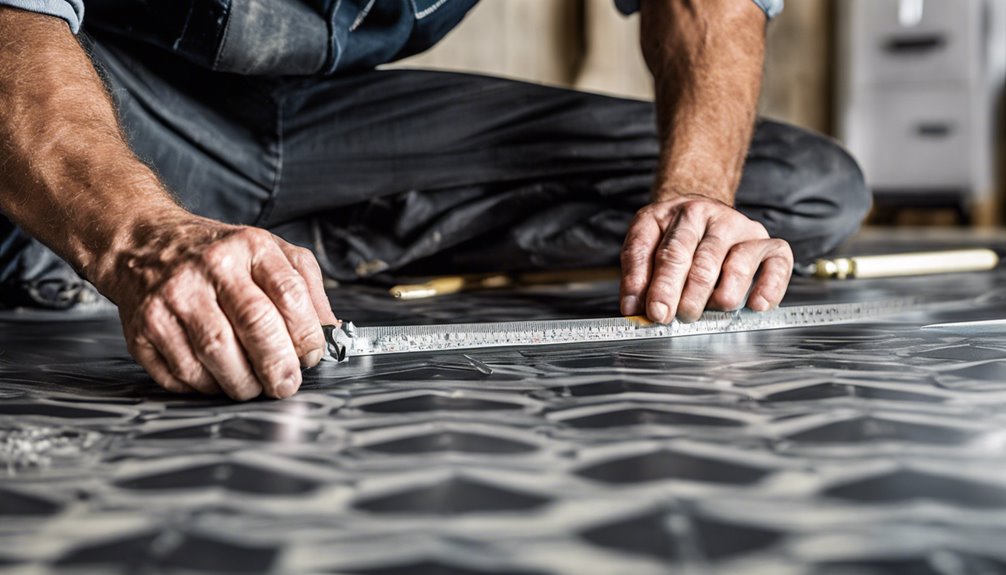
Measuring and cutting sheet vinyl accurately is essential for a successful installation, as even slight errors can lead to complications later on. Begin by selecting the right vinyl types for your space, guaranteeing they match your aesthetic and performance needs. Use a tape measure and mark your measurements on the back of the vinyl with a pencil. For cutting tools, a sharp utility knife works best; make certain it's well-maintained for clean edges. Cut along your marked lines, applying even pressure. If your vinyl has a pattern, pay attention to alignment to maintain continuity. Finally, double-check your measurements before making any cuts to avoid waste and guarantee a precise fit for your floors.
Plan the Layout
Before you start laying your sheet vinyl, you need to measure the room dimensions accurately to guarantee a proper fit. Next, choose a vinyl design that complements your space and meets your style preferences. Finally, determine the plank orientation to maximize visual appeal and minimize seams in high-traffic areas.
Measure Room Dimensions
Accurate room dimensions are essential when planning the layout for your sheet vinyl flooring. Start by evaluating the various room shapes; whether it's rectangular, L-shaped, or irregular, each presents unique challenges for measurement. Use reliable measurement tools like a tape measure or laser distance measurer for precision. Measure the length and width of the room, noting any alcoves or nooks that might affect your vinyl layout. Don't forget to measure doorways, as they can influence how you position the flooring. Record these dimensions carefully, as they're crucial for ensuring a seamless fit. By taking the time to measure accurately, you'll enable yourself to lay the flooring efficiently and achieve a professional-looking result.
Choose Vinyl Design
Once you've got your room dimensions in hand, the next step is to choose a vinyl design that not only complements your space but also enhances its functionality. Consider various vinyl patterns and color options that suit your interior style. Think about how colors might affect the mood of the room; lighter shades can make a space feel larger, while darker hues can create warmth.
| Vinyl Pattern | Color Options | Ideal Room Type |
|---|---|---|
| Wood Grain | Light Oak, Dark Walnut | Living Room |
| Stone Look | Gray, Beige | Kitchen |
| Abstract Design | Multicolor | Playroom |
| Solid Color | Navy, Soft White | Bedroom |
Determine Plank Orientation
As you prepare to lay your sheet vinyl flooring, determining the plank orientation is essential for achieving a visually appealing layout. The plank direction can considerably influence the aesthetic impact of your space. Generally, aligning the planks parallel to the longest wall or the primary light source creates an illusion of depth and enhances the room's proportions. Consider the room's function too; for example, in narrow spaces, running planks lengthwise can make them feel wider. Before starting, visualize the layout by using chalk lines or dry-fitting a few planks to ascertain the chosen orientation complements your design. This planning step not only improves the overall look but also contributes to a more seamless installation process, giving you the freedom to express your style.
Apply Adhesive
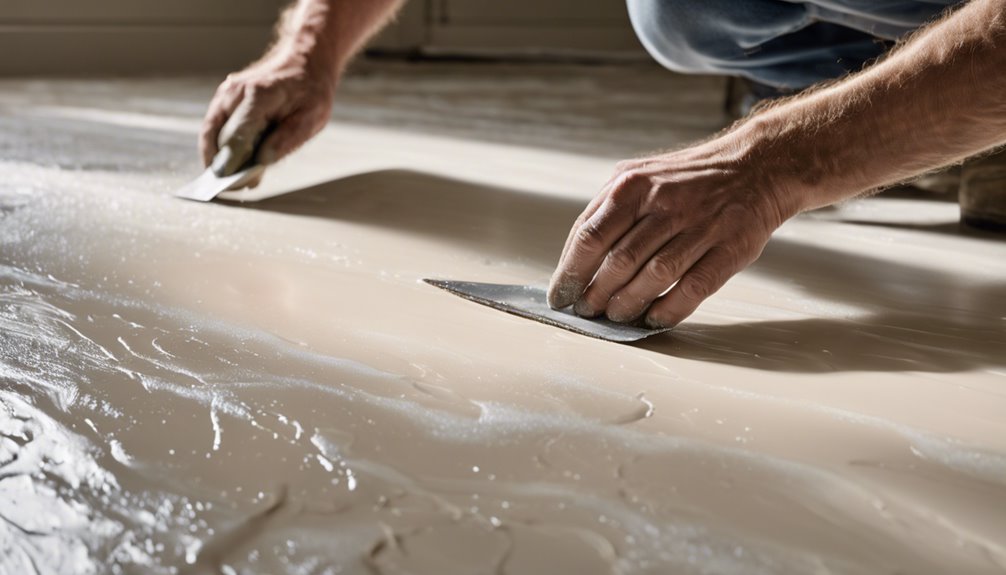
To achieve a strong bond between your sheet vinyl and the subfloor, applying adhesive correctly is crucial. Start by selecting the right adhesive types for your flooring; pressure-sensitive and full-spread adhesives are common choices. Next, prepare the subfloor by making sure it's clean and dry, as this promotes ideal adhesion. Use a notched trowel for applying the adhesive, as it guarantees even distribution. Apply it in sections, following the manufacturer's recommendations on coverage. When using application techniques, be mindful of working in manageable areas to prevent the adhesive from drying before you lay the vinyl. Finally, let the adhesive set for the recommended time before proceeding with installation to guarantee a secure bond.
Install the Vinyl
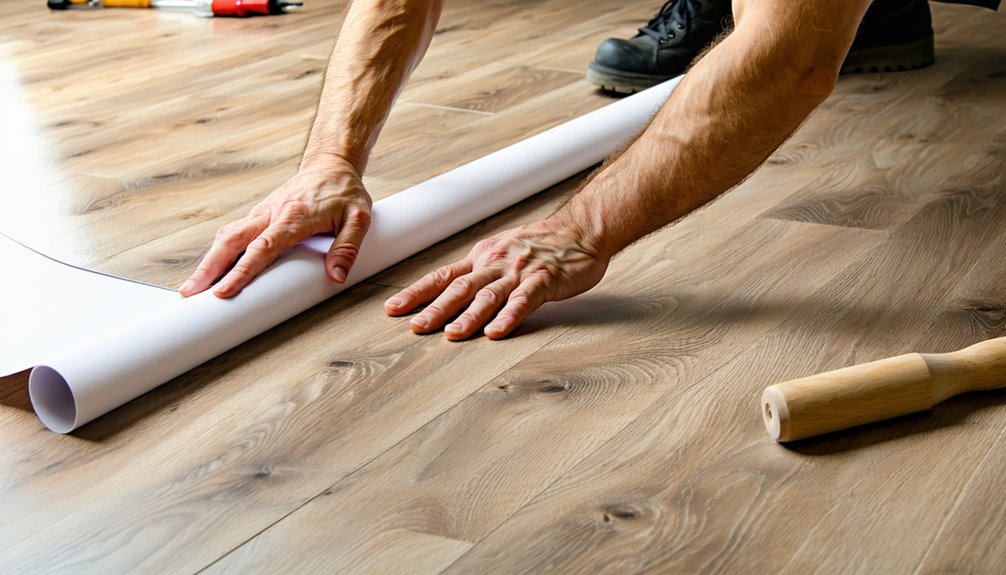
Begin by rolling out the sheet vinyl over the prepared adhesive, guaranteeing it aligns with your room's layout. Once positioned, press the vinyl down firmly, starting from the center and working your way outwards to eliminate air bubbles. Use a roller for even pressure and adherence. As you work, keep an eye on the edges to guarantee they stay straight and aligned.
For vinyl installation tips, consider using a utility knife to trim excess material, but wait until the final fitting to guarantee accuracy. After installation, allow the adhesive to cure as per the manufacturer's guidelines. For ongoing vinyl maintenance advice, sweep or vacuum regularly and use a damp mop with a gentle cleaner to maintain its appearance.
Trim and Finish Edges
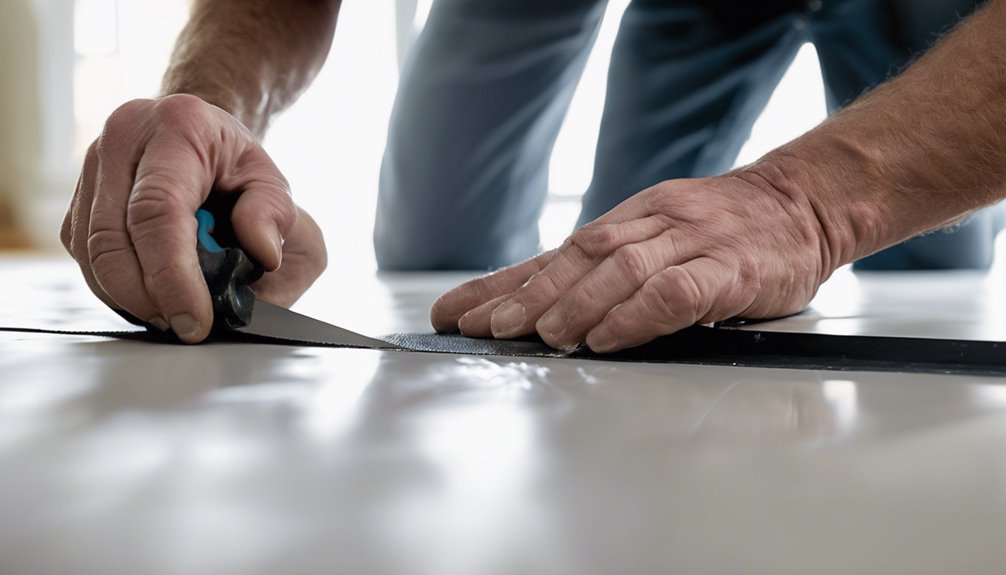
Once you've laid the sheet vinyl, trimming and finishing the edges is essential for a polished look. Start by using a sharp utility knife for precise cutting. Employ effective trimming techniques, such as scoring the vinyl lightly before cutting through for clean edges. Make certain to cut the vinyl slightly excess to guarantee a snug fit against walls or corners, then trim the excess to achieve a seamless finish.
For finishing touches, consider using transition strips or quarter round molding to cover any gaps and enhance aesthetics. Secure these with adhesive or nails, depending on the material. This not only protects your vinyl edges but also gives your flooring a professional appearance, allowing you to enjoy your beautifully laid vinyl with confidence.
Clean and Maintain Floor
After finishing the edges, maintaining your sheet vinyl floor is key to preserving its appearance and longevity. Start with regular cleaning techniques, like sweeping or vacuuming to remove dirt and debris. For deeper cleans, use a damp mop with a gentle, pH-neutral cleaner specifically designed for vinyl. Avoid harsh chemicals that can damage the surface.
For maintenance tips, consider placing mats at entryways to minimize dirt and moisture. It's also wise to periodically check for any scratches or dents; addressing them quickly can prevent further damage. Finally, avoid dragging heavy furniture across the floor to prevent tears. With these practices, you'll keep your vinyl flooring looking fresh and vibrant, allowing you to enjoy your space freely.
Frequently Asked Questions
How Long Does Vinyl Flooring Typically Last?
You might be surprised to learn that vinyl flooring can last anywhere from 10 to 20 years, depending on various vinyl longevity factors. If you take care of it, like keeping it clean and avoiding harsh chemicals, you'll maximize its lifespan. Regular maintenance tips, such as sweeping and mopping, can prevent wear and tear. So, by investing a little time, you can enjoy your vinyl flooring for years to come, offering you freedom in your space.
Can I Install Vinyl Over Existing Flooring?
Yes, you can install vinyl over existing flooring, but flooring preparation is essential. Ascertain the surface is clean, dry, and level. Remove any loose or damaged sections. You'll want to apply an underlayment if your current floor is uneven. For best results, follow these installation tips: use a high-quality adhesive, roll the vinyl to eliminate air bubbles, and allow it to acclimate to room temperature before installation. This approach will enhance durability and appearance.
What Are the Best Types of Adhesive for Vinyl?
Did you know that nearly 60% of DIYers struggle with choosing the right vinyl adhesive types? You'll want to take into account pressure-sensitive, full spread, or perimeter bond adhesives based on your project. Each has unique adhesive application techniques—like spreading a thin layer for pressure-sensitive options. For best results, make certain your surface is clean and dry. Choosing the right adhesive can give you the freedom to create a stunning floor that lasts for years.
Is Professional Installation Recommended for Vinyl Flooring?
Is professional installation recommended for vinyl flooring? It often depends on your skill level and the complexity of the job. Hiring professionals can provide significant benefits, like ensuring a perfect fit and avoiding costly mistakes. However, be mindful of installation costs, which might strain your budget. If you're confident in your abilities, you might save money and enjoy the freedom of a DIY project, but don't underestimate the value of professional expertise.
How Do I Repair a Damaged Vinyl Flooring Section?
To repair a damaged section of vinyl flooring, you can utilize vinyl repair techniques like patching methods. First, clean the area thoroughly and cut out the damaged piece. Measure and cut a patch from leftover vinyl, ensuring it fits snugly. Use vinyl adhesive to secure the patch in place, and roll over it with a roller for even adhesion. Finally, seal the edges with a vinyl seam sealer to prevent further damage.


