
To lay Pergo flooring, first prepare your subfloor by ensuring it’s clean, dry, and level within 3/16 inch over 10 feet. Acclimate the planks in the installation room for 48 hours at 60-80°F and 35-65% humidity. Plan your layout, positioning the first row with the tongue side facing center and maintaining a 1/4 inch expansion gap. Click planks together at a slight angle with firm pressure. For a flawless finish, trimming edges and installing connection strips correctly is essential—you’ll find more detailed steps ahead.
Preparing the Subfloor
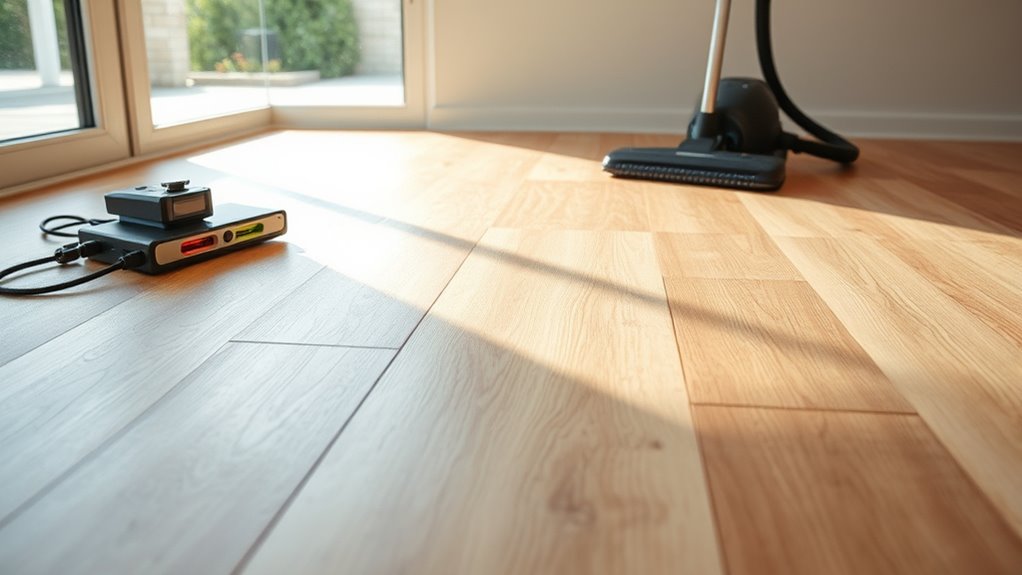
Before you lay Pergo flooring, you need to thoroughly prepare the subfloor to guarantee a smooth, durable installation. First, identify the subfloor types in your space—common options include concrete, plywood, or oriented strand board (OSB). Each requires specific handling to assure stability. Next, perform moisture testing; excessive moisture can cause Pergo planks to warp or buckle. Use a reliable moisture meter to measure moisture levels accurately. For concrete, ensure it’s fully cured and below 3% moisture content. For wood subfloors, check for moisture below 12%. Address any uneven areas by sanding or applying a leveling compound to maintain flatness within 3/16 inch over 10 feet. Properly prepared, your subfloor will support your flooring’s longevity and your freedom to enjoy a flawless, resilient surface.
Acclimating the Pergo Flooring
Proper acclimation of your Pergo flooring is essential to confirm the planks adjust to the room’s temperature and humidity, preventing expansion or contraction after installation. To do this, store the unopened flooring boxes flat in the room where you’ll install them for at least 48 hours. Maintain strict temperature control between 60°F and 80°F and stabilize humidity levels around 35-65%. Avoid placing the flooring near heat sources, direct sunlight, or damp areas during this period. Open the boxes only when ready to install, allowing planks to breathe and reach equilibrium with the environment. This process confirms dimensional stability, reducing gaps or buckling post-installation. Proper acclimation is a critical step that safeguards your investment and confirms long-lasting performance.
Planning the Layout

Since accurate planning guarantees a seamless installation, you’ll want to measure the room precisely and determine the direction of the planks early on. Start by taking exact room measurements to calculate the number of Pergo planks needed and minimize waste. Next, consider layout considerations such as natural light sources and traffic flow to decide the plank orientation for a visually appealing and durable floor. Finally, plan for expansion gaps along walls to accommodate floor movement.
- Measure room length and width accurately.
- Choose plank direction parallel to longest wall or main light source.
- Account for expansion gaps, usually 1/4 inch around edges.
Following these steps guarantees an efficient layout that supports both aesthetics and functionality, giving you freedom to customize your space confidently.
Installing the First Row
Start by positioning the first row of Pergo planks along the longest wall, ensuring the tongue side faces the room’s center. Align the planks precisely, maintaining a consistent 1/4-inch expansion gap between the wall and the first row using spacers. This gap allows for natural expansion and contraction, essential for a durable installation. Use a tapping block and hammer gently to secure each plank’s edge without damaging the flooring. Installation tips include checking for level subfloor conditions before proceeding and trimming the last plank of the first row to fit accurately, ensuring a clean edge. Take your time positioning the first row correctly—it sets the foundation for the entire floor. Accuracy here guarantees straight rows and a professional finish throughout your Pergo flooring project.
Clicking Planks Together
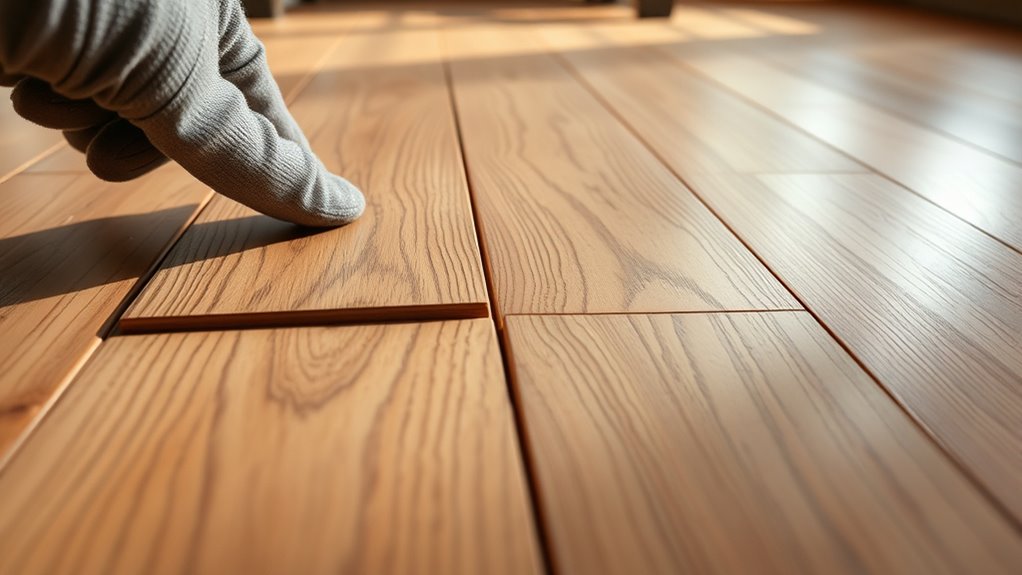
When clicking planks together, you need to carefully align the edges to guarantee a seamless fit. Engage the click mechanism firmly by angling and pressing the plank until it locks securely in place. Make sure there are no gaps between planks to maintain stability and a smooth surface.
Aligning Plank Edges
To align plank edges correctly, you’ll need to confirm the tongue and groove of each Pergo plank fit snugly before clicking them together. Precise plank alignment guarantees a seamless surface and prevents gaps or unevenness. Focus on edge matching to maintain structural integrity and aesthetic flow.
Follow these steps:
- Position the plank at a slight angle, aligning the groove with the tongue of the preceding plank.
- Gently lower the plank, confirming edges are flush without forcing to avoid damage.
- Apply consistent pressure along the length to engage the locking mechanism fully.
Securing Click Mechanism
Although aligning the plank edges guarantees a proper fit, securing the click mechanism requires applying firm, even pressure along the plank joint until you hear or feel the locking system engage. Different click mechanism types—such as angle-angle or drop-lock—dictate specific engagement methods. For angle-angle systems, gently angle the plank and press down until it clicks; for drop-lock systems, lower the plank straight down with steady force. Use installation tools like tapping blocks and pull bars to verify a secure connection without damaging the planks. Avoid excessive force that risks compromising the locking profile. Mastering these techniques grants you the freedom to assemble your Pergo flooring efficiently, achieving a seamless, stable surface ready for use.
Avoiding Gaps Between Planks
Ensuring planks click together without gaps requires precise alignment and consistent pressure throughout the installation process. To achieve effective gap prevention, focus on these critical steps:
- Maintain Uniform Plank Spacing – Consistently measure and adjust spacing to prevent uneven gaps that compromise structural integrity and aesthetics.
- Align Edges Before Locking – Position each plank edge-to-edge at a slight angle, then lower it slowly to engage the click mechanism fully without forcing.
- Apply Even Pressure – Use a tapping block and mallet gently to secure planks, avoiding excessive force that can damage locking joints or create gaps.
Finishing and Trimming Edges
Once your Pergo flooring is fully installed, you’ll need to focus on finishing and trimming the edges for a clean look. Start by securely attaching baseboards and use quarter round molding to cover expansion gaps without restricting floor movement. Finally, place transition strips at doorways or between different flooring types to guarantee a smooth, professional finish.
Baseboard Installation Tips
When installing baseboards after laying Pergo flooring, you’ll want to focus on accurately trimming edges to guarantee a clean, professional finish. Selecting the right baseboard styles is vital, as they must complement your flooring and room aesthetic. Mastering precise installation techniques will assure durability and visual appeal. Follow these steps:
- Measure and cut baseboards at a 45-degree angle for inside and outside corners to achieve tight, seamless joints.
- Use a nail gun to secure baseboards to studs, avoiding damage to the flooring by leaving a small expansion gap.
- Fill nail holes and seams with wood filler, then sand and paint or stain to match your desired finish.
Quarter Round Molding Use
Although baseboards provide a clean boundary between your Pergo flooring and walls, quarter round molding is essential for covering gaps and creating a polished edge. Choose quarter round materials that match or complement your flooring for a seamless look. Common options include wood, MDF, or flexible vinyl, each offering different durability and finish qualities. For installation techniques, start by measuring and cutting the molding to fit corners precisely, using a miter saw for clean 45-degree angles. Attach the quarter round by nailing it into the baseboard—not the floor—to allow for natural flooring expansion. Use a nail set to countersink nails, then fill holes with wood filler for a smooth finish. This guarantees your flooring edges stay protected, visually neat, and free to expand without damage.
Transition Strip Placement
Three key types of connection strips—T-molding, reducer, and threshold—are essential for finishing and trimming Pergo flooring edges where it meets different surfaces. When planning connection strip installation, choose the correct connection strip types based on height differences and adjoining flooring materials. Follow these steps precisely:
- Measure the gap between flooring surfaces to select the appropriate strip length and type.
- Secure the connection strip using the manufacturer’s recommended fasteners or adhesive, ensuring a tight fit without restricting floor expansion.
- Align the strip evenly, maintaining a smooth connection and preventing tripping hazards.


