Are you tired of staring at that cold, bare cement floor in your home? Transforming it into a warm and inviting space is easier than you might think.
Laying laminate flooring on cement can elevate your room’s look without breaking the bank. Imagine stepping onto a sleek, polished surface that not only enhances your home’s aesthetics but also adds value. In this guide, you’ll discover the simple steps to get this done, even if you’re not a seasoned DIY enthusiast.
Picture the satisfaction of completing this project yourself, creating a space that reflects your personal style. Ready to learn how you can achieve this transformation? Let’s dive into the details and get you started on your flooring upgrade!
Preparing The Cement Surface
Begin with a clean surface. Use a broom or vacuum. Dirt can cause problems later. Inspect the cement. Look for any cracks or holes. These need fixing. A clean surface helps the laminate stick better.
Cracks must be repaired first. Fill them with cement filler. Smooth out the surface. Ensure no bumps remain. Holes should be filled too. Use a simple patch kit. Make sure the surface is even.
Check the level of the cement. Use a level tool. The floor must be flat. Uneven surfaces cause issues. Fix any uneven areas. Use self-leveling compound if needed. A flat floor makes laying laminate easier.
Gathering Necessary Tools And Materials
Start with a tape measure. It’s key for accurate measurements. A saw helps cut the laminate. Use a hammer to secure pieces. Spacers keep gaps even. Safety goggles protect your eyes. Gather these tools before you start. They make the job easier and safe.
A good underlayment makes a big difference. It adds cushion and reduces noise. Some underlayments also act as a moisture barrier. Choose one that suits your floor needs. The right underlayment can make your floor last longer.
Laminate quality matters. Cheap laminate may not last. Check the thickness of the boards. Thicker boards are often better. Look for a good warranty. That shows confidence in the product. Quality laminate looks better and lasts longer.
Acclimating The Laminate Flooring
Laminate flooring needs time to adjust. This is called acclimation. It helps the flooring fit well. Without it, floors might warp or gap. Warping makes floors uneven. Gaps make floors look bad. Proper acclimation avoids these issues.
The flooring needs to sit for at least 48 hours. Keep it in the room where it will be installed. The room must be at the right temperature. Keep it between 60°F to 80°F. Make sure the air is not too dry. Keep humidity between 30% and 60%. These conditions help the flooring adjust well.
Installing The Underlayment
Start by cleaning the cement floor. Dirt and dust can cause bumps. Flat surfaces are important. Unroll the underlayment on the floor. Cut it to fit using scissors. Cut carefully for a perfect fit. Make sure it covers all areas. Overlapping pieces are okay.
Use tape to connect seams. This stops movement. It also keeps the underlayment smooth. Press down on the tape firmly. Check for any gaps between seams. If gaps are found, tape again. Secure all corners well. This helps the laminate sit flat later.
Laying The First Row Of Laminate
Start by measuring the room’s length and width. Accurate measurements are crucial. Use a tape measure. Mark the measurements on your laminate boards. Always double-check your marks.
Next, use a saw to cut the boards. A jigsaw or hand saw works well. Cut slowly and carefully. Make sure the cuts are straight. This ensures a neat fit.
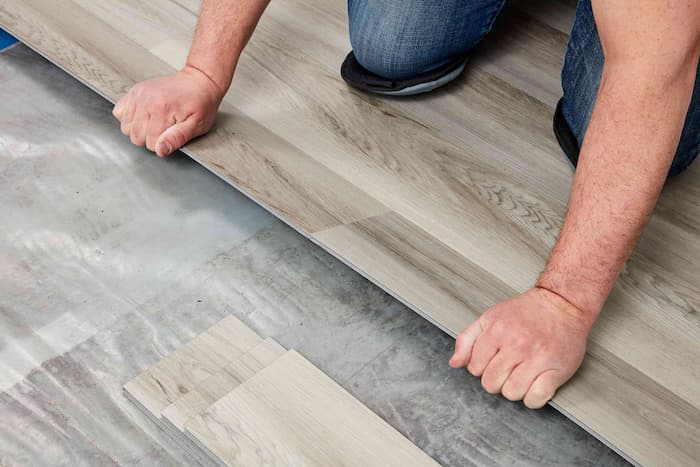
Place the first board in a corner. Align it with the wall. Leave a small gap for expansion. This gap should be around 1/4 inch. Spacers can help with this.
Continue placing boards along the wall. Check alignment after each board. Keep them straight. Use spacers between each board. This keeps them evenly spaced. Helps with the room’s overall look.
Continuing The Installation
Staggering the seams is very important. It makes the floor strong. Start each row with a different length. This helps the seams not line up. Always keep a gap of at least 12 inches between seams. This method stops the floor from breaking.
Always leave a small gap near the wall. This is called an expansion gap. The gap lets the floor grow when it is warm. Use spacers to keep the gap right. Usually, the gap should be 1/4 inch wide. Never forget this gap. It keeps the floor safe.
Fitting Around Obstacles
Place the laminate plank next to the door frame. Use a pencil to mark where the door frame meets the plank. Use a saw to cut the marked section. Ensure the plank fits snugly under the door frame. Always double-check before cutting. A snug fit looks neat and professional. Remember, measure twice, cut once!
Measure the diameter of the pipe or vent. Mark the plank with this measurement. Use a drill to create a small hole. The hole should be slightly larger than the pipe. Cut a notch from the edge to the hole. This allows the plank to fit around the pipe. Use glue to secure the plank around the pipe. Ensure the plank is level with others. This gives a smooth floor finish.

Finishing Touches
First, gather your baseboards and trim materials. Measure the walls where you will install them. Cut the trim to fit each section. Use a miter saw for angled cuts. Fit the trim against the wall snugly. Use nails or glue to secure it. Make sure there are no gaps.
Check each piece for a smooth fit. You might need to sand some edges. Paint or stain the trim as needed. Allow it to dry before touching. This makes the room look finished and neat.
Start by sweeping the entire floor. Remove dust and debris. Use a damp mop to clean it. Ensure the mop is not too wet. Excess water can damage the laminate. Once clean, let the floor dry.
Inspect the floor for any loose pieces. Check for any gaps or uneven parts. Fix any issues you find. This ensures the floor is safe and looks great. A clean floor makes the room feel fresh and new.
Frequently Asked Questions
What Tools Are Needed For Laminate Flooring?
To lay laminate flooring on cement, you’ll need a saw, measuring tape, spacers, underlayment, hammer, and adhesive. Ensure you have safety gear like gloves and goggles. These tools will help you cut, measure, and secure the laminate efficiently, ensuring a smooth installation process.
Can Laminate Be Installed Directly On Cement?
Yes, laminate can be installed on cement, but use a moisture barrier. This prevents moisture damage to the flooring. A proper underlayment is also essential to provide cushioning and soundproofing. Ensure the cement surface is clean and level for the best results.
How Do I Prepare Cement For Laminate?
To prepare cement for laminate, clean the surface thoroughly. Remove debris and dust. Ensure the floor is level using a leveling compound if needed. Apply a moisture barrier to protect against dampness. This preparation ensures a smooth installation and long-lasting laminate flooring.
Is Underlayment Necessary For Cement Floors?
Yes, underlayment is crucial for cement floors when installing laminate. It provides moisture protection, cushioning, and noise reduction. Choose an underlayment compatible with cement surfaces for optimal results. Proper underlayment enhances durability and comfort of your laminate flooring.
Conclusion
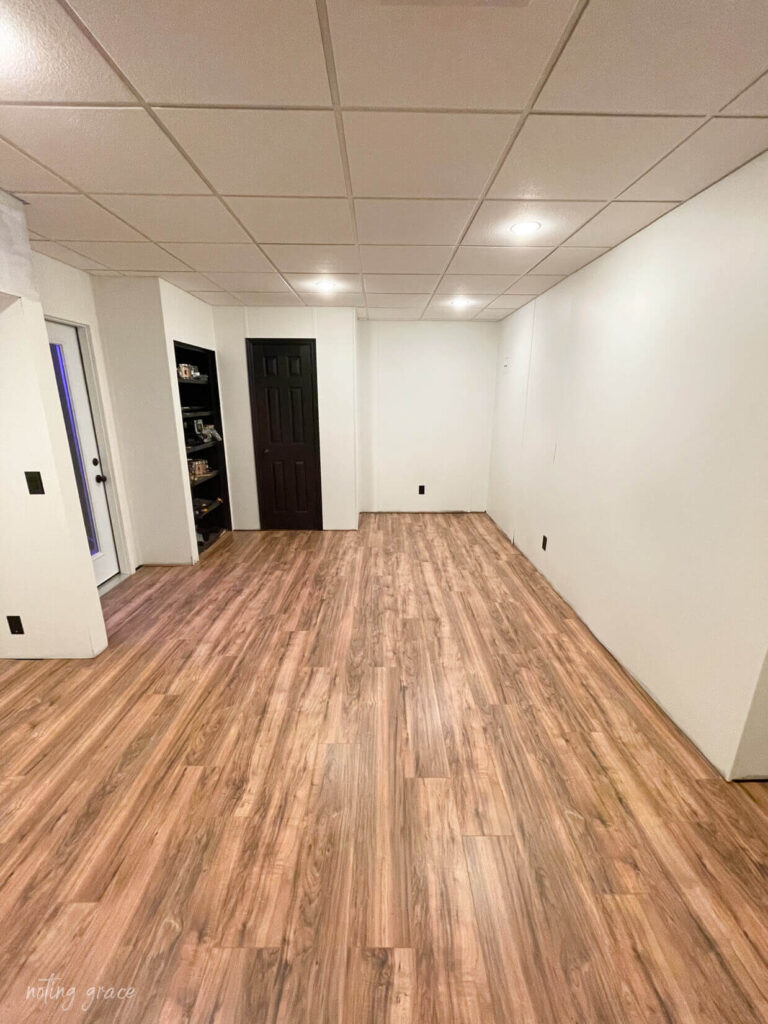
Laying laminate flooring on cement is manageable with the right steps. Start with a clean surface. Use underlayment to prevent moisture damage. Measure accurately for a neat finish. Cut planks carefully to fit the space. Connect them securely for stability.
Regularly check your progress to ensure alignment. Once complete, enjoy your new floor. It adds beauty and functionality to your home. Remember, patience and precision are key. This project improves your space without breaking the bank. Follow these tips to achieve a professional look.
You’ll be proud of your DIY skills!


