Are you dreaming of transforming your home with the timeless elegance of hardwood floors? You’re not alone.
Many homeowners crave the warmth and beauty that only hardwood can bring. But the thought of installing it yourself might seem daunting. What if I told you that laying hardwood floors is not only achievable but also a rewarding project you can tackle on your own?
Imagine the pride and satisfaction you’ll feel, knowing you installed these stunning floors with your own hands. In this guide, you’ll discover step-by-step instructions, essential tips, and expert advice to help you confidently lay hardwood floors. Get ready to enhance your living space and impress everyone who walks through your door. Dive in and unlock the secrets to a successful hardwood floor installation!
Choosing The Right Hardwood
Hardwood comes in many types. Each type has its own look and feel. Oak is very strong and lasts long. Maple is smooth and shines bright. Cherry wood is dark and elegant. Each wood type has different colors. Some are light, while others are dark. Choose what you like best.
Think about your home’s style. Big rooms may need darker floors. Small rooms might look nice with light wood. Consider your budget. Some woods cost more than others. Look at how much wear the floor will get. High traffic areas need harder woods. Ask if the wood is easy to clean. Easy cleaning can save time.
Preparing The Subfloor
A clean subfloor is very important. Remove all dirt and debris. Sweep the floor with a broom. Use a vacuum for small dust. Check for any nails or staples. Remove them if found. Level the subfloor with a leveling compound. Uneven floors cause problems later. Use a long straight edge. Find high and low spots. Fill low spots with compound. Let it dry completely.
Moisture can damage hardwood floors. It’s important to test it. Use a moisture meter. Check several spots on the subfloor. Ideal moisture should be low. If too high, wait or use a dehumidifier. This helps protect your new floor. Always follow the moisture guidelines. It ensures a strong and lasting floor.
Gathering Necessary Tools And Materials
A tape measure helps you find the right length. Use a hammer for nailing. A nail gun is faster than a hammer. A flooring saw cuts wood to fit. A chalk line helps make straight lines. Get a flooring nailer for perfect nails. Safety first: wear safety goggles to protect your eyes.
| Materials |
|---|
| Hardwood planks |
| Nails |
| Underlayment |
| Wood glue |
| Flooring adhesive |
Acclimating The Hardwood
Hardwood needs time to adjust to your home. This is called acclimating. Leave the wood in the room for a few days. This helps the wood get used to the air. It needs the right temperature and humidity. The wood will expand or contract. This makes it ready for the floor.
Check the wood often. Make sure it is not bending or twisting. If it does, it might not fit right. Keep the room warm and dry. Use a heater if needed. This keeps the wood safe. Always follow the manufacturer’s advice. They know best.
Planning The Layout
Start by measuring the length and width of the room. Use a tape measure for accuracy. Note the dimensions on paper. Check if the room is square. Measure from corner to corner. This will help determine the amount of flooring needed. Consider any alcoves or corners. Adjust measurements for these areas. Divide the total area by the size of each plank. This tells you how many planks to buy.
Decide on a flooring pattern. Popular choices include straight, diagonal, or herringbone. Straight patterns are easy to install. Diagonal adds a unique look. Herringbone is stylish but harder to lay. Pick a pattern that suits your room. Consider the room’s shape and size. Patterns can make small rooms look larger. They also add character to big spaces. Choose one that fits your style.
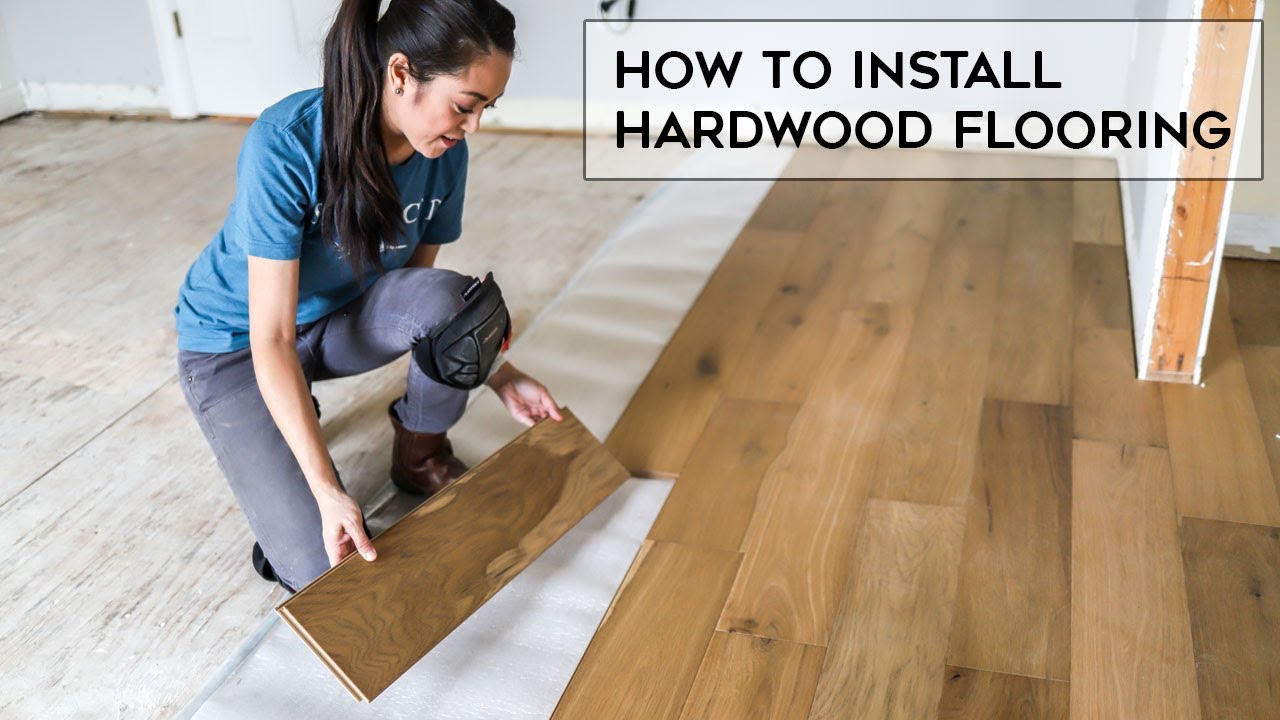
Installing The First Row
Start by placing the first board at the room’s edge. The straight side should face the wall. Ensure the board is perfectly aligned. Use a chalk line to guide you. The line helps keep boards straight. Keep a gap between the board and wall. This allows the wood to expand. Use spacers for the gap. The gap should be around 1/4 inch.
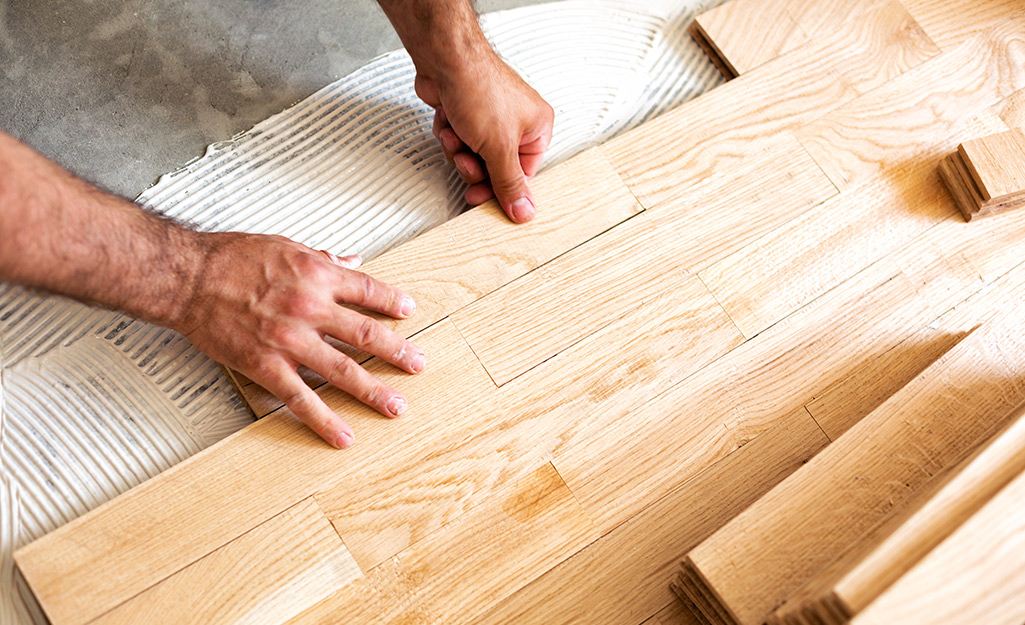
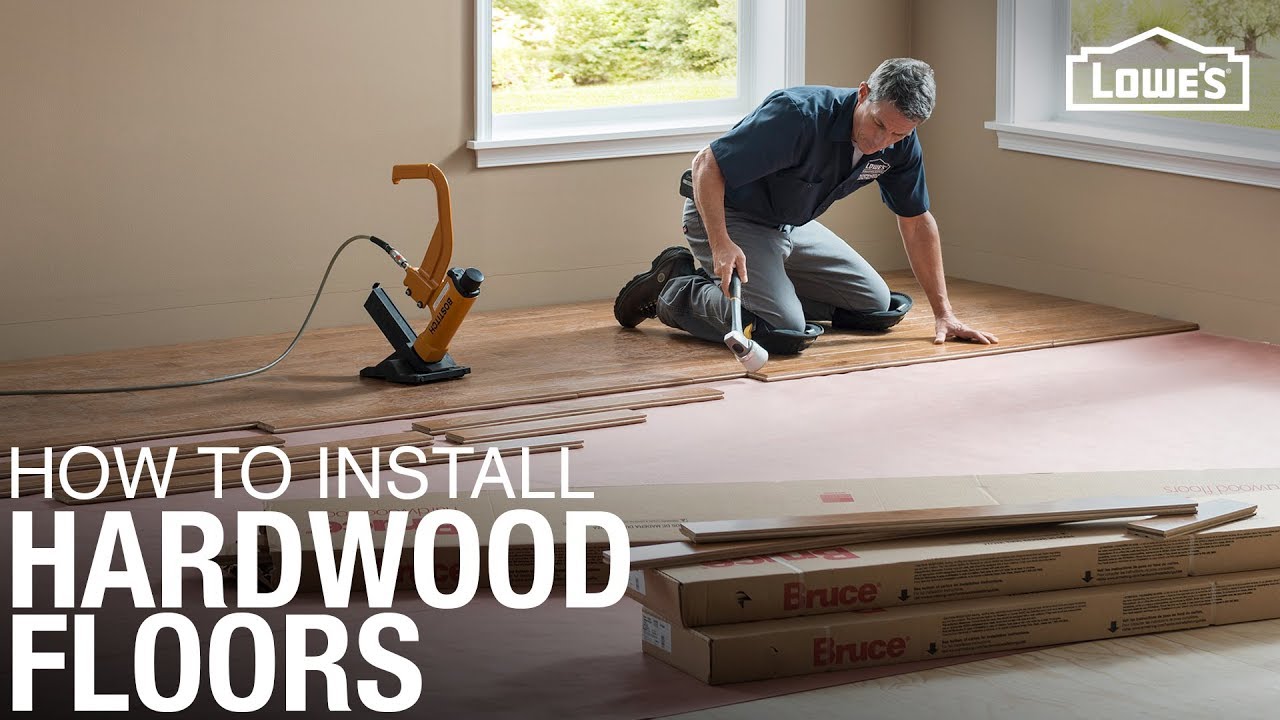
Nail the boards into place firmly. Use a flooring nailer or a hammer. Ensure each nail is secure. Place nails at an angle. This keeps boards tight. Make sure nails are hidden. Hidden nails look better. Continue until the first row is complete. Check each board for stability. Adjust if any are loose.
Continuing The Installation
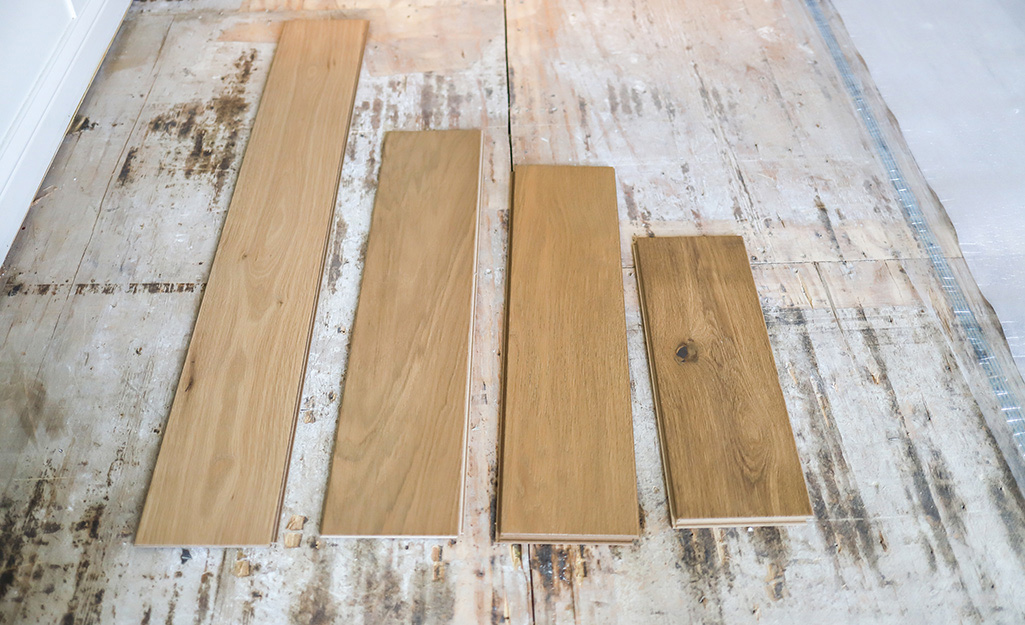
Staggering the seams makes floors look beautiful and strong. Avoid aligning board ends in a straight line. This can make floors weak. Each board should be a different length. This creates a natural look. Use a measuring tape for accurate cuts. Always double-check before cutting. Small mistakes can be costly. Use a saw to trim boards to size. Always wear safety gear. Protect your eyes and hands.
A flooring nailer helps secure the boards. Position it correctly to avoid damage. Strike the nailer with a mallet. This drives nails into the wood. Always check if the nails are set. Make sure they are not loose. Use a nailer at the edge of each board. This keeps them tight together. A tight fit means a strong floor. Practice makes perfect. Do not rush this step.
Cutting And Fitting Final Rows
Measure the space left for the final rows. Use a tape measure for accuracy. Make sure to leave a small gap. This gap helps with wood expansion. Mark the cutting line on the board. A pencil works well for this. Use a saw to cut the board. Be careful and take your time. A straight cut is very important.
Place the cut board in its spot. Check if it fits well. Boards should be tight but not too tight. Use a mallet to tap it in place. Gaps between boards should be small. If gaps are big, cut another board. Repeat until all rows fit snugly. Make sure every board is secure. This keeps your floor strong and safe.
Finishing Touches
Adding the final touches is crucial for a flawless hardwood floor installation. Clean the surface thoroughly, ensuring no debris remains. Apply a protective finish to enhance durability and shine.
Installing Baseboards
Baseboards give a neat look to your hardwood floors. Measure the walls first. Cut baseboards to fit each wall using a saw. Use a level to ensure straight installation. Nail them securely to the wall. Fill gaps with caulk for a clean finish. Paint or stain the baseboards as desired. Let everything dry before use.
Cleaning And Sealing
Keep your new floors shiny and protected. Sweep the floors to remove dust. Use a damp mop for a deeper clean. Avoid too much water. Choose a wood-friendly cleaner. Follow instructions on the label. Apply a sealant to protect the wood. Use a brush or roller for even application. Let the sealant dry completely. Enjoy your beautiful floors!
Maintenance Tips
Transform your space with hardwood floors. Ensure a smooth installation by prepping the subfloor and aligning planks carefully. Seal and finish for lasting beauty.
Regular Cleaning
Dust and dirt can scratch hardwood floors. Use a soft broom or vacuum to clean them. Wet mops can damage wood, so avoid them. A damp cloth works well for sticky spots. Cleaning regularly keeps floors shiny and fresh. Always use gentle cleaners made for wood. Harsh chemicals can ruin the finish.
Preventing Damage
Protect floors from heavy furniture. Use felt pads under legs to prevent scratches. Water is a big enemy to wood. Wipe spills immediately to avoid stains. Rugs and mats help in high-traffic areas. Shoes can bring dirt and damage floors. Encourage family and guests to remove them. Pet nails can scratch surfaces. Trim them often to keep floors safe.
Frequently Asked Questions
What Tools Are Needed For Hardwood Flooring?
To lay hardwood floors, you’ll need essential tools like a tape measure, saw, nail gun, and mallet. A flooring nailer speeds up installation. Use a level to ensure even placement. Safety gear, including goggles and gloves, is crucial. Accurate measuring and cutting tools are vital for a precise fit.
How Do I Prepare The Subfloor?
Preparing the subfloor involves cleaning, leveling, and repairing any damage. Remove debris and ensure it’s dry and stable. Use a leveling compound for uneven areas. Secure loose boards or replace damaged sections. Proper preparation ensures a smooth installation and prevents future issues like squeaking or shifting.
What Direction Should Hardwood Floors Be Laid?
Lay hardwood floors in the direction of the longest wall for an elegant look. This enhances the room’s visual appeal. In narrow spaces, laying them along the length can make it appear larger. Consider light sources; laying floors towards windows can highlight natural light beautifully.
How Do I Maintain Hardwood Floors?
Maintain hardwood floors by regularly sweeping and using a damp mop with hardwood cleaner. Avoid excessive water and harsh chemicals. Place mats at entryways to reduce dirt and moisture. Use furniture pads to prevent scratches. Regularly inspect for damage and refinish every few years for longevity.
Conclusion
Laying hardwood floors can transform your space beautifully. Follow the steps outlined. Choose quality materials for lasting results. Prepare your subfloor carefully. Use proper tools for precision. Safety goggles and gloves are essential. Measure twice, cut once to avoid mistakes.
Acclimate the wood before installation. Secure planks tightly for a smooth finish. Keep extra boards for future repairs. Maintain your floors regularly to ensure durability. With patience and attention, you’ll achieve a stunning look. Enjoy the warmth and elegance of your new hardwood floors.


