Are you tired of that cold, uninviting concrete floor? Imagine transforming it into a stylish, warm space with the simple addition of vinyl plank flooring.
It’s easier than you think, and you don’t have to be a professional to get it right. Whether you’re sprucing up your basement, garage, or any concrete surface, installing vinyl plank flooring can be a game-changer for your home. You might worry about the process or feel overwhelmed by the idea, but don’t fret! This guide will break everything down into manageable steps, ensuring you feel confident from start to finish.
Dive in and discover how you can effortlessly elevate your space and enjoy a stunning new floor.

Tools And Materials Needed
Start with a tape measure to measure the room. You will need a utility knife for cutting the vinyl. Use a straightedge for accurate cuts. A rubber mallet helps fit the planks together. Have a floor roller ready to press the planks down. Underlayment is needed for smooth floors.
Keep some spacers handy for proper gaps. Make sure to have a safety mask and gloves. A broom and vacuum will keep the floor clean. Don’t forget a pencil for marking cuts. These tools will make your work easier.

Preparing The Concrete Surface
Sweep the floor to remove dust and debris. Use a mop with warm water. Add a few drops of mild soap. Scrub the floor thoroughly. Rinse with clean water. Let the floor dry completely. Dirt can cause issues with flooring adhesion. Ensure the surface is spotless.
Inspect the floor for cracks or holes. Use a concrete patching compound. Follow the instructions on the package. Apply the compound to fill the cracks. Smooth it out with a trowel. Allow it to dry as recommended. This ensures a stable base for your floor.
Check the floor for uneven spots. Use a long level to spot them. Apply a self-leveling compound if needed. Follow the instructions on the packaging. Pour the compound over low areas. Spread it evenly with a trowel. Let it dry completely. A flat floor helps the vinyl planks lay evenly.
Choosing The Right Vinyl Plank
Vinyl planks come in many styles. Some look like wood. Others look like stone. Each type has its own feel. It’s important to choose what you like best. Think about your room style when picking.
Thickness is very important for vinyl planks. Thicker planks feel more like real wood. They are also more durable. Durability means they last long. Planks range from 2mm to 8mm thick. Thicker planks are good for busy areas. Thin planks work in quieter spots. Always check the warranty. A good warranty means it will last.
Acclimating The Vinyl Planks
Vinyl planks need time to adjust. Keep them in the room. This helps them match the room’s temperature. It stops bending or warping. 24 hours is a good time to wait. Keep them flat and straight. Remove any packaging. This lets air flow around them. Make sure the room is not too hot. Or too cold. This keeps the planks safe. Check the room’s humidity. It should be normal. Not too wet. Not too dry. This protects the planks. Make sure they are ready. Before you start installing. This is important. It helps the planks last long.
Laying Out The Planks
Begin by drawing a map of the room. This helps in visualizing the space. Mark where each plank will go. Look at the room’s unique features like doors or corners. This helps avoid mistakes. Measure the room to know how many planks you need. Make sure the planks fit well together. Leave a small gap near walls for expansion. This prevents flooring issues later. A good plan saves time and effort. It ensures a smooth installation process.
Use a tape measure to get accurate sizes. Measure the length and width of the room. Write these numbers down. Mark the center of the room with chalk. This helps in starting the first row. Check your measurements twice for accuracy. Use a straight edge to draw lines on the floor. This guides the planks’ placement. Proper marking ensures a neat finish. It makes the job easier.

Cutting The Vinyl Planks
Vinyl planks require precise cutting for a perfect fit on concrete floors. Use a sharp utility knife for clean edges. Ensure measurements are accurate to prevent gaps and ensure a seamless appearance.
Tools For Cutting
Use a sharp utility knife for straight cuts. Try tin snips for small cuts. A jigsaw helps with curves and corners. Measure with a tape measure for accuracy. Keep a straightedge handy for guiding cuts. Safety goggles protect your eyes. Use gloves to keep hands safe. Use pencil or chalk for marking lines. These tools make cutting vinyl safe and easy.
Cutting Techniques
Measure the plank carefully before cutting. Mark the line clearly with a pencil. Use the utility knife to score the line. Press down with steady pressure. Use tin snips for small, tricky cuts. Use a jigsaw for curved lines. Sand the edges for a smooth finish. Check the fit before laying it down. Practice makes cutting easier and faster.
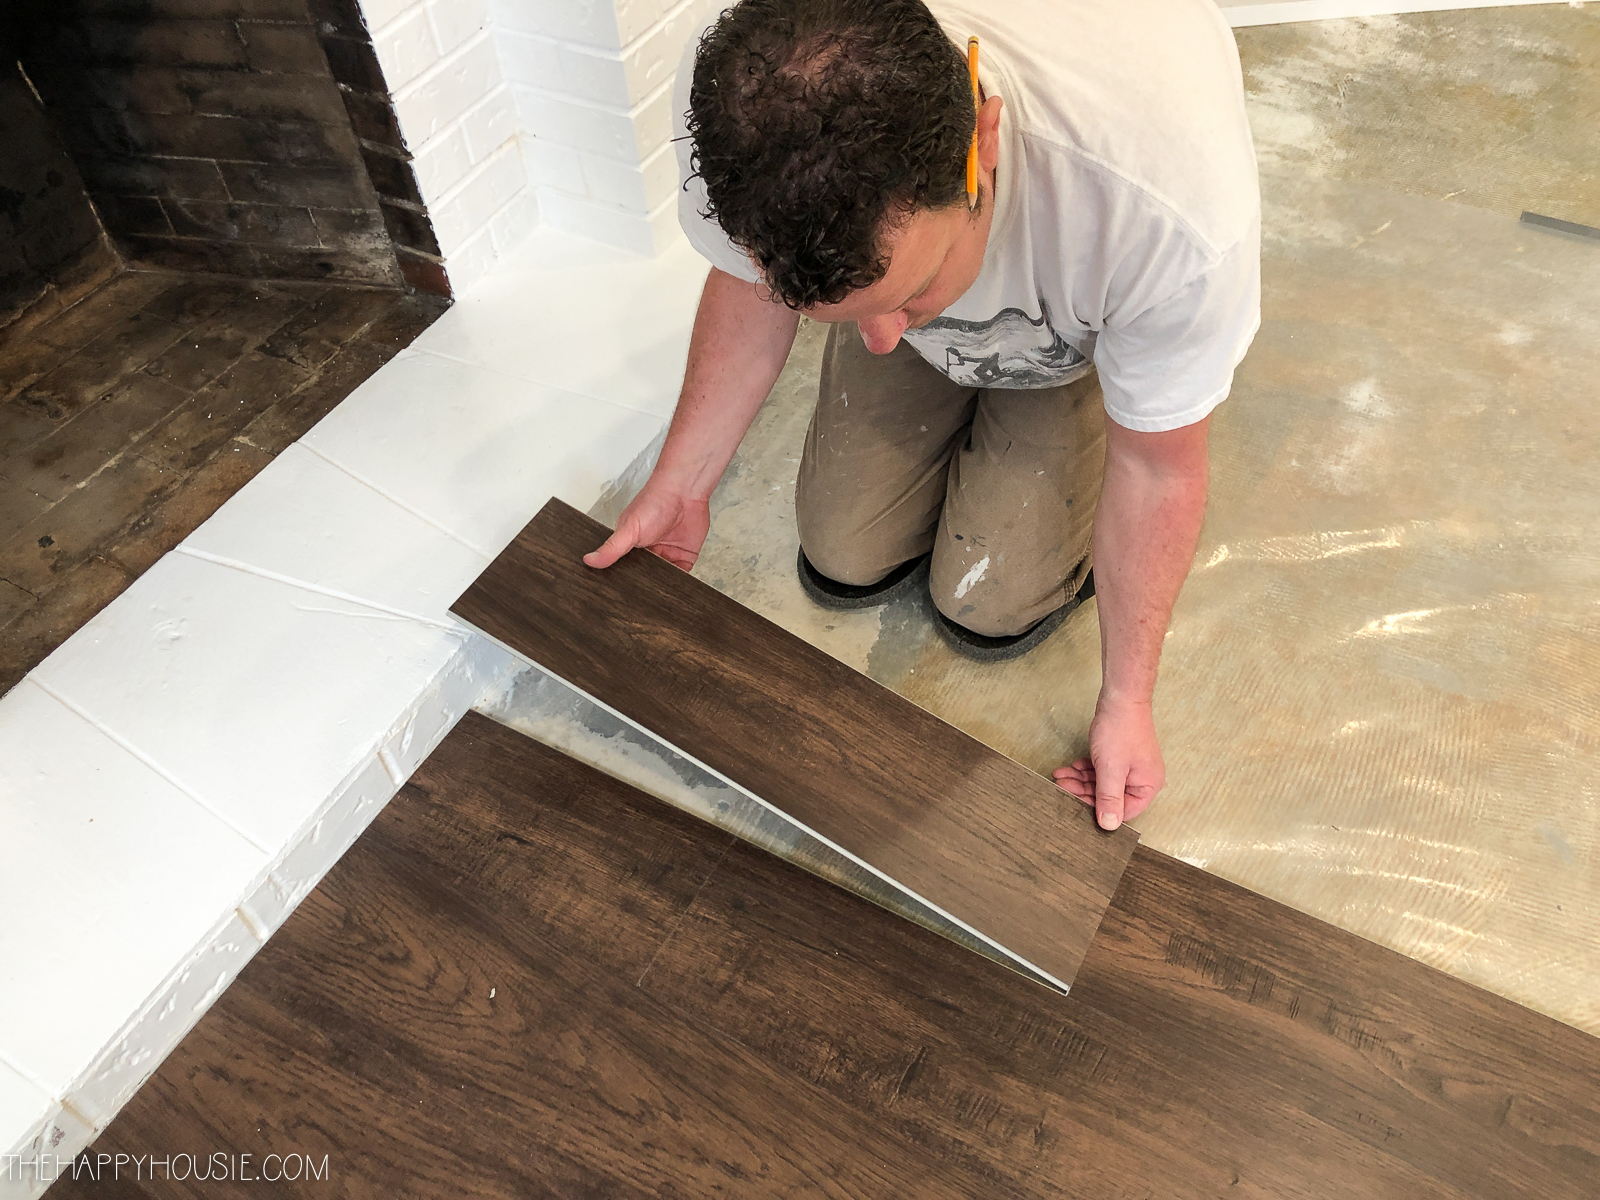
Installing The Vinyl Planks
Begin at the room’s corner. Place the first plank. Make sure it’s straight. Use spacers to create a gap by the wall. This gap helps the floor breathe. Continue laying planks. Tap them together gently. Ensure they fit snugly.
Planks have grooves and tongues. Connect them by clicking. Push the plank downward. Listen for a click. This means it’s locked. Repeat until the floor is covered. Trim the last row if needed. Always check the alignment.
Apply glue to the concrete. Use a trowel for even spread. Lay the plank on the glue. Press it firmly. Continue with the next plank. Make sure each plank is close. Let the glue dry. Follow the glue’s instructions for drying time.
Finishing Touches
Trim and moldings make floors look finished. They hide gaps between walls and floors. Start by measuring the area. Cut the trim to the right size. Use a saw for clean cuts. Attach the trim with nails or glue. Be sure it’s secure and straight. This keeps the floor looking neat and tidy.
Vinyl floors are easy to clean. Use a damp mop for everyday cleaning. Avoid using too much water. Excess water can damage the floor. Sweep regularly to remove dirt and dust. Use a soft broom for best results. Avoid harsh chemicals when cleaning. They can harm the floor finish. A mild cleaner is best for vinyl floors.
Frequently Asked Questions
What Tools Are Needed For Installation?
To install vinyl plank flooring, you’ll need a measuring tape, utility knife, spacers, straight edge, and a rubber mallet. A tapping block and pull bar are also essential for fitting the planks snugly. Ensure you have safety goggles and gloves for protection during installation.
Do I Need Underlayment For Vinyl Planks?
Yes, underlayment is recommended for vinyl plank flooring over concrete. It helps with moisture control and provides cushioning. Underlayment can also improve sound insulation. Choose a thin, moisture-resistant underlayment specifically designed for vinyl flooring to ensure optimal performance.
How Do I Prepare Concrete For Installation?
Ensure the concrete is clean, dry, and level. Remove debris and fill any cracks or holes. Use a concrete grinder to smooth uneven surfaces. Check moisture levels with a moisture meter. Let the concrete cure if it’s newly poured, usually for at least 28 days.
Can I Install Vinyl Planks In A Bathroom?
Yes, vinyl plank flooring is suitable for bathrooms. It’s water-resistant and durable, making it a great choice for moist environments. Ensure the concrete is dry and level before installation. Use waterproof adhesive or sealant around edges to prevent water damage.
Conclusion
Vinyl plank flooring on concrete is a great choice. It’s easy to install and maintain. Follow the steps carefully for a smooth process. Ensure the concrete is clean and dry. Proper preparation is key to success. Use the right tools for best results.
Remember, patience is important. Take your time with each step. Your new floor will look amazing. Enjoy the fresh, modern feel. Vinyl flooring adds value to any space. It’s durable and stylish. Perfect for busy households. Now, you can confidently start your flooring project.
Happy installing!


