To install Smartcore Pro flooring, start by preparing the subfloor and ensuring it is clean and level. Then, lay down a moisture barrier and begin installing the planks, making sure to stagger the joints for added stability.
Use a tapping block and rubber mallet to secure the planks tightly together, and trim the last row as needed. Finally, install any necessary transitions and moldings to complete the installation.
Choosing The Right Smartcore Pro Flooring
When it comes to installing Smartcore Pro Flooring, it is important to choose the right type for your needs. Here are some factors to consider before installation:
- Durability: Before making a purchase, consider the level of durability you require. Smartcore Pro Flooring comes in different thicknesses, so choose a thickness that suits the traffic and use in your space.
- Style: Smartcore Pro Flooring offers a range of styles and designs to suit various aesthetics. Take the time to select a style that complements your existing decor or desired look.
- Moisture Resistance: If you plan to install the flooring in an area prone to moisture, such as a bathroom, laundry room, or kitchen, opt for Smartcore Pro Flooring with enhanced moisture resistance.
- Installation Method: Consider the installation method that best suits your skill level and preferences. Smartcore Pro Flooring offers options for floating or glue-down installation.
By carefully considering these factors, you can ensure that you choose the right Smartcore Pro Flooring for your space, resulting in a beautiful and durable floor that meets your needs.

Preparing The Subfloor
- Tape measure
- Level
- Carpenter’s square
- Utility knife
- Screwdriver
- Damp cloth
- Primer
- Underlayment
- Flexible adhesive
- Rolling pin
- Cutting tool for underlayment
- Spacers
- Flooring installation kit
Before installing Smartcore Pro Flooring, it is essential to inspect and clean the subfloor. Start by examining the subfloor for any damages, such as cracks or uneven surfaces. If you detect any issues, make sure to address them and perform necessary repairs before proceeding.
Next, remove any existing flooring and thoroughly clean the subfloor to remove dirt and debris. Be extra careful in removing any adhesive residue or old underlayment that may remain.
Apply a primer to the subfloor to ensure proper adhesion between the subfloor and the new flooring. This step is crucial for a long-lasting and stable installation.
Once the subfloor is prepared and clean, install the underlayment. Use a cutting tool to fit the underlayment into the room, allowing for a small gap around the edges for expansion. Secure the underlayment properly using the manufacturer’s recommended method.
Now, you are ready to begin the installation process for your Smartcore Pro Flooring. Following the manufacturer’s instructions, apply a flexible adhesive on the subfloor, and remember to work in small sections to ensure proper bonding.
Using a rolling pin, press the flooring firmly onto the adhesive. Make sure to use spacers to keep a consistent gap between the flooring and the walls.
Continue the installation, making sure each piece of flooring is properly aligned and locked together. Use a flooring installation kit to assist in the process.
Remember, a well-prepared subfloor is key to a successful Smartcore Pro Flooring installation. Take your time to prepare the subfloor properly, addressing any issues or repairs that may be necessary, and you’ll achieve a beautiful and enduring result.
Acclimating The Flooring
Proper acclimation is a crucial step in installing Smartcore Pro flooring. Acclimating the flooring allows it to adjust to the temperature and moisture conditions of its installation environment. This ensures a stable and long-lasting floor.
To acclimate Smartcore Pro flooring, follow these steps:
- Store the unopened boxes of flooring in the room where it will be installed for at least 48 hours.
- Keep the room’s temperature and humidity consistent with the expected conditions after installation.
- Open the boxes and remove the planks or tiles.
- Stack the flooring loosely, allowing air to circulate around each piece.
- Leave the flooring to acclimate for an additional 48 hours.
By allowing Smartcore Pro flooring to acclimate properly, you ensure that it will expand or contract minimally after installation, reducing the risk of any issues such as warping or buckling.
Remember, the acclimation process is an important part of ensuring a successful flooring installation.
Installing Smartcore Pro Flooring
| Smartcore Pro Flooring | Utility knife | Tape measure |
| Duct tape | Underlayment | Tapping block |
| Hand saw | Spacers | Pry bar |
| Hammer | Level | Pencil |
| Vapor barrier (if needed) | Chalk line |
1. Prepare the subfloor by removing any existing flooring and ensuring it is clean and level. If necessary, install a vapor barrier to prevent moisture issues.
2. Lay down the underlayment, cutting it to fit the room and taping the seams together with duct tape.
3. Start the installation in a corner of the room, ensuring that the first row is square to the walls. Use spacers to maintain an expansion gap around the edges.
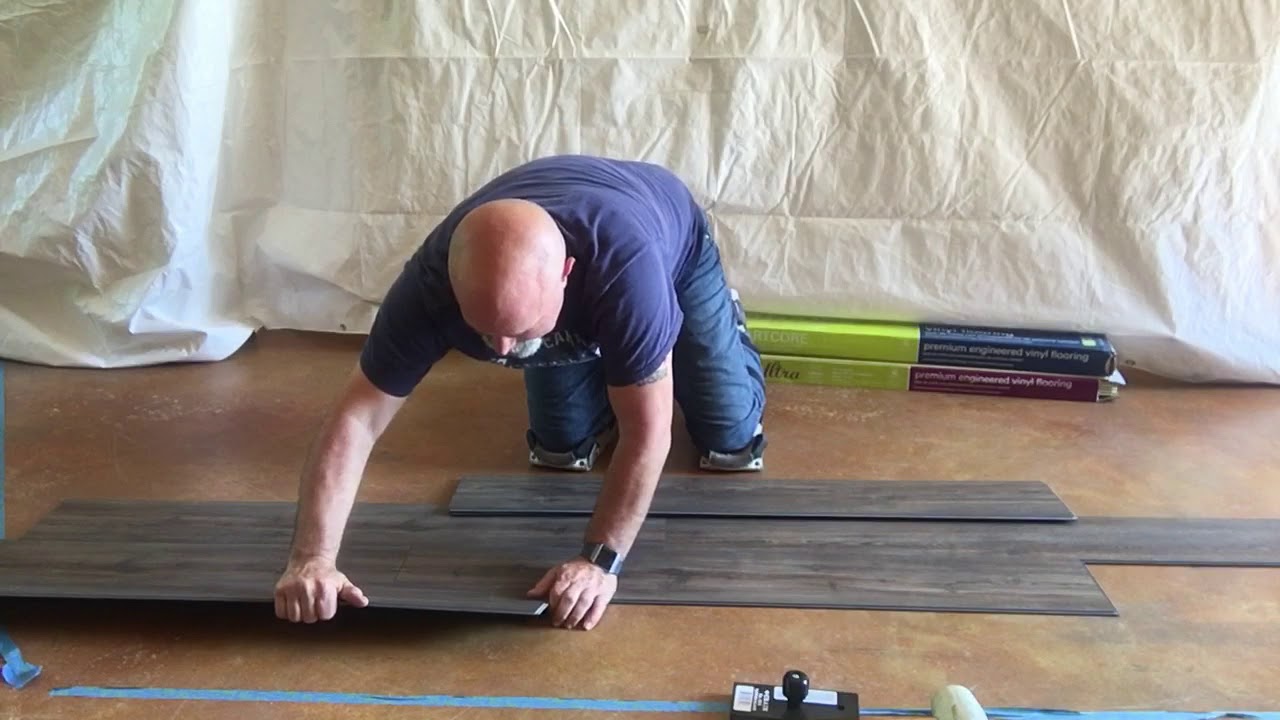
4. Install the first row of Smartcore Pro Flooring planks, using a tapping block and hammer to lock them securely together.
5. Continue installing subsequent rows, staggering the planks for a more natural appearance. Cut planks as needed using a utility knife or hand saw.
6. Once all planks are installed, remove the spacers and install the finishing moldings to cover the expansion gaps.
– Measure and double-check your cuts before making them to avoid mistakes.
– Tap the planks gently with the tapping block and hammer, ensuring they are snugly connected without excessive force.
– Use a level to check for any unevenness in the subfloor and make necessary adjustments.
Finishing Touches And Maintenance
Installing Smartcore Pro flooring is a great investment in the beauty and durability of your home. Once the main installation is complete, it’s time to focus on the finishing touches and maintenance. One important step is trimming and fitting the flooring. Use a utility knife or a jigsaw to carefully trim the planks to fit around obstacles such as doorways and cabinets. Additionally, applying trim pieces and transitions can provide a polished look to your flooring. These pieces will cover the edges and gaps, giving your floor a seamless appearance.
After installation, it’s important to regularly clean and maintain your Smartcore Pro flooring to ensure its longevity. Use a broom or a vacuum cleaner to remove dirt and dust, and mop your floors with a mild cleaner to keep them looking fresh. Avoid using harsh cleaning agents or abrasive tools that can damage the surface of the flooring. Consistent maintenance and care will help preserve the beauty and durability of your Smartcore Pro flooring for years to come.
Troubleshooting And Common Challenges
Troubleshooting and Common Challenges
Installing Smartcore Pro Flooring can sometimes come with its fair share of challenges. It’s important to be prepared for the common installation problems that may arise and know how to solve them to ensure a smooth and successful flooring installation.
Common installation problems and how to solve them:
1. Uneven subfloor: Before installation, make sure the subfloor is level and free of any debris. If there are any uneven areas, use a leveling compound to create a smooth surface for the flooring.
2. Gaps or buckling: If you notice gaps or buckling in the flooring, check the expansion gaps around the perimeter of the room. Make sure they are properly spaced and allow for any potential expansion or contraction of the flooring.
3. Adhesive issues: If the adhesive is not sticking properly or there are adhesive residues on the flooring, clean the surface thoroughly and reapply the adhesive according to the manufacturer’s instructions.
4. Warped or damaged planks: If you come across warped or damaged planks during installation, remove and replace them with new ones to ensure the integrity of the flooring.
Tips for avoiding and fixing potential issues:
– Always read and follow the installation instructions provided by the manufacturer.
– Acclimate the flooring to the installation environment as per the manufacturer’s recommendations.
– Use the right tools and equipment for installation.
– Take time to properly plan the layout and measure the space before starting the installation.
– Follow proper installation techniques and avoid shortcuts.
– If in doubt, consult a professional flooring installer or reach out to the manufacturer for assistance.
Enhancing The Appearance Of Smartcore Pro Flooring
When installing Smartcore Pro Flooring, there are various ways to enhance its appearance and overall functionality. One important aspect to consider is adding underlayment. By incorporating underlayment, you can achieve soundproofing and moisture protection, making your flooring more durable and comfortable. Underlayment helps to minimize hollow sounds caused by footsteps, ensuring a quieter and more enjoyable living space. Additionally, it acts as a barrier against moisture, preventing any potential damage to the flooring material.
To further enhance the aesthetics of your Smartcore Pro Flooring, you can also utilize floor accessories. These accessories, such as transition strips, baseboards, and moldings, not only provide a polished and finished look but also help to protect the edges and corners of your flooring. By carefully selecting and incorporating these accessories, you can effortlessly create a cohesive and visually appealing space that complements your flooring.
Understanding The Benefits Of Smartcore Pro Flooring
Smartcore Pro Flooring is renowned for its exceptional durability and resistance to moisture, scratches, and stains. With its innovative technology and high-quality materials, this flooring option is designed to withstand the rigors of daily life, making it an ideal choice for both residential and commercial spaces.
One of the key advantages of Smartcore Pro Flooring is its exceptional resistance to moisture. Unlike traditional hardwood or laminate flooring, Smartcore Pro is 100% waterproof, thanks to its waterproof core and tight-locking joints. This feature makes it perfect for areas prone to high humidity or spills, such as kitchens, bathrooms, and laundry rooms.
Furthermore, Smartcore Pro Flooring is highly scratch and stain-resistant, ensuring it maintains its pristine appearance even in high-traffic areas. Whether you have pets, children, or frequent visitors, this flooring option can withstand the daily wear and tear without showing signs of damage.
In addition to its durability, Smartcore Pro Flooring also offers excellent noise reduction and comfort underfoot. Its integrated pad provides added cushioning, making it a comfortable surface to walk and stand on for extended periods.
| Durability and resistance to: | Noise reduction and comfort |
|---|---|
|
|
Frequently Asked Questions Of How To Install Smartcore Pro Flooring
How Do I Prepare My Floor Before Installing Smartcore Pro Flooring?
Before installing Smartcore Pro Flooring, make sure your floor is clean, dry, and level. Remove any existing flooring, and ensure that the subfloor is solid and free of any debris. Additionally, be sure to acclimate the flooring by letting it sit in the room for at least 48 hours before installation.
Can I Install Smartcore Pro Flooring Over Existing Tile Or Hardwood Floors?
Yes, you can install Smartcore Pro Flooring over existing tile or hardwood floors. However, it is important to ensure that the existing flooring is in good condition, level, and free of any moisture or damage. You may need to use an underlayment or adhesive to create a smooth and stable surface for installation.
How Do I Install Smartcore Pro Flooring Around Doorways And Obstacles?
To install Smartcore Pro Flooring around doorways and obstacles, you will need to use a miter saw or coping saw to cut the planks to fit. Start by measuring and marking the plank, then make your cut. Remember to leave a small expansion gap around the edges to allow for natural movement.
Use a transition molding to create a seamless transition between different flooring surfaces.
Can I Install Smartcore Pro Flooring In Bathrooms Or Kitchens?
Yes, you can install Smartcore Pro Flooring in bathrooms or kitchens. The flooring is 100% waterproof, making it perfect for these moisture-prone areas. However, it is important to seal all edges and seams with silicone sealant to prevent any water infiltration.
Follow the manufacturer’s instructions for proper installation and maintenance in these areas.
Conclusion
Installing Smartcore Pro flooring is a straightforward process that can be easily accomplished with the right tools and guidance. By following the step-by-step instructions provided in this blog post, you can achieve a professional-looking finish in your home. The durability and aesthetic appeal of Smartcore Pro flooring make it an excellent choice for homeowners looking to enhance the beauty and functionality of their space.
So, why wait? Get started on your flooring project today and transform your home with Smartcore Pro flooring.


