Imagine stepping onto a warm floor on a chilly morning, feeling the comfort spread across your home. That’s the magic of in floor heating.
If you’ve ever dreamed of ditching cold tiles or carpets for a cozy surface that warms your feet, you’re in the right place. Installing in floor heating might seem like a daunting task, but with the right guidance, it’s well within your reach.
You’re about to discover the secrets to transforming your home into a sanctuary of warmth and efficiency. Whether you’re renovating or building anew, understanding how to install this luxurious feature could be the game-changer for your living space. Dive in and let’s unravel the steps that will turn your home into the ultimate comfort zone.
Benefits Of In-floor Heating
In-floor heating keeps your feet warm. No more cold floors in winter. It spreads heat evenly throughout the room. This system is hidden under the floor. So, you see no bulky radiators. It is also quiet. No buzzing or humming noises. You can walk barefoot comfortably. It works with all floor types. Tiles, wood, or carpet.
The air stays cleaner. Dust doesn’t fly around like with traditional heaters. You can save on energy bills. The system uses less power. It is a good choice for energy-efficient homes. You also have more space. No need for big heaters taking up room. In-floor heating is a smart choice for comfort and style.
Types Of In-floor Heating Systems
Electric radiant heating uses electric cables to warm the floor. These cables are placed under the floor tiles. Thin mats with wires can also be used. The system is simple to install. It is best for small spaces. Electric heating works quickly. It is ideal for bathrooms or kitchens. The system needs electricity to run. It can be expensive in large areas.
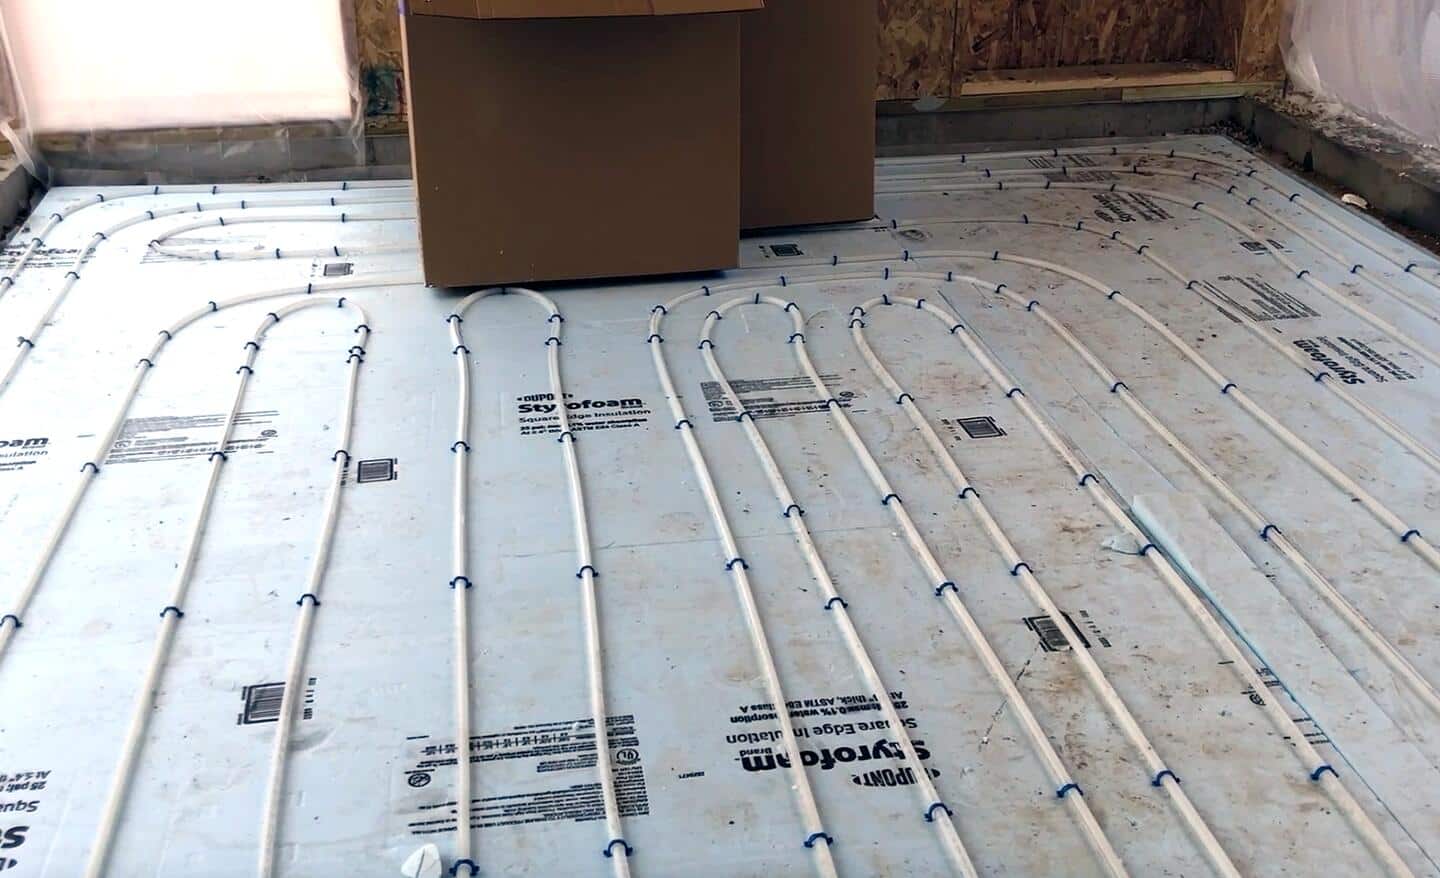
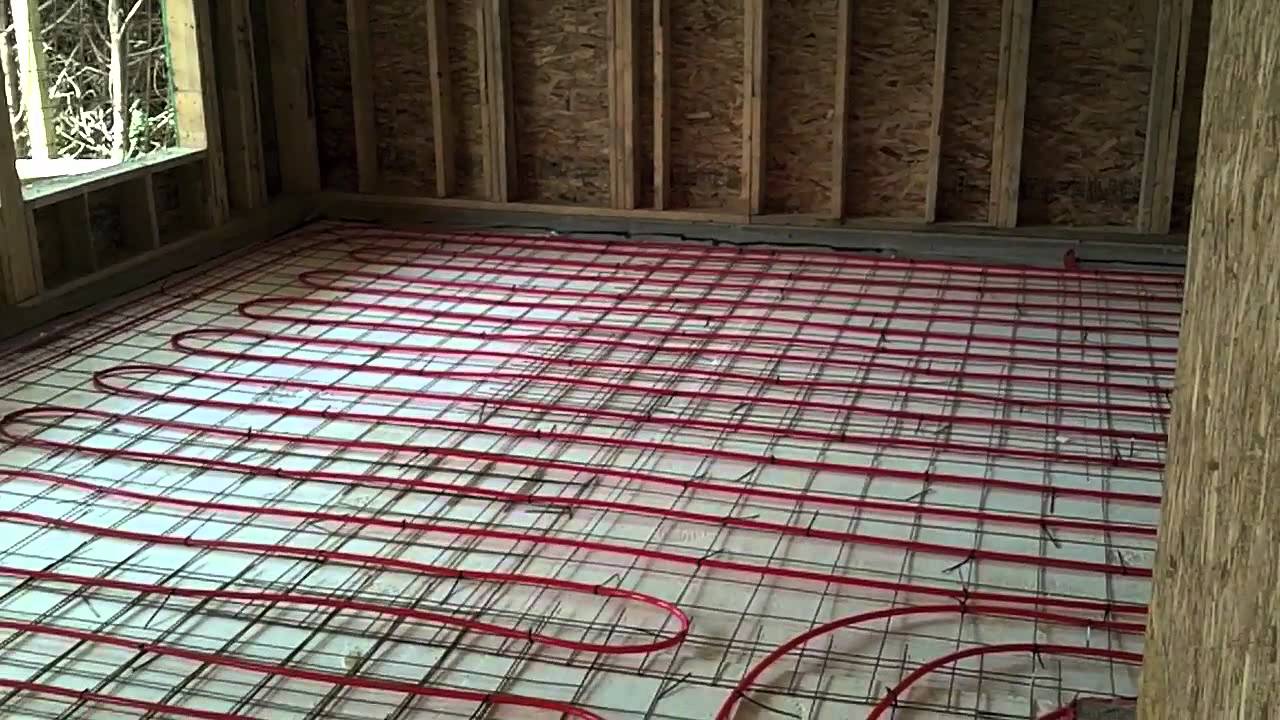
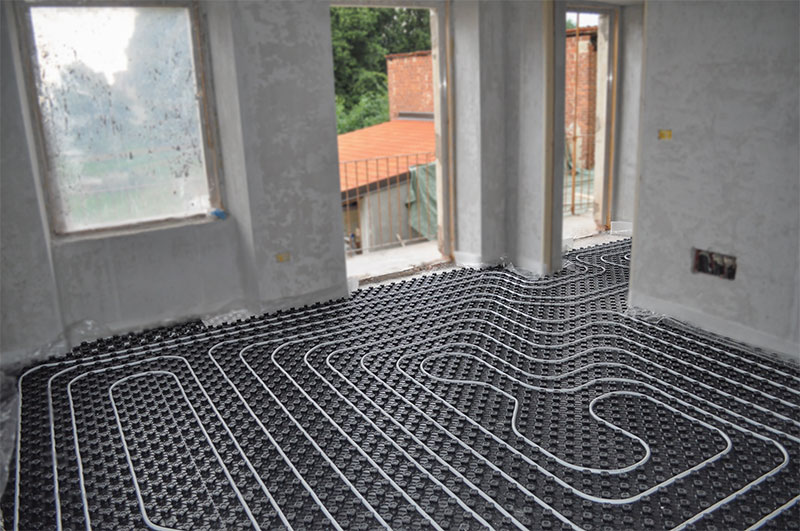
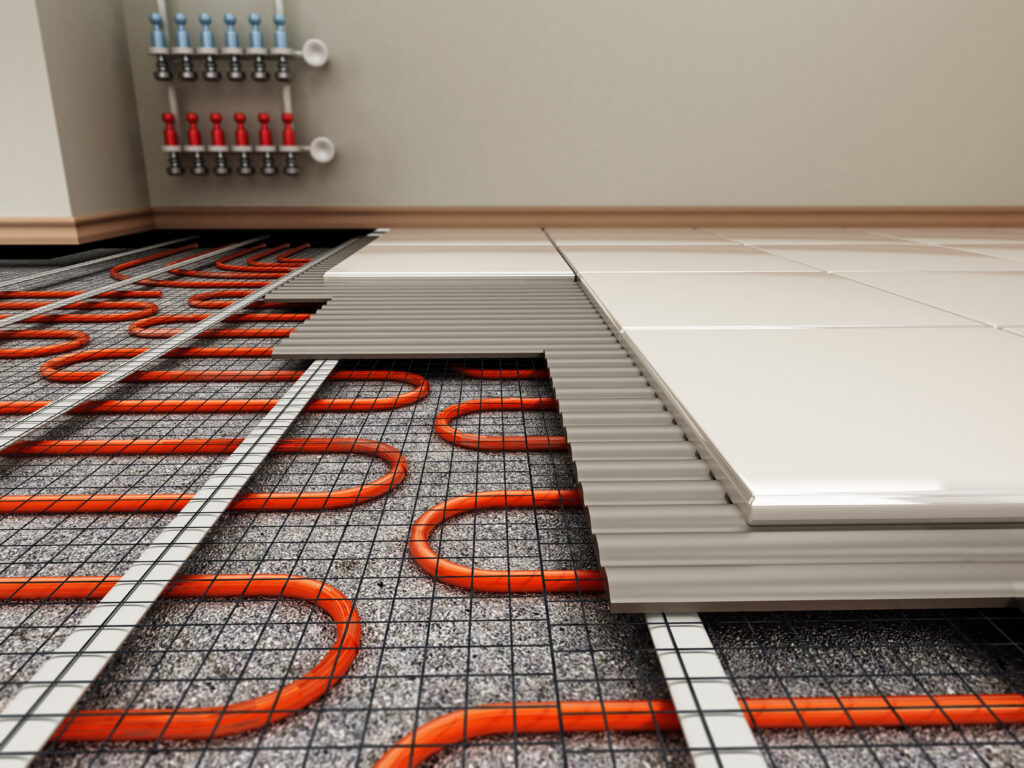
Hydronic radiant heating uses hot water to heat floors. Water tubes are installed under the flooring. A boiler heats the water. The water flows through the tubes. This system is energy-efficient. It is great for heating large areas. The system can use different energy sources. It is more complex to install. It might need professional help. Hydronic heating is often used in new constructions.
Tools And Materials Needed
Electric heating mats are essential. They spread warmth evenly. Thermostat helps control the heat. Insulation boards keep the heat in the room. Adhesive tape secures everything in place.
Wire cutters trim wires safely. Screwdrivers tighten connections. Multimeter checks electrical flow. Safety goggles protect your eyes. Gloves guard your hands.
| Tool | Purpose |
|---|---|
| Electric heating mats | Spread warmth evenly |
| Thermostat | Control heat |
| Insulation boards | Keep heat in |
| Adhesive tape | Secure mats |
| Wire cutters | Trim wires |
| Screwdrivers | Tighten connections |
| Multimeter | Check electrical flow |
| Safety goggles | Protect eyes |
| Gloves | Guard hands |
Preparing The Floor Surface
Make sure the floor is clean. Dust and dirt can cause issues. Sweep the surface well. Use a mop for stubborn spots. Check for cracks. Fill them with concrete filler. Level the floor. Uneven floors may affect heating. Use a level tool. Smooth out bumps and dips. This ensures even heat distribution. Repeat the process until satisfied.
Insulation is important. It helps keep the heat in. Choose a good insulation material. Foam boards work well. Lay them on the clean floor. Cut them to fit corners. Secure them with tape. This prevents movement. Insulation saves energy. It makes heating more efficient. It’s a smart step for warm floors.
Installing The Heating System
Start by cleaning the floor. Remove all dust and dirt. Check the floor is dry and flat. This is important for the mats. Use scissors to cut the mat if needed. But never cut the wires. Place the mats on the floor. Make sure they fit well. Mats should not overlap. Use tape to keep them in place. Connect the wires to the thermostat. Follow the instructions carefully. Make sure all connections are tight.
First, plan the layout. Use a pencil to mark the floor. This will guide you. Unroll the tubing slowly. Keep it straight and flat. Use clips to hold the tubes down. Spacing is important. Keep tubes even. Connect to the manifold. Follow the guide for connections. Check for leaks. Use water to test. Make sure all joints are secure.
Connecting To The Power Source
First, turn off the main power. This step keeps you safe. Next, locate the junction box. This box holds all the wires. Find the power cable for the floor heating. Now, connect this cable to the thermostat. The thermostat controls the heat. Use a screwdriver to tighten the connections. Make sure the wires are secure. Loose wires can cause problems.
Check if the thermostat is working. Turn the power back on. The floor should start to warm up. If not, check your connections. Always follow the instructions. They help avoid mistakes. Keep the area clean. Avoid placing objects on the floor. This ensures even heating.
Testing The System
Turn on the floor heating system for the first time. Check if it lights up. Listen for any unusual sounds. Make sure everything seems normal. If something seems wrong, turn it off and call for help. Safety is important. Always be careful with electrical systems.
Walk around the room slowly. Feel the floor with your hands. Ensure the heat is even everywhere. If some spots are cold, adjustments might be needed. Use a thermometer for more accuracy. Check different areas, especially corners. Even heat is important for comfort.
Finishing The Floor
Installing in-floor heating enhances comfort and efficiency. Begin by laying the heating mats on a clean, dry surface. Connect the system to a thermostat, ensuring even heat distribution.
Applying Underlayment
Underlayment gives support to the floor. It makes the floor smooth. Choose the right material for underlayment. Foam or cork are good options. Lay it evenly on the subfloor. Use a tape to secure it. Make sure it covers all areas. Keep the surface clean and dust-free.
Installing Flooring Material
Choose the flooring you like. Wood, tile, or laminate work well. Cut the pieces to fit the space. Start from one corner. Lay each piece one by one. Use spacers for gaps. Press them down firmly. Check each piece is level. Finish by trimming the edges. Clean the area when done.
Maintenance Tips
Ensure the system works well with regular checks. Look for any damage or faults. Fix them quickly to keep the heating efficient. Listen for strange noises. They can signal problems. Check the thermostat to ensure accurate temperature settings.
Keep the system clean. Dirt can block heat flow. Use a vacuum cleaner to remove debris. Avoid using water near electrical parts. Clean twice a year for best results. Always follow the manufacturer’s cleaning instructions.
Get a professional check-up yearly. Experts can spot hidden issues. They ensure the system runs safely and efficiently. Professional servicing can extend the system’s lifespan. It is a smart investment for long-term comfort.
Frequently Asked Questions
What Is In-floor Heating?
In-floor heating, or radiant floor heating, is a system that warms floors using electric or water-based heat. It provides consistent, efficient warmth and enhances comfort by heating spaces evenly. This system is often installed beneath tile, wood, or laminate flooring, making it an energy-efficient heating solution.
How Do You Install In-floor Heating?
To install in-floor heating, first prepare the subfloor, then lay the heating system. Follow with installing the flooring material. Ensure proper insulation and connection to a power source. Professional installation is recommended for complex systems to ensure safety and efficiency.
Always follow manufacturer guidelines for best results.
Is In-floor Heating Energy Efficient?
Yes, in-floor heating is energy efficient. It operates at lower temperatures than traditional systems, reducing energy consumption. Heat is distributed evenly, eliminating cold spots and maintaining consistent comfort. This efficiency often results in reduced energy bills, making it a cost-effective heating solution for many homes.
Can In-floor Heating Be Installed Under Wood Floors?
Yes, in-floor heating can be installed under wood floors. It requires careful selection of suitable wood types to prevent warping. Engineered wood is often recommended due to its stability. Always follow manufacturer guidelines and consult professionals to ensure optimal performance and longevity of both the heating system and flooring.
Conclusion
Installing in-floor heating offers warmth and comfort. It’s a practical upgrade for any home. Follow these simple steps for a smooth process. Gather your tools and materials first. Prepare the floor properly for installation. Lay down the heating elements with care.
Connect them securely to the power source. Test the system thoroughly before finalizing. Enjoy a cozy and inviting space all year long. Regular maintenance ensures long-lasting performance. Experience the benefits of energy-efficient heating. Transform your home into a warmer haven.
Embrace the convenience of in-floor heating today.


