
Are you tired of staring at the unfinished edges of your floors? Installing floor molding can transform your space, giving it a polished and sophisticated look.
You might think it’s a task reserved for professionals, but with the right guidance, you can easily tackle it yourself. Imagine walking into a room where every detail feels complete, enhancing not just the aesthetics but also the value of your home.
This guide will walk you through every step of the installation process, breaking it down into simple, manageable tasks. Whether you’re looking to add elegance to your living room or bring a touch of class to your hallway, floor molding is the perfect solution. Let’s dive in and discover how you can achieve that magazine-worthy finish in your own home.
Tools And Materials Needed
You need a few basic tools to install floor molding. A tape measure helps in getting the right size. Saw is used to cut the molding pieces. Hammer and nails keep the molding in place. Caulk fills any gaps. A level ensures everything is straight. Safety goggles protect your eyes.
Gather the right materials too. Choose the molding type that suits your style. Paint or stain adds color. Use sandpaper to smooth edges. Wood glue can help in fixing pieces. Having these tools and materials ready makes the job easier.
Preparing The Area
First, sweep the floor. Remove all dust and debris. Use a vacuum for small particles. Then, use a damp mop. This will help clean sticky dirt. Make sure the floor is dry before moving on.
Use a utility knife to cut along the top of the molding. This stops paint from peeling. Next, use a pry bar to gently lift the molding. Start from one end and move slowly. Be careful not to damage the wall. Once removed, clean the area. Make sure there are no nails left behind.
Measuring And Cutting
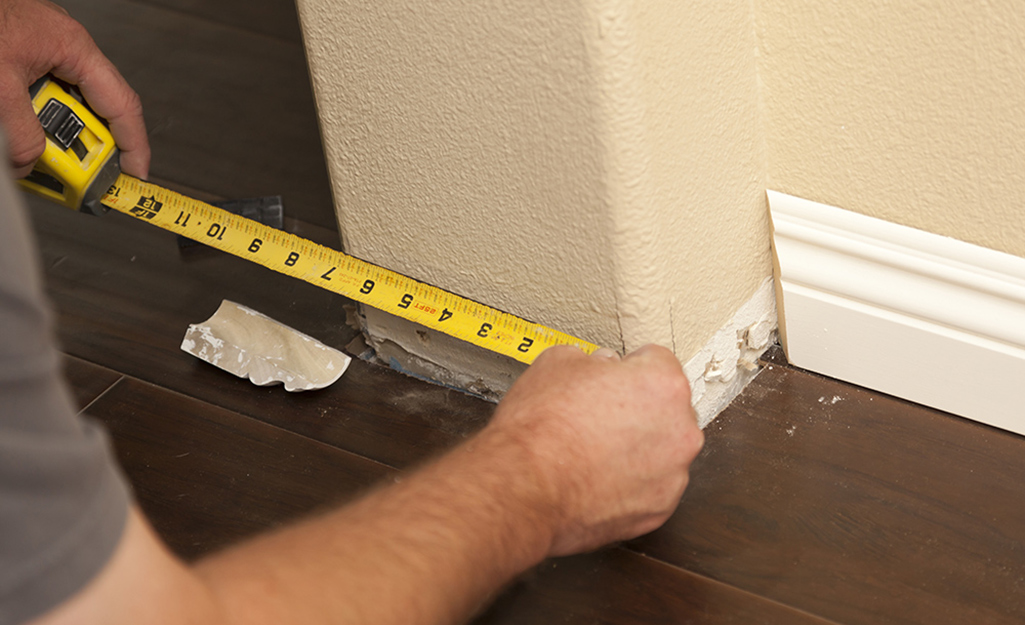
Measure each wall with a tape measure. Write down each number. Add these numbers to get the total length. This helps in buying the right amount of molding. Measure twice to be sure. Mistakes can cost time and money.
Place the molding against the wall. Use a pencil to mark where it will be cut. Make sure the marks are clear. This helps in cutting the molding correctly. Double-check the marks before cutting.
Use a saw to cut the molding. A miter saw works best for angled cuts. Straight cuts are easy with a hand saw. Always cut slowly and carefully. Wear safety glasses to protect your eyes.
Installing The Molding
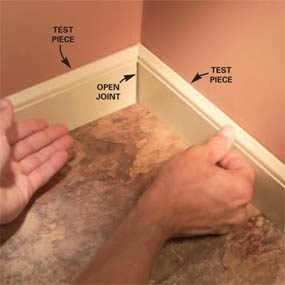
Begin by placing the first piece at a corner. Make sure it fits snugly against the wall. If it doesn’t fit well, trim it. A saw works best for trimming. This makes the molding look neat. Ensure the angle matches the corner.
Use nails or glue to secure the molding. Nails hold it tight and firm. Glue works well for smaller pieces. Press firmly to ensure it sticks. Check that it is straight. You can use a level tool for this. This prevents uneven lines.
When joining pieces, ensure they fit well together. Trim edges if needed. This helps them look smooth. Use a small amount of glue at joints. Press them together tightly. Check for any gaps. Fill gaps with caulk if necessary.
Finishing Touches
Use wood filler to fill any gaps. Apply it with a putty knife. Let it dry completely. Sand the area until smooth. This makes the molding look seamless and neat.
Choose paint or stain to match your room. Use a small brush for corners. Apply evenly for the best look. Two coats may be needed. Allow each coat to dry.
Clean the area around the molding. Remove any dust or debris. Use a damp cloth for wiping. Check for any missed spots. Your floor will look clean and fresh.
:max_bytes(150000):strip_icc()/how-to-install-shoe-molding-1822791_01_mark_first_trim_3218-45c8b65cd861481c89b07ab327d237aa.jpg)
Common Mistakes To Avoid
Measure twice, cut once. Wrong measurements lead to wasted time. Ensure your tape is straight. Use a pencil for marking. Check each corner for accuracy.
Every tool has a purpose. Saw blades should be sharp. Use a level for alignment. Hammer gently to avoid damage.
Clean the floor first. Dirt affects adhesion. Check for uneven surfaces. Fix bumps before installing molding.
Maintenance Tips
Keep the floor molding clean. Use a soft cloth or a vacuum. Dust and dirt can make it look dull. Clean it every week to keep it shiny. Avoid using water directly on the molding. Water can damage the wood. Use a damp cloth instead.
Check the molding often. Look for any cracks or chips. Small damage can become big problems. Fix them early to save time and money. Use wood filler for small cracks. Paint over it to match the molding.
Keep heavy objects away from the molding. Bumps and hits can cause serious damage. Teach children to be gentle around it. Use furniture pads to prevent scratches. This keeps the molding looking new.
Frequently Asked Questions
What Tools Do I Need For Floor Molding?
To install floor molding, you’ll need a miter saw, tape measure, hammer, nails, and a caulking gun. Additionally, sandpaper and a level are essential for a smooth finish. A coping saw might also be necessary for intricate cuts.
How Do I Measure For Floor Molding?
Begin by measuring each wall’s length with a tape measure. Note measurements for precise cuts. Allow extra material for corners and adjustments. It’s better to measure twice to ensure accuracy. Accurate measurements prevent wastage and ensure a perfect fit.
Can I Install Floor Molding Myself?
Yes, you can install floor molding yourself with the right tools and preparation. Follow detailed instructions and take your time. Familiarize yourself with the process through tutorials or guides. DIY installation can save money and be rewarding.
How Do I Cut Floor Molding Accurately?
Use a miter saw for precise angle cuts on floor molding. Measure carefully and mark the cutting line. A miter saw ensures clean and accurate cuts, essential for perfect corner joints. Practice on scrap pieces to gain confidence.
Conclusion
Installing floor molding can transform any room. It adds style and finish. With patience, you can do it yourself. Start by gathering tools and materials. Cut the molding to fit precisely. Secure it in place carefully. Paint or stain for a polished look.
This task may seem challenging. But with practice, it becomes easier. The effort pays off with a beautiful result. Your home will look neat and complete. Enjoy your new space. Feel proud of your handiwork. A small project with big impact.
You can handle it with ease.


