To install E Track on a wood trailer floor, start by measuring and planning your layout, confirming even spacing. Prepare the surface by cleaning and sanding if necessary. Mark drill holes with a pencil, then secure the track using screws about 1-1.5 inches long. Ascertain the track lies flat and is straight throughout. After installation, test stability with weights that mimic typical cargo to check for any issues. There's more you can do to enhance your cargo management.
Understanding E Track and Its Benefits

E Track is a versatile cargo management system designed to secure loads in trailers and trucks. Its primary benefits include enhanced load stability, increased safety, and ease of use. With E Track, you can quickly adjust and reposition your cargo straps, allowing for flexible configurations that suit your specific hauling needs. The system features durable aluminum or steel tracks, which can be mounted on various surfaces, providing you the freedom to customize your trailer. Additionally, E Track offers various accessories, such as tie-downs and brackets, ensuring you can adapt to different cargo shapes and sizes. By investing in E Track, you're not only optimizing your hauling capacity but also ensuring that your loads are transported securely and efficiently.
Tools and Materials Needed for Installation
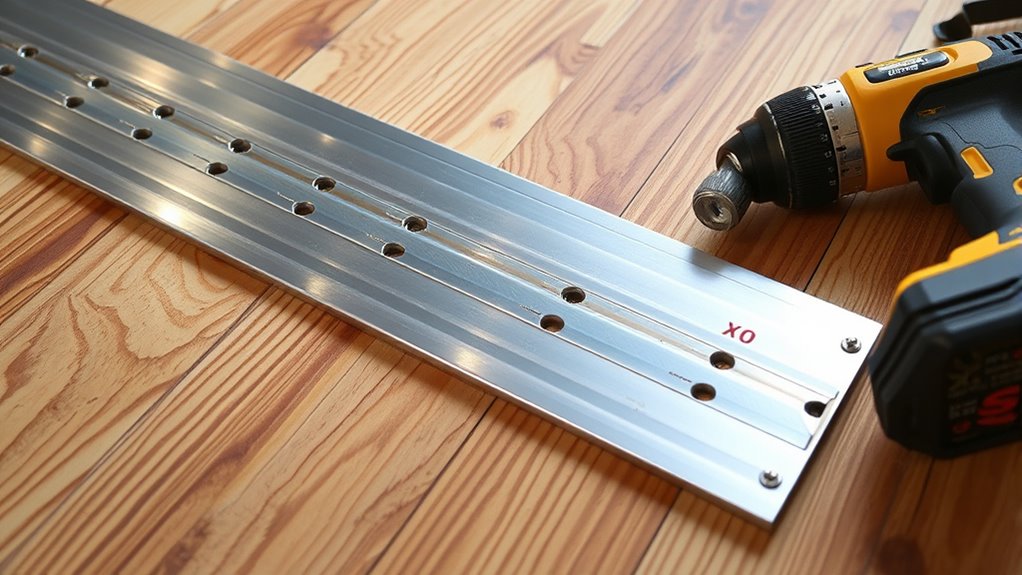
Installing E Track on a wood trailer floor requires a few essential tools and materials to guarantee a secure and efficient setup. Start with a power drill, which is crucial for making pilot holes and securing the E Track. You'll also need screws specifically designed for wood, typically 1-1.5 inches in length. A measuring tape provides accurate placements, while a level helps maintain straightness during installation. Don't forget a saw for any necessary adjustments to the E Track length. Finally, consider using a stud finder to locate the best mounting points. Following these installation tips and focusing on proper tool selection will lead to a successful E Track installation, giving you the freedom to secure your cargo effectively.
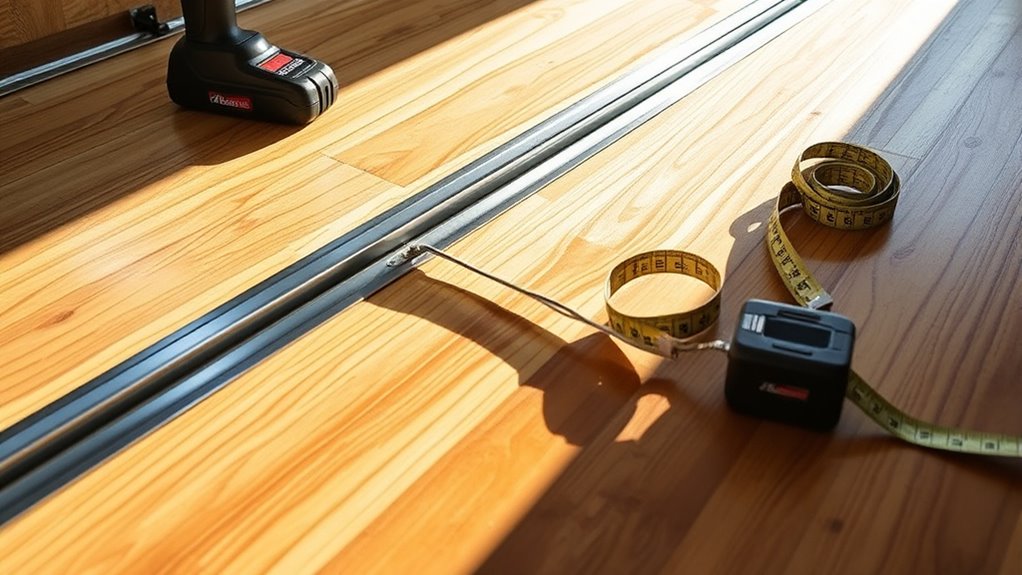
Measuring and Planning Your E Track Layout

Before you start installing E Track, it's essential to determine its placement on your trailer floor. Consider the load requirements for your specific cargo to guarantee the track provides adequate support and securement. Careful planning at this stage will enhance both functionality and safety during transport.
Determine Track Placement
Planning the layout for your E Track is essential for maximizing its effectiveness and ensuring secure cargo transport. Start by determining the desired track alignment based on your cargo types and dimensions. Measure the trailer floor, considering areas that might require floor reinforcement for better stability. Space the E Track sections uniformly, typically every 24 inches, to maintain balance and prevent shifting during transit. Use a chalk line to mark the placement, ensuring accuracy before drilling. Remember, improper alignment can lead to inadequate support, compromising your cargo's safety. Once you've established the layout, double-check your measurements to guarantee everything's in line. This meticulous approach will enhance your trailer's cargo management and efficiency, giving you the freedom to transport with confidence.
Consider Load Requirements
To guarantee your E Track system effectively meets your load requirements, it's vital to assess the weight and dimensions of the cargo you'll be transporting. Start by calculating the total weight of your load and verify it doesn't exceed the E Track's load capacity. Proper weight distribution is critical; uneven loads can compromise stability and safety. Plan your E Track layout to accommodate various securing points for maximum load management. Consider adding additional E Track sections if you're dealing with heavy or bulky items. By strategically placing the E Track, you'll maintain control over your cargo, verifying it stays secure during transport, and allowing you the freedom to haul diverse loads without concern.
Preparing the Wood Trailer Floor
When you're ready to install E Track on your wood trailer floor, guaranteeing the surface is properly prepared is essential for a secure fit. Start with a thorough trailer floor inspection. Look for any cracks, rot, or damage that could compromise the E Track's stability. Clean the wood floor to remove dirt, oil, or debris, as contaminants can affect adhesion and integrity. If needed, sand the surface to create a smooth area for installation. Ensure the wood is dry; moisture can weaken the bond. Once you've completed the wood floor preparation, you're set to move on to the next steps. By taking these precautions, you'll guarantee a long-lasting and reliable setup for securing your cargo.
Marking Drill Holes for E Track
Marking drill holes for E Track requires precision to guarantee proper alignment and secure installation. Start by laying the E Track in your desired position, making sure it's parallel to the trailer's length. Use a straight edge or measuring tape to confirm placement. Next, apply marking techniques by using a pencil to mark the holes on the wood. It's important to measure the distance from the edges to guarantee consistent hole alignment across the track. Double-check your marks before proceeding; a small error can lead to misalignment during installation. If possible, use a level to confirm that the track is straight. Properly marked holes will facilitate a hassle-free drilling process, allowing for a strong and secure E Track setup.
Drilling Holes in the Wood Floor
Now that you've marked the drill hole locations, it's time to choose the correct drill bit size for your E Track installation. Make sure the bit matches the diameter of the fasteners you'll be using to secure the track. Accurately drilling these holes is essential for a solid and safe installation.
Choosing Drill Bit Size
Choosing the right drill bit size is vital for successfully installing E Track on your wood trailer floor. You'll want to match the drill bit type to the wood density of your trailer. For softer woods, like pine, a standard twist bit will suffice, but for denser hardwoods, a spade or auger bit may be more effective. It's important to use a bit that matches the diameter of the E Track mounting holes, typically around 3/8 inch. This guarantees a snug fit for the bolts or screws you'll be using. Always check the manufacturer's specifications if available, as using the wrong bit size can lead to improper installation and limit the E Track's performance.
Marking Hole Locations
Before you drill holes in the wood floor, it's essential to accurately mark the locations for the E Track mounting points. Start by using a measuring tape to determine where you want the E Track installed. Employ precise marking techniques, like a chalk line or a pencil, to outline the track's position. Make sure you leave enough space between the mounts for ideal load distribution. Next, use alignment tips to check that your marks are straight and evenly spaced. Double-check measurements before proceeding. Remember, accuracy in marking prevents misalignment during installation, allowing you to achieve the freedom of securely transporting your cargo without worry. Once you're satisfied with your marks, you'll be ready to drill the holes.
Securing E Track to the Floor
To secure E Track to the trailer floor effectively, start by gathering the necessary tools and materials, including a drill, appropriate screws, and a level. Position the E Track at the marked locations, ensuring it's straight, and use the level for accuracy. For ideal track security, drill holes through the E Track into the trailer floor, ensuring you hit the wooden beams for maximum floor reinforcement. Insert screws through the E Track and into the floor, tightening them securely without over-torquing, which could strip the wood. Check that the E Track is firmly anchored, allowing it to withstand loads and provide reliable tie-down points for your cargo. Proper installation will give you the freedom to transport your gear safely.
Testing the Stability of the Installation
Once you've secured the E Track, it's essential to test its stability. Start with a thorough visual inspection to check for any misalignments or weaknesses. Then, conduct load testing and assess long-term durability to guarantee the installation can withstand regular use.
Visual Inspection Techniques
As you complete the installation of E Track on your wood trailer floor, it is essential to conduct a thorough visual inspection to confirm stability and safety. Start by examining the E Track connections; verify all screws are tight and the track lies flat against the surface. Check for any signs of wood damage or splintering around the installation points. Use visual inspection methods like looking for gaps between the E Track and the wood or any bending in the track itself. Make this inspection a routine part of your maintenance, adhering to an inspection frequency of at least once per month. This diligence will help you catch potential issues early, assuring your load remains secure during transport.
Load Testing Procedures
After completing your visual inspection, it's important to conduct load testing to verify the E Track installation can withstand the weights it will support during transport. Start by carefully loading your trailer with weights that mimic your typical cargo, ensuring even weight distribution across the E Track sections. Gradually increase the load to the maximum expected weight, observing how the E Track and its fasteners respond. Look for any signs of movement or deformation. After the load is applied, allow it to sit for a short period before removing it, then inspect the installation again. This process confirms the stability of your E Track installation, ensuring it can handle the demands of your cargo without compromising safety.
Long-Term Durability Assessment
While securing the stability of your E Track installation is vital, evaluating its long-term durability is equally important. To assess long-term performance, periodically inspect the E Track for any signs of wear, corrosion, or loosening. Pay special attention to the attachment points where the track meets the wood floor. Durability considerations include environmental factors such as exposure to moisture and temperature fluctuations, which could affect the integrity of both the E Track and the mounting hardware. If you notice any deterioration, it's important to address these issues promptly to maintain peak functionality. Regular maintenance not only extends the life of your installation but also guarantees that you can rely on it for secure cargo transport over time.
Adding Accessories for Enhanced Functionality
To maximize the utility of your E Track system, consider adding various accessories tailored to enhance functionality. These accessory options can greatly improve your cargo management and safety while ensuring you get the most out of your trailer.
- E Track Straps: Secure your load with adjustable, heavy-duty straps for flexibility.
- E Track D-Rings: Attach these rings to anchor points for added tie-down options.
- E Track Hooks: Ideal for hanging tools or equipment, keeping your trailer organized.
Maintenance Tips for E Track Systems
Regular maintenance of your E Track system is essential for guaranteeing safety and longevity. Start by inspecting the E Track for any signs of wear, corrosion, or damage. Clean the tracks regularly to remove dirt and debris that may interfere with load management. Check the attachment points to verify they're securely fastened, as loose components can compromise safety considerations. It's also advisable to periodically test the load capacity, confirming that you're not exceeding the recommended limits. Replace any damaged accessories immediately to maintain peak functionality. Finally, always refer to the manufacturer's guidelines for specific maintenance tips tailored to your E Track system. By following these steps, you'll guarantee both efficiency and safety in your trailer operations.
Frequently Asked Questions
Can E Track Be Installed on Metal Trailer Floors?
Imagine the freedom of securing your cargo, knowing it won't budge during transit. Yes, E track can be installed on metal trailer floors, but there are important metal trailer considerations. Make sure you use appropriate fasteners that can securely attach the E track, and verify the thickness of the metal to prevent damage. Proper E track installation will enhance your trailer's functionality and give you peace of mind as you hit the road.
How Much Weight Can E Track Systems Hold?
E track systems can hold impressive weight, but understanding the E track weight capacity is essential for safe use. Generally, each E track section can handle around 2,000 pounds when properly installed. However, you must also consider the E track safety limits, which include the distribution of weight and attachment points. Always confirm you're using compatible accessories and follow guidelines to maintain safety and maximize your load capacity effectively.
Are There Different Sizes of E Track Available?
Yes, there are different E track sizes available, typically ranging from 2-inch to 12-inch widths. When choosing, consider E track compatibility with your equipment and cargo needs. Standard sizes often allow for various accessories, ensuring you can secure loads efficiently. It's important to match your chosen size to the specific requirements of your trailer, providing the freedom to customize your setup for ideal strength and versatility in transporting goods.
Can E Track Be Easily Removed or Repositioned?
Did you know that over 70% of trailer users prefer adjustable cargo systems? When it comes to E Track, you'll find that E Track removal and repositioning is quite straightforward. Simply unfasten the fittings, and you can relocate the track as needed. This flexibility allows you to adapt your setup for different loads, giving you the freedom to maximize your trailer's space efficiently. Enjoy the convenience of customizing your cargo restraint system!
Is E Track Weather-Resistant for Outdoor Use?
E track can be weather-resistant for outdoor use, but it depends on the materials used. Typically, E track made from galvanized steel or powder-coated finishes offers better protection against rust and corrosion. For ideal E track maintenance, regularly inspect for wear or damage, and clean it to prevent buildup. If you're using it in harsh conditions, consider applying a protective coating for added durability, ensuring your setup remains functional and reliable over time.


