To grout floor tiles, start by gathering your materials, including the right grout type and color. Clean the tile surface thoroughly and let it dry completely. Mix the grout according to the manufacturer's instructions, achieving a smooth consistency. Using a float, apply the grout while filling the joints, working in small sections. Clean excess grout within 30 minutes with a damp sponge. Allow the grout to set for at least 24 hours, then seal the grout lines to protect against stains and moisture. With these steps, you'll guarantee a durable finish, and there's more useful info ahead.
Gather Your Materials
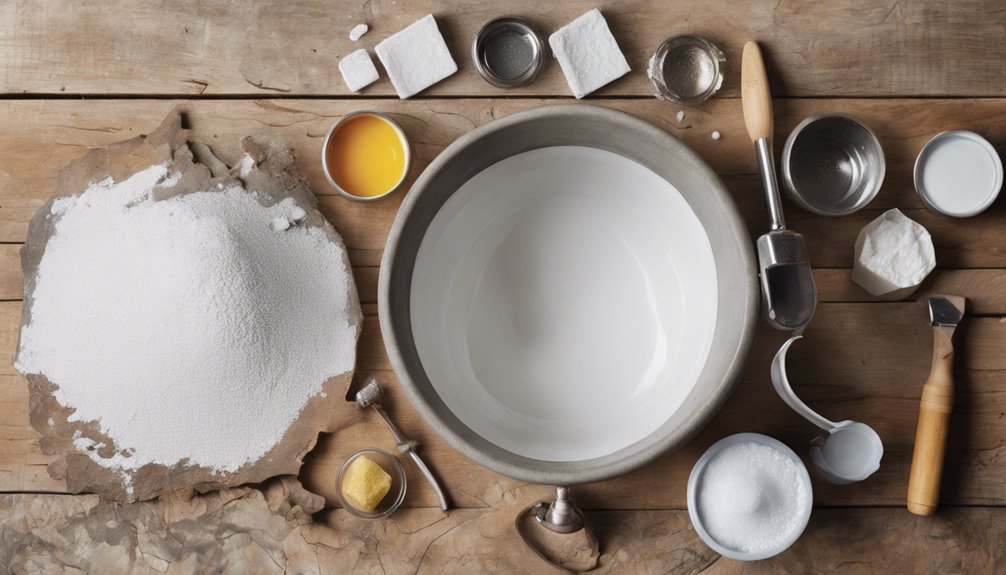
Before you jump into grouting your floor tiles, it's important to gather all the necessary materials. Start by choosing the right grout type; you'll typically find sanded and unsanded options. Sanded grout is great for wider joints, while unsanded works best for narrow ones. Next, think about color selection. The right color can enhance your tile's appearance or create a striking contrast. Consider samples to see how different shades work with your tile under various lighting. Don't forget a mixing bucket, trowel, grout float, and a sponge for cleanup. Also, grab a grout sealer to protect your work once it's dry. With everything in hand, you're ready to take the next step toward beautifully grouted tiles!
Prepare the Tile Surface
Before you start grouting, it's essential to clean the tile surface thoroughly to remove any dust or debris. Check for any damage, like cracks or chips, that might affect the grouting process. Taking these steps guarantees a smooth application and a durable finish.
Clean the Tile Surface
Cleaning the tile surface is an essential step in the grouting process, as it guarantees proper adhesion and a smooth finish. Start by removing any dust and debris with a broom or vacuum. You can then use tile cleaning methods like a damp mop with warm water or a gentle pH-neutral cleaner to wipe down the tiles. For stubborn stains, consider using a soft scrub brush, but avoid anything abrasive that could scratch the surface. After cleaning, make certain to thoroughly dry the tiles—damp surfaces can interfere with grout adhesion. Follow these surface preparation tips to guarantee your tiles are spotless and ready for grouting, giving you the best possible results and a beautiful finish.
Inspect for Damage
Once you've cleaned the tile surface, it's vital to inspect for any damage that could affect the grouting process. Conducting a thorough damage assessment guarantees your tiles are ready for the next step. Here's what to look for during your tile inspection:
- Cracks or Chips: Check for any visible cracks or chips that might compromise the grout's integrity.
- Loose Tiles: Gently press on each tile to identify any that might be loose or unstable.
- Uneven Surfaces: Look for any uneven areas that could affect the grout application.
Addressing these issues before grouting not only enhances the appearance but also secures the longevity of your tile floor. Don't skip this vital step!
Mix the Grout Properly

To mix grout properly, you'll first need to gather all necessary materials, including the grout, water, and a mixing container. Make certain to follow the mixing instructions on the grout packaging closely, as the right consistency is key for effective application. A well-mixed grout will guarantee better adhesion and a smoother finish for your floor tiles.
Gather Necessary Materials
Before you plunge into grouting your floor tiles, it's vital to gather the right materials and mix the grout properly for the best results. Understanding grout types is key, as the right one depends on your tile selection. Here's what you'll need:
- Grout: Choose between sanded or unsanded grout based on your tile spacing.
- Mixing Bucket: A sturdy container for mixing your grout guarantees a smooth consistency.
- Trowel or Float: Essential tools for applying grout into the joints effectively.
With these materials in hand, you're set to create a durable, beautiful finish that enhances your tiled space. Remember, investing time in the preparation phase will give you the freedom to enjoy your newly grouted floors without hassle.
Follow Mixing Instructions
As you prepare to mix grout, it is essential to follow the manufacturer's instructions closely for best results. Start by gathering your mixing tools, like a bucket, a mixing paddle, and a drill. Measure the dry grout and water accurately to achieve the right grout consistency. Too much water can weaken your grout, while too little can make it hard to work with. Mix thoroughly until there are no lumps, and the mixture is smooth and uniform. You might need to adjust the water slightly based on the environment, but stay within the recommended ratios. Once mixed, let the grout sit for about 10 minutes before using it, ensuring peak performance during application.
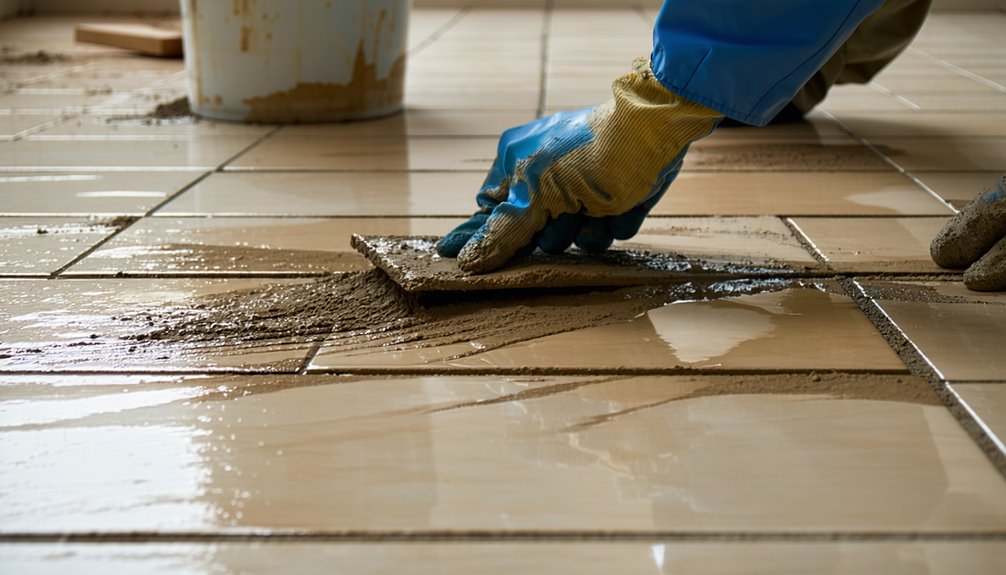
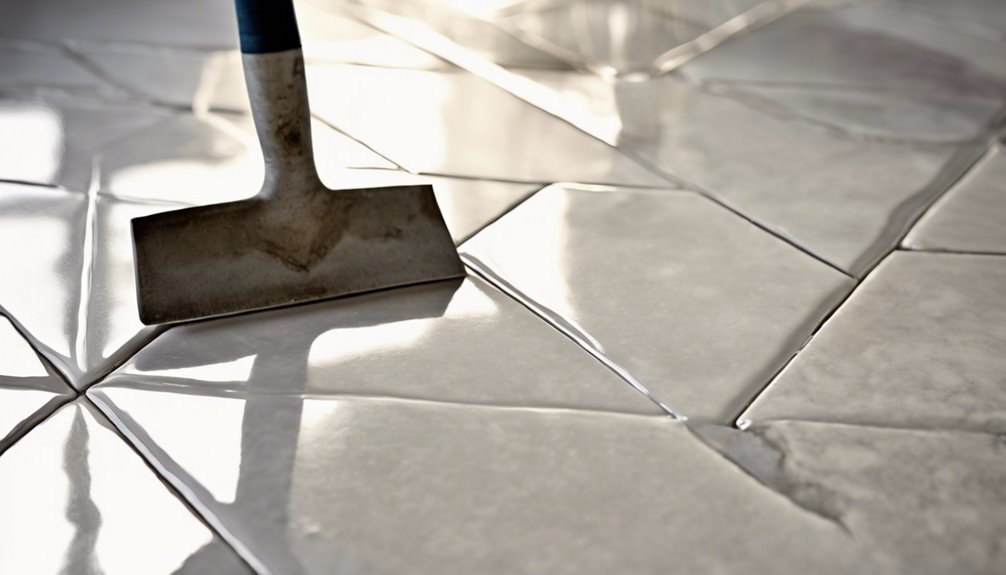
Apply Grout With a Float
Grab your grout float and prepare to fill those spaces between your floor tiles. Choosing the right grout types is essential for a lasting finish. Here are three key float techniques to help you get started:
- Hold the float at a 45-degree angle to the tiles for better control and coverage.
- Apply the grout with firm pressure, forcing it into the joints to prevent air pockets.
- Use a sweeping motion to remove excess grout from the surface, ensuring a clean finish.
Work in Small Sections
After applying grout with your float, it's important to tackle the job in manageable sections. This small section strategy not only helps you maintain control but also guarantees that the grout doesn't dry too quickly before you can smooth it out. Aim for sections of about 3 to 4 tiles at a time, which allows you to work efficiently without feeling rushed. As you progress, keep an eye on the grout's consistency; if it starts to harden, adjust your pace. This approach also promotes an efficient workflow, allowing you to focus on each area thoroughly. Remember, taking your time in small sections will lead to a more polished and professional finish that you'll appreciate for years to come.
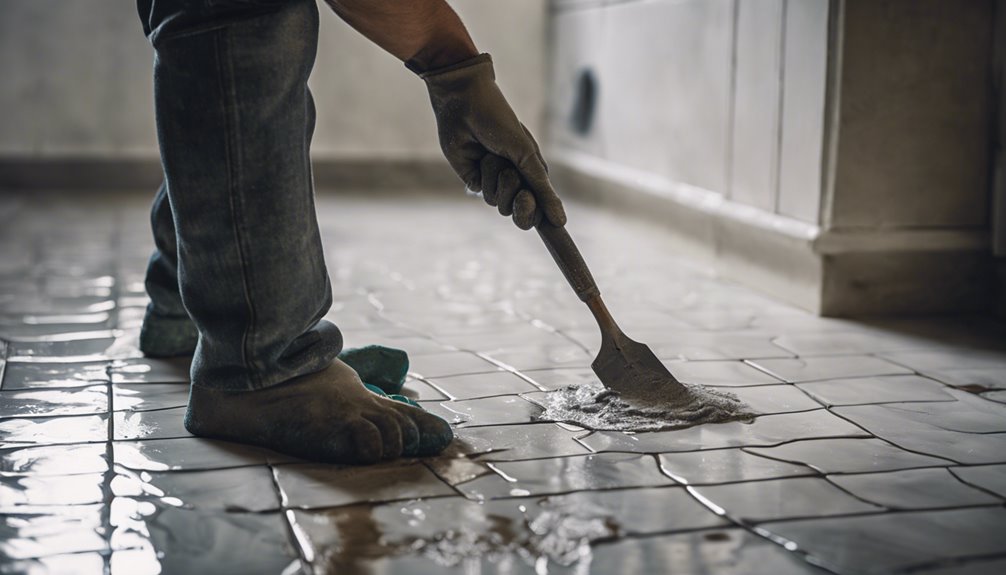
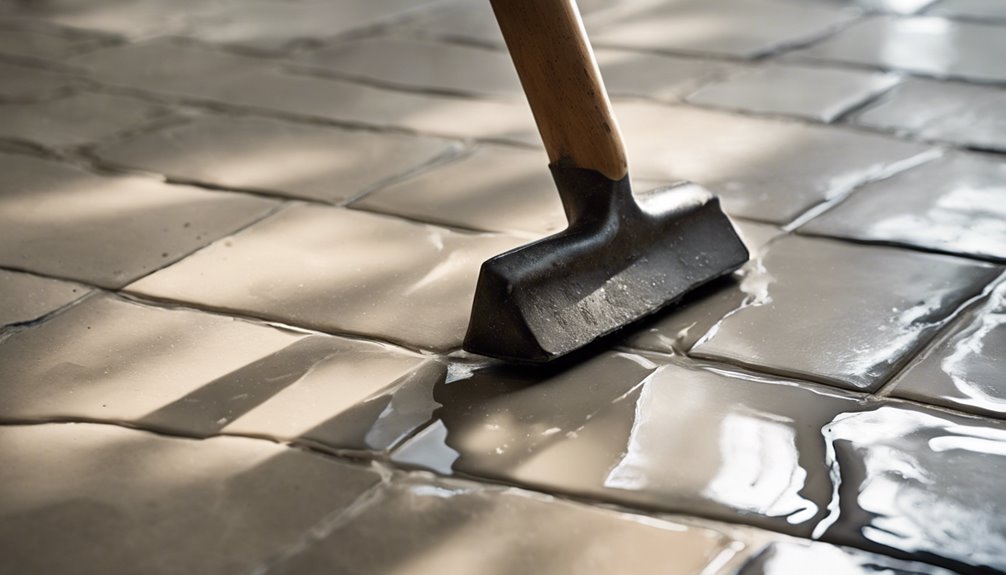
Clean Excess Grout
Once you've finished grouting, it's essential to clean up any excess grout before it hardens. Gather necessary tools like a sponge, bucket, and a damp cloth, and remember that timing is key—cleaning too late can make the job much harder. Use a gentle, circular motion with your sponge to remove the grout without damaging the tiles.
Gather Necessary Tools
To effectively clean excess grout from your floor tiles, you'll need a few essential tools at your disposal. Having the right tools can make this task much smoother and guarantee your tiles look pristine. Here's a quick tools checklist to gather before you start:
- Sponge: A clean, damp sponge helps lift and remove excess grout without scratching your tiles.
- Bucket: You'll need a bucket for rinsing your sponge and keeping the workspace tidy.
- Grout Scraper: This tool allows you to tackle stubborn grout spots that cling to the tile surface.
With these essential tools ready, you'll be well-equipped to achieve a clean and polished look for your floor tiles. Enjoy the freedom of a job well done!
Timing Is Key
Cleaning excess grout should be done promptly after applying it to your floor tiles. Timing considerations play an essential role in this process. If you wait too long, the grout will start to dry, making it much harder to remove. Aim to clean the grout haze within 10 to 30 minutes after application for ideal drying results.
Use a damp sponge to gently wipe away the excess grout, guaranteeing you don't disturb the grout lines. Rinse the sponge frequently to avoid spreading grout back onto the tiles. Staying on top of this task not only guarantees a cleaner finish but also saves you from the hassle of scraping dried grout later. Trust me, sticking to this timing will make your grouting experience much smoother!
Use Proper Technique
While it might seem tempting to rush through the cleanup process, using the proper technique is crucial for achieving a polished final look on your newly grouted floor tiles. A clean finish not only enhances aesthetics but also guarantees durability. Here are three key steps to keep in mind:
- Wait for the Right Time: Allow the grout to set for about 15-30 minutes before cleaning.
- Use a Damp Sponge: Lightly dampen your sponge to avoid pulling out the grout from the joints during cleanup.
- Wipe in a Circular Motion: This technique helps remove excess grout without disturbing your grout application.
Allow Grout to Set
After you've applied the grout, it's important to allow it to set properly to guarantee a strong bond and a polished finish. Grout setting typically requires at least 24 hours, but this can vary based on the type of grout used and the conditions of your workspace. During this drying time, avoid walking on the tiles to prevent any disturbance. Make sure the area is well-ventilated but avoid direct drafts, as this can cause uneven drying. It's also vital to maintain a consistent temperature; extreme fluctuations can affect the grout's integrity. Patience is key here—allowing the grout to set fully will help you achieve that professional look and long-lasting durability. Your hard work will pay off!
Seal the Grout Lines
To enhance the longevity and appearance of your newly grouted floor tiles, sealing the grout lines is essential. Sealing not only protects your hard work but also adds to the overall aesthetic. Here are some grout sealing benefits you shouldn't overlook:
- Prevents Stains: Sealing keeps dirt and spills from penetrating the grout.
- Reduces Mold Growth: Moisture is less likely to linger, minimizing mold and mildew.
- Extends Durability: A sealant adds an extra layer of protection, prolonging the life of your grout.
When it comes to sealing techniques, use a high-quality grout sealer and apply it evenly with a brush or applicator. Be sure to follow the manufacturer's instructions for the best results, ensuring your floor tiles remain stunning for years to come.
Maintain Your Grout
Once you've sealed your grout lines, the next step is to maintain them properly to keep your tiles looking their best. Regular grout cleaning is essential; use a gentle, pH-balanced cleaner to avoid damaging the seal. For routine maintenance, sweep or vacuum your floors to remove debris, then mop with a suitable solution. Avoid harsh chemicals that can break down your grout sealing over time.
It's also a good idea to inspect your grout every few months. If you notice any discoloration or damage, address it immediately. Re-seal your grout lines annually or as needed based on wear and tear. By staying proactive with maintenance, you'll enjoy a beautiful floor that enhances your space for years to come.
Troubleshooting Common Issues
While grouting your floor tiles can seem straightforward, various issues can arise that may hinder your project. Here are some common problems to watch for:
- Grout cracking: Often caused by improper mixing or drying too fast. Make sure you follow recommended drying times.
- Grout discoloration: This can result from dirty tools or improper sealing. Regular grout maintenance and sealing can help prevent this issue.
- Grout haze: If you notice a cloudy film, it's likely due to residue left after grout application. Use a haze remover and follow up with a thorough cleaning.
To avoid uneven grout and grout shrinkage, be mindful during the application process. Address these concerns promptly to maintain the beauty and integrity of your tiled surfaces!
Frequently Asked Questions
How Long Should I Wait Before Walking on Newly Grouted Tiles?
You might think you could sprint across your newly grouted tiles right away, but hold your horses! After grouting, it's crucial to wait about 24 to 48 hours for the grout drying and tile curing process to work its magic. Walking on them too soon could lead to cracks or unevenness, ruining all your hard work. So, take a breather and let that beautiful grout set properly before you strut your stuff!
Can I Use Sanded Grout for All Tile Types?
You can't use sanded grout for all tile types due to tile compatibility issues. While sanded grout offers advantages like durability and resistance to cracking, it's best suited for tiles with a wider grout joint, typically 1/8 inch or more. For delicate or polished tiles, unsanded grout is recommended to avoid scratching. Always check your tile's specifications to verify you're using the right type of grout for ideal results and long-lasting beauty.
What Is the Best Sealer for Grout Lines?
Imagine stepping onto a shimmering floor, where grout lines gleam, untouched by stains. For the best grout sealers, look for water-based or penetrating options that offer lasting protection while allowing your tiles to breathe. These sealers not only enhance your tile's beauty but also simplify tile maintenance, keeping dirt and moisture at bay. Remember, a good sealer can make all the difference in preserving that pristine, inviting look you love.
How Often Should I Reseal My Grout?
You should aim to reseal your grout every six months to a year, depending on usage and the type of sealer you've used. For grout maintenance tips, always check for discoloration or stains as signs it's time to reseal. If you want to maintain that fresh look and prevent moisture damage, don't skip this step. Staying on top of resealing frequency will save you time and effort in the long run.
Is It Necessary to Wear a Mask While Grouting?
When you're grouting, it's wise to err on the side of caution. Wearing a mask is essential for grouting safety, as it protects you from inhaling harmful dust and fumes. Respiratory protection isn't just a good idea; it's a necessity that'll keep your lungs safe while you work. Don't take unnecessary risks—safeguarding your health means you can enjoy your project without any worries down the line. So, suit up and breathe easy!


