Have you ever walked across a tiled floor and noticed the neat, seamless lines between each tile? That’s the magic of grout at work, and it’s not as mysterious as it might seem.
If you’re looking to breathe new life into your home with a stunning tiled floor, mastering the art of grouting is essential. Imagine transforming your space with your own hands, achieving that professional finish that you’ve always admired. You don’t need to be a seasoned pro to get the job done right; you just need the right guidance and a bit of patience.
In this guide, you’ll discover simple, step-by-step instructions that will empower you to grout floor tiles like an expert. Get ready to dive into a DIY project that’s as rewarding as it is satisfying. Let’s make your tiling dreams a reality—keep reading to unlock the secrets of perfect grout lines!
Preparation Steps
Start by cleaning the tiles. Use a damp cloth to wipe away dirt. Make sure no dust remains. Clean tiles help grout stick better. Also, check for cracks. Repair them before grouting.
Gather all tools before starting. You will need a grout float, sponge, and bucket. Also, get grout mix and a mixing tool. Having tools ready saves time. Prepare your workspace to keep it tidy.
Choosing The Right Grout
Grout comes in different types. The main types are cement-based and epoxy. Cement-based grout is easy to use. It is good for most projects. Epoxy grout is stronger. It is great for areas with water, like bathrooms. It is also more stain-resistant. Choose the right type based on your needs.
The grout color is very important. It can change the look of your floor. Light colors make the room feel big. Dark colors hide dirt better. Some people match the grout color with the tiles. Others choose a contrast color for a bold look. Always consider the room’s style and light. Test a small area first. This helps you see how it looks.
Mixing Grout Properly
Always read the grout package instructions before starting. Use the right amount of water. Too much or too little can cause problems. Mix the grout until it is smooth and thick. It should be like peanut butter. Use a bucket to mix. Stir slowly to avoid bubbles. Rest the mix for a few minutes. This helps it blend well.
The grout should not be too watery or too stiff. Check by lifting some grout with a trowel. It should hold but not drip. Adjust by adding small amounts of water or grout. Mix again until perfect. Test it a few times to be sure. Proper consistency makes grouting easy and neat.
Application Techniques
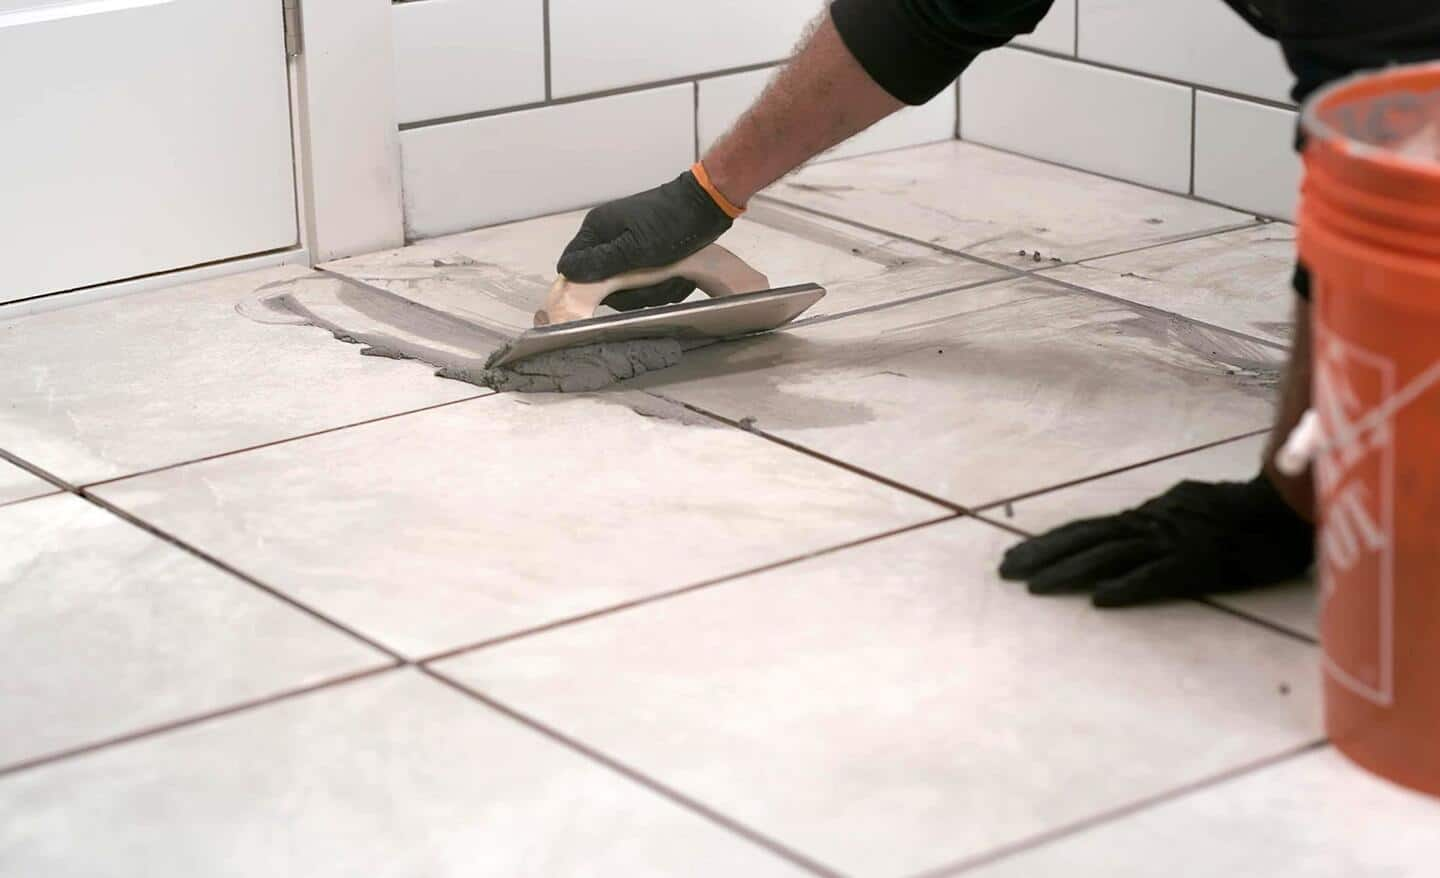
Applying grout to floor tiles involves spreading it evenly using a rubber float. Press firmly to fill gaps, then wipe excess grout with a damp sponge. Allow it to set before cleaning the tiles again.
Using A Grout Float
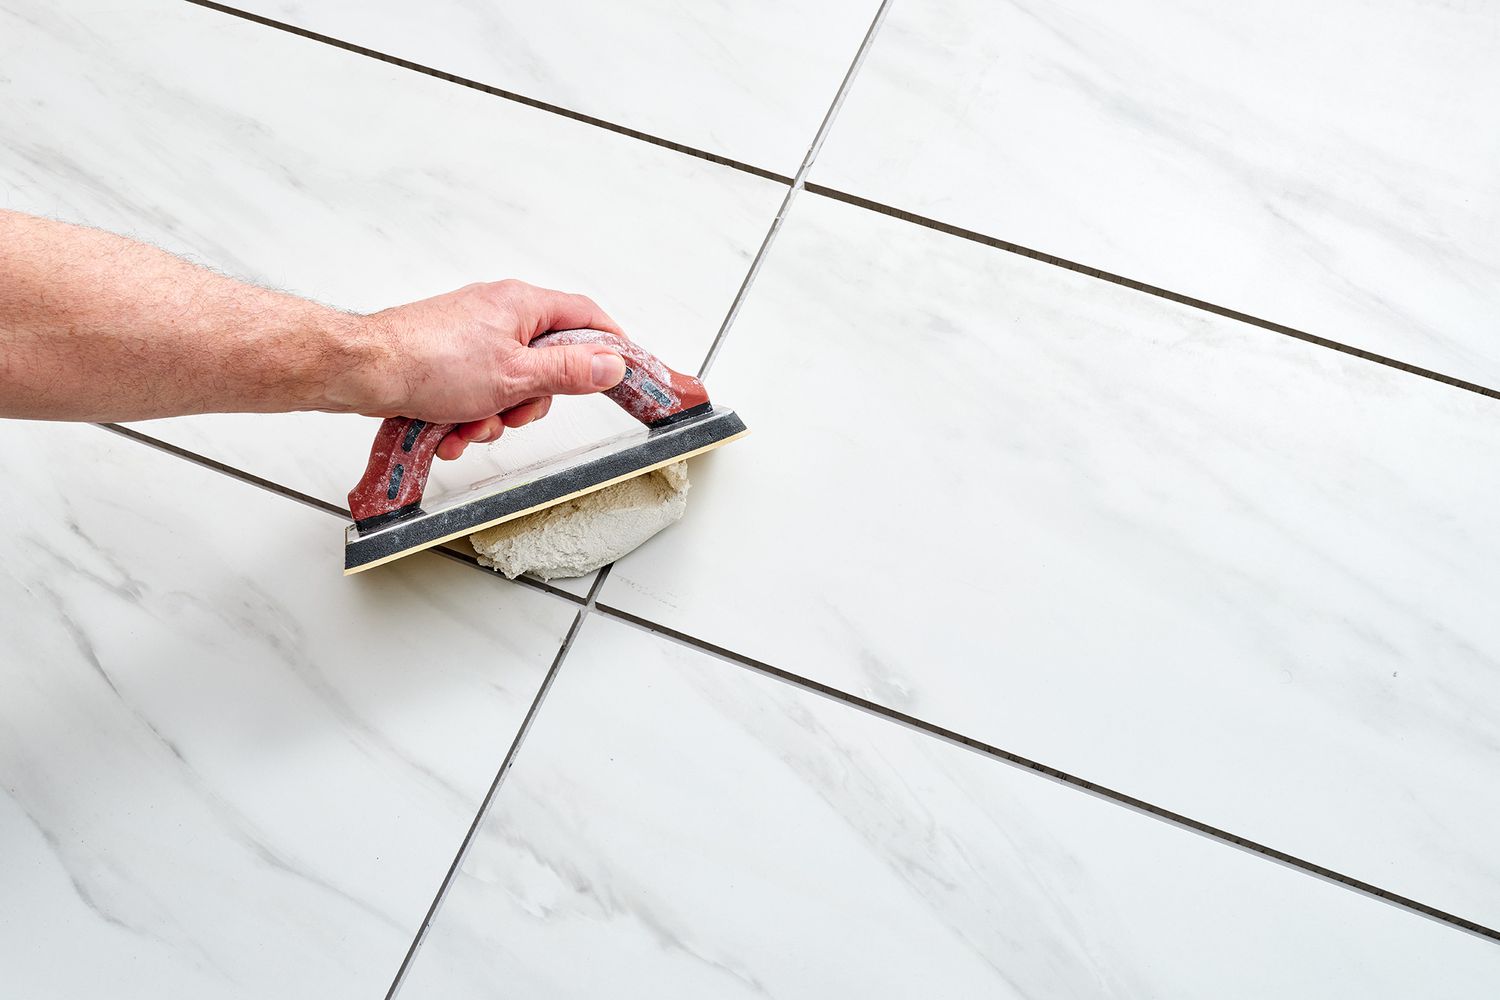
Grout floats help in spreading grout smoothly. Hold the float at a 45-degree angle. Press firmly to ensure grout fills the gaps. Push the grout diagonally across tiles. This method avoids damaging the tiles. Keep the float clean for smooth application. Cleaning ensures the grout spreads evenly.
Filling Joints Evenly
Ensure grout fills all joints evenly. Use consistent pressure to fill gaps well. Smooth the surface gently with a damp sponge. This removes excess grout. Wipe the tiles lightly to maintain their shine. Grout should not cover tiles fully. Properly filled joints look neat and last longer.
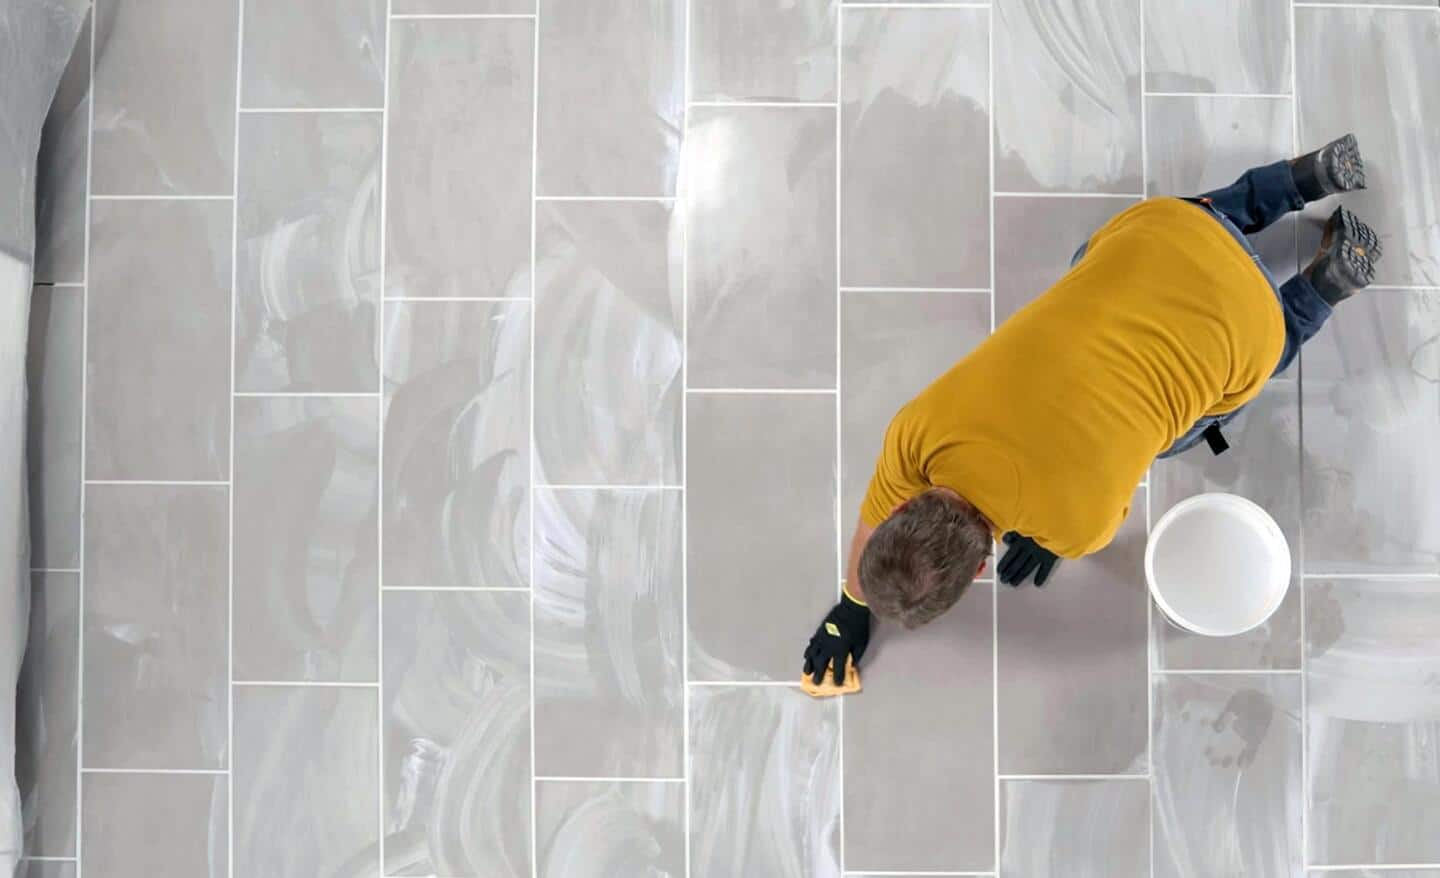
Cleaning Excess Grout
A damp sponge helps clean excess grout from tiles. Squeeze the sponge to remove extra water. Wipe the tiles gently to avoid grout removal from joints. Rinse the sponge often to keep it clean. Repeat until tiles are clear.
Be gentle to prevent scratching tiles. Use a sponge, not a rough pad. Check the sponge for dirt before using. Clean in a circular motion for best results. This protects the tile surface from damage.
:max_bytes(150000):strip_icc()/how-to-grout-a-tile-floor-5208084-03-f0f15bc2d87542cbaaae5e73f5cbf342.jpg)
Final Touches
Applying final touches to grout floor tiles involves precision and care. Ensure even spreading of grout between tiles. Wipe away excess for a clean finish. This step enhances the overall look and durability of your floor. Properly grouted tiles resist wear and maintain their beauty longer.
Polishing Tile Surface
Clean the tile surface gently. Use a soft cloth or sponge. Rub the tiles in small circles. This helps remove any leftover grout. Make the tiles shine. A little bit of warm water helps. Add a few drops of mild soap. Rinse the tiles with clean water. Dry with a soft towel. This makes the tiles look new and bright.
Sealing Grout Lines
Sealing grout keeps it strong and clean. Use a small brush to apply sealer. Cover each grout line carefully. Avoid spilling on tiles. Let the sealer dry for 24 hours. This protects from water and stains. Check the instructions on the sealer. Follow them closely for best results. Reapply sealer every year. This keeps the grout looking nice.
Common Mistakes
Over-washing grout can make it weak. Grout needs time to set. If washed too much, it loses strength. Only wipe gently to remove excess. Use a damp sponge, not a wet one. Too much water can cause problems. Grout color may change or fade. Keep water use to a minimum.
Always read the manufacturer guidelines. Each product is different. The instructions help you use the grout right. They say how long to mix, apply, and cure. Ignoring these steps can lead to poor results. Following guidelines ensures strong and lasting grout. Always have the instructions handy. They are your best guide.
Expert Tips For Longevity
Keeping your floor tiles clean is very important. Use a soft mop or cloth for cleaning. Avoid harsh chemicals; they can damage the grout. Water and mild soap are often enough. Regular cleaning prevents dirt buildup.
Stains can make your tiles look bad. For small stains, use baking soda paste. Apply it and let it sit for a few minutes. Then scrub gently and rinse. For bigger stains, you might need a grout cleaner. Repairing damage is also crucial. Fix cracks quickly to avoid further issues. Broken grout can lead to water damage. Always keep an eye out for these problems.
Frequently Asked Questions
What Tools Do You Need To Grout Floor Tiles?
You’ll need a rubber float, grout sponge, bucket, and grout mix. A margin trowel is also helpful for mixing. Ensure you have protective gloves and a dust mask. These tools will help you efficiently apply and clean the grout, ensuring a professional finish.
How Long Does Grout Need To Dry?
Grout typically requires 24 to 72 hours to dry completely. Drying time can vary based on humidity and temperature. It’s important to avoid foot traffic during this period to ensure proper setting. For best results, always follow the manufacturer’s guidelines for drying times.
Can You Grout Over Existing Grout?
Grouting over existing grout is not recommended. It may not adhere properly and can lead to future issues. Removing old grout ensures better adhesion and a smoother finish. If re-grouting is necessary, clean the area thoroughly before applying new grout.
How To Clean Floor Tiles After Grouting?
After grouting, use a damp sponge to wipe off excess grout. Rinse the sponge frequently to avoid spreading grout haze. Once the tiles are clean, use a dry cloth to polish the surface. This will help restore the tiles’ shine and remove any remaining haze.
Conclusion
Grouting floor tiles can transform your space beautifully. It seals gaps and creates a smooth finish. Start by choosing the right grout for your tile type. Mix it well to avoid lumps. Spread it evenly using a rubber float. Push grout deep into joints for durability.
Wipe off excess using a damp sponge. Let it dry completely before walking on it. Regular cleaning keeps it looking fresh and new. Grouting not only enhances looks but also increases tile lifespan. Follow these steps, and your floor will shine with elegance and strength.


