
Are you frustrated with scratches, dents, or dull spots on your wood floor? You’re not alone.
Many homeowners find themselves wishing they could bring their floors back to life without spending a fortune on replacements. The good news is, you can fix those imperfections yourself with a few simple techniques. Imagine walking across your floor and feeling proud of its polished, beautiful surface.
In this guide, we’ll show you how to restore your wood floor, making it look as good as new. Don’t let minor damage ruin the aesthetic of your home. You have the power to transform your floors and boost your home’s value. Keep reading to discover the secrets to a flawless wood floor that you can achieve on your own!
Common Wood Floor Issues
Scratches make wood floors look dull. Use a soft cloth to buff them. For deeper scratches, a wood filler can help. Match the filler color with the floor. Always test the filler on a small spot. This ensures a good match. Regular cleaning helps prevent scratches. Use a soft broom or a vacuum with a wood floor setting. Place mats at doors to catch dirt and grit. This keeps the floor safe from harm.
Water can harm wood floors. Use a dry cloth to soak up spills fast. Stains might need a wood cleaner. Test the cleaner on a small area first. If stains stay, sanding might be needed. Sanding helps remove deep stains. After sanding, apply a new finish. This protects the wood from future damage. Always use rugs in wet areas like the kitchen.
Gaps happen when wood dries out. Use a humidifier to keep air moist. For big gaps, wood filler is useful. Match the filler to the floor color. Buckling can occur from too much water. Keep water away from wood floors. If buckling happens, remove the damaged planks. Replace them with new ones. Ensure the new planks fit well. This keeps the floor looking smooth.

Assessing The Damage
Knowing the type of wood is very important. Different woods have different needs. Oak is strong and lasts long. Pine is soft and can scratch easily. Maple is hard and can resist dents. Learn about your wood type. It helps in choosing the right fix. This avoids more damage.
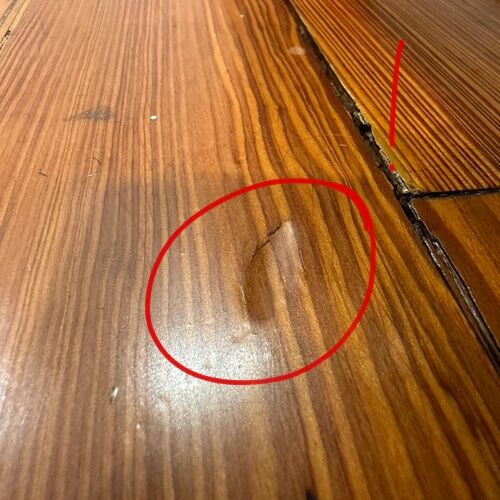
Look at the scratches and dents. Are they deep or just surface marks? Check for any stains or water damage. Water can make wood warp. Feel the surface. Is it smooth or rough? Listen for squeaks. They can show loose boards. All these signs tell how much work is needed.
Tools And Materials Needed
Start with a hammer and a set of nails. A chisel helps remove damaged wood. Use a putty knife for applying filler. Sanding is easier with a sanding block. Keep a measuring tape handy to check lengths. A level ensures everything stays flat. Safety gear like gloves and goggles is important.
Pick wood filler that matches your floor color. Floor finish protects and shines the wood. Get replacement boards of similar wood type. Sealants help prevent water damage. Use adhesive for strong wood bonding. A clear coat maintains the wood’s beauty. Make sure materials are durable and long-lasting.
Repair Techniques For Surface Damage
Scratches can make floors look bad. Use wood filler for deep scratches. Apply the filler with a small knife. Let it dry as per instructions. Sand the area after it dries. Use fine sandpaper for a smooth finish. Clean the dust with a damp cloth. Apply wood stain to match the floor color. Let the stain dry completely. Finish with a clear coat for protection.
Minor dents can be fixed easily. Use a damp cloth over the dent. Place a hot iron on the cloth. The steam helps the wood rise. Check the dent every few seconds. Stop when the wood is even. Let the area dry properly. Sand lightly if needed. Use wood polish to finish. This will make the floor shiny again.
Dealing With Water Damage
Water on wood floors can cause big problems. Use a dry cloth to soak up water. A fan can help dry the area faster. Open windows for fresh air. Dehumidifiers can also remove moisture. Check the floor for any signs of damage. Act fast to save the wood.
Some planks may be too damaged. Remove these with care. Use a hammer and chisel. Measure the size of new planks. Cut them to fit the space. Place the new plank and secure it. Sand the area for a smooth finish. Finally, apply a matching stain or varnish.

Fixing Gaps And Buckling
Loose boards can be a trip hazard. First, find the loose board. Use a hammer to tap nails into the board. This will make it tight. If nails do not work, try screws. Make sure the screw head is flat. This will keep the floor smooth.
Gaps between boards can be unsightly. Use wood filler to fix them. Choose a filler that matches the floor color. Apply it with a putty knife. Press it into the gap. Let it dry fully. Sand it smooth with fine sandpaper. Now the gap is gone.
Refinishing And Polishing
Oil-based finishes add warmth to wood floors. They dry slowly, giving time for corrections. Water-based finishes dry fast and are clear. These are eco-friendly and safe for kids. Polyurethane is strong and resists scratches. It is perfect for homes with pets. Each type suits different needs. Choose wisely for your wood floor.
Clean the floor first. Use a soft brush. Apply stain evenly. A cloth works well. Wait for it to dry. Then, add sealant for protection. Sealant keeps the floor shiny. It prevents damage from spills. Let it cure fully. This ensures a durable finish. Your floor will look new again.
Preventive Measures
Keep wood floors clean and shiny. Sweep floors every day. Use a soft broom. Dirt and dust can scratch floors. Mop them once a week. Use a damp mop, not a wet one. Water can damage wood. Vacuum once a week too. Use a vacuum with a soft brush. This helps keep the floors nice.
Furniture can scratch wood floors. Use furniture pads under chairs and tables. This prevents marks. Rugs help too. Place them in busy areas. They stop dirt and scratches. Sunlight can fade wood. Use curtains to block sun rays. This keeps the floor color bright.
Frequently Asked Questions
How Do You Repair Scratched Wood Floors?
To repair scratched wood floors, clean the area first. Use a wood floor cleaner to remove debris. Apply a wood floor touch-up marker that matches your floor color. For deeper scratches, consider sanding and refinishing. Always finish with a protective coating to prevent future damage.
What Is The Best Way To Fix Warped Wood Floors?
To fix warped wood floors, first, identify the cause. Often, moisture is the culprit. Reduce humidity in the area using a dehumidifier. For minor warps, place a heavy object on the affected area. Severe cases may require professional sanding and refinishing to restore the floor.
Can Water-damaged Wood Floors Be Fixed?
Yes, water-damaged wood floors can often be fixed. First, dry the area thoroughly using fans or dehumidifiers. Remove any warped planks and replace them. Sand and refinish the affected area to blend with the existing floor. Prevent future damage by fixing leaks and controlling indoor humidity levels.
How To Fix Squeaky Wood Floors?
To fix squeaky wood floors, locate the squeak source. Sprinkle talcum powder between the floorboards to reduce friction. For persistent squeaks, secure loose boards with nails or screws. If the issue persists, consider consulting a professional to assess underlying structural problems.
Conclusion
Fixing wood floors isn’t as hard as it seems. Start with small repairs. Use the right tools and materials. Sanding and staining may be needed. This helps restore shine. Regular maintenance prevents future damage. Protect your floors from scratches. Use rugs or mats in high-traffic areas.
Clean spills quickly to avoid stains. Enjoy your beautiful and durable wood floor. Feel proud of the work you’ve done. Your floor can look new again with care and effort. Keep learning new tips. Improve your skills over time. Happy repairing!


