
Are you tired of your cold, hard concrete floors? Do you dream of transforming your space with the warmth and elegance of hardwood?
You’re not alone. Many homeowners like you are looking to upgrade their homes and create a cozy atmosphere. But how do you get from rough concrete to stunning hardwood? In this guide, we’ll unveil the secrets to installing hardwood floors on concrete, making your home more inviting and increasing its value.
You’ll discover practical tips and insights that will make the process smoother and more enjoyable. Stick around, because by the end, you’ll have the confidence to tackle this project and achieve the beautiful floors you’ve always wanted.
Preparing The Concrete Surface
Clean the concrete surface thoroughly. Remove all dirt and debris. Use a broom or vacuum for best results. Next, check for any bumps or dents. Use a leveling compound to fix uneven areas. Let the compound dry completely before moving forward. This step ensures a smooth surface for the hardwood.
Moisture can damage hardwood floors. Test for moisture using a moisture meter. Place the meter on the concrete surface. Read the results carefully. The reading should be low for safe installation. If moisture is present, consider a moisture barrier. This barrier protects the hardwood from damage. Always ensure the area is dry and safe.

Choosing The Right Hardwood
Picking the right wood is important. Solid wood is one piece of wood. It can be sanded many times. But, it may not be best for concrete floors. Engineered wood has layers. It’s more stable and good for concrete. It handles moisture better. Think about your needs before choosing.
Many wood species are available. Oak is strong and popular. Maple is smooth and light. Walnut is dark and rich. Each species has unique grains. Styles can change the look of your room. Wide planks look modern. Narrow planks are classic. Choose a style that fits your home.
Installation Methods
Installing hardwood floors on concrete involves several key steps. Start by ensuring the concrete surface is clean and dry. Use a moisture barrier before laying the wooden planks. Secure the planks using adhesive or nails, depending on the chosen method.
This creates a beautiful and durable floor.
Floating Floor Method
This method is simple. It’s great for beginners. The floor is not glued or nailed. The planks snap together. They rest on the concrete. Underlayment goes beneath the wood. It reduces moisture. It adds a cushion. This method is quick and easy. It’s ideal for DIY projects.
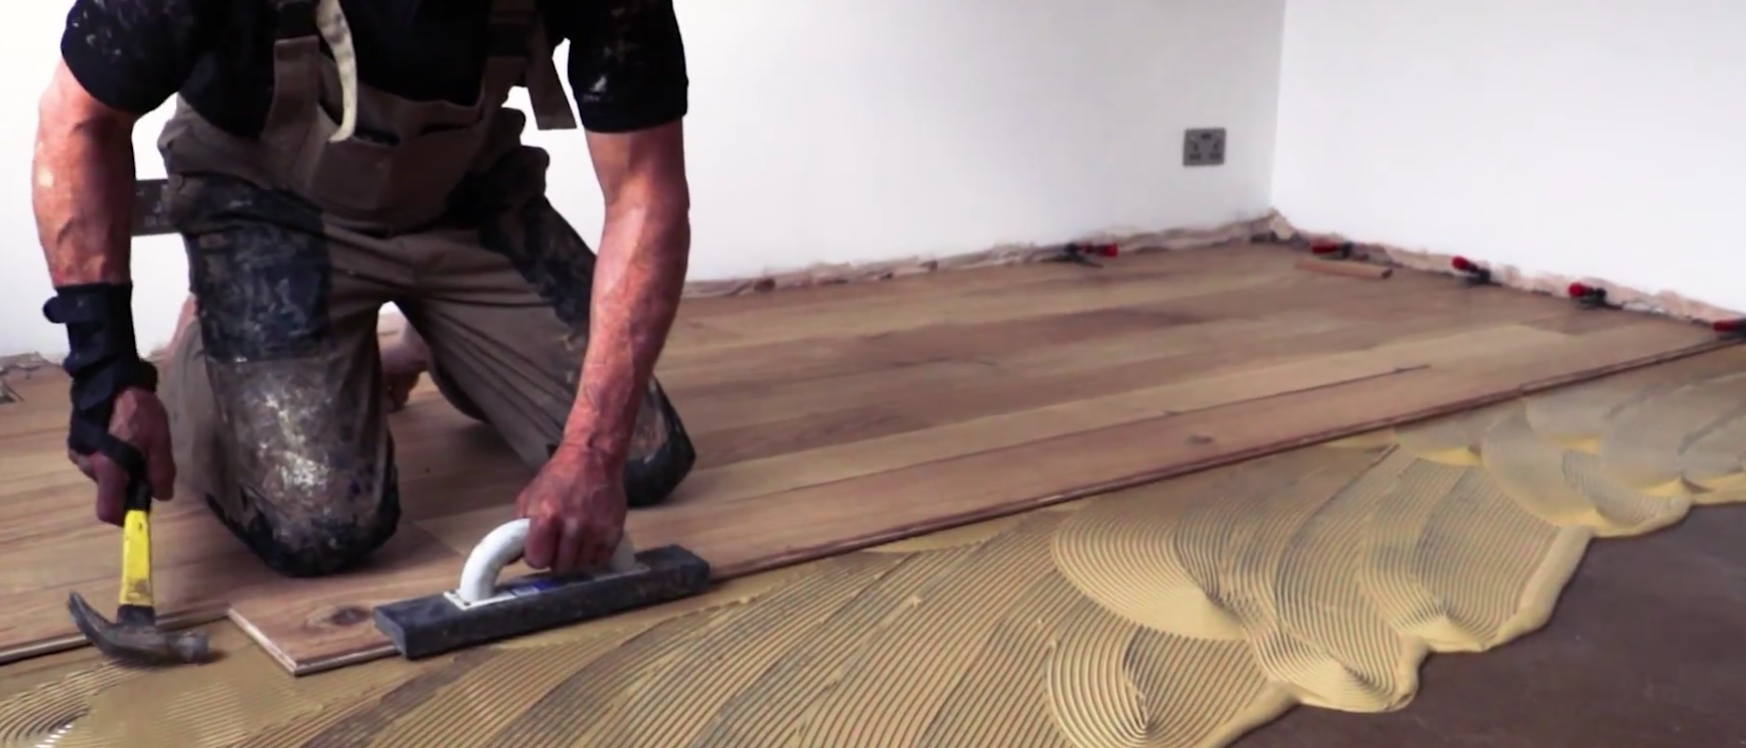
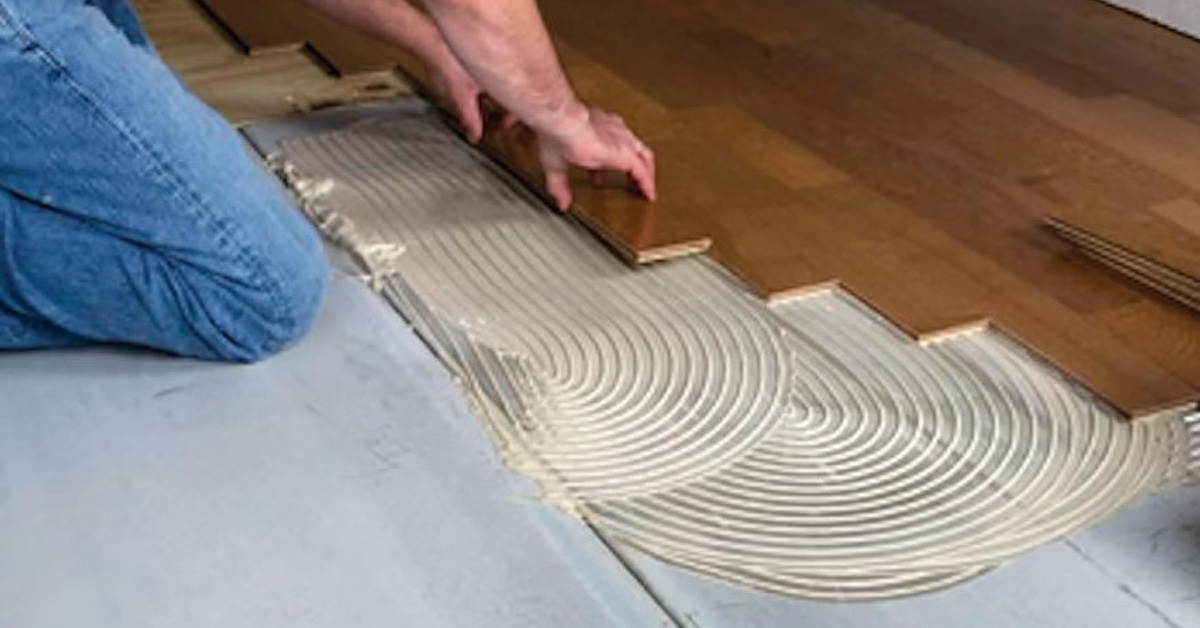
Glue-down Method
This method is strong. The wood is glued to the concrete. Adhesive is used for bonding. This ensures stability. It’s perfect for high traffic areas. The glue prevents shifting. It requires careful planning. This method is less forgiving. Mistakes are hard to fix.
Nail-down Method
This method is traditional. Plywood is needed. It’s placed on concrete first. The wood is nailed to the plywood. This is labor-intensive. It’s very sturdy. It offers a classic look. Professionals prefer this method. It needs precise work.
Essential Tools And Materials
Start with a tape measure. It helps you measure the area. A chalk line is useful. It marks straight lines on concrete. Hammer for nailing boards. Use a rubber mallet for gentle taps. Drill for drilling holes. Saw to cut wood. Floor sander smooths the surface. Level checks evenness. Vacuum cleaner cleans debris. These tools make work easier.
Hardwood flooring is essential. Underlayment protects the wood. Adhesive sticks wood to concrete. Nails secure boards. Use sealant for protection. Moisture barrier prevents damage. Spacer blocks maintain gaps. Wood filler repairs gaps. Safety gear includes gloves and goggles. These materials ensure a good finish.
Step-by-step Installation Guide
Let the wood sit in the room. This helps it adjust to the room’s temperature and humidity. Place the wood on the floor. Keep it there for at least 48 hours. This step is very important. Skipping it can lead to problems later.
Begin with a straight line. Use a chalk line for guidance. Leave a small gap near the wall. This allows the wood to expand. Nail down the first row firmly. Make sure it’s straight. This sets the foundation for all other rows.
Fill any gaps with wood filler. Choose a filler that matches the floor color. Sand the floor gently. This makes it smooth. Apply a finish to protect the wood. It also gives the floor a nice shine. Let the finish dry fully before walking on it.
Maintenance Tips
Installing hardwood floors on concrete can enhance your home’s beauty. Ensure the concrete is clean and dry. Use a moisture barrier to protect the wood. Properly secure planks for a stable, long-lasting finish. Regular maintenance keeps floors looking new.
Cleaning Routine
Keep your hardwood floors shining by sweeping them daily. Use a soft broom for this task. Mop the floors once a week with a damp cloth. Make sure the mop is not too wet. Water can harm wood. Dry the floor with a dry cloth right after mopping. Avoid using strong chemicals. They can damage the wood. Choose a cleaner made for hardwood floors. This will keep them safe and clean.
Preventing Damage
Protect your floors from heavy furniture. Use furniture pads under chair and table legs. This stops scratches. Keep the floors dry to prevent warping. Spills should be wiped immediately. Rugs can also protect high-traffic areas. They add beauty and safety. Trim pet nails to avoid scratches. This keeps your floors looking new. Always remove shoes before walking on the floor. It reduces dirt and wear.
Troubleshooting Common Issues
Installing hardwood floors on concrete can be tricky. Ensure the concrete is dry and level first. Use moisture barriers to prevent damage. Select proper adhesive to secure the wood. Follow these steps for a durable and beautiful floor.
Addressing Moisture Problems
Moisture can cause problems with hardwood floors. It makes wood swell and warp. Check for water leaks nearby. Use a moisture barrier under the wood. This protects the floor from dampness. Ventilate the room well. Keep windows open or use fans. This helps keep the floor dry.
Repairing Scratches And Dents
Scratches and dents can ruin your floor’s look. Use a wood filler to fix dents. Fill the dent and let it dry. Sand the area to make it smooth. For scratches, use a scratch repair kit. Match the kit color with your floor. Apply it carefully on scratches. Your floor will look new again.
Benefits Of Hardwood On Concrete
Hardwood floors are very strong. They last a long time. Concrete is also strong. Together, they make a great team. This pair can handle heavy things. Like furniture and lots of walking. They don’t break easily. This means you won’t need to fix them often. Saves money and time.
Hardwood floors look beautiful. They add warmth to a room. The natural look is very nice. Concrete floors with wood look fancy. It makes a home feel cozy. Many people like this style. It can make any room feel special. Perfect for living rooms and bedrooms.
Frequently Asked Questions
Can Hardwood Be Installed On Concrete?
Yes, hardwood can be installed on concrete. Ensure the concrete is clean, dry, and level. Use a moisture barrier to prevent damage. Choose engineered hardwood for better stability and durability. Follow manufacturer guidelines for installation techniques like floating, gluing, or nailing.
What Type Of Hardwood Is Best For Concrete?
Engineered hardwood is best for concrete floors. It offers superior stability and moisture resistance compared to solid hardwood. Its layered construction prevents warping and swelling. Choose quality brands for durability and aesthetic appeal. Always check the manufacturer’s recommendations for concrete installations.
Do I Need A Moisture Barrier?
Yes, a moisture barrier is essential when installing hardwood on concrete. It prevents moisture from seeping through the concrete and damaging the wood. Use vapor barriers or underlays specifically designed for hardwood flooring. This step ensures longevity and maintains the floor’s appearance.
How Do I Prepare Concrete For Hardwood?
Preparing concrete involves cleaning, leveling, and drying the surface. Remove any debris and ensure it’s completely dry. Use a leveling compound for uneven spots. Check for moisture content and apply a moisture barrier. Following these steps ensures a smooth, stable base for your hardwood flooring.
Conclusion
Completing hardwood floors on concrete is achievable. Follow simple steps for success. Start with a clean, level surface. Select quality materials for durability. Measure accurately to avoid mistakes. Use proper tools for installation ease. Seal the floor to protect it from moisture.
Regular maintenance keeps floors looking great. Don’t rush the process. Patience ensures excellent results. Enjoy the beauty and warmth of your new hardwood floors. Your effort pays off with long-lasting elegance. With care, these floors can enhance your home for years.
Experience the satisfaction of a job well done.


